To install a ceiling fan remote, first, turn off the power supply, then remove the fan canopy to access the electrical connections. Connect the receiver and transmitter according to the manufacturer’s instructions and secure them in place.
Reassemble the fan, replace any batteries, and turn the power back on to test the remote functionality. Ceiling fans are not only functional but can also enhance the aesthetic appeal of a room. One convenient feature is the option to control the fan and its lighting using a remote.
Installing a ceiling fan remote is a relatively simple task, as long as you follow the proper steps. We will provide a concise guide on how to install a ceiling fan remote, ensuring that you can enjoy the convenience and ease of controlling your fan from anywhere in the room. So, let’s get started with the installation process and ensure a comfortable and efficient airflow within your space.
Tools And Materials Needed
Before you begin the installation process for your ceiling fan remote, it’s important to gather all the necessary tools and materials. Having everything ready beforehand will make the installation smoother and ensure you don’t have to pause midway to hunt down missing items. Here are the essential tools and materials you’ll need:
Screwdriver
A screwdriver is an indispensable tool for any DIY project, and installing a ceiling fan remote is no exception. Make sure you have both a flathead and a Phillips screwdriver on hand. These will be used to remove the fan’s canopy and access the wiring.
Pliers
Pliers come in handy for various tasks during the installation process. You’ll need them to twist wires together and secure wire nuts. Additionally, pliers can be useful for gripping and loosening small nuts and bolts.
Wire cutter
To properly connect the wiring of the ceiling fan remote, you’ll need a wire cutter. This tool allows you to cleanly and safely cut through electrical wires, ensuring a smooth installation process.
Wire stripper
A wire stripper is necessary for removing the insulation from the ends of the wires. This will expose the bare conductive wire, allowing you to properly connect it to the remote control and receiver.
Voltage tester
Safety should never be overlooked when working with electrical components. A voltage tester is crucial for ensuring that the power to the fan is indeed turned off before you begin the installation. It helps you verify that there is no live electricity running through the wires.
Ceiling fan remote kit
Of course, you’ll need the ceiling fan remote kit itself. This kit typically includes the remote control, receiver, and any necessary mounting brackets or screws. Make sure you have the complete kit before starting the installation process.
Batteries
Most ceiling fan remotes operate on batteries, so it’s important to have a fresh set on hand. Check the instructions that come with your remote kit to determine what type and how many batteries you’ll need.
By ensuring you have all the required tools and materials ready, you’ll be well-prepared to install your ceiling fan remote without any interruptions or unnecessary delays. With everything in place, you can proceed confidently to the next steps of the installation process.
Preparing For Installation
Before you begin installing a ceiling fan remote, it’s important to properly prepare for the installation process. This involves a few simple steps to ensure your safety and to make the installation go smoothly. Follow the steps below to prepare for the installation:
Turn off power to the ceiling fan
The first step in preparing for the installation is to turn off the power to the ceiling fan. This is crucial for your safety as it eliminates the risk of electrical shock while working on the fan. To turn off the power, locate the circuit breaker or fuse box and switch off the appropriate breaker or remove the corresponding fuse. You can also use a non-contact voltage tester to verify that the power to the fan is indeed off.
Locate the fan’s junction box
Once the power is turned off, the next step is to locate the junction box of the ceiling fan. The junction box is a metal or plastic box that houses the electrical connections for the fan. It is usually mounted in the ceiling or on a bracket. Look for a cover plate on the ceiling that conceals the junction box.
Remove the cover plate from the junction box
With the junction box located, you’ll need to remove the cover plate to access the wires inside. Most cover plates are secured with screws, so use a screwdriver to remove them. Once the screws are removed, gently pull the cover plate away from the junction box, exposing the wires within.
Identify the wires in the junction box
Inside the junction box, you’ll find several wires. These wires are responsible for supplying power to the ceiling fan. Take a moment to visually inspect and identify the wires. Common colors include black (hot), white (neutral), and green or bare copper (ground). However, wire colors can vary, so refer to the manufacturer’s instructions or consult an electrician if you are unsure.
Determine the type of wiring in your ceiling
Before proceeding any further, it’s crucial to determine the type of wiring in your ceiling. This is important as it will dictate the specific installation steps you need to follow. There are two main types of wiring: standard wiring and remote-controlled wiring. Standard wiring involves separate switches for the light and fan, while remote-controlled wiring requires a remote control to operate the fan and light.
Now that you have properly prepared for the installation by turning off the power, locating the junction box, removing the cover plate, identifying the wires, and determining the type of wiring in your ceiling, you are ready to move on to the next steps in installing your ceiling fan remote. Stay tuned for our next blog post where we will guide you through the installation process!
Installing The Ceiling Fan Remote Receiver
When it comes to upgrading your ceiling fan, installing a remote receiver can be a game-changer. No more getting up to adjust the speed, turn on the light, or change the direction of the fan blades. With a ceiling fan remote, you can control all these functions from the comfort of your couch. Here, we’ll walk you through the step-by-step process of installing the ceiling fan remote receiver, so you can enjoy the convenience and comfort it brings.
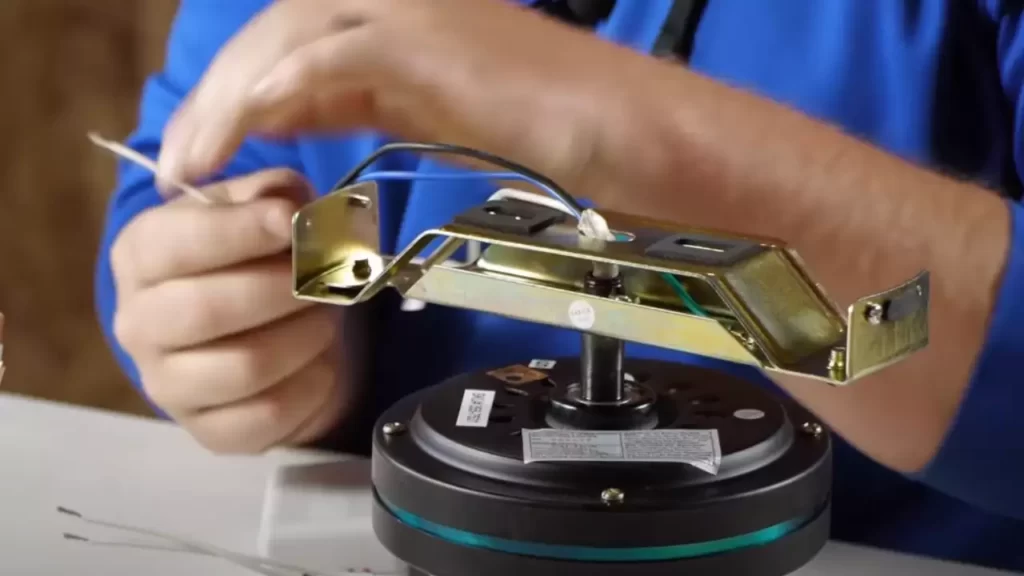
Mount the receiver in the ceiling fan
The first step is to mount the receiver inside the ceiling fan housing. It’s important to follow the manufacturer’s instructions for your specific model, as the mounting process may vary. Generally, you’ll need to:
- Open the fan’s housing by removing any screws or clips.
- Locate a suitable spot to mount the receiver, usually near the fan’s canopy.
- Use the provided screws or brackets to securely attach the receiver to the fan housing.
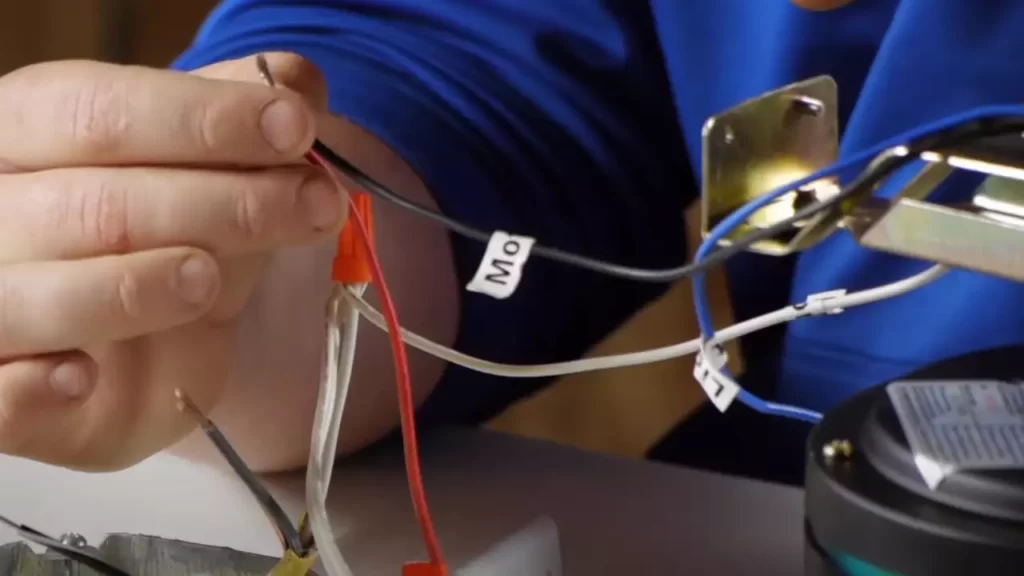
Connect the receiver to the fan’s wires
With the receiver mounted, it’s time to connect it to the fan’s wiring. Make sure the power to the fan is switched off before you start. Follow these steps:
- Identify the fan’s wires and the receiver’s corresponding wires. They are usually color-coded for easy identification.
- Strip the insulation from each wire end using wire strippers.
- Twist together the matching wire ends, securing them with wire nuts.
- Once all the wires are securely connected, tuck them neatly into the fan housing.
Attach the receiver to the ceiling fan
With the receiver connected to the fan’s wiring, it’s time to reattach the fan’s housing. Here’s what you need to do:
- Carefully place the fan’s housing back onto the mounting bracket, aligning the screw holes.
- Insert and tighten the screws or clips to secure the housing in place.
Secure the receiver’s antenna
The final step is to secure the receiver’s antenna. This will ensure optimal signal reception for the remote control. Follow these steps:
- Extend the antenna fully, taking care not to bend or kink it.
- Position the antenna so that it extends away from other objects and is parallel to the ground.
- Use zip ties or clips to secure the antenna to the fan housing or any other nearby support.
And there you have it! With the receiver mounted, connected, and secure, you can now enjoy the convenience of controlling your ceiling fan with a remote. Sit back, relax, and enjoy the cool breeze or the gentle hum of the fan, all at the touch of a button.
Wiring The Ceiling Fan Remote Receiver To The Wall Switch
In order to control your ceiling fan with a remote, you need to wire the ceiling fan remote receiver to the wall switch. This step is crucial to ensure that the remote receiver communicates effectively with the ceiling fan and allows you to operate it conveniently. Below, we will guide you through the process of wiring the ceiling fan remote receiver to the wall switch, starting with identifying the wall switch that controls the fan.
Identify the wall switch that controls the fan
Before you begin connecting the remote receiver to the wall switch, you need to determine which switch regulates the ceiling fan. Typically, the wall switch responsible for controlling the fan is located separately from other switches in the room and is marked accordingly.
Remove the wall switch cover
Once you have identified the correct switch, proceed by turning off the power to the switch at the circuit breaker or fuse box to ensure safety. Next, cautiously remove the cover of the wall switch by unscrewing the screws that hold it in place, revealing the interior wiring connections.
Test the wires in the wall switch box
With the wall switch cover removed, carefully inspect the wires inside the switch box. You will typically find three wires; a black-hot wire, a white-neutral wire, and a green or copper ground wire. To determine which wires are connected to the fan, you can use a circuit tester. Simply attach one lead of the tester to the black wire and the other lead to the white wire. If the tester lights up, you have identified the correct wires for your ceiling fan.
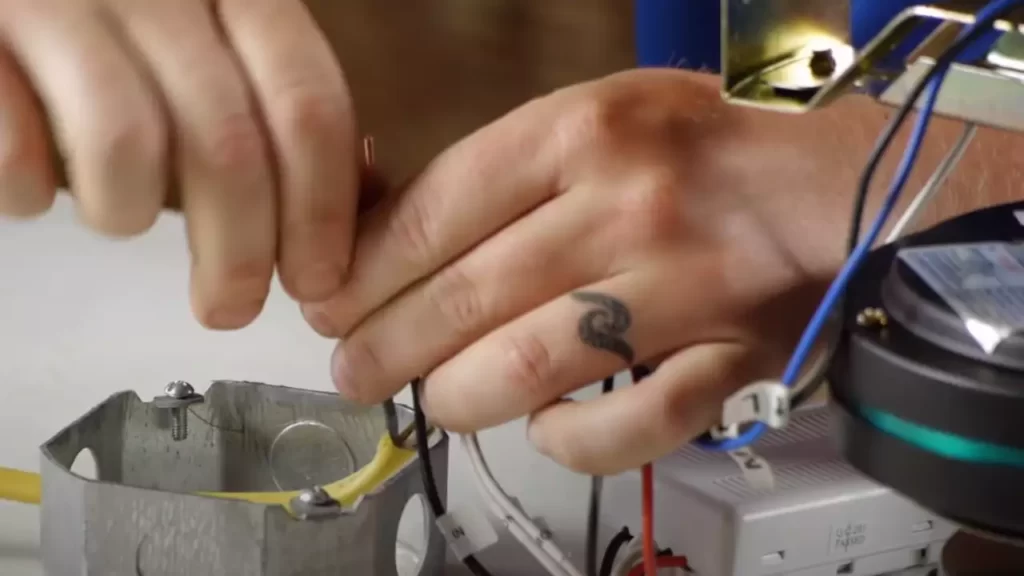
Connect the receiver to the wall switch wires
Now that you have identified the proper wires, it is time to connect the remote receiver to the wall switch. Start by connecting the black wire from the receiver to the black-hot wire in the switch box using a wire nut. Proceed by connecting the white wire from the receiver to the white-neutral wire in the same manner. Finally, attach the green or copper ground wire from the receiver to the ground wire in the switch box. Ensure that the connections are secure and tightly fastened.
Secure the wires with wire nuts
After connecting the receiver to the wall switch wires, it is important to secure the connections to prevent any loose or exposed wires. Use wire nuts to cover each connected wire, making sure they are properly twisted and tight. This will ensure a safe and reliable connection.
By following these steps, you can successfully wire the ceiling fan remote receiver to the wall switch. Remember to always prioritize safety and consult a professional if you are unsure or uncomfortable with any part of the installation process.
Programming The Ceiling Fan Remote
Install batteries in the remote
Before programming your ceiling fan remote, you need to ensure that it has power. To do this, you will need to install batteries in the remote.
- Locate the battery compartment on the back of the remote.
- Remove the cover by sliding it off or pushing it open, depending on the design.
- Insert the required batteries, following the polarity markings inside the compartment.
- Replace the cover.
Make sure to use fresh batteries and check that they are properly inserted. This step is crucial for the remote to function correctly.
Turn on power to the ceiling fan
Next, you need to ensure that the power to the ceiling fan is turned on. Without power, the remote will not work. Follow these steps to turn on the power:
- Locate the wall switch or circuit breaker that controls the fan’s power.
- Turn on the switch or flip the circuit breaker to the “on” position.
Wait a moment to allow the fan to receive the electrical connection and power up. It is essential to have a stable power supply for the remote to function reliably.
Test the remote to ensure it is working
Before proceeding to program the remote, it is crucial to test whether the remote is functioning correctly. Follow these steps to test the remote:
- Stand near the ceiling fan.
- Press any button on the remote.
- Observe whether the fan responds to the remote command.
If the fan does not respond or only responds intermittently, check the battery connection and replace the batteries if needed. A fully functional remote is important for successful programming.
Program the remote to control the fan’s speed and direction
Now that you have confirmed the remote is working, it’s time to program it to control the fan’s speed and direction. Follow the instructions below:
- Locate the programming button on the fan’s receiver or control unit.
- Press and hold the programming button until the LED indicator on the receiver or control unit starts blinking.
- While the LED is blinking, use the buttons on the remote to set the desired fan speed and direction.
- Once you have selected the desired settings, press the programming button again to save the configuration.
After programming, test the remote again to ensure the fan responds correctly to the speed and direction commands. It may take a few tries to find the right combination of buttons for your specific fan model.
By following these simple steps, you can easily program your ceiling fan remote to control the fan’s speed and direction, providing you with optimal comfort and convenience.
Troubleshooting And Tips
Common issues during installation
Installing a ceiling fan remote can be a convenient and energy-saving addition to your home. However, like any electrical installation, it can sometimes come with its fair share of challenges. Here are a few common issues you may encounter during the installation process:
- Improper wiring: One of the most common issues is improper wiring. Double-check that all the wires are properly connected and secure. If you’re unsure about the wiring, it’s always a good idea to consult a professional electrician.
- Incompatible remote: Another issue that may arise is using a remote that is not compatible with your ceiling fan. Make sure to check the model and specifications of your fan before purchasing a remote to ensure compatibility.
- Weak signal: Sometimes, you may find that the remote doesn’t respond as expected. This can be caused by weak signals between the remote and the fan. Check for any obstructions and ensure the remote is within range of the fan.
Troubleshooting tips for remote control problems
Remote control problems can be frustrating, but they are often easily remedied. Here are a few troubleshooting tips to help you get your ceiling fan remote working smoothly:
- Check the batteries: The most common issue with remote controls is dead or weak batteries. Replace the batteries with fresh ones to see if this resolves the problem.
- Reprogram the remote: If the remote still doesn’t work after changing the batteries, try reprogramming it. Refer to the manufacturer’s instructions for the correct procedure.
- Inspect the receiver: The receiver, located inside the fan, may have loose or disconnected wires. Ensure all the wires are securely connected and consider tightening any loose connections.
- Reset the frequency: Interference from other devices or neighboring fans could affect the remote signal. Resetting the frequency can often resolve this issue. Again, consult the manufacturer’s instructions for guidance.
Advice for maintaining and caring for your ceiling fan remote
Proper maintenance and care can help prolong the lifespan of your ceiling fan remote. Here are a few tips to keep it in optimal condition:
- Keep it clean: Regularly clean the remote control to prevent dust and dirt buildup. A soft, damp cloth should be sufficient for wiping the surface.
- Avoid extreme temperatures: Exposing the remote to extreme temperatures can damage its components. Keep it away from direct sunlight, heaters, and other heat sources.
- Store it properly: When not in use, store the remote in a cool and dry place. Avoid tossing it around or placing heavy objects on top of it.
- Replace batteries in a timely manner: Monitor the battery life and replace them promptly when needed. Weak batteries can lead to unreliable remote performance.
By following these troubleshooting and care tips, you can ensure that your ceiling fan remote works smoothly and efficiently, providing you with comfort and convenience whenever you need it.
Frequently Asked Questions
Can You Add A Remote Control To An Existing Ceiling Fan?
Yes, you can add a remote control to an existing ceiling fan.
How Do You Wire A Remote Control For A Ceiling Fan?
To wire a remote control for a ceiling fan, follow these steps: 1. Turn off the power to the fan at the circuit breaker. 2. Remove the old switch and disconnect the wires. 3. Connect the receiver to the fan’s wiring and secure it.
4. Install the remote control’s batteries. 5. Test the remote control to ensure proper functionality.
Does A Remote Controlled Ceiling Fan Need A Wall Switch?
No, a remote controlled ceiling fan does not require a wall switch. You can control the fan’s functions, such as speed and light, using the remote control provided.
Can Any Fan Have A Remote Control?
Yes, any fan can have a remote control. Remote control is available for all fans, allowing users to easily adjust the settings.
Conclusion
Installing a ceiling fan remote is an easy and convenient way to control the fan from anywhere in the room. By following the step-by-step guide provided in this blog post, you can successfully set up your ceiling fan remote without any hassle.
Enjoy the comfort and convenience of operating your ceiling fan with just the touch of a button. So, why wait? Get ready to experience the ultimate convenience in controlling your ceiling fan with a remote today!