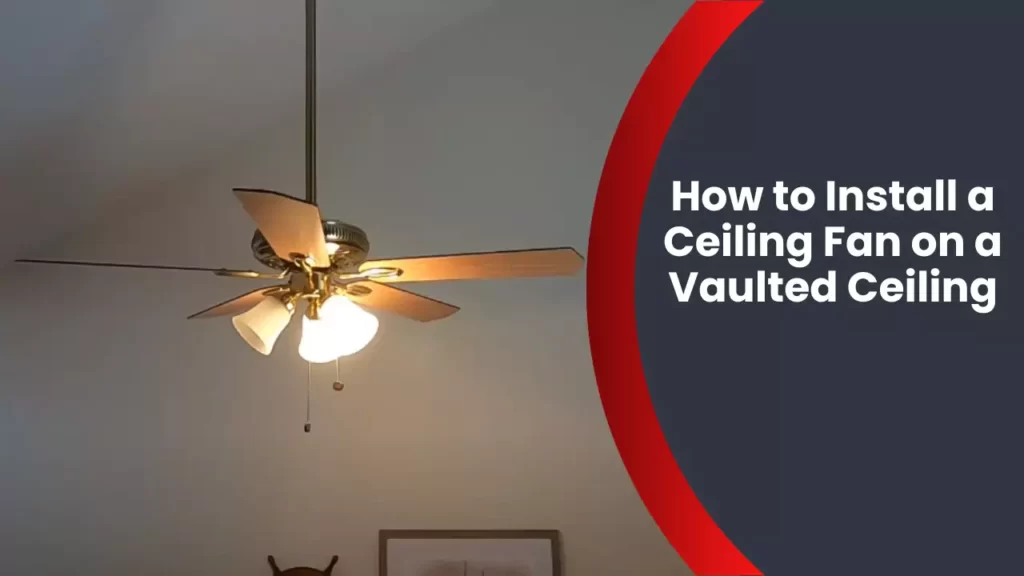
To install a ceiling fan on a vaulted ceiling, follow these steps: first, determine the correct mounting bracket for your ceiling type; second, assemble the fan according to the manufacturer’s instructions. Installing a ceiling fan on a vaulted ceiling can be a challenging task, but with the right tools and knowledge, it can be done effectively.
A ceiling fan not only adds aesthetic appeal to a room but also provides much-needed air circulation during hot summer months. Whether you’re replacing an old fan or installing a new one, it’s important to consider the unique challenges that come with a vaulted ceiling.
In this guide, we will walk you through the steps to properly install a ceiling fan on a vaulted ceiling, ensuring a safe and efficient installation process. So, let’s get started with the installation process.
1. Planning For The Installation
Determine the location for the ceiling fan
Before starting the installation process, it’s essential to determine the ideal location for your ceiling fan on the vaulted ceiling. Choosing the right spot ensures proper air circulation and enhances the overall aesthetic appeal of your room.
Consider the layout and size of the room when deciding on the location. Ideally, you would want the ceiling fan to be centralized, providing air circulation to all corners of the room. This ensures that you can enjoy the cool breeze from any area, making your space comfortable during hot summer days.
Additionally, consider any existing lighting fixtures or architectural features on the ceiling that could impact the installation. You want to avoid any obstructions that may hinder the fan’s performance or interfere with its aesthetic appeal.
Measure the height and angle of the vaulted ceiling
Once you’ve determined the ideal location, it’s crucial to measure the height and angle of your vaulted ceiling. This step is essential for ensuring the proper installation and operation of the ceiling fan.
To measure the height, use a measuring tape or a measuring stick. Start from the floor and measure straight up until you reach the desired installation height. It’s important to note this measurement as it will help you choose the appropriate downrod length for your fan.
Next, measure the angle of the vaulted ceiling. This is necessary to determine the correct mounting bracket for your fan. To measure the angle, use an angle finder or smartphone app specifically designed for this purpose. Place it on the ceiling, making sure it’s perpendicular to the ground. The reading on the device will give you the angle measurement, which you can then use when selecting the appropriate mounting bracket.
Consider the size and weight of the fan
The size and weight of the ceiling fan are crucial factors to consider when installing it on a vaulted ceiling. Choosing the right size and weight ensures the fan’s stability and proper functioning.
Meticulously check the specifications provided by the manufacturer to determine the fan’s dimensions and weight. This information will help you select a fan that is compatible with your vaulted ceiling and can be safely installed at the desired location.
Installing a heavy fan on a vaulted ceiling requires additional support, such as reinforced ceiling joists or a special mounting system. Be sure to consider these factors when purchasing a ceiling fan, as additional support may be required to ensure the fan’s stability and your safety.

2. Gathering The Tools And Materials
Before you start installing a ceiling fan on a vaulted ceiling, it is important to gather all the necessary tools and materials. Having everything you need at hand will help make the installation process smoother and more efficient. Below is a list of essential tools and materials you will need:
List of tools required for the installation:
| Tool | Description |
| Screwdriver | A flathead or Phillips screwdriver will be needed to remove the existing ceiling fan or to install the new one. |
| Wire Strippers | Wire strippers are necessary for stripping the insulation off the electrical wires before making the connections. |
| Wire Cutters | Wire cutters are used to cut the electrical wires to the desired length. |
| Tape Measure | Having a tape measure handy will help you take accurate measurements for positioning the ceiling fan. |
| Ladder or Step Stool | A ladder or step stool will allow you to safely access and work on the vaulted ceiling. |
List of materials needed for the installation:
- The Ceiling Fan
- Mounting Bracket
- Mounting Screws
- Fan Blades
- Fan Blade Screws
- Canopy
- Wire Nuts
- Electrical Tape
Make sure to check that you have all the necessary tools and materials before beginning the installation process. This will save you time and avoid any interruptions during the installation. With all the tools and materials ready, you are now one step closer to installing your ceiling fan on a vaulted ceiling.

3. Preparing The Vaulted Ceiling
Before installing a ceiling fan on a vaulted ceiling, it is important to prepare the ceiling to ensure a safe and secure installation. This step is crucial to prevent any issues or complications down the line. Here are three important factors to consider when preparing the vaulted ceiling:
Assess the accessibility of the ceiling
The first step is to assess the accessibility of the vaulted ceiling. Determine whether it is easily reachable and if there are any obstacles in the way. This will help determine what tools or equipment you may need for the installation process. Additionally, measuring the height and angle of the ceiling will allow you to make informed decisions regarding the length of downrods and extension poles required to properly install the ceiling fan.
Install a support brace if necessary
Next, if the ceiling does not have an existing electrical box or support brace suitable for a ceiling fan, it is essential to install one. This is crucial for the safety and stability of the fan. A support brace will ensure that the fan is securely fastened to the ceiling and can withstand its weight and movement. It is recommended to consult a professional or reference the manufacturer’s instructions for guidance on the installation of a support brace.
Ensure proper electrical wiring
Proper electrical wiring is essential for the safe and optimal functioning of a ceiling fan. Check the existing electrical wiring in the vaulted ceiling to ensure it is compatible with a ceiling fan installation. If needed, hire a licensed electrician to ensure that the wiring is done correctly and up to code. This will help prevent any electrical hazards and ensure that the fan operates smoothly and efficiently. Remember to turn off the power supply to the ceiling before performing any electrical work.
In conclusion, preparing the vaulted ceiling is a crucial step in installing a ceiling fan. Assess the accessibility of the ceiling, install a support brace if necessary, and ensure proper electrical wiring. Taking these steps will help ensure a safe and successful installation of a ceiling fan on a vaulted ceiling.

4. Assembling The Ceiling Fan
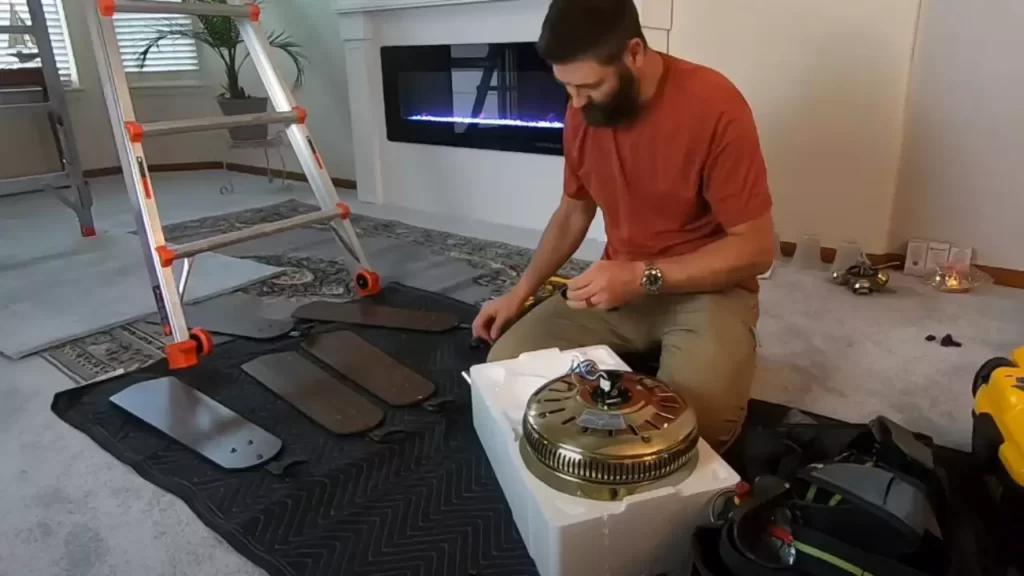
Once you have gathered all the necessary tools and have prepared the area for installation, it’s time to assemble your ceiling fan. Follow these steps to ensure a smooth and successful assembly process.
Follow the manufacturer’s instructions for assembly
Before starting the assembly process, it’s crucial to carefully read and follow the manufacturer’s instructions. Different ceiling fan models may have specific requirements, and not all assembly steps are the same. By adhering to the instructions provided, you ensure that the fan is assembled correctly and minimize any potential issues during the installation.
Attach the fan blades and light fixture, if applicable
Once you are familiar with the manufacturer’s instructions, it’s time to attach the fan blades. Carefully align each blade with the designated bracket or hub and secure them in place using the provided screws or fasteners. Ensure that all blades are evenly spaced and firmly attached.
If your ceiling fan model includes a light fixture, now is the time to attach it as well. Follow the manufacturer’s instructions and safely connect the wiring, making sure to turn off the power at the circuit breaker beforehand. Double-check all connections and ensure everything is securely fastened.
Test the fan before installation
Prior to mounting the fan onto the vaulted ceiling, it’s crucial to test the function of the assembled fan. This step allows you to identify any potential issues or defects before the fan is in its permanent position. Make sure the power is turned on and test the fan’s various settings, speeds, and any additional features, such as the light fixture. Check for any abnormal noises or vibrations, and address them accordingly.
Once you have verified that the fan is working correctly, you can proceed to the installation process without any concerns.
By diligently following the manufacturer’s instructions, attaching the fan blades and light fixture securely, and performing a thorough test before installation, you ensure a successful assembly of your ceiling fan on the vaulted ceiling.

5. Installing The Ceiling Fan
Once you have secured the mounting bracket to the vaulted ceiling, the next step is to hang the ceiling fan from the bracket and connect the electrical wiring. Follow these steps carefully to ensure a safe and efficient installation.
1. Secure the mounting bracket to the vaulted ceiling
Bold Table: The first step in installing a ceiling fan on a vaulted ceiling is securing the mounting bracket properly. Here’s how you can do it:
| Steps to secure the mounting bracket: |
|
2. Hang the ceiling fan from the mounting bracket
Bold Paragraph: Once the mounting bracket is securely in place, it’s time to hang the ceiling fan. Follow these steps:
- Align the holes in the fan’s mounting plate with the holes in the mounting bracket.
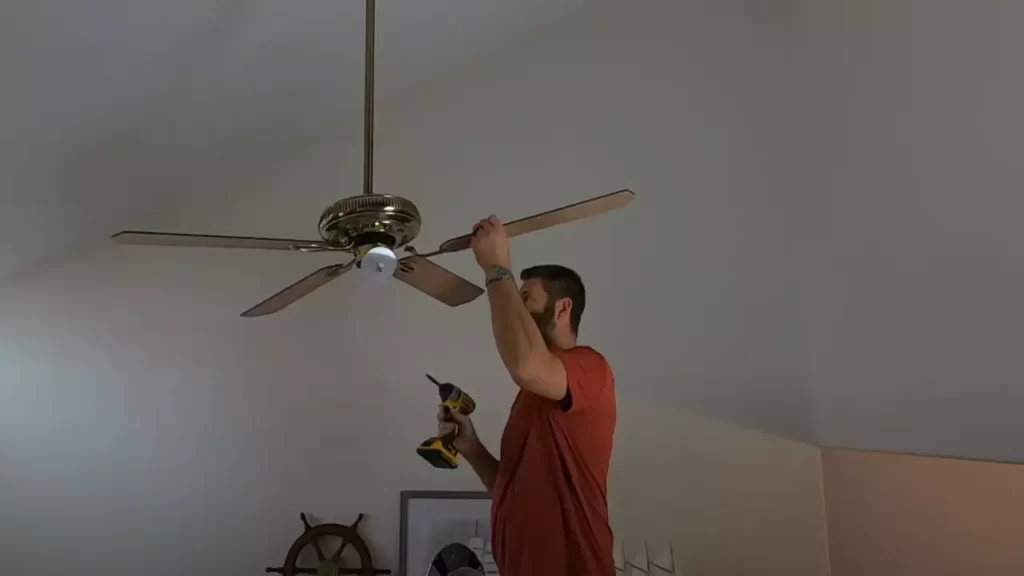
- With the help of an assistant, hold the fan steady as you insert screws through the mounting plate and into the bracket.
- Tighten the screws using a screwdriver or a drill, but be careful not to overtighten.
- Double-check that the fan is securely attached to the bracket by giving it a slight shake.
3. Connect the electrical wiring
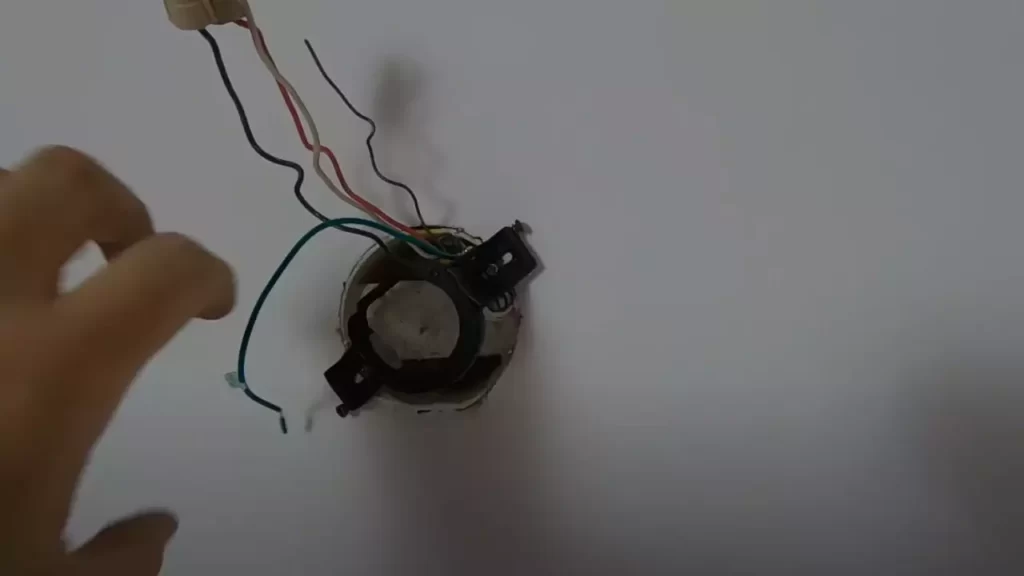
Bold Paragraph: After hanging the ceiling fan, the next step is to connect the electrical wiring. Ensure the electricity is turned off at the breaker panel before starting:
- Strip the insulation from the ends of the electrical wires, both from the fan and the ceiling.
- Connect the wires of the same color – black to black, white to white, and green or copper to the grounding wire.
- Twist the wire nuts onto the connections securely.
- Carefully tuck the wiring and wire nuts into the junction box, ensuring they are not touching the fan blades or motor.
- Securely attach the fan’s canopy to the mounting bracket, covering the electrical connections.
Bold Conclusion: A properly installed ceiling fan on a vaulted ceiling can not only enhance the aesthetics of your space but also provide better air circulation. By following these steps to secure the mounting bracket, hang the fan, and connect the electrical wiring, you’ll be well on your way to enjoying the comfort and functionality of your new ceiling fan.
6. Adjusting The Fan For Optimal Performance
Installing a ceiling fan on a vaulted ceiling can bring both functionality and style to your living space. However, it’s crucial to adjust the fan properly to ensure optimal performance. Here are some essential steps to follow:
Balance the Fan Blades for Smooth Operation
To enjoy a smooth and efficient airflow, it’s important to balance the fan blades. Imbalanced blades can cause vibrations and noise, disturbing the peaceful ambiance of your room. To balance the blades:
- Make sure the fan is turned off and the blades are stationary.
- Place a blade balancing kit on top of the fan motor housing.
- Turn on the fan and observe if any of the blades are tilting or wobbling.
- If you notice an imbalance, use the provided balancing clips or weights to counterbalance the problem area.
- Continue adjusting the clips or weights until the fan blades spin smoothly without any noticeable wobbling.
- Once balanced, remove the balancing kit and ensure all screws are securely tightened.
This simple balancing process will optimize the performance of your ceiling fan, keeping it running quietly and efficiently.
Test the Fan on Different Speed Settings
After balancing the fan blades, it’s time to test the fan on different speed settings to ensure it operates properly. Adjusting the fan speed allows you to customize the airflow to your comfort level. Here’s how to test the fan on different speeds:
- Turn on the fan at the lowest speed setting.
- Observe the airflow and ensure it is smooth and evenly distributed throughout the room.
- Gradually increase the fan speed, testing each setting.
- Take note of any unusual noises, vibrations, or imbalances that may occur at higher speeds.
Testing the fan at various speed settings helps you identify any issues that may arise and allows for adjustments before regular use. Remember, a properly functioning fan will provide optimal comfort and cooling.
Check for Any Noise or Wobbling Issues
To ensure your ceiling fan operates noiselessly and without any wobbling issues, it’s important to perform a thorough check. Here’s what you need to do:
- Turn on the fan and listen carefully for any unusual noises, such as humming, scraping, or clicking.
- Inspect the fan at each speed setting, paying close attention to any changes in noise.
- If you notice any excessive noise, investigate the source and tighten any loose screws or components.
- Check for any wobbling motion of the fan blades as they rotate.
- If there is any noticeable wobbling, ensure that all screws are securely tightened and that the fan is properly balanced.
- Make any necessary adjustments, such as using balancing clips or weights, to eliminate wobbling issues.
By thoroughly checking for noise and wobbling issues at different speed settings, you can ensure that your ceiling fan operates smoothly, quietly, and without any disruptions.
To conclude, installing a ceiling fan on a vaulted ceiling requires attention to detail when adjusting it for optimal performance. Balancing the fan blades, testing different speed settings, and checking for noise or wobbling issues will guarantee a comfortable and enjoyable airflow throughout your living space. Take the time to properly adjust your ceiling fan, and you’ll reap the benefits of efficient, quiet, and aesthetically pleasing cooling in your room.
7. Safety Precautions And Maintenance Tips
7. Safety Precautions and Maintenance Tips
Installing a ceiling fan on a vaulted ceiling can provide excellent air circulation and create a comfortable living environment. However, it’s crucial to prioritize safety when undertaking this project. By following a few safety precautions and maintaining your ceiling fan properly, you can enjoy its benefits for years to come.
Ensure the fan is properly grounded
Proper grounding is essential for the safe operation of your ceiling fan. Before installation, ensure that the fan’s metal mounting bracket is securely connected to a ground wire. This will help prevent electrical shocks and ensure the fan functions optimally. If you’re uncertain about the grounding process, it’s best to consult a professional electrician to avoid potential hazards.
Regularly clean the fan blades and motor
Maintaining a clean ceiling fan not only helps to keep it looking pristine but also contributes to its efficient performance. Over time, dust and dirt can accumulate on the blades and motor, causing the fan to work harder and potentially become less effective. To clean the fan, follow these steps:
- Turn off the fan and wait for the blades to stop moving completely.
- Using a ladder or step stool, carefully reach the fan blades and gently wipe them down with a soft cloth or damp sponge.
- For stubborn stains or grime, mix a mild detergent with water and use a soft brush to clean the blades.
- Wipe down the fan motor and any other exposed parts, ensuring to avoid contact with electrical components.
- Once cleaned, allow the fan to dry completely before turning it back on.
Check for any loose or damaged parts
Regular inspections of your ceiling fan are essential to identify any loose or damaged parts that may compromise its safety and efficiency. Here’s a simple checklist to follow:
- Ensure the mounting bracket is secure and properly anchored to the ceiling.
- Check all screws, bolts, and connectors to ensure they’re tightened securely.
- Examine the fan blades for any signs of cracks or damage. If any blades are compromised, they should be replaced immediately.
- Inspect the pull chains to ensure they’re functioning correctly and not frayed or tangled.
- Test the fan’s speed and direction settings to ensure they’re working as intended.
Addressing any loose or damaged parts promptly can prevent accidents or further damage to your ceiling fan.
By adhering to these safety precautions and maintenance tips, you can install and maintain a ceiling fan on a vaulted ceiling with confidence. Remember, if you’re unsure about any aspect of the installation or encounter any issues during maintenance, it’s always best to consult a professional for assistance. Stay safe and enjoy the benefits of a well-functioning ceiling fan!
8. Troubleshooting Common Issues
Even with proper installation, it’s possible to encounter some common issues when installing a ceiling fan on a vaulted ceiling. Don’t worry, we’ve got you covered! In this section, we’ll address three common problems that may arise and provide solutions to troubleshoot them. Read on to ensure your ceiling fan installation goes smoothly.
Fan not working after installation
If your ceiling fan is not working after installation, there could be a few reasons for this issue:
- Check the power supply: Ensure that the switch is turned on and that there is power flowing to the ceiling fan. Use a voltage tester to confirm that there is electricity reaching the fan.
- Secure electrical connections: Make sure all electrical connections are securely tightened, including the wiring connections and the fan’s electrical housing. Loose connections can disrupt the electrical flow and prevent the fan from working properly.
- Inspect the remote control: If your ceiling fan comes with a remote control, check the batteries and make sure they are properly installed. Try replacing the batteries to see if this resolves the issue.
- Verify the fan direction switch: Some fans have a direction switch that allows you to change the rotation of the blades. Ensure that this switch is set to the desired direction and not in between positions.
- Consult the user manual: If all else fails, refer to the user manual that came with your ceiling fan. It may provide specific troubleshooting steps or contact information for customer support.
Fan making unusual noises
If your ceiling fan is making unusual noises, it can be quite frustrating. Here are a few steps you can take to address this issue:
- Tighten loose parts: Check if any screws or bolts are loose and tighten them. Loose parts can cause vibrations and result in noises.
- Balance the fan: Use a balancing kit (often provided with the fan) to ensure that the blades are properly aligned and balanced. Imbalanced blades can lead to wobbling and noise.
- Inspect the motor: Open the fan’s motor housing and examine the motor components. Look for any signs of wear or damage such as loose wires or broken parts. If you notice any issues, contact the manufacturer for assistance.
- Lubricate moving parts: Over time, the moving parts of the fan may start to dry out and create friction, resulting in noise. Apply a small amount of lubricant to the motor and bearings as per the manufacturer’s instructions.
- Seek professional help: If the noise persists despite your efforts, it may be time to seek help from a professional electrician or the fan’s manufacturer. They will have the expertise to identify and resolve the issue.
Fan not turning on or off properly
If your ceiling fan is not turning on or off properly, consider the following troubleshooting steps:
- Check the wall switch: Verify that the wall switch is properly connected and functioning. Sometimes, the switch may be faulty or not compatible with the fan.
- Examine the pull chain switch: Ensure that the pull chain switch on the fan is in the correct position. If the switch is loose or damaged, it may need to be replaced.
- Inspect the wiring connections: Double-check that all wiring connections on the fan are secure and well-connected. Loose or faulty wiring can prevent the fan from turning on or off reliably.
- Reset the fan’s settings: If your fan has a remote control, try resetting the settings by removing the batteries, waiting a few minutes, and reinserting them. This can sometimes resolve communication issues between the remote and the fan.
- Consult a professional: If the problem persists, it’s best to consult a professional electrician who can diagnose the issue and offer the appropriate solution.
By troubleshooting these common issues step by step, you can ensure that your ceiling fan functions properly on your vaulted ceiling, providing you with cool air and a comfortable environment.
Frequently Asked Questions
Can You Put A Ceiling Fan On A Vaulted Ceiling?
Yes, you can install a ceiling fan on a vaulted ceiling. Ensure to use a downrod extension that matches the slope of the ceiling. It is essential for proper installation and functionality.
Can You Put A Ceiling Fan On A Sloped Ceiling?
Yes, you can install a ceiling fan on a sloped ceiling. Just make sure to use a sloped ceiling adapter to ensure proper installation and stability. This adapter allows the fan to be mounted securely on angled ceilings.
Where Should Ceiling Fans Be Placed On A Vaulted Ceiling?
Place ceiling fans on a vaulted ceiling near the highest point to ensure proper air circulation. This helps to distribute cool or warm air throughout the room efficiently. Ideally, position the fan blades about 8-10 feet above the floor for optimal comfort.
How Do You Circulate Air In A Room With A Vaulted Ceiling?
To circulate air in a room with a vaulted ceiling, use ceiling fans or portable fans placed strategically. Position the fans to gently push air downward and create a breeze. This will help distribute air evenly throughout the room and promote better air circulation.
Conclusion
Installing a ceiling fan on a vaulted ceiling may seem daunting, but with the right tools and know-how, it can be a straightforward process. By following the step-by-step instructions detailed in this blog post, you can ensure a successful installation.
Remember to take safety precautions, measure properly, and consult the manufacturer’s instructions for your specific ceiling fan model. With a little persistence and attention to detail, you can enjoy the benefits of a properly installed ceiling fan on your vaulted ceiling.
Happy installing!
