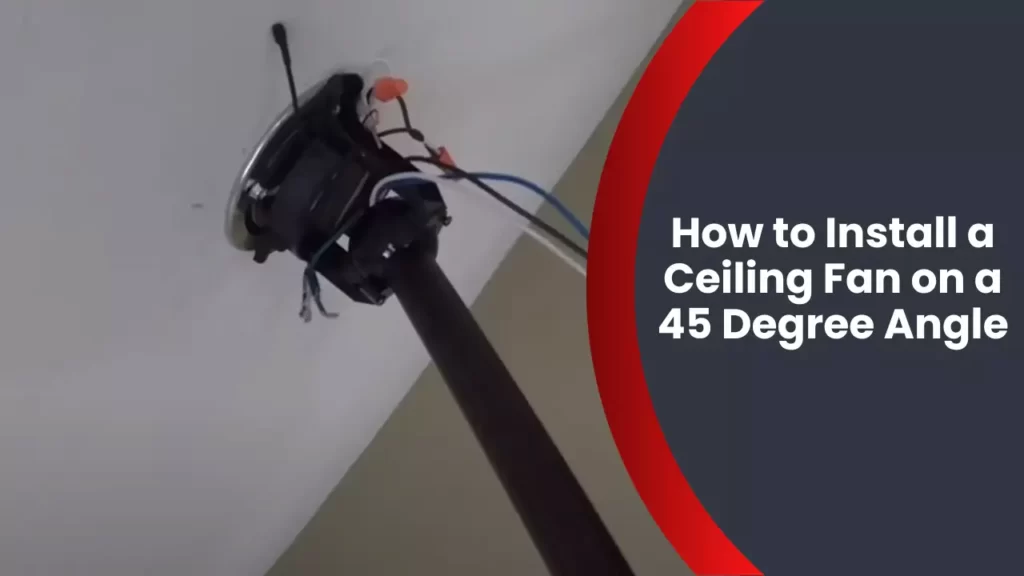
To install a ceiling fan on a 45-degree angle, follow these steps. Start by ensuring that you have the necessary tools and materials, including a fan-rated junction box, a fan mounting bracket, and a downrod.
Then, secure the junction box to the ceiling at the desired location and attach the fan mounting bracket. Next, connect the electrical wiring according to the manufacturer’s instructions and mount the fan onto the bracket. Finally, insert and secure the downrod to complete the installation.
Make sure to double-check all connections and follow proper safety precautions during the process.
Understanding The Basics Of Ceiling Fan Installation
Installing a ceiling fan may seem like a daunting task, especially when faced with the challenge of a 45-degree angled ceiling. However, with the right technique and proper understanding, it can be a straightforward process. In this article, we will delve into the factors you need to consider before starting the installation process and the importance of understanding the 45-degree angle installation technique.
Factors to consider before starting the installation process
Before embarking on your ceiling fan installation project, it’s crucial to take into account a few important factors. These considerations will ensure that your installation is safe and successful:
- Weight-bearing capacity: Check if your ceiling can support the weight of the fan. Most ceiling fans weigh between 10 to 50 pounds, so verify that your ceiling can handle this load.
- Electrical wiring: Ensure that you have the necessary electrical wiring in place. If not, consult a professional electrician to help you with the wiring installation.
- Tools and equipment: Gather all the required tools and equipment before beginning the installation. This may include a ladder, wire stripper, screwdriver, pliers, and a voltage tester.
- Ceiling height: Take into consideration the height of your ceiling to determine the appropriate downrod length for your fan. This will ensure optimal airflow and clearance.
Importance of understanding the 45-degree angle installation technique
The 45-degree angle installation technique is crucial when dealing with sloped or vaulted ceilings. This technique ensures that your ceiling fan is properly aligned and optimized for efficient airflow. Here’s why it’s important:
- Optimal performance: Installing a ceiling fan on a 45-degree angle allows for maximum air circulation in rooms with sloped ceilings. This ensures that you enjoy a comfortable and consistent breeze throughout the space.
- Aesthetic appeal: By using the 45-degree angle technique, your ceiling fan will be positioned correctly, enhancing the overall aesthetics of the room. This ensures that the fan fits seamlessly with the slope of the ceiling, making it visually pleasing.
- Safety considerations: Properly installing a ceiling fan on a 45-degree angle reduces the risk of any potential accidents or malfunctions. It ensures that the blades are at a safe distance from the sloped ceiling, preventing any damage or interference.
Now that you understand the basics of ceiling fan installation and the importance of the 45-degree angle technique, you can confidently proceed with your project. Keep in mind the factors you need to consider and follow the correct technique to ensure a successful installation. With these guidelines, you’ll be enjoying the comfort and functionality of your ceiling fan in no time!
Assessing The Viability Of Installing A Ceiling Fan On A 45-Degree Angle
Installing a ceiling fan on a 45-degree angle can not only add a stylish touch to your room but also improve air circulation and create a comfortable environment. However, before diving into the installation process, it is essential to assess whether your ceiling structure allows for this specific angle. Additionally, conducting a thorough assessment will ensure the safety and stability of the installation, providing peace of mind for you and your family. In this article, we will explore the necessary steps to determine if a 45-degree angle installation is viable and how to ensure a safe and stable outcome.
Determining if the ceiling structure allows for a 45-degree angle installation
Before beginning the installation process, it is crucial to examine whether your ceiling structure is suitable for a 45-degree angle installation. Not all ceilings are designed to accommodate this angle, so it is essential to take the following steps:
- Ensure you have a ladder or step stool to safely reach the ceiling.
- Inspect the area where you plan to install the ceiling fan. Look for any structural obstacles such as beams or joists that may interfere with the installation.
- If there are no visible obstacles, use a stud finder to locate the ceiling joists. This step is crucial for ensuring the fan will have proper support.
- Measure the distance between the ceiling joists to ensure they are at least the length required for the fan’s mounting bracket.
- If the ceiling structure meets these requirements, you can proceed to the next step of conducting a thorough assessment. Otherwise, consider alternative installation options or consult a professional for assistance.
Conducting a thorough assessment to ensure the safety and stability of the installation
Once you have determined that your ceiling structure allows for a 45-degree angle installation, it is time to conduct a thorough assessment to ensure the safety and stability of the installation. Follow these steps to achieve a secure outcome:
- Check the weight and size limitations specified by the manufacturer for the ceiling fan you have chosen. Make sure the ceiling structure can support the weight.
- Inspect the wiring in the ceiling to ensure it is in good condition and can safely accommodate the ceiling fan’s electrical requirements.
- If necessary, consult an electrician to assess the electrical system’s compatibility and make any required adjustments.
- Verify that all necessary tools and equipment are available and in good working condition before starting the installation.
- Follow the manufacturer’s instructions carefully when assembling and installing the ceiling fan. Pay particular attention to the step-by-step process for mounting the fan on a 45-degree angle.
- Secure all screws, bolts, and connections tightly to ensure a stable and secure installation.
By following these steps and conducting a thorough assessment, you can ensure that your ceiling fan installation on a 45-degree angle is both safe and stable. Enjoy the improved air circulation and stylish addition to your living space!
Gathering The Necessary Tools And Materials
Before you start installing a ceiling fan on a 45-degree angle, it’s crucial to gather all the necessary tools and materials. Having everything you need at the beginning will save you time and make the installation process much smoother. In this section, we’ll outline the essential tools required and recommend the materials you’ll need for a successful 45-degree angle installation.
Essential tools required for the installation process
When it comes to installing a ceiling fan on a 45-degree angle, having the right tools can make all the difference. Here are the essential tools you’ll need:
- Power drill with screwdriver bits
- Tape measure
- Stud finder
- Adjustable wrench
- Phillips and flathead screwdrivers
- Wire cutters and strippers
- Voltage tester
- Wire nuts
- Electrical tape
- Ladder or step stool
These tools will help you securely mount and wire your ceiling fan, ensuring a safe and efficient installation.
Recommended materials for a successful 45-degree angle installation
In addition to the necessary tools, it’s equally important to have the right materials for a successful 45-degree angle installation. Here are the recommended materials:
| Materials | Quantity |
|---|---|
| Ceiling fan with a downrod | 1 |
| Mounting hardware | As provided with the fan |
| Wire connectors | 3 or more, depending on the wires |
| Wire nuts | 2 or more, depending on the wires |
| Electrical box | 1, suitable for ceiling fan installation |
| Electrical wire | As needed, depending on the distance from the power source |
| Mounting bracket | 1, specific for use on a sloped ceiling |
| Wood screws | As needed, depending on the bracket and ceiling material |
| Ceiling fan remote or wall control | 1, optional but recommended for ease of use |
| Light kit (if desired) | 1, compatible with the ceiling fan |
Having these materials readily available will ensure you have everything necessary to install your ceiling fan on a 45-degree angle without any hiccups.
In this section, we discussed the gathering of necessary tools and materials for installing a ceiling fan on a 45-degree angle. We covered the essential tools required, ensuring you have everything you need to complete the installation process efficiently. Additionally, we recommended the materials you should have on hand for a successful 45-degree angle installation. By having the right tools and materials, you’ll be well-prepared to tackle the next steps of the installation process smoothly and safely.

Preparing The Ceiling For Fan Installation
Installing a ceiling fan on a 45-degree angle can add both comfort and style to your living space. However, before embarking on this project, it’s essential to properly prepare your ceiling to ensure a secure and sturdy installation. This guide will walk you through the necessary steps to measure and mark the desired location for the ceiling fan and identify and secure the appropriate support structure.
Measuring and marking the desired location for the ceiling fan
Before you start installing your ceiling fan on a 45-degree angle, it’s crucial to measure and mark the desired location accurately. Follow these steps:
- Use a measuring tape to determine the exact center of your ceiling. Mark this spot with a pencil for reference.
- Locate the nearest ceiling joist or support beam near the desired installation area. You can typically find these by tapping lightly on the ceiling until you hear a more solid sound.
- Measure the distance from the center of the ceiling to the nearest joist. This measurement will help you determine the correct extension rod length for your fan.
- Use a plumb bob or a long, vertical level to create a straight vertical reference line down from the center of the ceiling to the floor. This line will ensure that your fan hangs straight and perpendicular to the ground.
- Mark the 45-degree angle by measuring and marking a point along the vertical reference line that aligns with your desired installation spot.
By carefully measuring and marking the desired location for your ceiling fan, you’ll ensure a well-balanced installation that adds both functionality and aesthetic appeal to your room.
Identifying and securing the appropriate support structure for the fan
Once you’ve determined the location for your ceiling fan, you need to identify and secure the appropriate support structure. Follow these steps:
- Locate the joist or support beam that corresponds to the marked installation spot. Ensure that the selected support structure is strong enough to bear the weight of the ceiling fan.
- Using a stud finder or by tapping, confirm the presence and direction of the selected joist.
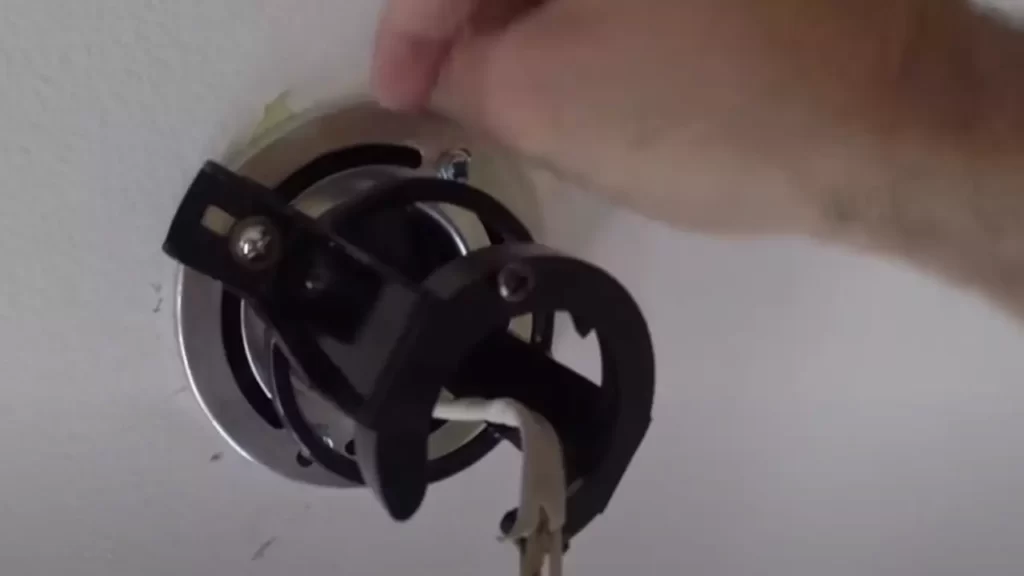
- Securely attach a ceiling fan-rated electrical box to the joist. Make sure the box is fastened tightly and can support the weight and movement of the fan.
- Install a sturdy mounting bracket provided with your ceiling fan kit onto the installed electrical box. Ensure that the bracket aligns with the marked 45-degree angle.
- Double-check the stability and alignment of the mounting bracket, making any necessary adjustments before attaching the fan itself.
By identifying and securing the appropriate support structure for your ceiling fan, you’ll guarantee its stability and longevity.
Assembling And Mounting The Ceiling Fan
Step-by-step instructions for assembling the various components of the ceiling fan
After choosing the perfect ceiling fan with the right fan blades and motor size for your angled ceiling, it’s time to assemble and mount it. To make the installation process smoother, follow these step-by-step instructions for assembling the various components of the ceiling fan:
- Start by unpacking all the parts of the ceiling fan and organizing them on a clean, flat surface.
- Attach the fan blades to the blade holders using the screws provided. Ensure that each blade is secured tightly to its holder.
- Next, locate the fan motor and prepare it for installation. Consult the manufacturer’s instructions to determine if any additional components need to be attached to the motor before mounting it.
- Once the motor is ready, align it with the pre-drilled holes on the mounting bracket. Use the provided screws to fasten the motor securely to the bracket. Be sure to tighten the screws firmly, but avoid overtightening as it may damage the components.
- With the motor securely attached to the mounting bracket, it’s time to connect the fan wiring to the electrical supply. Follow the manufacturer’s instructions carefully, ensuring that the wires are connected in the correct order and are properly insulated.
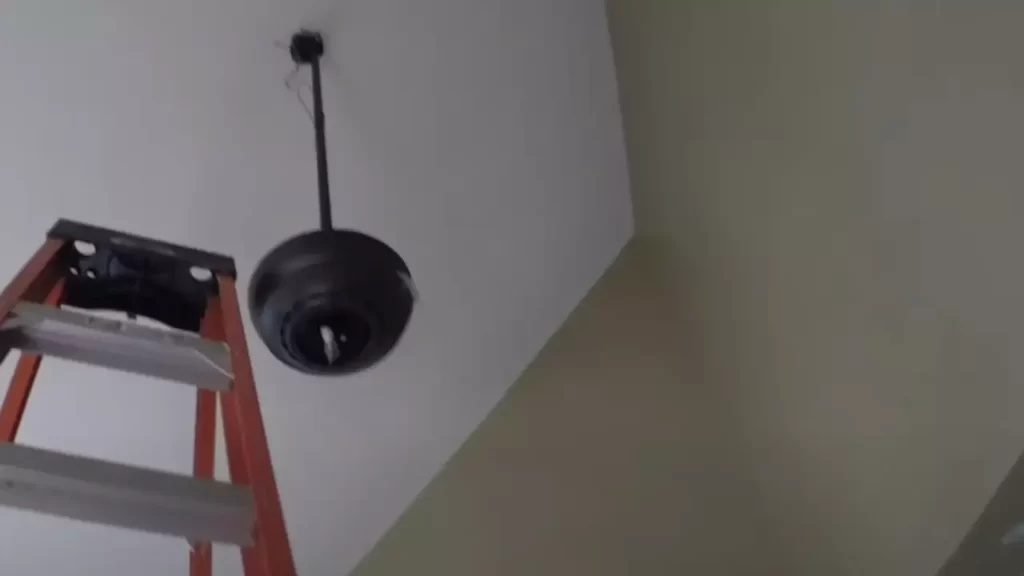
- After the wiring is complete, gently lift the assembled fan and mounting bracket towards the ceiling. Align the holes on the mounting bracket with the anchor points on the ceiling, making sure it is level.
- To secure the mounting bracket to the ceiling, insert the provided screws through the bracket and into the anchor points. Use a screwdriver to tighten them evenly until the bracket feels firm and secure.
- Make a final check to ensure that all the components are securely fastened, and the fan is properly aligned.
With the various components of the ceiling fan correctly assembled and the mounting bracket securely attached to the ceiling, you are now ready to move on to the next step: wiring and installing the fan switch.
Electrical Wiring And Connections
Safety precautions to follow when working with electrical wiring:
Before starting the electrical wiring process for your ceiling fan on a 45-degree angle, it is crucial to prioritize safety. Handling electrical connections requires caution to prevent any accidents or damage. Here are some essential safety precautions you must follow:
- Ensure the power to the circuit is turned off before beginning any work. This can be done by switching off the corresponding breaker in your electrical panel.
- Use insulated tools to minimize the risk of electrical shocks.
- Wear safety glasses to protect your eyes from any debris or sparks.
- Avoid working alone. Have someone nearby who can assist you in case of an emergency.
- Double-check all wiring connections and make sure they are properly secured to avoid loose connections and potential electrical hazards.
- If you are unsure or uncomfortable with any step, it is best to seek professional assistance to ensure the installation is done correctly and safely.
Detailed instructions for wiring the ceiling fan and connecting it to the electrical system:
Now that we have covered the safety precautions, let’s delve into the step-by-step process of wiring your ceiling fan on a 45-degree angle and connecting it to the electrical system.
- Start by identifying the power source and making sure it is compatible with your fan’s electrical requirements. It is crucial to check the voltage and amperage specifications before proceeding.
- Next, carefully read the manufacturer’s instructions that came with your ceiling fan.
- Locate the ceiling fan’s mounting bracket and secure it to the electrical box using the provided screws.
- Now, prepare the electrical wires by stripping off the insulation as directed in the manufacturer’s instructions. Usually, you will have a black (hot), white (neutral), and green (ground) wire.
- Connect the black wire from the ceiling fan to the black (hot) wire from the electrical box. This is typically done by twisting the ends of the wires together and securing them with a wire nut.
- Next, connect the white wire from the ceiling fan to the white (neutral) wire from the electrical box in the same manner.
- For the green (ground) wire, connect it to the grounding screw on the mounting bracket. If there is no grounding screw, consult the manufacturer’s instructions for an alternative grounding method.
- Carefully tuck the connected wires into the electrical box, ensuring they do not get pinched or damaged when the ceiling fan is installed.
- Once the wiring is complete, attach the fan blades and any other components according to the manufacturer’s instructions.
- Finally, turn the power back on at the breaker and test your newly installed ceiling fan to ensure it is working properly.
Remember, if you are unsure about any step or if you encounter any difficulties during the wiring process, it is best to consult a qualified electrician to complete the installation safely and effectively.
Balancing And Testing The Ceiling Fan
When it comes to installing a ceiling fan on a 45-degree angle, proper balancing and testing are crucial for ensuring a smooth and efficient operation. In this section, we will discuss the importance of proper balancing and how to test the functionality and performance of the installed ceiling fan.
1. Importance of Proper Balancing for Smooth and Efficient Operation
A balanced ceiling fan not only operates quietly but also minimizes stress on the motor, ensuring a longer lifespan. Proper balancing plays a significant role in distributing air evenly throughout the room, maximizing the fan’s performance. Without proper balancing, you may experience excessive wobbling, noise, and decreased airflow.
To achieve the right balance, follow these steps:
- Begin by ensuring that all blades are securely attached to the fan motor. Check for any loose screws or bolts and tighten them if necessary.
- Use a balancing kit, which typically includes adhesive weights, to address any imbalances. Attach the weights to the blades, starting with the heaviest blade.
- Turn on the fan and observe its operation. If you still notice wobbling or any other issues, try moving the weights to different areas of the blades until you achieve a smooth and balanced rotation.
2. Testing the Functionality and Performance of the Installed Ceiling Fan
Once you have installed and balanced the ceiling fan, it’s essential to test its functionality and performance to ensure optimal operation. Follow these steps:
- Turn on the fan to check if it starts up smoothly without any unusual noises.
- Check the airflow in different directions to ensure proper air distribution in the room.
- Verify that all fan speeds work correctly by adjusting the speed settings on the fan’s control panel.
- Observe the fan’s operation for a sufficient period, paying attention to any signs of wobbling, vibration, or other irregularities.
It’s recommended to test the fan at different speeds and settings to ensure it performs consistently and meets your expectations. If you notice any issues during the testing phase, double-check the balance and make any necessary adjustments to improve the fan’s operation.
Troubleshooting Common Issues
Installing a ceiling fan on a 45-degree angle can be a bit more challenging compared to a standard horizontal installation. However, with the right knowledge and techniques, you can overcome common issues that may arise during the process. In this section, we will guide you through identifying and resolving these common problems, and provide valuable tips and techniques to ensure a successful installation.
Identifying and resolving common problems encountered during the installation process
During the installation process of a ceiling fan on a 45-degree angle, several issues may arise. By recognizing these problems and understanding how to resolve them, you can save time and frustration. Here are some common problems and their solutions:
| Common Problem | Resolution |
|---|---|
| The ceiling fan doesn’t hang straight | Ensure the mounting bracket is securely fastened to the ceiling, and the downrod is properly attached to the fan. Use a level to adjust the angle if necessary. |
| The fan wobbles or makes noise | Check the alignment of the blades. Tighten any loose screws or bolts. Balance the blades using a fan balancing kit, placing adhesive weights on the blades as needed. |
| The fan doesn’t function properly | Make sure the fan is wired correctly according to the manufacturer’s instructions. Ensure the fan is connected to a secure power source and the wall switch is properly working. |
| The fan installation is blocking proper airflow | Ensure that the fan is not obstructed by any nearby objects or obstacles. Adjust the angle or position of the fan to maximize airflow and improve its efficiency. |
Tips and techniques for troubleshooting and resolving issues
When troubleshooting and resolving common issues during the installation of a ceiling fan on a 45-degree angle, keep the following tips and techniques in mind:
- Follow the manufacturer’s instructions: Carefully read and adhere to the instructions provided by the manufacturer to ensure a proper installation.
- Use quality tools: Invest in good quality tools that are specifically designed for ceiling fan installation. This will make the process easier and reduce the likelihood of encountering problems.
- Double-check measurements: Before drilling any holes or making any permanent adjustments, double-check your measurements to ensure accuracy and avoid unnecessary mistakes.
- Seek professional assistance if needed: If you encounter complex issues or are unsure about any step of the installation process, it is always wise to seek assistance from a professional electrician or handyman.
- Regular maintenance: After the installation is complete, perform regular maintenance by cleaning the fan blades, checking for loose screws, and lubricating the moving parts to ensure optimal performance and longevity.
By applying these troubleshooting techniques and adhering to these valuable tips, you can overcome common issues and enjoy the benefits of a ceiling fan installed at a 45-degree angle.
Additional Tips And Considerations
While installing a ceiling fan on a 45-degree angle brings a unique challenge, there are additional tips and considerations you should keep in mind to ensure optimal performance and efficiency. In this section, we will cover energy-saving tips as well as maintenance and cleaning guidelines to ensure your ceiling fan operates smoothly for years to come.
Energy-saving tips for maximizing the efficiency of your ceiling fan
1. Adjust the fan’s direction: Ceiling fans typically have multiple settings, allowing you to change the direction of the fan blades. During the summer months, set the fan to rotate in a counterclockwise direction to create a cooling breeze. In winter, switch the fan to rotate clockwise to push warm air down from the ceiling.
2. Utilize the right fan speed: Ceiling fans usually have different speed settings to choose from. For optimal energy efficiency, select the lowest speed that provides sufficient airflow and comfort. This helps reduce unnecessary energy consumption.
3. Combine with air conditioning: Ceiling fans can work in tandem with your air conditioning unit. By using a ceiling fan together with your AC, you can set the thermostat a few degrees higher while still maintaining a comfortable indoor temperature. This can lead to significant energy savings over time.
4. Optimize your home’s airflow: Ensure that the airflow from your ceiling fan is not obstructed. Make sure furniture, curtains, or other objects are not blocking the airflow, as this may reduce the fan’s efficiency. Additionally, keeping doors and windows closed while the fan is in operation helps maintain a consistent indoor temperature.
Maintenance and cleaning guidelines for long-term performance
Regular maintenance and cleaning are crucial for keeping your ceiling fan running smoothly and ensuring its long-term performance. Here are some guidelines to follow:
- Clean the fan blades: Dust and dirt can accumulate on the fan blades over time, affecting its performance. Use a soft cloth or a duster to gently wipe down the blades. If needed, you can also dampen the cloth with a mixture of mild soap and water for a more thorough cleaning.
- Tighten loose screws: Periodically check and tighten any loose screws or bolts on your ceiling fan. Over time, vibrations can cause these fasteners to become loose, affecting the stability and functioning of the fan.
- Check for wobbling: If your ceiling fan starts to wobble excessively, it could be an indication of an imbalance. You can use a balancing kit to correct the issue. The kit usually includes weights that can be attached to the blades to restore balance.
- Inspect the motor: Check the motor of your ceiling fan periodically for dust accumulation. Use a vacuum cleaner or compressed air to remove any dirt or debris that may have accumulated in the motor housing.
- Keep the fan lubricated: Some ceiling fans may require lubrication to ensure smooth operation. Refer to the manufacturer’s guidelines for the correct type of lubricant and the recommended maintenance schedule.
By following these energy-saving tips and maintenance guidelines, you can maximize the efficiency and longevity of your ceiling fan on a 45-degree angle installation. Enjoy the comfort and cost savings it brings to your home!
Frequently Asked Questions
Can You Put A Ceiling Fan On An Angled Ceiling?
Yes, you can install a ceiling fan on an angled ceiling. However, it is important to use a fan specifically designed for angled ceilings and follow the manufacturer’s instructions for proper installation.
Do I Need A Special Ceiling Fan For Slanted Ceiling?
Yes, a special ceiling fan is needed for a slanted ceiling. These fans have an adjustable mount that allows them to be installed on angled surfaces. They are designed to ensure proper airflow and prevent any unnecessary strain on the motor.
How Far Should A Ceiling Fan Be From A Sloped Ceiling?
A ceiling fan should be at least 7 feet from a sloped ceiling for safe and efficient operation.
How Do I Know If My Junction Box Can Hold A Fan?
To determine if your junction box can hold a fan, check its weight capacity and electrical rating. Consult an electrician or the manufacturer’s guidelines for specific information about your junction box.
Conclusion
Installing a ceiling fan on a 45-degree angle may seem intimidating, but with the right tools and methods, it can be a straightforward process. By following the steps outlined in this blog post, you can easily and safely install a ceiling fan on a sloped ceiling.
Remember to take accurate measurements, use the correct mounting bracket, and secure all connections properly. With these guidelines, you can enjoy a cool and comfortable atmosphere in any room, regardless of the ceiling angle. Happy installing!