Installing a ceiling fan light kit involves following the manufacturer’s instructions and wiring the kit to the existing ceiling fan. It is a straightforward process that adds lighting functionality to your ceiling fan.
Ceiling fan light kits are available in various designs, allowing you to choose the one that suits your style. This guide will walk you through the steps to successfully install a ceiling fan light kit in your home, enhancing both the aesthetics and functionality of your ceiling fan.
So let’s get started on installing your ceiling fan light kit for a brighter and more comfortable space.
Common Problems And Their Solutions
Installing a ceiling fan light kit can instantly upgrade the look and functionality of any room. However, like any electrical installation, it can come with its own set of challenges. In this section, we will look at some common problems that may arise after installing a ceiling fan light kit and provide you with their solutions. By addressing these issues, you’ll be able to enjoy a well-lit and comfortable space.
Bulbs not working after installation
If your ceiling fan light bulbs are not working after installation, it can be frustrating. Fortunately, this issue is often due to a simple oversight or a quick fix. Here are a few possible causes and solutions for bulbs not working:
- Check the bulb connection: Ensure that the bulbs are properly screwed in and have a secure connection. Sometimes, they may appear to be in place but require a firmer twist to establish a good connection.
- Inspect the wiring: Carefully examine the wiring connections between the ceiling fan and the light kit. Ensure that they are securely connected and not loose.
- Verify the compatibility: Make sure that the light bulbs you are using are compatible with the light kit. Some fans may have specific requirements for bulb type or wattage.
- Test the circuit breaker: Check if the circuit breaker controlling the fan’s electricity is tripped. If it has, reset it and see if the bulbs start working.
Light flickering or not staying on
Experiencing light flickering or the light not staying on can be irritating. Here are a few potential causes and solutions:
- Ensure the bulbs are tightly screwed in: Loose bulbs can cause flickering or intermittent light. Check and tighten the bulbs to ensure a secure connection.
- Check the voltage: Ensure that the ceiling fan light kit is receiving the correct voltage. Incorrect voltage can cause flickering or the light not staying on. Consult a professional electrician if necessary.
- Inspect the light kit wiring: It’s essential to check the wiring connections within the light kit. Loose or faulty wiring can lead to flickering. Ensure all connections are secure and undamaged.
- Upgrade the dimmer switch: If you have a dimmer switch, consider upgrading to one specifically designed for ceiling fans. Improper dimmer switches can cause issues with the lighting.
Fan and light not working together
If your ceiling fan and light are not working together as intended, it can be puzzling. Here are some possible causes and solutions:
- Verify the wiring connections: Double-check the wiring connections between the ceiling fan, light kit, and any remote control receiver. Ensure they are properly connected and secured.
- Check the pull chains: Make sure the pull chains on the fan and light are in the correct position. If they are not positioned correctly, it can disrupt the operation of the fan and light.
- Test the remote control: If your ceiling fan has a remote control, ensure that it is functioning properly and has fresh batteries. Sometimes, a malfunctioning remote can cause issues with both the fan and light.
- Consult the manufacturer or an electrician: If the above solutions don’t resolve the issue, it’s best to contact the manufacturer for specific troubleshooting instructions. Alternatively, consult an electrician who can provide expert guidance in resolving complex electrical issues.
By addressing these common problems and following the provided solutions, you can ensure a smooth and functional ceiling fan light kit installation. Enjoy the enhanced lighting and comfort that your ceiling fan brings to your space!
Essential Equipment For A Successful Installation
When it comes to installing a ceiling fan light kit, having the right equipment is crucial for a successful and seamless installation process. By having the necessary tools at your disposal, you can ensure that the installation goes smoothly and that your ceiling fan light kit is properly and securely installed. In this section, we will discuss the essential equipment you will need for the installation.
Screwdriver
A screwdriver is an essential tool when it comes to installing a ceiling fan light kit. Make sure you have both a flathead and a Phillips screwdriver to accommodate different types of screws. The right screwdriver will help you remove and secure screws, ensuring a secure and stable installation.
Wire Strippers
Wire strippers are necessary for removing the insulation from the electrical wires. This step is crucial to make proper connections and ensure the electrical circuit functions properly. With wire strippers, it is easy to strip off the necessary amount of insulation, exposing the bare wire for proper connection.
Wire Connectors
Wire connectors are essential for joining wires together securely and safely. These connectors typically consist of a plastic housing with metal components that securely join wires. By using wire connectors, you can ensure that the connections between wires are tight, eliminating the risk of loose connections that can lead to electrical shorts or other issues.
Ladder
A sturdy ladder is necessary to reach the ceiling and properly install the ceiling fan light kit. Make sure the ladder is of the appropriate height and stability to safely reach the installation area. Using a ladder will also provide stability and support while working above your head, making the installation process easier and safer.
Ceiling Fan Light Kit
Of course, you will need the ceiling fan light kit itself. Make sure to choose a kit that is compatible with your ceiling fan model and meets your lighting needs. The kit should include the necessary components such as the light fixture, wiring, and any additional accessories required for installation.
Electrical Tape
Electrical tape is essential for securing and insulating electrical connections. It is used to wrap around exposed wires, providing insulation and protection against electrical shorts. Make sure to use high-quality electrical tape to ensure a secure and long-lasting connection.
A Step-By-Step Guide For A Successful Installation
If you’re looking to brighten up your living space and improve air circulation, installing a ceiling fan light kit is a great DIY project. Not only will it add functionality to your ceiling fan, but it can also enhance the overall look and feel of the room. In this step-by-step guide, we’ll walk you through the process of installing a ceiling fan light kit, ensuring a successful installation that’s both safe and efficient.
Check for power supply
Before you begin, it’s crucial to check the power supply in the area where you’ll be installing the ceiling fan light kit. Switch off the power at the circuit breaker to ensure your safety during the installation. Use a voltage tester to confirm that the power is indeed off before proceeding.
Safety precautions
Your safety should always be a priority when working with electrical installations. Make sure you have the necessary safety equipment such as goggles and gloves. It’s also a good idea to have a sturdy ladder or step stool to reach the ceiling. Remember to read through the ceiling fan light kit’s instructions before starting the installation.
Remove the existing light fixture
Begin by removing the existing light fixture if there is one. Switch off the power and carefully remove the bulbs and any covers or shades. Undo the screws or nuts holding the fixture to the ceiling and gently disconnect the wires. When removing the fixture, be careful not to damage any wires or the ceiling surface.
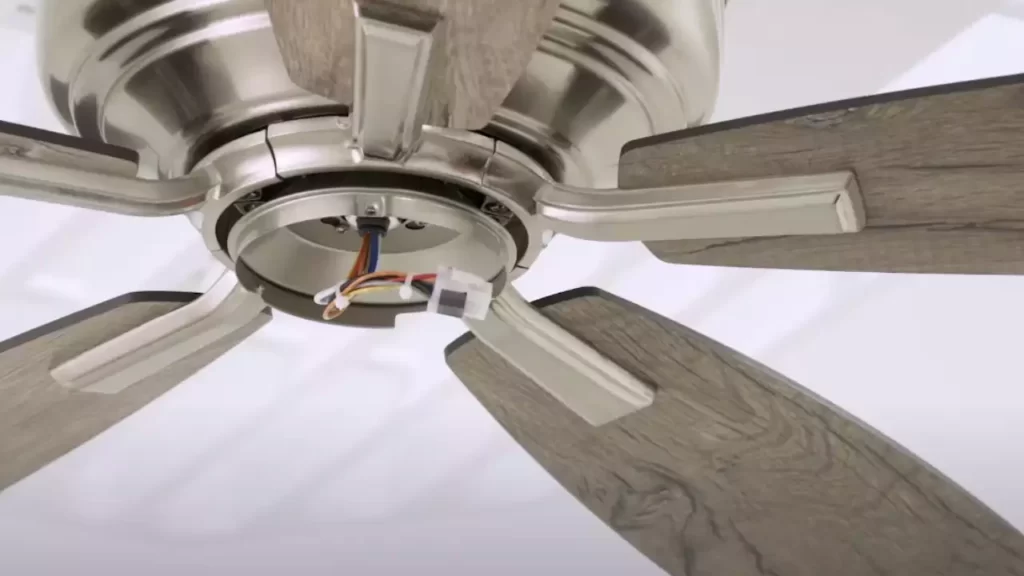
Understand the wiring
Before connecting the light kit wires, it’s important to understand the wiring of the ceiling fan. Typically, there will be a black wire, a white wire, and a green or copper grounding wire. The black wire is the live wire, the white wire is the neutral wire, and the green/copper wire is the ground wire. Familiarize yourself with these wires before proceeding to the next step.
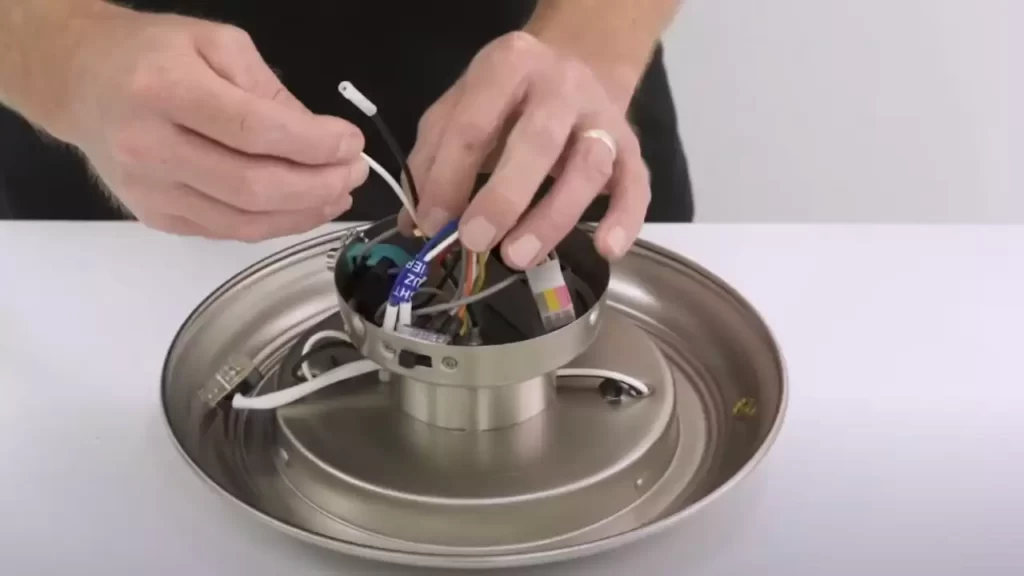
Connect the light kit wires
Now it’s time to connect the light kit wires. Begin by matching the colors of the wires from the light kit to the corresponding wires on the ceiling fan. Use wire nuts or connectors to securely attach the black wire from the light kit to the black wire from the fan. Repeat this process for the white and green/copper wires. Ensure all connections are tight and properly insulated.
Attach the light kit to the ceiling fan
With the wires connected, you can now attach the light kit to the ceiling fan. Following the manufacturer’s instructions, align the slots or brackets on the light kit with the corresponding slots on the fan. Once aligned, secure the light kit in place using the provided screws or other attachment methods. Double-check that the light kit is firmly attached before moving on.
Testing the light
With the installation complete, it’s time to test the light. Switch the power back on and turn on the fan’s light switch. If everything has been correctly installed, the light should illuminate. Check for any flickering or abnormal behavior and make any necessary adjustments. Once you’re satisfied with the light’s functionality, you can enjoy your newly installed ceiling fan light kit.
By following this step-by-step guide, you can easily install a ceiling fan light kit and enhance both the lighting and ventilation in your space. Remember to prioritize safety and always refer to the manufacturer’s instructions for specific details about your particular ceiling fan light kit.

Considerations For A Perfect Fit
Considerations for a Perfect Fit
When it comes to installing a ceiling fan light kit, there are several important considerations to keep in mind. Taking the time to research and select the right light kit for your ceiling fan will not only ensure a perfect fit but also enhance the overall look and functionality of your space. Here are some key factors to consider when choosing a ceiling fan light kit.
Style and Design Matching
One of the first considerations when selecting a ceiling fan light kit is to ensure that the style and design of the kit matches your existing ceiling fan. Whether you have a modern, traditional, or rustic style fan, finding a light kit that complements the fan’s design will create a cohesive and visually appealing look. Opting for a light kit that blends seamlessly with the fan will enhance the overall aesthetic of your room.
Light Output and Brightness
Another important factor to consider is the light output and brightness of the ceiling fan light kit. The purpose of a light kit is to provide adequate illumination in the room. Therefore, it’s crucial to choose a kit that offers sufficient brightness based on your needs. Whether you prefer a soft ambient glow or a brighter lighting option, make sure the light kit you select can deliver the desired level of illumination.
Energy Efficiency
In today’s environmentally conscious world, energy efficiency is a significant consideration when choosing any lighting fixture. Opting for an energy-efficient ceiling fan light kit not only reduces your carbon footprint but also helps you save on energy bills. Look for light kits that feature LED bulbs or those with an Energy Star rating, as they consume less energy and have a longer lifespan compared to traditional incandescent bulbs.
Ease of Installation
When it comes to installing your ceiling fan light kit, it’s crucial to consider the ease of installation. If you’re a handy DIY enthusiast, you may not mind a more complex installation process. However, if you’re not confident in your abilities, selecting a light kit with simple instructions and straightforward installation will save you time and frustration. Additionally, choosing a light kit that is compatible with your existing ceiling fan will make the installation process even easier.
Compatibility with Existing Ceiling Fan
One of the most critical considerations is ensuring compatibility between the light kit and your existing ceiling fan. Before purchasing a light kit, check the specifications and ensure it is designed to fit your specific ceiling fan model. Take note of any limitations or restrictions outlined by the manufacturer to avoid compatibility issues. Checking if the light kit is compatible with both the size and electrical requirements of your fan is essential to ensure a successful installation.
In conclusion, selecting the right ceiling fan light kit involves thoughtful consideration of several factors. From style and design matching to light output, energy efficiency, ease of installation, and compatibility with your existing fan, each consideration plays a crucial role in achieving a perfect fit. By taking the time to research and make an informed decision, you can enhance the functionality and aesthetic appeal of your space with a ceiling fan light kit that ticks all the right boxes.
Ensure A Safe And Secure Installation
Installing a ceiling fan light kit is a great way to enhance the look and functionality of your room. However, it’s crucial to prioritize safety throughout the installation process. By following a few simple steps and taking necessary precautions, you can ensure a safe and secure installation. In this guide, we’ll walk you through the essential measures to keep in mind when installing your ceiling fan light kit.
Ensure Power Supply is Switched Off
Before you begin the installation process, always make sure to turn off the power supply. This step will help prevent any electrical accidents and keep you safe during the installation. Locate the breaker for the room where the ceiling fan is located and switch it off. You can also use a voltage tester to double-check that there is no power running through the wires. Safety should always be your primary concern.
Use Proper Safety Gear
When working with electrical components, it’s crucial to protect yourself by wearing the appropriate safety gear. Remember to put on safety glasses and gloves before you start the installation process. Safety glasses will protect your eyes from any debris that may be generated during the installation, while gloves will safeguard your hands from cuts and scratches. By using proper safety gear, you significantly reduce the risk of injury.
Follow Manufacturer’s Instructions
Each ceiling fan light kit comes with specific instructions provided by the manufacturer. It’s essential to carefully read and follow these instructions to ensure a safe and successful installation. The manufacturer’s instructions will guide you through the entire installation process, from identifying the right connections to wiring the light kit correctly. By following their guidelines, you guarantee that the installation is done correctly and optimally.
Securely Fasten All Connections
During the installation process, it’s crucial to securely fasten all connections. This includes attaching the ceiling fan light kit to the ceiling fan as well as connecting the electrical wires. Loose connections can lead to electrical issues and accidents. Make sure to tighten all screws and nuts properly, ensuring that everything is securely in place. This step will give you peace of mind, knowing that your ceiling fan light kit is installed safely and securely.
Regular Maintenance and Inspection
Once you have successfully installed your ceiling fan light kit, it’s essential to perform regular maintenance and inspection to ensure its continued safety and functionality. Check the connections periodically for any signs of wear or corrosion and tighten them if necessary. Inspect the fan blades and the light fixtures for any damage and replace them if needed. By staying on top of regular maintenance, you can enjoy a safe and efficient ceiling fan light kit for years to come.
By following these steps and adhering to the safety measures outlined above, you can ensure a safe and secure installation of your ceiling fan light kit. Prioritizing safety throughout the process will not only protect you from potential hazards but also provide you with peace of mind knowing that you have created a safe and comfortable environment in your home.
Why You Should Consider Adding A Light Kit
Increased functionality and convenience
Adding a light kit to your ceiling fan can greatly enhance the functionality and convenience of your space. By integrating a light into the fan, you can eliminate the need for additional lighting fixtures, allowing you to streamline your room’s design and minimize clutter. This not only gives you more control over the lighting in your space but also saves you time and effort in searching for the right lighting solution. Whether you want to brighten up a dark room or create a cozy ambiance, a ceiling fan light kit offers flexibility in achieving the perfect lighting for any occasion.
Aesthetically pleasing
In addition to providing functional benefits, a ceiling fan light kit can also enhance the aesthetic appeal of your room. With various designs and styles available, you can effortlessly find the perfect light kit that complements and enhances your existing decor. Whether you prefer a sleek and modern look or a more traditional and decorative style, there is a wide range of options to choose from. The integration of a light kit not only adds visual interest but also elevates the overall design of your space, creating a more cohesive and polished look.
Energy efficient lighting option
Opting for a ceiling fan light kit provides you with an energy-efficient lighting solution. Many light kits are equipped with energy-saving LED bulbs, which consume less electricity than traditional incandescent bulbs. LED technology not only lowers your energy consumption but also reduces the frequency of bulb replacement, saving you money in the long run. Additionally, many light kits offer dimming capabilities, allowing you to adjust the brightness level according to your preference and further reduce energy usage. Embracing an energy-efficient lighting option not only benefits the environment but also reduces your electricity bills.
Factors to consider before an upgrade
Before making a decision to upgrade your ceiling fan with a light kit, there are a few factors to consider. Firstly, ensure that your ceiling fan is compatible with a light kit. Some older models may not have the necessary wiring or space to accommodate a light kit, making it important to check the manufacturer’s specifications or consult a professional. Secondly, consider the amount of light you require in your space. Different light kits offer varying levels of brightness, so it’s essential to select one that suits your needs. Lastly, take into account the overall design and style of your room to ensure that the chosen light kit complements your existing decor seamlessly.
In conclusion, adding a light kit to your ceiling fan offers increased functionality, aesthetic appeal, and energy-efficient lighting. By considering the factors mentioned above, you can make an informed decision and transform your space into a well-lit and visually appealing haven. So, don’t miss out on the benefits that a ceiling fan light kit can provide – upgrade your fan today!
Frequently Asked Questions
Are Ceiling Fan Light Kits Easy To Install?
Yes, ceiling fan light kits are easy to install. They can be easily attached to most ceiling fans and come with clear instructions. Simply follow the steps, and you’ll have your ceiling fan with a light kit up and running in no time.
Do Ceiling Fan Light Kits Fit All Fans?
Ceiling fan light kits do not fit all fans. Compatibility depends on the design and model of the fan. Make sure to check if the light kit is compatible with your specific fan model before purchasing.
Do You Need Electrician To Install Ceiling Fan Light?
Yes, you need an electrician to install a ceiling fan light.
Are Most Ceiling Fan Light Kits Universal?
Yes, most ceiling fan light kits are universal. They are designed to fit on various ceiling fan models, making them versatile and easy to install.
Conclusion
Installing a ceiling fan light kit is a simple and cost-effective way to enhance the functionality and aesthetics of your space. By following the steps outlined in this blog post, you can easily upgrade your ceiling fan and enjoy improved lighting and air circulation.
Remember to gather the necessary tools and materials, refer to the manufacturer’s instructions, and prioritize safety throughout the installation process. With a little effort and know-how, you’ll be enjoying the benefits of your new ceiling fan light kit in no time.