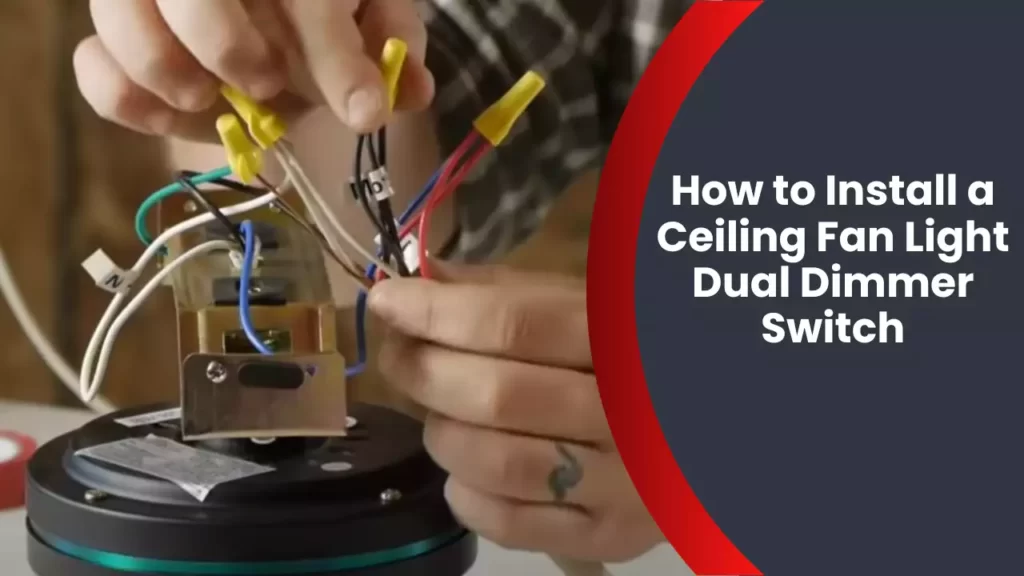
To install a ceiling fan light dual dimmer switch, follow these steps: Turn off the power, remove the existing switch, connect the new switch, and secure it in place. The process requires basic electrical knowledge and tools.
Ceiling fans not only provide a cool breeze on hot days but also enhance the aesthetic appeal of any room. Adding a dual dimmer switch to control the fan and lights can further enhance your comfort and create a cozy ambiance.
Although the installation may sound daunting, with the right guidance and precautions, it can be easily accomplished. We will outline the step-by-step process to install a ceiling fan light dual dimmer switch, ensuring a safe and efficient installation. So, let’s get started and transform your ceiling fan into a versatile and customizable home accessory.
Benefits Of Installing A Ceiling Fan Light Dual Dimmer Switch
Installing a ceiling fan light dual dimmer switch offers several remarkable benefits that can enhance the functionality and ambiance of any room. With the ability to customize lighting and fan speed control, increase energy efficiency, and improve comfort, this simple upgrade can transform your living space. In this article, we will explore in detail how a ceiling fan light dual dimmer switch can revolutionize your home.
Allows for Customized Lighting and Fan Speed Control
One of the primary benefits of installing a ceiling fan light dual dimmer switch is the ability to have complete control over your lighting and fan speed. This means you can effortlessly adjust the brightness of your lights and set the perfect fan speed to create a comfortable environment for any occasion. Whether you want to create a cozy atmosphere for a romantic dinner, brighten up the room for a lively gathering, or simply relax and enjoy a gentle breeze, the dual dimmer switch puts you in full command.
Increases Energy Efficiency and Cost Savings
By installing a ceiling fan light dual dimmer switch, you can significantly increase your energy efficiency and save on utility bills. With the ability to adjust the brightness of your lights and control the fan speed, you can optimize the energy consumption based on your needs. For example, during the daytime, you may only need a lower light intensity and fan speed, resulting in lower energy usage. Additionally, you can take advantage of the natural breeze by setting the fan to a lower speed instead of relying solely on air conditioning. These energy-saving measures not only reduce your carbon footprint but also contribute to long-term cost savings.
Enhances the Ambiance and Comfort of Any Room
The installation of a ceiling fan light dual dimmer switch introduces a new level of ambiance and comfort to any room. With the option to control both the lighting and fan speed, you can create the perfect atmosphere for relaxation, entertainment, or work. Whether you prefer a bright, well-lit space for reading or studying, or a dim, soothing environment for winding down after a long day, the dual dimmer switch puts you in control of the mood. The gentle airflow from the fan can also help maintain a comfortable temperature, reducing the need for excessive air conditioning or heating.
Overall, the installation of a ceiling fan light dual dimmer switch offers a range of benefits that enhance the functionality, energy efficiency, and comfort of any room. By providing the ability to customize lighting and fan speed control, increase energy efficiency, and create the perfect ambiance, this upgrade brings a notable transformation to your living space. Make the switch today and experience the numerous advantages firsthand.
Things To Consider Before Installation
Before you begin the installation process of a ceiling fan light dual dimmer switch, there are a few important factors to consider. Taking the time to assess these considerations will help ensure a successful and safe installation. In this section, we will explore the compatibility of the switch with your existing ceiling fan and light fixtures, the importance of understanding electrical wiring and safety precautions, as well as gathering the necessary tools and materials for the installation process.
Compatibility with your existing ceiling fan and light fixtures
One of the first things you need to consider before installing a ceiling fan light dual dimmer switch is its compatibility with your existing ceiling fan and light fixtures. Not all ceiling fans are designed to work with a dual dimmer switch, so it’s essential to check the specifications of your fan and light fixtures before making a purchase. Ensure that your fan and light fixtures have separate switches or wiring that can accommodate a dual dimmer switch. This will ensure optimal functionality and prevent any electrical malfunctions.
Understanding electrical wiring and safety precautions
Before attempting any electrical installation, it’s crucial to have a basic understanding of electrical wiring and the necessary safety precautions to avoid any potential hazards. If you’re not familiar with electrical work, it’s strongly recommended to consult a professional electrician or seek guidance from an experienced individual. Familiarize yourself with the wiring diagram of your ceiling fan and light fixtures, and always follow the manufacturer’s instructions and safety guidelines. Remember to turn off the power supply to the ceiling fan and light fixtures before starting the installation process to prevent electrical shocks or accidents.
Gathering the necessary tools and materials for the installation
Now that you are aware of the compatibility of the dual dimmer switch and understand the importance of safety, it’s time to gather the necessary tools and materials for a smooth installation process. Here’s a list of the essential items you’ll need:
| Tools | Materials |
|---|---|
|
|
Ensuring you have all the necessary tools and materials before you begin the installation process will save you time and frustration. Additionally, it’s important to double-check the compatibility of the dimmer switch with your existing fan and light fixtures to avoid any last-minute surprises.
Step 1: Turn Off The Power
Step 1: Turn Off the Power
Before you begin installing a ceiling fan light dual dimmer switch, it is crucial to turn off the power to avoid any electrical accidents. Following these steps will help ensure a safe installation process.
Locate the circuit breaker that controls the ceiling fan and light
To find the circuit breaker that controls the ceiling fan and light, you will need to locate your home’s electrical panel. This panel is usually located in a basement, garage, or utility room. Once you have found the electrical panel, open the door to reveal a series of switches or fuses.
Look for the switch or fuse that corresponds to the ceiling fan and light. It may be labeled as such, but if not, you can identify it by its location or by switching off each switch one at a time while someone else listens for the fan and light to turn off. Once you have identified the correct circuit breaker, take note of its position for future reference.
Switch off the power to prevent any electrical accidents during installation
Now that you have located the circuit breaker that controls the ceiling fan and light, it’s time to switch off the power. To do this, flip the switch or remove the fuse for the corresponding circuit breaker. This effectively cuts off the electrical supply to the ceiling fan and light, ensuring your safety during the installation process.
- Switching off the power is vital as it eliminates the risk of electrocution or electrical shock while working on the ceiling fan and light.
- Never assume that the power is off without physically confirming it. Always double-check before proceeding.
Remember, safety should be your top priority when working with electricity. Taking the necessary precautions by turning off the power will prevent any accidents and make the installation process smoother and stress-free.
Step 2: Remove The Existing Switches
Step 2: Remove the cover plate of the existing switches
Before you can begin installing the ceiling fan light dual dimmer switch, you’ll need to remove the cover plate of the existing switches. This allows you to access the switches and ultimately replace them with the new dual dimmer switch.
To begin, make sure the power to the switches is turned off at the circuit breaker. Safety should always be your top priority when working with electrical components.
Once the power is off, use a screwdriver to gently pry off the cover plate. Insert the tip of the screwdriver into one of the screw holes on the plate, and apply gentle pressure until the plate pops off. Repeat this process for any additional cover plates you have in the same electrical box.
Unscrew the switches from the electrical box
With the cover plate removed, you can now access the switches themselves. To remove them from the electrical box, you’ll need a screwdriver.
Start by removing the screws that secure the switches to the electrical box. Typically, there will be two screws for each switch—one at the top and one at the bottom. Use your screwdriver to rotate each screw counterclockwise until it is completely loosened.
Once the screws are removed, gently pull the switches forward, away from the electrical box. Be careful not to pull too hard, as there may be wires still connected to the switches.
Inspect the wiring to ensure it is safe to proceed with the installation. Look for any signs of damage or loose connections. If everything looks good, you can continue with the installation of the new dual dimmer switch.
Before disconnecting any wires from the existing switches, it’s a good idea to take a photograph or make a diagram of the wiring configuration. This will help you when it comes time to connect the wires to the new dual dimmer switch. Labeling the wires with tape or colored markers can also be helpful.
To disconnect the wires, use a screwdriver to loosen the screws holding each wire in place. Once the screws are loose, gently remove the wires from the switches. Make sure to keep track of which wire goes where, as they will need to be reconnected to the new switch in the same configuration.
With the existing switches removed and the wiring safely disconnected, you are now ready to proceed to the next step: installing the new ceiling fan light dual dimmer switch.

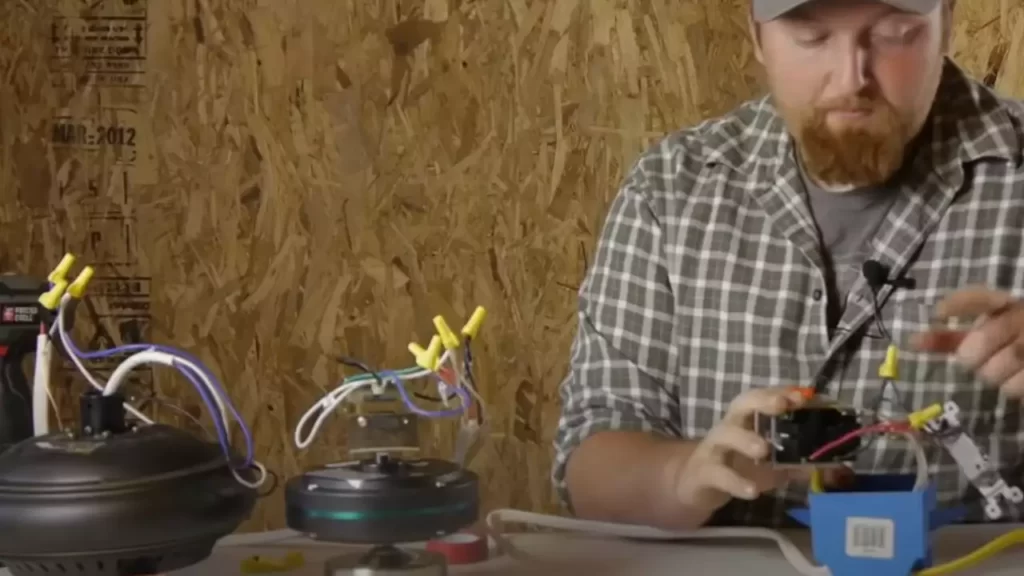
Step 3: Identify The Wiring
Step 3: Identify the Wiring
Before you start installing your ceiling fan light dual dimmer switch, it is crucial to identify and understand the different wires involved in the process. Each wire serves a specific purpose, and distinguishing between them is essential to ensure a successful installation.
Distinguish between the different wires – hot, neutral, and ground
When it comes to ceiling fan light dual dimmer switch installation, it is important to distinguish between three specific wires: hot, neutral, and ground.
- The hot wire: This wire carries the electrical current from the power source to the switch. It is usually colored black or red and is responsible for providing the necessary power to operate the fan and the light.
- The neutral wire: The neutral wire completes the electrical circuit. It is commonly colored white and is responsible for carrying the current back to the power source. It ensures a safe flow of electricity and is essential for proper functioning.
- The ground wire: This wire is responsible for providing a path for electrical current in case of a fault or short circuit. It is usually colored green or bare and is crucial for safety reasons. The ground wire should always be properly connected to prevent electric shocks or damage.
Understand the purpose of each wire in the installation process
Each wire plays a specific role in the ceiling fan light dual dimmer switch installation process. Understanding the purpose of each wire ensures a smooth and secure installation.
- The hot wire: As mentioned earlier, the hot wire carries the electrical current from the power source to the switch. It is essential for supplying power to the fan and the light. To ensure safety, the hot wire should be properly connected to the appropriate terminal of the switch.
- The neutral wire: The neutral wire completes the electrical circuit, allowing the current to flow back to the power source. It is vital for safe and efficient operation. The neutral wire should be connected to the corresponding terminal of the switch to ensure proper functionality.
- The ground wire: The ground wire provides a path for electrical current in case of a fault or short circuit. It protects against electrical shocks and is a crucial safety measure. The ground wire should be securely connected to the grounding terminal of the switch to ensure proper grounding.
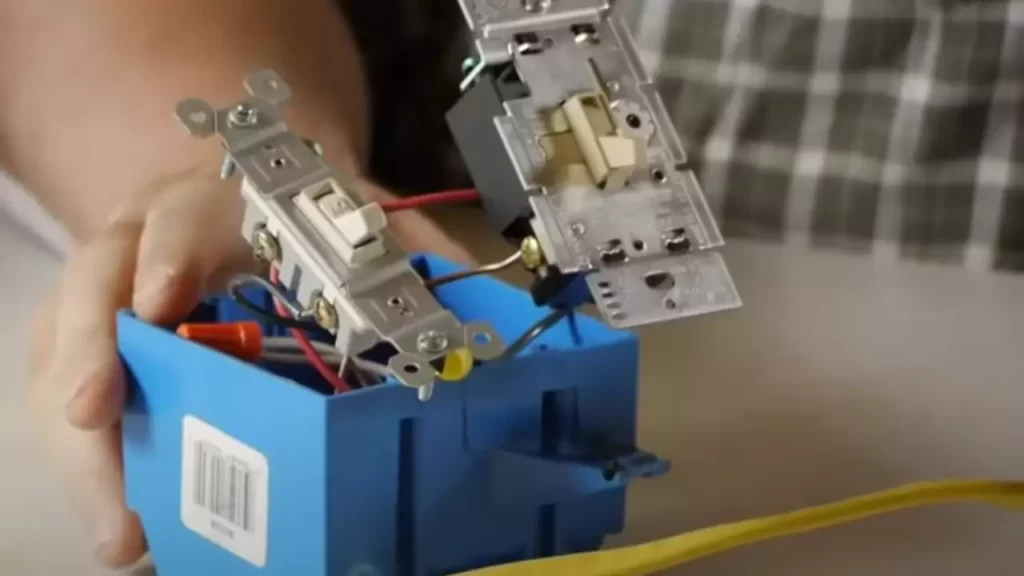
Step 4: Install The Dual Dimmer Switch
Now that you have successfully completed the previous steps, it’s time to install the dual dimmer switch for your ceiling fan light. This switch will allow you to control both the fan and the light separately, giving you flexibility in managing your room’s ambiance. Follow these instructions to correctly install the dual dimmer switch.
Connect the hot wires to the proper terminals on the switch
First, identify the hot wires coming from your electrical box. These wires are usually black or red. Make sure to turn off the power at the breaker box before continuing with this step to ensure your safety.
Once you have ensured that the power is off, strip the ends of the hot wires. Connect one hot wire to the common terminal on the dual dimmer switch. This terminal is typically labeled with a dark color or the letter “C.” Tighten the screw to secure the connection.
Next, connect the remaining hot wire to the other terminal on the switch. This terminal is typically labeled with the letter “L” or the word “Load.” Again, tighten the screw to ensure a secure connection. Double-check that the hot wires are properly connected before proceeding to the next step.
Attach the neutral wires to the designated terminals
Locate the neutral wires in your electrical box. These wires are typically white or gray. Strip the ends of the neutral wires, ensuring they have enough exposed copper to make a solid connection.
Connect one neutral wire to each of the neutral terminals on the dual dimmer switch. These terminals are usually labeled with the letter “N” or the word “Neutral.” Tighten the screws firmly to create a secure connection between the switch and the neutral wires.
Remember, the neutral wires should only be connected to the neutral terminals. Double-check that you have correctly attached the neutral wires before moving on to the next step.
Connect the grounding wires to the appropriate location
Last but not least, locate the grounding wires in your electrical box. These wires are typically bare or covered in green insulation. The grounding wires provide a safe path for electrical currents in case of a fault or short circuit.
If your dual dimmer switch has a grounding terminal, connect all the grounding wires together, including any from the electrical box and the switch itself. Use a wire nut to secure the connection, ensuring a tight fit.
If your dual dimmer switch doesn’t have a grounding terminal, it might have a grounding screw instead. In this case, wrap the grounding wires around the screw and tighten it firmly.
Once you have connected the grounding wires correctly, carefully tuck them inside the electrical box. Make sure there are no exposed wires and that they are not touching any other components.
Before proceeding to the final step, verify that all the connections are secure and tight. Double-check each wire to ensure it is properly attached to the designated terminals on the dual dimmer switch. Take your time and be thorough to avoid any potential electrical hazards.
Congratulations! You have successfully installed the dual dimmer switch for your ceiling fan light. Now you can enjoy the convenience of controlling both the fan and the light separately, creating the perfect ambiance for any occasion.
Step 5: Secure The Dual Dimmer Switch
Carefully insert the switch back into the electrical box
To proceed with securing your dual dimmer switch, carefully insert the switch back into the electrical box. Hold the switch by its edges, making sure to align it properly with the screw holes on the box. This step is crucial to ensure that the switch fits snugly into the box without any loose or protruding parts.
Fasten the switch with screws to ensure stability
Once the dual dimmer switch is correctly positioned in the electrical box, it’s time to secure it in place. Fasten the switch with screws to ensure stability and prevent any movement or dislodging. Using a screwdriver, tighten the screws to fix the switch firmly onto the electrical box.
| Step 5: Secure the Dual Dimmer Switch |
|---|
|
Remember, proper installation and securing of the dual dimmer switch are vital to ensure its longevity and functionality. By following these steps diligently, you can enjoy the convenience and ambiance offered by your ceiling fan light dual dimmer switch.
Step 6: Test The Dual Dimmer Switch
Step 6: Test the Dual Dimmer Switch
After successfully installing the ceiling fan light dual dimmer switch, it’s time to put it to the test. This step involves turning on the power at the circuit breaker and gradually adjusting the dimmer controls to ensure that both the fan and the light are functioning properly. Let’s dive into the details on how to perform this crucial step.
Turn on the power at the circuit breaker
Before testing the dual dimmer switch, make sure that you have restored power to the circuit. Head over to the circuit breaker panel and locate the switch that controls the fan and light circuit. Flip the switch to the “On” position to supply electricity to the dual dimmer switch.
Gradually adjust the dimmer controls to test the fan and light functionality
Once the power is turned on, successfully operating the fan and light through the dual dimmer switch is essential. Take note of the following steps to ensure a smooth testing experience:
1. Begin by gradually adjusting the dimmer control for the fan. Slowly increase the intensity of the fan speed by moving the dimmer switch to the desired level. Observe if the fan responds accordingly, spinning at a higher or lower speed depending on the dimmer setting.
2. Next, focus on the light functionality. Gently adjust the dimmer control for the light, increasing or decreasing the brightness. Pay close attention to the changes in light output as you make adjustments. The dimmer should smoothly transition the light from a soft glow to a brighter illumination.
3. Keep testing different speed and light settings to ensure all features of the dual dimmer switch are fully functional. Confirm that the fan operates at each speed level without any glitches and the light adjusts its brightness smoothly across the full range of the dimmer control.
It is crucial to carefully test the dual dimmer switch to verify its functionality before concluding the installation process. By gradually adjusting the dimmer controls for both the fan and the light, you can ensure that you have successfully installed a reliable dual dimmer switch that provides effortless control over your ceiling fan’s lighting and speed options.
Remember to double-check all connections and consult the manufacturer’s instructions if you encounter any issues during the testing process. Enjoy the convenience and ambiance that your newly installed ceiling fan light dual dimmer switch brings to your living space!
Issue 1: Fan Or Light Not Working
If you’ve recently installed a ceiling fan light dual dimmer switch and are experiencing issues with the fan or light not working, there are a few potential causes to consider. In this section, we’ll explore the first issue: checking the wiring connections and ensuring they are properly secured.
Check the wiring connections and ensure they are properly secured
One common reason for a ceiling fan or light to not work after installing a dual dimmer switch is improper wiring connections. It’s essential to ensure that all the wires are properly connected and secured in order for the fan and light to function correctly. Here are the steps you can follow:
- Turn off the power: Before checking any wiring connections, make sure to turn off the power supply to the room at the circuit breaker. Safety should always be the top priority.
- Remove the switch cover: Use a screwdriver to remove the switch cover carefully, exposing the wiring connections behind it. Take note of the existing connections.
- Inspect the connections: Carefully examine each wire connection to ensure they are secure. If any wire connection appears loose or disconnected, use a wire stripper to remove a small section of insulation and reestablish the connection.
- Use wire nuts: For each wire connection, use wire nuts to twist the wires together securely. Make sure to match the corresponding colors of the wires.
- Reinstall the switch cover: After ensuring all the wiring connections are secure, carefully reattach the switch cover using the screwdriver.
- Restore power: Finally, restore power to the room by switching the circuit breaker back on. Test the fan and light to see if the issue has been resolved.
By checking the wiring connections and ensuring they are properly secured, you can address any potential issues that may cause the fan or light not to work after installing a ceiling fan light dual dimmer switch. However, if the issue persists, there may be other factors contributing to the problem that require further investigation.
Issue 2: Inconsistent Dimming Or Flickering Lights
Verify that the dual dimmer switch supports dimmable bulbs
Inconsistent dimming or flickering lights can be a frustrating issue when it comes to installing a ceiling fan light dual dimmer switch. One of the possible causes for this problem is using non-dimmable bulbs with a dimmer switch that only supports dimmable bulbs. It’s important to verify that your dual dimmer switch is compatible with dimmable bulbs before proceeding further.
To check if your dual dimmer switch supports dimmable bulbs, follow these steps:
- Turn off the power to the ceiling fan light fixture by flipping the corresponding circuit breaker.
- Remove the wall plate covering the dual dimmer switch, exposing the wiring and switches.
- Inspect the switch itself for any labeling or instructions indicating its compatibility with dimmable bulbs. Check for phrases such as “dimmable bulbs only” or “compatible with dimmable LED/CFL bulbs.”
- If you do not find any labeling, refer to the manufacturer’s documentation or contact their customer support for clarification. They will be able to confirm whether the switch supports dimmable bulbs or not.
If the dual dimmer switch does not support dimmable bulbs, you will need to replace it with a switch that is compatible to achieve proper dimming functionality.
Replace any incompatible or malfunctioning bulbs with compatible options
If you have verified that your dual dimmer switch supports dimmable bulbs and are still experiencing inconsistent dimming or flickering lights, the issue may lie with the bulbs themselves. Incompatible or malfunctioning bulbs can disrupt the dimming process and cause undesirable effects.
To address this issue, follow these steps:
- Make sure the power to the ceiling fan light fixture is turned off before proceeding.
- Inspect each bulb individually for any signs of damage or malfunction. Replace any bulbs that are flickering or not functioning properly.
- Check the bulbs’ packaging or labeling to ensure they are compatible with dimmer switches. Look for phrases such as “dimmable,” “compatible with dimmable switches,” or “suitable for use with dimmers.”
- If the bulbs are non-dimmable or incompatible, purchase and install dimmable bulbs specifically designed for use with dimmer switches.
- Replace the non-dimmable or malfunctioning bulbs with the new dimmable bulbs, making sure they are securely screwed into the light sockets.
By ensuring that you have compatible and functioning dimmable bulbs in your ceiling fan light fixture, you can help eliminate inconsistent dimming or flickering light issues and enjoy a smoother and more enjoyable lighting experience.
Issue 3: Excessive Noise Or Vibration
One common problem that homeowners often encounter when installing a ceiling fan light dual dimmer switch is excessive noise or vibration. This can be quite irritating and disruptive, especially when you are trying to create a peaceful and comfortable environment in your home. Fortunately, there are a few steps you can take to address this issue and enjoy a quieter and more tranquil atmosphere in your living space.
Ensure all screws and mounting hardware are tightened securely
To begin troubleshooting the excessive noise or vibration problem, start by ensuring that all screws and mounting hardware are tightly secured. Loose screws or hardware can contribute to the rattling and shaking of the fan, resulting in annoying noises and vibrations. Carefully inspect the fan and check if any screws or mounting brackets need tightening.
If you are unsure which screws need to be tightened or adjusted, refer to the fan’s installation manual for guidance. It is essential to follow the manufacturer’s instructions to ensure proper installation and functioning of the fan. By securely fastening all the screws and mounting hardware, you can reduce the likelihood of excessive noise and vibration.
Balance the fan blades as needed to reduce noise and vibration
Another effective solution to address excessive noise and vibration is to balance the fan blades. Over time, fan blades can become unbalanced due to wear and tear or improper installation. An unbalanced fan can create a wobbling motion, resulting in noise and vibration.
To balance the fan blades, use a fan blade balancing kit, which is readily available at most hardware stores. The kit typically includes a balancing clip and detailed instructions on how to use it. Attach the balancing clip to each fan blade one at a time and observe if it reduces the noise and vibration. If necessary, adjust the positioning of the clip until you achieve a smoother and quieter operation.
In addition to using a balancing kit, ensure that all fan blades are clean and free from dust and debris. Build-up on the blades can also contribute to imbalances and add to the noise and vibration. Gently clean the blades using a damp cloth or a soft brush to maintain their optimal performance.
By taking the time to tighten all screws and mounting hardware and balance the fan blades, you can significantly reduce the noise and vibration associated with your ceiling fan light dual dimmer switch installation. Creating a serene and peaceful atmosphere in your home is now within reach.
Enjoy The Benefits Of A Ceiling Fan Light Dual Dimmer Switch
Installing a ceiling fan light dual dimmer switch in your home can greatly enhance your lighting and cooling experience. With the ability to customize your lighting and fan speed to suit your preferences, you can create the perfect atmosphere in any room. Not only does this provide practical convenience, but it also offers a range of benefits that can transform your living space. Let’s explore the advantages of a ceiling fan light dual dimmer switch, so you can make an informed decision when considering this upgrade.
Customize Your Lighting and Fan Speed to Suit Your Preferences
One of the main advantages of a ceiling fan light dual dimmer switch is the ability to customize your lighting and fan speed according to your preferences. With individual dimmer controls for both the lights and the fan, you have complete control over the ambience in your room. Whether you prefer bright, full lighting or a soft, romantic glow, you can easily adjust the brightness of your ceiling fan lights. Additionally, you can regulate the fan speed to match your desired level of airflow. This flexibility allows you to create the perfect setting for any occasion, whether it’s hosting a vibrant house party or enjoying a cozy evening at home.
Maximize Energy Efficiency and Reduce Electricity Costs
By installing a ceiling fan light dual dimmer switch, you can maximize energy efficiency and reduce your electricity costs. Adjustable dimmer controls enable you to lower the brightness of your lights, which in turn reduces their energy consumption. This means you can enjoy the benefits of proper lighting while consuming less electricity, ultimately saving money on your energy bills. Additionally, controlling the fan speed helps regulate the airflow in the room, reducing the need for energy-consuming air conditioning or heating devices. This eco-friendly feature not only reduces your carbon footprint but also promotes sustainable living.
Create a Comfortable and Inviting Ambiance in Any Room
With a ceiling fan light dual dimmer switch, you have the power to create a comfortable and inviting ambiance in any room of your home. By adjusting the lighting levels and fan speed, you can set the mood that aligns with your desired atmosphere. Whether you want a bright, invigorating workspace or a calming, serene bedroom environment, a dual dimmer switch allows you to achieve your ideal ambiance effortlessly. This control over your room’s atmosphere enhances the overall comfort and appeal of the space, making it more appealing to both residents and guests.
In conclusion, a ceiling fan light dual dimmer switch offers numerous benefits that enhance both functionality and aesthetic appeal in your home. With the ability to customize your lighting and fan speed, you can create a personalized setting that suits your preferences. Moreover, maximizing energy efficiency and reducing electricity costs make it an environmentally conscious choice. By installing a dual dimmer switch, you can transform any room into a comfortable and inviting space, elevating your living experience to a whole new level.
Frequently Asked Questions
Can You Use A Dimmer Switch On A Fan Light Combo?
Yes, you can use a dimmer switch on a fan light combo.
How Do You Wire A Dimmer Switch To A Ceiling Fan And Light?
To wire a dimmer switch to a ceiling fan and light, turn off the power, remove the existing switch, identify the common wire, connect it to the dimmer’s common terminal, connect the other wires, and secure the dimmer switch. Always refer to the manufacturer’s instructions for specific details.
Can You Install A Dimmer Switch On A Light With Two Switches?
Yes, you can install a dimmer switch on a light with two switches. However, keep in mind that both switches must be replaced with compatible dimmer switches for it to work properly.
Why Does My Dimmer Switch Not Work With My Ceiling Fan?
Your dimmer switch may not work with your ceiling fan because ceiling fans require a specific type of switch designed specifically for them. Dimmer switches are designed for use with lighting fixtures, not ceiling fans. To control the speed of your ceiling fan, you should use a fan speed controller instead.
Conclusion
To sum up, installing a ceiling fan light dual dimmer switch can be a straightforward process with the right tools and guidance. By following the steps outlined in this blog post, you can enhance your room’s lighting and create a comfortable ambiance.
Remember to always prioritize safety and consult an electrician if needed. With a little effort, you can enjoy the benefits of a ceiling fan light dual dimmer switch in no time. Happy installing!