To install a ceiling fan box, first turn off the power supply, attach the box to the ceiling, and connect the wiring following the manufacturer’s instructions. Then, securely mount the fan to the box and test its functionality.
Installing a ceiling fan box involves a few simple steps that can enhance the comfort and aesthetics of your space. In this guide, we will walk you through the process of installing a ceiling fan box, including turning off the power supply, attaching the box to the ceiling, connecting the wiring, mounting the fan securely, and testing its functionality.
By following these steps carefully, you can ensure a safe and successful installation of a ceiling fan box in your home or office.
Importance Of A Sturdy Ceiling Fan Box
A sturdy ceiling fan box is an essential component of any ceiling fan installation. It provides the necessary support for the weight of the fan and ensures its safe operation. In this article, we will explore the importance of a sturdy ceiling fan box, focusing on how it ensures safety during installation and operation, as well as its role in supporting the weight of the fan.
Ensures safety during installation
When it comes to installing a ceiling fan, safety should always be a top priority. A sturdy ceiling fan box plays a crucial role in ensuring a safe installation. It provides a secure mounting point for the fan, preventing it from wobbling or becoming loose over time. This helps to reduce the risk of accidents, such as the fan falling from the ceiling or the blades coming loose during operation.
Moreover, a properly installed fan box minimizes the chance of electrical hazards. It allows for the correct wiring and grounding of the fan, ensuring that it is safely connected to the electrical system. This helps to prevent the risk of electrical fires or shocks, providing peace of mind to homeowners.
Supports the weight of the ceiling fan
The weight of a ceiling fan can vary depending on its size, design, and materials used. A sturdy fan box is designed to support the weight of the fan, ensuring that it remains securely in place. This is particularly important for larger, heavier fans that can put significant stress on the ceiling structure.
By providing reliable support, a sturdy fan box helps to prevent the fan from sagging or falling from the ceiling over time. It ensures that the fan remains balanced and stable during operation, reducing vibration and noise. This not only enhances the fan’s performance but also prolongs its lifespan.
It’s important to note that not all ceiling fan boxes are created equal. Some may be specifically designed to support the weight of heavy-duty fans, while others are intended for lighter fans. It’s essential to choose a fan box that matches the weight and size of your ceiling fan to ensure optimal performance and safety.
In conclusion, a sturdy ceiling fan box is of utmost importance for a safe and secure ceiling fan installation. It ensures safety during the installation process by preventing wobbling or loose connections and reduces the risk of electrical hazards. Additionally, it supports the weight of the ceiling fan, maintaining its stability and preventing damage to the ceiling structure. When installing a ceiling fan, be sure to invest in a high-quality fan box that meets the requirements of your fan’s weight and size. By doing so, you can enjoy a safe and trouble-free ceiling fan experience.

Different Types Of Ceiling Fan Boxes
When it comes to installing a ceiling fan, one of the most important steps is choosing the right ceiling fan box. A ceiling fan box not only supports the weight of the fan but also ensures its stability and safety. There are several types of ceiling fan boxes available in the market, each designed to meet specific installation requirements. In this article, we will explore three commonly used types of ceiling fan boxes: double-gang boxes, octagonal boxes, and round boxes.
Double-gang boxes
Double-gang boxes are spacious and offer ample room to accommodate multiple electrical wires. They are designed to support not just ceiling fans but also other heavy fixtures such as chandeliers. These boxes are typically made of metal and come with pre-drilled holes for easy installation. With their sturdy construction, double-gang boxes provide a secure base for mounting heavier ceiling fans.
If you are considering installing a ceiling fan in a room with multiple electrical circuits or if you want the option to add extra fixtures in the future, a double-gang box can be a great choice. Its large size and durability make it ideal for handling heavier loads and offering maximum support.
Octagonal boxes
Octagonal boxes are among the most commonly used ceiling fan boxes, and for good reason. They are versatile, affordable, and relatively easy to install. Octagonal boxes have a standard size and shape, making them compatible with most ceiling fans on the market. These boxes are typically made of metal or plastic and are suitable for both new and existing installations.
Octagonal boxes are designed to be mounted directly onto ceiling joists or support brackets, ensuring a secure and stable installation. They come with mounting brackets and screws, making the installation process hassle-free. The compact size of octagonal boxes also makes them a popular choice for rooms with limited ceiling space.
Round boxes
Round boxes, also known as pancake boxes, are another type of ceiling fan box that offers a low-profile option for installations. These boxes are slim and lightweight, making them perfect for rooms with low ceilings or tight spaces. Round boxes are generally made of metal or plastic and are compatible with most ceiling fan models.
Despite their small size, round boxes are designed to provide sufficient support for ceiling fans. They are installed flush with the ceiling and attached directly to joists or support brackets using screws. The compact design of round boxes makes them a preferred choice for ceiling fan installations in areas with minimal clearance.
Choosing the right ceiling fan box is crucial for a safe and secure installation. Double-gang boxes offer ample space and durability for heavy-duty applications, while octagonal boxes provide versatility and ease of installation. For rooms with limited ceiling space, round boxes offer a low-profile solution without compromising on support. Assessing your installation requirements and considering the specific features of each type of ceiling fan box will help you make an informed decision and ensure a successful ceiling fan installation.
Gathering The Necessary Tools And Equipment
Before you start installing a ceiling fan box, it’s essential to gather all the necessary tools and equipment at hand. This will ensure a smooth process and save you from any unnecessary delays. Here are the key tools and equipment you’ll need:
Screwdriver
A screwdriver is a versatile tool that you’ll use throughout the installation process. It’s recommended to have a Phillips head screwdriver, as most ceiling fan boxes use this type of screw. This tool will come in handy when securing the fan’s mounting bracket, attaching fan blades, and connecting wires.
Pliers
Pliers are an indispensable tool for installing a ceiling fan box. You’ll need them to strip and cut wires to the necessary length. Additionally, pliers can be used to secure wire connectors properly, ensuring a safe and secure connection. Whether you have needle-nose pliers or standard pliers, make sure you have them on hand.
Wire Connectors
Wire connectors are crucial for joining wires securely and protecting the electrical connection. These connectors come in different sizes, so ensure you have a variety to accommodate various wire gauges. When connecting wires, it’s important to choose the appropriate size connector based on the thickness of the wires you’ll be working with.
Voltage Tester
When dealing with electrical installations, safety should always be a top priority. A voltage tester allows you to check if the power is off before you begin the installation process. It helps identify live wires, ensuring you don’t accidentally come into contact with them. Make sure you have a reliable voltage tester handy to keep yourself safe throughout the installation.
By having these tools and equipment ready, you’ll be well-prepared to install a ceiling fan box without interruptions or delays. Now that you’re equipped with everything you need, let’s move on to the next steps of the installation process.
Safety Precautions To Take Before Installation
Safety Precautions to Take Before Installation
Before you begin the installation process for your new ceiling fan box, it is crucial to prioritize safety precautions. Taking the proper measures ensures a secure and successful installation, while protecting yourself and your property from any potential harm. Follow these steps to ensure a safe environment:
Turn off the circuit breaker for the room
The first step in any electrical installation is to ensure that all power sources are turned off. Locate your home’s circuit breaker panel and switch off the breaker that controls the room where you will be installing the ceiling fan box. This guarantees that no electricity is flowing to the existing box and decreases the risk of electrical shock.
Use a voltage tester to ensure no power is flowing to the existing box
While turning off the circuit breaker is a good first step, it is always advisable to use a voltage tester before proceeding further. This small tool helps determine whether there is any live electricity in the existing box, providing an additional safeguard. Simply touch the tester’s probes to the wires within the box, and if the voltage tester does not detect any power, it is safe to proceed.
Remove any furniture or obstructions in the area
Before you begin working on the ceiling fan box installation, it is important to create a safe and clutter-free work area. Clear the space of any furniture, fixtures, or other obstructions that may hinder your movement or access to the installation area. Creating a wide-open space allows for better maneuverability and reduces the chances of accidents or damage to your belongings.
By implementing these safety precautions, you can ensure a smooth and secure process when installing your new ceiling fan box. Prioritizing safety not only protects you and your property, but also ensures a successful installation that will provide comfort and functionality for years to come.
Removing The Existing Box (If Applicable)
Before installing a new ceiling fan box, you may need to remove the existing box that is currently in place. This step is only necessary if there is already a box installed and you need to replace it or if you are installing a ceiling fan in a location without an existing box.
Removing the screws or nails holding the box in place
The first step in removing the existing box is to locate and remove any screws or nails that are holding it in place. These fasteners are typically located on the sides or bottom of the box, and they secure it to the ceiling joists or support beams.
To remove the screws or nails, you will need a screwdriver or a pry bar. Carefully insert the screwdriver or pry bar into the gap between the box and the ceiling, near the fasteners. Apply gentle pressure and leverage to loosen and remove the fasteners one by one.
If the box is held in place by screws, simply turn them counterclockwise using a screwdriver until they are completely removed. If the box is held in place by nails, use a pry bar to carefully pull them out of the ceiling, taking care not to damage the surrounding area.
Disconnecting any electrical connections
Once the fasteners have been removed, you will need to disconnect any electrical connections that are connected to the existing box. These connections include the wires that supply power to the box and any additional wires that may be connected to a light fixture or switch.
Before disconnecting any wires, ensure that the power to the box is turned off at the circuit breaker or fuse box. This will help prevent any electrical shock or injury. Once the power is off, use a voltage tester to confirm that no electricity is flowing to the box.
Next, locate the wire nuts or connectors that are joining the wires together. Use a pair of wire cutters or pliers to remove the wire nuts or connectors, separating the wires from each other. Be sure to label or take note of the individual wires and their corresponding colors or markings to make it easier when installing the new box.
After disconnecting the electrical connections, you can safely remove the existing box from the ceiling. Gently pull it down and set it aside, making sure to handle it with care to avoid any damage.
In conclusion, removing the existing box is an essential step when installing a new ceiling fan box. By removing the screws or nails and disconnecting any electrical connections, you can ensure a smooth and successful installation process.
Assessing The Ceiling Structure
When it comes to installing a ceiling fan box, one of the most important steps is assessing the ceiling structure. This ensures that the fan box will be properly supported and prevents any potential accidents or damage. In this section, we will discuss how to determine the type of ceiling and construction materials and how to ensure there is enough support for the fan box. Follow these steps to assess the ceiling structure before proceeding with the installation process.
Determining the type of ceiling and construction materials
The first step in assessing the ceiling structure is determining the type of ceiling and construction materials. This is crucial as different ceiling types and construction materials have varying requirements for supporting a ceiling fan box. Here are some common types of ceilings and the construction materials associated with them:
| Ceiling Type | Construction Materials |
|---|---|
| Wooden Ceiling | Wooden beams or joists |
| Drywall Ceiling | Metal or wooden studs |
| Concrete Ceiling | Concrete or masonry |
| Suspended Ceiling | Metal grids and acoustical tiles |
| Plaster Ceiling | Wooden lath strips covered with plaster |
*Note: These are just some examples and there may be variations depending on your specific ceiling type and construction materials.*
Once you have determined the type of ceiling and construction materials, you can proceed to the next step: ensuring there is enough support for the fan box.
Ensuring there is enough support for the fan box
To ensure there is enough support for the fan box, you need to understand the weight and load requirements of the ceiling fan you plan to install. Most ceiling fans come with specific instructions and guidelines for proper installation. It is crucial to follow these instructions to avoid any safety hazards.
However, as a general rule, here are some guidelines to ensure adequate support for the fan box:
- For wooden ceilings, make sure the fan box is securely attached to wooden beams or joists using appropriate screws or fasteners. Ensure that the beams or joists are strong enough to support the weight of the fan.
- For drywall ceilings, locate the metal or wooden studs and securely attach the fan box to the studs using screws or brackets. Avoid attaching the fan box directly to the drywall as it may not provide enough support.
- For concrete or masonry ceilings, use appropriate anchors or expansion bolts to secure the fan box to the ceiling. Ensure that the anchors or bolts are rated to hold the weight of the fan.
- For suspended ceilings, consult the manufacturer’s instructions for specific guidelines on how to attach the fan box to the metal grids or acoustical tiles. It is important to follow the manufacturer’s recommendations to avoid any damage to the suspended ceiling.
- For plaster ceilings, locate the wooden lath strips and securely attach the fan box to them using screws or brackets. Make sure the lath strips are in good condition and capable of supporting the weight of the fan.
By ensuring there is enough support for the fan box, you can proceed with confidence to the installation process, knowing that your ceiling fan will be securely mounted and safe to use.
Marking And Cutting The Opening
Installing a ceiling fan box requires careful planning and precise execution. One crucial step in the process is marking and cutting the opening for the fan box on the ceiling. This step ensures a secure and proper fit for the box, allowing you to safely install the ceiling fan. In this guide, we will walk through two essential tasks: selecting the desired location for the fan box and tracing the outline of the box on the ceiling. Let’s delve into the details.
Selecting the Desired Location for the Fan Box
The first step in marking and cutting the opening is determining the ideal location for the fan box. You want to choose a spot where the fan will provide optimal airflow and be centered in the room. Proper placement also ensures that the ceiling structure can support the weight of the fan. Here are a few factors to consider when selecting the desired location for the fan box:
- Ceiling Joists: Find the ceiling joists using a stud finder or by tapping the ceiling. This helps you identify stable areas for mounting the fan box.
- Clearance: Make sure there is enough clearance from any obstacles, such as light fixtures or beams, to prevent interference with the fan blades.
- Electrical Wiring: Position the fan box near existing electrical wiring for easy connection. If no wiring is present, consult a professional electrician to install it safely.
Tracing the Outline of the Box on the Ceiling
Once you’ve determined the desired location for the fan box, it’s time to trace the outline of the box on the ceiling. This step helps you visualize the cutting area and ensures accuracy. Follow these steps to trace the outline:
- Prepare the Box: If the fan box comes with a template, use it to align the box with the ceiling structure. If not, mark the dimensions of the box on a piece of cardboard and cut it out.
- Position the Box: Hold the template or cardboard cutout in the desired location and check that it aligns with the selected spot. Make any necessary adjustments until you are satisfied with the placement.
- Trace the Outline: With the template or cardboard firmly held against the ceiling, use a pencil or marker to trace the outline of the box onto the ceiling. Take your time to ensure accurate markings.
Using a Jigsaw to Cut the Opening
After tracing the outline, the next step is cutting the opening for the fan box. A jigsaw is the ideal tool for this task, as it allows for precise cuts in various materials. Here’s how to use a jigsaw to cut the opening:
- Prepare the Jigsaw: Install a fine-toothed blade suitable for cutting through the ceiling material. Ensure the jigsaw is in good working condition and the blade is secure.
- Start Cutting: Begin cutting along the traced outline, keeping a steady hand and following the line closely. Take breaks if needed, but try to maintain a consistent cutting pace for smooth edges.
- Clear the Debris: Throughout the cutting process, periodically clear away debris to maintain visibility and prevent accidental damage. Dispose of the debris properly.
By following these guidelines, you are on your way to successfully marking and cutting the opening for your ceiling fan box. It’s essential to take your time, work with caution, and double-check your measurements to ensure a secure and snug fit. Once the opening is complete, you can proceed with the installation of your ceiling fan and enjoy the cool breeze it will bring to your space.
Mounting The Ceiling Fan Box
One of the most important steps in installing a ceiling fan is mounting the fan box securely to the ceiling structure. This ensures that the fan is stable and operates smoothly without any wobbling or sagging. In this section, we will guide you through the process of inserting the fan box into the opening, securing it to the ceiling structure, and ensuring it is level and securely attached.
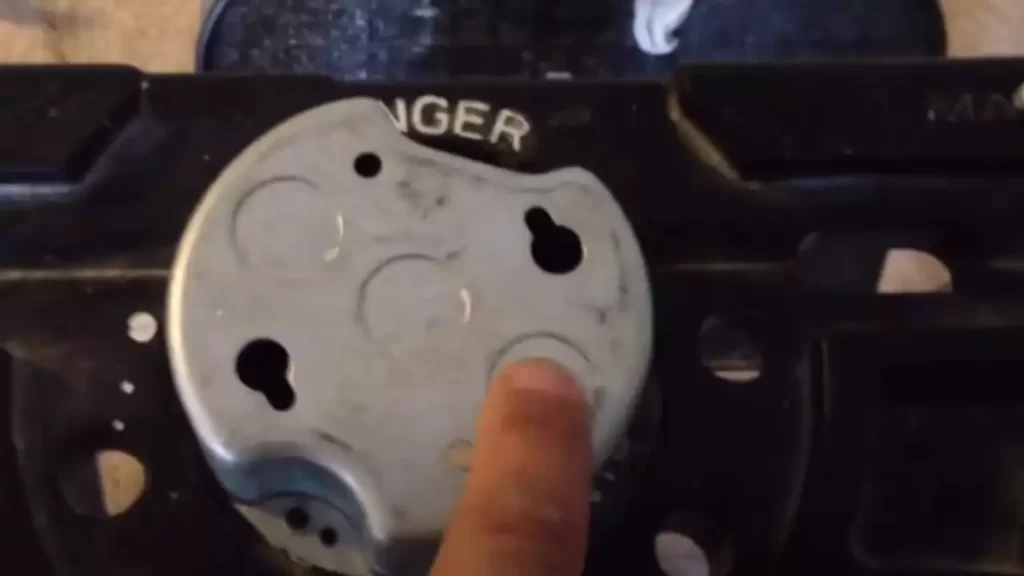
Inserting the fan box into the opening
The first step in mounting the ceiling fan box is to carefully insert it into the opening in the ceiling. Make sure the opening is the right size for the fan box and that it is aligned with the electrical box where the wiring will be connected. Slowly lower the fan box down into the opening, making sure it fits snugly and is flush with the ceiling surface.
Securing the box to the ceiling structure
Once the fan box is properly inserted into the opening, it’s time to secure it to the ceiling structure. This is an important step to ensure the fan box stays in place and can support the weight of the ceiling fan. Start by using screws or nails to attach the fan box to the wooden ceiling joists or support beams. Make sure to use suitable fasteners that are long enough to penetrate and hold securely in the ceiling structure.
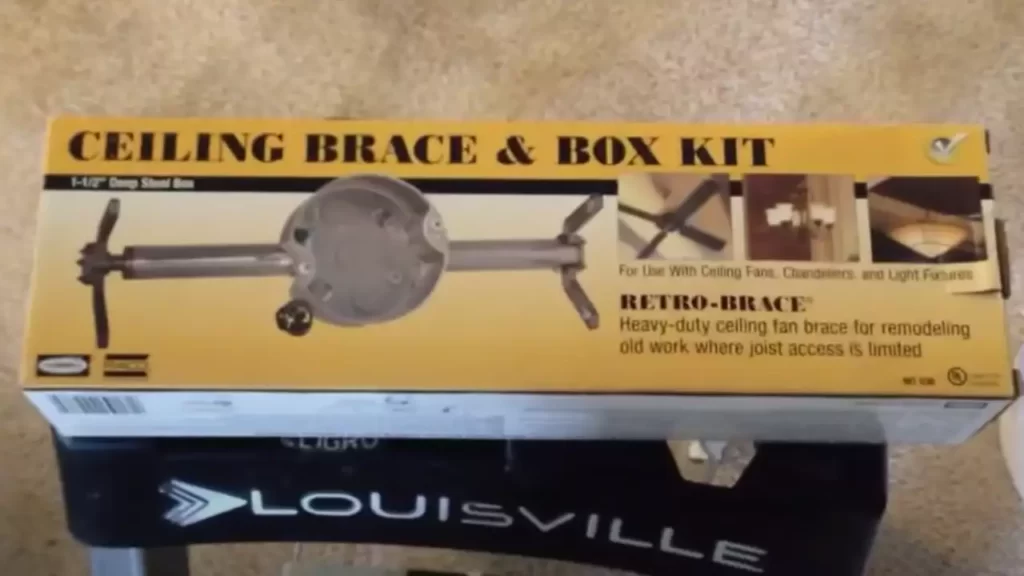
It’s important to note that if you have a plaster or drywall ceiling, you may need to use additional support, such as a ceiling fan brace or an adjustable metal bar, to ensure the fan box is properly secured. Consult the manufacturer’s instructions or seek professional advice if needed.
Ensuring the box is level and securely attached
After securing the fan box to the ceiling structure, it’s crucial to check that it is level and securely attached. A level ceiling fan box is essential for the proper operation of the fan and prevents any imbalance or noise issues. Use a level tool to ensure the box is perfectly horizontal or as per your desired angle.
Once you’ve confirmed the levelness, double-check that the box is securely attached by giving it a gentle tug. If it feels loose or moves, you may need to reinforce the fasteners or consider additional support options. Ensuring the fan box is level and securely attached will provide a stable foundation for your ceiling fan installation.
By following these steps, you can confidently mount your ceiling fan box and create a solid base for your ceiling fan installation. A properly mounted fan box will ensure that your ceiling fan operates smoothly and securely, providing comfort and style to your space.
Wiring The Ceiling Fan Box
Wiring the Ceiling Fan Box is an essential step in the installation process, as it ensures that your fan will function properly and safely. In this section, we will guide you through the process of connecting the wiring to the fan box, using wire connectors to join the wires, and testing the connections with a voltage tester. Follow these steps carefully to ensure a successful installation of your ceiling fan.
Connecting the wiring to the fan box
Before you begin connecting the wiring to the fan box, make sure the power is turned off at the circuit breaker or fuse box for safety purposes. Once the power is off, carefully remove the old ceiling box and disconnect the existing wires. Now, take the wires from the new fan box and match the colors with the corresponding wires from the fan. Use wire strippers to remove about half an inch of insulation from each wire end for a clean connection.
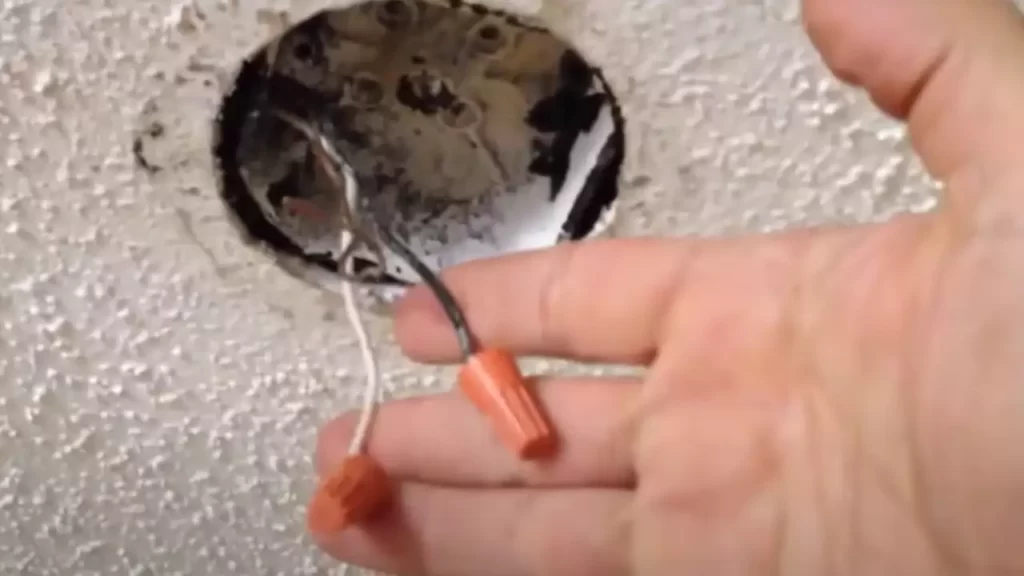
Using wire connectors to join the wires
Wire connectors are essential for creating secure connections between the wires. Take the exposed ends of the wires from the fan box and fan, and twist them together clockwise. With the wires twisted together, place a wire connector over the connection and twist it clockwise until it is firmly in place. Make sure there are no exposed wires or loose connections. Repeat this process for each set of wires, including the ground wire if present.
Testing the connections with a voltage tester
After connecting the wires using wire connectors, it is crucial to test the connections to ensure they are secure and properly functioning. Use a voltage tester to check each wire connection for power. Simply touch the tester to each wire connection, and if the tester lights up, it indicates that the connection has the correct voltage. If the tester does not light up, double-check the connections and make any necessary adjustments.
Congratulations! You have successfully wired the ceiling fan box. Now you can proceed with the rest of the installation process, such as attaching the fan blades and assembling the fan motor. Follow the manufacturer’s instructions for further steps, and always prioritize safety by turning the power back on only after the installation is complete and you have confirmed everything is working as it should!
Securing The Ceiling Fan To The Box
After successfully installing the ceiling fan box and ensuring it is properly supported, the next step is to secure the ceiling fan to the box. This crucial step ensures that the fan is stable and safe to use. In this section, we will go through the process of attaching the mounting bracket to the box, connecting the fan to the bracket, and confirming the fan is securely mounted.
Attaching the Mounting Bracket to the Box
The mounting bracket is an essential component that connects the ceiling fan to the electrical box. Before attaching the bracket, make sure that the power to the circuit is turned off to prevent any accidents. Here’s how to attach the mounting bracket:
- Start by removing the decorative cover from the ceiling fan box, exposing the mounting plate.
- Align the holes on the mounting bracket with the screw holes on the box.
- Insert the screws provided with the fan into the holes and tighten them securely using a screwdriver or a power drill.
- Ensure that the bracket is level and securely attached to the box before moving on to the next step.
Connecting the Fan to the Bracket
Now that the mounting bracket is in place, it’s time to connect the fan to the bracket. This step requires attention to detail to ensure a stable and safe installation. Follow the steps below to connect the fan to the bracket:
- Hold the fan up to the bracket, aligning the holes on the fan’s canopy with the openings on the bracket.
- Insert the screws provided with the fan through the openings and into the holes on the bracket.
- Tighten the screws securely, but be careful not to over-tighten and damage the fan or the bracket.
- Double-check that the fan is properly aligned and centered on the bracket before proceeding to the final step.
Confirming the Fan is Securely Mounted
Once the fan is connected to the bracket, it’s crucial to confirm that it is securely mounted. A properly mounted fan ensures its stability and prevents any potential hazards. Here’s how to confirm the fan is securely mounted:
- Gently tug on the fan blades to ensure there is no movement or wobbling.
- Check that all screws on the mounting bracket, fan canopy, and blades are tight and properly secured.
- Run the fan on different speeds to see if there are any unusual noises or vibrations.
- Observe the fan for a while to ensure it remains stable and secure during operation.
By following these steps and confirming that the fan is securely mounted, you can enjoy a safe and efficient ceiling fan installation. Remember to always refer to the manufacturer’s instructions for specific installation guidelines and consult a professional if needed.
Installing The Fan Blades And Light Fixture (If Applicable)
Once you have successfully mounted the ceiling fan box and connected the wiring, it’s time to move on to installing the fan blades and the light fixture, if provided. This step is crucial to ensure that your ceiling fan functions properly and looks aesthetically pleasing in your space. In the following sections, we will guide you through the process of attaching the fan blades to the motor housing and installing the light fixture, if applicable.
Attaching the Fan Blades to the Motor Housing
Before attaching the fan blades, ensure that you have all the necessary tools handy, including a screwdriver and the blade attachment hardware that came with your ceiling fan. Follow these steps to securely attach the fan blades to the motor housing:
- Identify the blade attachment brackets on the motor housing.
- Align the holes of the blade with the holes in the blade attachment brackets.
- Insert the screws through the holes and into the brackets.
- Tighten the screws using a screwdriver, ensuring the blades are firmly attached to the motor housing.
- Repeat the process for each blade, making sure they are evenly spaced and securely fastened to maintain balance.
Once you have successfully attached all the fan blades, gently rotate them to ensure they move freely without hitting any obstructions. This step will help prevent any wobbling or noise issues when the ceiling fan is in operation.
Installing the Light Fixture, if Provided
If your ceiling fan comes with a light fixture, now is the time to install it. Follow these steps to install the light fixture securely:
- Locate the light fixture attachment point on the bottom of the motor housing.
- Carefully connect the wiring from the light fixture to the corresponding wiring inside the motor housing.
- Secure the connections by twisting the wire nuts clockwise until they are tight.
- Gently push the excess wiring into the electrical box, ensuring it doesn’t interfere with the fan blades or light fixture.
- Attach the light fixture to the motor housing using the provided screws or mounting hardware.
- Double-check that all connections are secure and free from any exposed wiring.
Once the light fixture is installed, install the light bulbs according to the manufacturer’s instructions. Turn on the wall switch to test the functionality of both the fan and the light fixture. If everything is working correctly, proceed to the final step of installing the fan’s canopy and any additional decorative elements, if provided.
By following these simple guidelines, you can efficiently install the fan blades and light fixture, if applicable, to complete the installation of your ceiling fan. Remember to refer to the manufacturer’s instructions for any specific requirements or additional steps that may apply to your particular model. With the fan blades and light fixture in place, you’re one step closer to enjoying the cool breeze and illumination provided by your new ceiling fan.
Testing The Ceiling Fan
Once you have successfully installed the ceiling fan box and mounted the ceiling fan, the next step is to test its functionality. Testing the ceiling fan is an important part of the installation process to ensure that it is working properly and safely. In this section, we will guide you through the necessary steps to test your ceiling fan.
Turning on the circuit breaker for the room
Before you can test the ceiling fan, you need to make sure that the circuit breaker for the room is turned on. Locate the circuit breaker panel in your home and find the breaker that controls the power supply to the room where the ceiling fan is installed.
Using the HTML syntax below, turn on the circuit breaker for the room:
<h3>Turning on the circuit breaker for the room</h3>
Testing the fan’s operation and speed settings
Once the circuit breaker is turned on, you can proceed with testing the fan’s operation and speed settings. This will ensure that the fan is functioning properly and that you can adjust its speed according to your liking.
Follow the steps below to test the fan’s operation and speed settings:
- Switch on the fan using the wall switch or remote control, depending on the type of fan you have installed.
- Observe the fan blades and check if they are rotating smoothly.
- Test each speed setting (low, medium, high) to ensure that the fan can adjust its speed accordingly.
- Listen for any unusual noises or vibrations. If you notice any, it may indicate a problem with the fan’s installation or components.
Verify that the fan’s operation and speed settings adhere to HTML syntax by using the following code:
<h3>Testing the fan's operation and speed settings</h3>
Verifying all electrical connections
Lastly, it is crucial to verify all electrical connections to ensure that they are properly secured and there are no loose wires that can pose a safety hazard. Carefully examine all the connections, including the ones between the fan and the ceiling box, as well as the wiring inside the box.
Take the following steps to verify all electrical connections:
- Inspect the wiring inside the ceiling fan box to ensure that all connections are tight and there are no loose or exposed wires.
- Check that the wires are properly connected according to the manufacturer’s instructions.
- Look for any signs of damage or fraying on the wires. If you notice any, it is crucial to address the issue before using the fan.
Use the HTML syntax below to adhere to the correct format:
<h3>Verifying all electrical connections</h3>
By following these steps and conducting a thorough test of your ceiling fan, you can ensure that it is operating safely and efficiently. Proper testing is crucial to identify any installation errors or malfunctions that may need to be addressed before regular use. Take the time to test your ceiling fan, and enjoy its comfort and functionality in your space.
Frequently Asked Questions
Can I Mount A Ceiling Fan Box Directly To A Joist?
Yes, you can mount a ceiling fan box directly to a joist. Make sure the joist is strong enough to support the weight of the fan and follow the manufacturer’s installation instructions. It’s important to ensure a secure and stable installation to prevent any accidents or damage.
Does A Ceiling Fan Need A Fan Box?
Yes, a ceiling fan needs a fan box. The fan box provides support and stability to the fan, ensuring it hangs securely from the ceiling. It also protects the electrical wiring and prevents any accidents or damage. Installing a fan box is essential for the safety and proper functioning of the ceiling fan.
How Do I Know If My Ceiling Box Can Support A Fan?
To determine if your ceiling box can support a fan, check if it is labeled as “fan-rated” or “approved for ceiling fans. ” You can also look for additional support brackets or indicators that it can handle the weight and movement of a fan.
How Do You Install A Ceiling Fan Box With Brackets?
To install a ceiling fan box with brackets, follow these steps: 1. Turn off the power supply. 2. Locate a suitable spot on the ceiling and mark it. 3. Attach the ceiling fan box using the supplied brackets and screws. 4.
Connect the electrical wires from the box to the fan. 5. Secure the fan to the brackets and turn on the power.
Conclusion
Installing a ceiling fan box is a simple yet essential task that can improve the comfort and circulation in any room. By following the step-by-step guide provided in this blog post, you can safely and efficiently install a ceiling fan box in your home.
Remember to gather the necessary tools, examine electrical connections, and securely mount the box. With these tips and precautions, you can confidently complete this DIY project and enjoy the benefits of a well-functioning ceiling fan.