To install a ceiling diffuser damper, first, locate the area on the ceiling where you want to install it. Then, attach the diffuser damper securely using the provided screws or adhesive.
Understanding The Ceiling Diffuser Damper
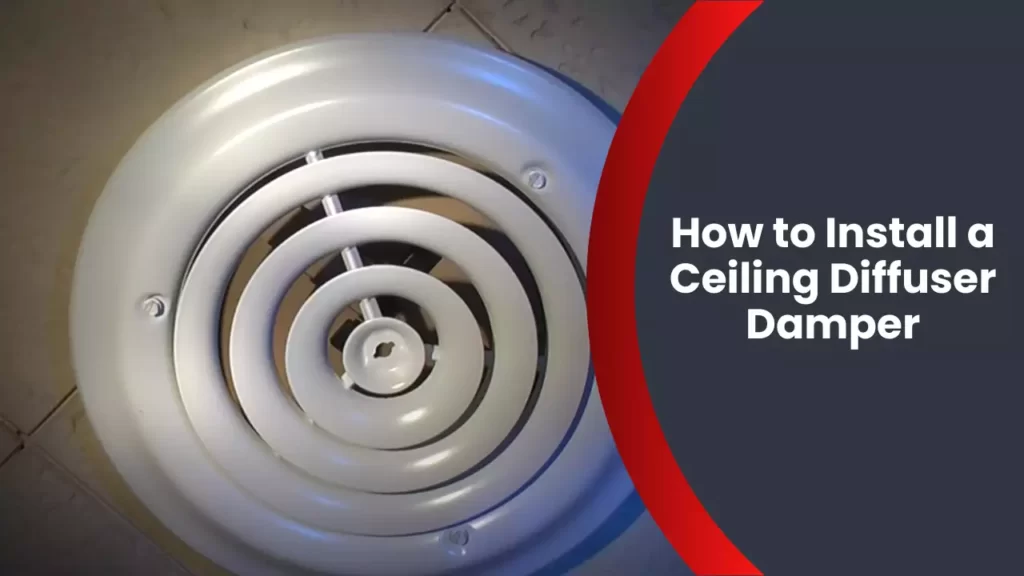
A ceiling diffuser damper is a crucial component in maintaining a comfortable and well-ventilated indoor space. It is typically installed on the ceiling diffuser to regulate the flow of air coming from the HVAC system. The damper allows you to control and adjust the airflow according to your desired preference, ensuring an optimum distribution of air throughout the room.
What is a Ceiling Diffuser Damper?
A ceiling diffuser damper, also known as an air register damper, is a device designed to control the airflow within a ventilation system. It is usually made of metal or plastic and is installed inside the ceiling diffuser. By opening or closing the damper blades, you can regulate the amount of air coming through the diffuser, increasing or decreasing the airflow velocity.
Importance of Installing a Ceiling Diffuser Damper
Installing a ceiling diffuser damper is crucial for several reasons. Firstly, it allows you to adjust the airflow to achieve optimal comfort within the room. By controlling the airflow, you can regulate the temperature, humidity, and air circulation, enhancing the indoor environment’s overall comfort level.
Additionally, a ceiling diffuser damper helps prevent drafts and air imbalances. It ensures that the air distribution is evenly spread across the room, eliminating hotspots and cold spots. This not only enhances comfort but also improves energy efficiency as the HVAC system doesn’t need to work harder to compensate for uneven air distribution.
Benefits of Using a Ceiling Diffuser Damper
Using a ceiling diffuser damper provides several benefits, making it an essential component of any ventilation system. Here are some of the key advantages:
- Improved Comfort: With a ceiling diffuser damper, you can easily control the airflow and customize the temperature and air distribution to suit your preferences.
- Energy Efficiency: By achieving a balanced airflow, a ceiling diffuser damper helps optimize the performance of your HVAC system, reducing energy waste and potentially lowering your utility bills.
- Noise Reduction: The adjustable blades of the damper can also help reduce noise levels, ensuring a peaceful and quiet indoor environment.
- Maintenance and Cleaning: Ceiling diffuser dampers are designed to be easily removable, making maintenance and cleaning a breeze. Regular cleaning helps promote better air quality and prolong the lifespan of your ventilation system.
Tools And Materials Needed
Installing a ceiling diffuser damper may seem like a daunting task, but with the right tools and materials, it can be a straightforward process. In this section, we will discuss the essential tools and required materials that you will need to successfully install a ceiling diffuser damper in your space.
Essential tools for installation
Before beginning the installation process, it is important to have the necessary tools on hand. These tools will help you complete the task efficiently and effectively.
- A screwdriver: A screwdriver is an essential tool for removing any screws or fasteners that may be holding the current ceiling diffuser in place. Ensure it is the appropriate size for the screws you will be working with.
- Tape measure: Accurate measurements are crucial when installing a ceiling diffuser damper. A tape measure will help you determine the proper placement and dimensions for the new damper.
- Pliers: Pliers can be useful for gripping and maneuvering small parts or wires during the installation process.
- Caulking gun: A caulking gun is essential for sealing any gaps or cracks around the edges of the new damper, ensuring a tight and secure fit.
- Drill: If you need to create new holes for the screws or anchors, a drill will come in handy. Make sure to select the appropriate drill bit size for the task.
- Safety goggles and gloves: Safety should always be a priority when working with tools. Protect your eyes with goggles and your hands with gloves to prevent any potential injuries.
Required materials for installation
In addition to the tools mentioned above, you will also need a few materials to complete the installation of your ceiling diffuser damper. Gathering these materials beforehand will ensure a smooth and hassle-free installation process.
- Ceiling diffuser damper: The most crucial material for this installation is, of course, the ceiling diffuser damper itself. Choose a damper that is appropriate for your space and HVAC system.
- Screws or anchors: Depending on your ceiling type, you may need screws or anchors to secure the new damper in place. Check the type of screws or anchors recommended for your specific ceiling material.
- Caulk: Caulk is essential for sealing any gaps or cracks around the edges of the damper. Look for a high-quality, moisture-resistant caulk to ensure a durable and long-lasting seal.
- Duct tape: Duct tape can be used to secure any loose or disconnected ductwork, ensuring proper airflow throughout your space.
- Ceiling touch-up paint: If the installation process results in any damage to your ceiling, having touch-up paint on hand will allow you to restore the appearance of your ceiling.
By gathering these essential tools and materials, you will be well-prepared to install a ceiling diffuser damper in your space. With proper planning and attention to detail, your installation process is sure to be a success.
Preparing For Installation
To ensure a smooth and successful installation of a ceiling diffuser damper, it is important to properly prepare beforehand. This involves choosing the right diffuser damper for your ceiling, measuring and marking the installation area, and clearing any obstructions in the installation area. By following these steps, you can ensure a hassle-free installation process and enjoy the benefits of a well-functioning ceiling diffuser damper. In this article, we will guide you through each step in detail.
Choosing the Right Diffuser Damper for Your Ceiling
Before starting the installation process, it is crucial to choose the right diffuser damper that suits your specific needs and ceiling type. Here are some factors to consider when selecting a diffuser damper:
- 1. Ceiling Type: Determine whether you have a standard ceiling, drop-in ceiling, or any other type. This will help you choose the appropriate diffuser damper that fits seamlessly.
- 2. Diffuser Style: Consider the style of diffuser you prefer, such as a square, round, or decorative design. Take into account the aesthetics and airflow requirements of your space.
- 3. Damper Type: Decide on the type of damper you need, such as manual or motorized, depending on your desired level of control over airflow.
- 4. Size: Measure the dimensions of your ceiling and choose a diffuser damper that matches those measurements, ensuring it will fit perfectly into the designated area.
Measuring and Marking the Installation Area
Once you have chosen the right diffuser damper, it’s time to measure and mark the installation area on your ceiling. Here’s how you can do it:
- 1. Measure: Use a measuring tape to determine the width and length of the installation area. Make sure to measure accurately, accounting for any obstacles or existing fixtures that may affect the placement of the diffuser damper.
- 2. Mark: Once you have the measurements, mark the corners and edges of the installation area on the ceiling using a pencil or a marker. This will serve as a guide during the installation process.
Clearing the Installation Area of Any Obstructions
Before proceeding with the installation, it is essential to clear the installation area of any obstructions that may hinder the proper functioning of the diffuser damper. Follow these steps:
- 1. Inspect the Area: Thoroughly examine the installation area and identify any objects, such as light fixtures, cables, or ventilation ducts, that may obstruct the installation or interfere with the airflow.
- 2. Remove Obstacles: Safely remove or relocate any obstructions that may hinder the installation or prevent the diffuser damper from operating effectively. Make sure to follow proper safety procedures and consult a professional if necessary.
By preparing for the installation by choosing the right diffuser damper, measuring and marking the installation area accurately, and clearing any obstructions, you are now ready to move on to the next step: the installation process itself. Stay tuned for our upcoming article, where we will guide you through the installation process step-by-step. Happy installing!
Step 1: Turning Off The Power
When it comes to installing a ceiling diffuser damper, the first and most crucial step is to turn off the power. This is an essential safety measure that should never be overlooked. Turning off the power ensures that you can work on the ceiling diffuser damper without the risk of electrocution or other electrical hazards. In this step, we will discuss the importance of turning off the power, locating the correct circuit breaker, and switching off the power to ensure safety.
Importance of Turning Off the Power
Turning off the power is of utmost importance when installing a ceiling diffuser damper. It eliminates the risk of electrical shock and protects you from potential harm. By cutting off the power supply, you can safely handle the wiring and components without worrying about accidental contact with live wires. This step ensures your safety and the prevention of any mishaps during the installation process.
Locating the Correct Circuit Breaker
Before you can turn off the power, you need to identify the correct circuit breaker that controls the electricity supply to the area where you’ll be working. To locate the correct circuit breaker:
- Start by locating the electrical panel in your home or building. This is usually found in a basement, utility room, or garage.
- Open the panel door and look for a collection of switches, also known as circuit breakers.
- Each circuit breaker should be labeled with the different areas or rooms it controls. Look for the label that corresponds to the room where you’ll be installing the ceiling diffuser damper.
- If the circuit breakers are not labeled correctly, you may need to do some trial and error. Turn off one circuit breaker at a time and check if the power is off in the desired area. Repeat this process until you find the correct breaker.
Switching Off the Power to Ensure Safety
Once you have located the correct circuit breaker, it’s time to switch off the power. Follow these steps for a safe power shutdown:
- Before touching the circuit breaker, make sure your hands are dry and free from any moisture.
- Using your hand, firmly switch the breaker to the “Off” position. You might hear a click or feel some resistance when the breaker is in the “Off” position.
- After switching off the breaker, double-check that the power is indeed off in the area where you’ll be working. Test a nearby light switch or an electrical outlet to confirm that the electricity has been successfully cut off.
- For added safety, place a small piece of masking tape over the breaker to remind yourself and others not to turn it back on while you’re working.
By meticulously following these steps, you can ensure that the power is turned off and that you can proceed with the next steps of installing your ceiling diffuser damper in a safe and secure manner.
Step 2: Removing The Existing Diffuser
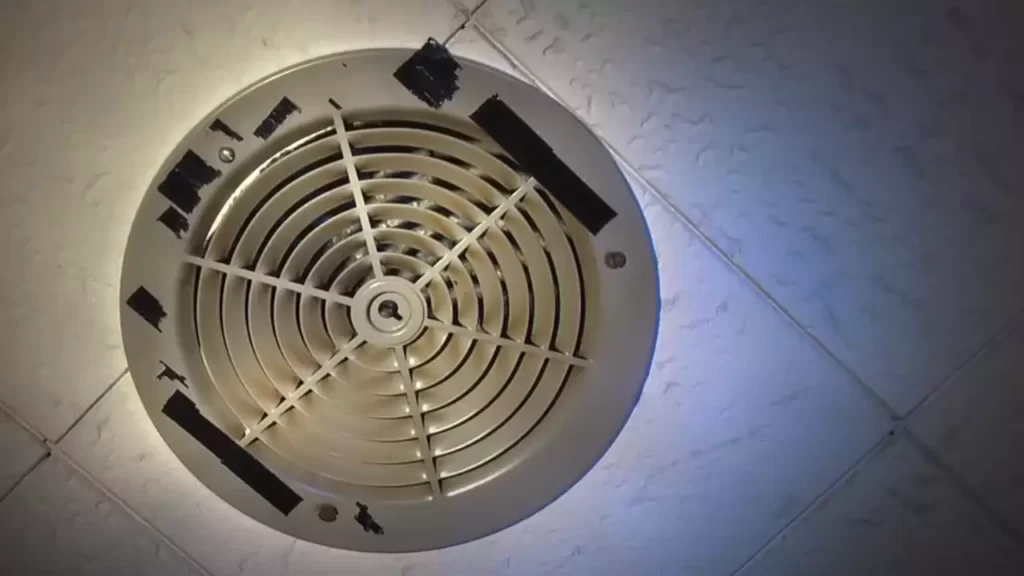
How to remove the old diffuser
Once you have gathered all the necessary tools, it is time to start removing the old diffuser. Follow these simple steps:
- Switch off the power: Before you begin, it is important to switch off the power to the HVAC system. This will ensure your safety while working on the diffuser.
- Locate the screws: Depending on the type of diffuser you have, you will find screws holding it in place. These screws are usually located on the outer edge of the diffuser.
- Remove the screws: Using a screwdriver, carefully remove the screws by turning them counterclockwise. Set the screws aside in a safe place, as you will need them when installing the new diffuser.
- Detach the diffuser: Slowly and gently pry the old diffuser away from the ceiling. Be careful not to damage the surrounding ceiling or ductwork.
In just a few simple steps, you have successfully removed the old diffuser. However, before installing the new one, there are a few important things you need to check and consider.
Checking for any damages or repairs needed
Now that the old diffuser is removed, take a closer look at both the diffuser and the ceiling to identify any damages or repairs needed. Follow these guidelines:
- Inspect the old diffuser: Examine the diffuser for any cracks, dents, or signs of wear and tear. If you notice any damages, it is advisable to replace the diffuser entirely, instead of reusing it.
- Assess the ceiling: Carefully inspect the area where the old diffuser was installed. Look for any signs of water damage, mold, or structural issues. If you notice any problems, it is crucial to address them before proceeding with the installation of the new diffuser.
By thoroughly checking both the old diffuser and the ceiling, you are ensuring that the new installation will be successful and long-lasting.
Cleaning the ceiling surface
Before you can install the new diffuser, it is essential to clean the ceiling surface properly. Here is how to do it:
- Remove dust and debris: Use a soft brush or a vacuum cleaner with a brush attachment to remove any dust or debris from the ceiling surface. This will create a clean and smooth surface for the new diffuser to be installed.
- Wipe the surface: Dampen a clean cloth or sponge with a mild cleaning solution and gently wipe the ceiling surface. This will remove any stubborn dirt or stains that cannot be removed with dry brushing alone.
- Dry the surface: Allow the ceiling surface to air dry completely before moving forward with the installation. A dry surface will ensure proper adhesion of any adhesives or tapes used during the installation process.
Once the ceiling surface is clean and dry, you are ready to proceed with the installation of the new diffuser, which will be covered in the next step.
Step 3: Preparing The Diffuser Damper
Once you have selected the perfect ceiling diffuser damper for your HVAC system, it’s important to properly prepare it before installation. This step ensures that the damper functions optimally, allowing you to control the airflow in your space effectively. Here are some crucial tasks you need to undertake during this preparation process:
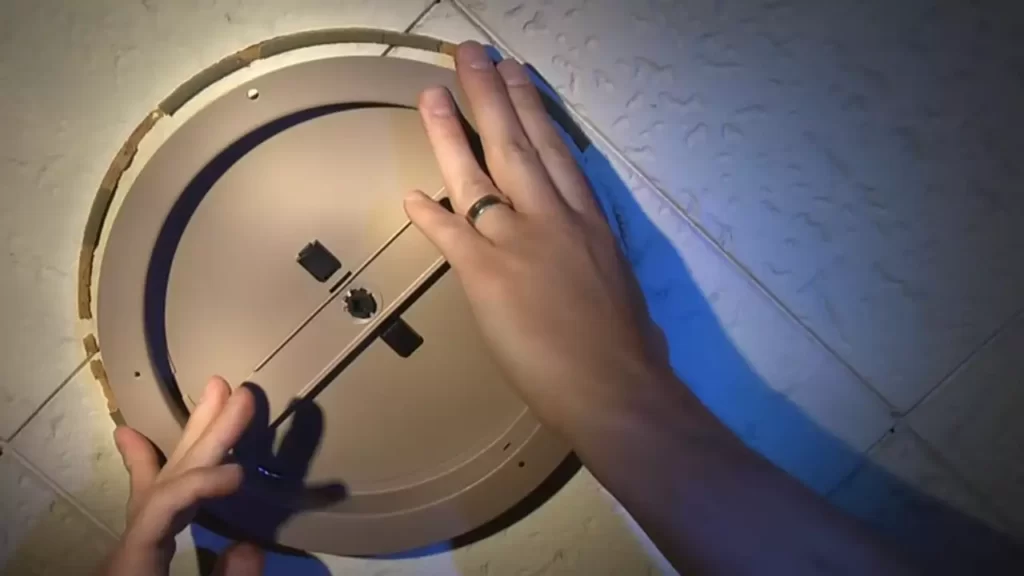
Inspecting the new diffuser damper
Before installation, it is essential to inspect the new diffuser damper thoroughly. This ensures it is free from any defects or damage that may hinder its performance. Take a close look at the damper blades and make sure they are intact and not bent. Inspect the frame for any signs of cracks or misalignment. Additionally, check all the fasteners to ensure they are secure. By taking the time to inspect the damper, you can identify any issues in advance and prevent unnecessary complications during the installation process.
Adjusting the damper settings
To optimize the function of the diffuser damper, it is crucial to adjust its settings before installation. This allows you to customize the airflow to suit your specific needs. Most diffuser dampers come with adjustable blades or louvers that can be positioned at different angles. By adjusting these blades, you can control the volume and direction of air flowing into the room. Refer to the manufacturer’s instructions on how to adjust the damper blades and ensure they are aligned correctly. Proper adjustment of the damper settings will ensure maximum efficiency and comfort in your space.
Preparing any additional components
In some cases, you may need to prepare additional components before installing the diffuser damper. This could include attaching mounting brackets, sealing gaskets, or insulation strips. These components play a crucial role in ensuring the damper fits securely in the ceiling and minimizes air leakage. Carefully read the installation manual to identify any additional components required for your specific diffuser damper model. Gather all the necessary components and ensure they are in good condition before proceeding with the installation. By preparing these additional components in advance, you can streamline the installation process and ensure that the diffuser damper operates effectively.
Remember, properly preparing the diffuser damper before installation is essential to ensure its optimal performance. So, take the time to inspect the damper, adjust its settings, and prepare any additional components. Following these steps will not only make the installation process smoother but also guarantee a well-functioning ceiling diffuser damper for your HVAC system.
Step 4: Installing The Diffuser Damper
Now that you have prepared the ceiling and assembled the diffuser damper, it is time to move on to the installation process. In this step, we will guide you through the process of attaching the damper to the ceiling, securing it in place, and ensuring proper alignment and levelness.
Attaching the Damper to the Ceiling
Start by positioning the diffuser damper over the opening in the ceiling. Ensure that all edges of the damper align perfectly with the opening to achieve a seamless fit. Take note of any obstructions or obstacles in the ceiling that may interfere with the installation.
Using a screwdriver, insert screws through the holes provided on the damper flange into the ceiling joists or support structure. Make sure to drive the screws in firmly, but avoid overtightening as it may distort the damper or damage the ceiling.
Securing the Damper in Place
Once the damper is attached to the ceiling, ensure that it is securely fastened. Give the damper a gentle push to check for any movement or looseness. If there is any, tighten the screws until the damper becomes stable.
In some cases, additional support may be required to ensure the damper’s stability. You can use metal strapping or braces to reinforce the connection between the damper and the ceiling. Secure these supports using screws or nails, ensuring they do not interfere with the operation of the damper.
Ensuring Proper Alignment and Levelness
To ensure the diffuser damper functions optimally, it is crucial to check for proper alignment and levelness. Use a level or plumb line to verify that the damper sits perfectly straight, both vertically and horizontally.
If you discover any misalignment, adjust the position of the damper by slightly loosening the screws and gently repositioning it. Retighten the screws gradually, checking the alignment after each adjustment, until the damper is perfectly level.
Additionally, you can check the damper’s alignment by observing its appearance from different angles. Stand below the damper and look upward to confirm that the damper is centered and symmetrical with the surrounding ceiling. This step will ensure not only proper functioning but also an aesthetically pleasing result.
Now that you have successfully installed the diffuser damper and ensured its alignment and levelness, you are ready to move on to the final step of connecting the ductwork and enjoying the benefits of a properly installed ceiling system.
Step 5: Testing And Adjusting
Once you have successfully installed your ceiling diffuser damper, it’s time to move on to the crucial step of testing and adjusting it to ensure optimal performance. This step is essential to ensure that the air is flowing properly and that the damper settings are correctly adjusted. Let’s take a look at the following subheadings to guide you through this process.
Turning on the power
Before testing the ceiling diffuser damper, ensure that the power is turned on. This allows the damper to function as intended and provides accurate readings when evaluating the air flow. Ensure that the power switch is in the “on” position and give it a few moments to power up.
Checking for proper air flow
Now that the power is on, it’s time to check the air flow. Stand below the ceiling diffuser damper and feel for any air coming out. It should be a steady and consistent flow. If you notice weak or no air flow, this may indicate an issue with the damper or the overall ventilation system. In such cases, it is recommended to consult a professional for further assistance.
Note: It’s important to mention that the ideal air flow may vary depending on the specific requirements and design of your space. Consulting the damper manufacturer’s guidelines or an HVAC professional can provide valuable insights to help you determine the desired air flow.
Making necessary adjustments to the damper settings
If you find that the air flow is not as desired, you may need to make adjustments to the damper settings. Locate the adjustment controls on the damper, typically found on the side or bottom. These controls allow you to regulate the airflow by adjusting the position of the damper blades.
| Adjustment control | Effect on air flow |
|---|---|
| Open position | Allows maximum air flow |
| Partially closed position | Reduces air flow |
| Closed position | Blocks air flow completely |
Start by moving the adjustment control to the desired position and observe the resulting air flow. Keep in mind that small adjustments may be necessary to achieve the desired balance between air flow and comfort. Repeat the process until you are satisfied with the air flow.
Note: It’s crucial to avoid fully closing the damper, as it may restrict air flow and lead to potential issues with the overall ventilation system.
By following these steps, you can confidently test and adjust your ceiling diffuser damper, ensuring optimal air flow and comfort in your space. Remember, proper installation and regular maintenance play a significant role in maintaining the performance and longevity of your damper.
Step 6: Finishing Touches
Cleaning up the installation area
After successfully installing the ceiling diffuser damper, it’s important to clean up the installation area to ensure a neat and tidy appearance. Start by gathering all the tools and materials used during the installation process and carefully store them away. Remove any debris or waste materials from the surrounding area and dispose of them properly. Use a clean cloth or sponge to wipe down the surface of the ceiling around the damper, removing any dust or dirt that may have accumulated during the installation. This will not only enhance the overall aesthetics but also prevent any potential damage to the damper in the long run.
Inspecting the installed damper
Now that the installation area is cleaned up, it’s time to inspect the installed damper to ensure everything is in place. Carefully examine the damper to see if it is securely attached to the ceiling and there are no visible signs of damage or misalignment. Check all the connecting screws or brackets to make sure they are tightened properly. Additionally, inspect the surrounding area for any potential obstructions or obstacles that may hinder the proper functioning of the damper. Address any issues or concerns identified during the inspection promptly to ensure optimal performance.
Conducting a final test to ensure functionality
To ensure that the ceiling diffuser damper is installed correctly and functioning as intended, it is essential to conduct a final test. This will help identify any potential issues or adjustments that may be required before considering the installation complete. Begin by turning on the HVAC system and adjust the airflow to the desired level. Observe the damper’s operation closely, checking for any abnormal noises, vibrations, or air leakage. Test different airflow settings and verify that the damper responds accordingly. If any issues are detected, refer to the manufacturer’s instructions or consult a professional to rectify the problem promptly.
In conclusion, completing the finishing touches of the ceiling diffuser damper installation is crucial for both aesthetics and functionality. By cleaning up the installation area, inspecting the installed damper, and conducting a final test, you can ensure that the damper is installed correctly and working effectively. This not only enhances the overall appearance of the space but also contributes to maintaining a comfortable and efficient HVAC system. So, don’t forget these essential steps to achieve a successful ceiling diffuser damper installation.
Troubleshooting Common Issues
Uneven air distribution
One common issue that homeowners encounter when installing a ceiling diffuser damper is uneven air distribution. This problem can result in certain areas of your home feeling too hot or too cold, leaving you feeling uncomfortable. Fortunately, there are a few troubleshooting steps you can take to address this issue.
First, ensure that the damper is properly installed and adjusted. Check that it is positioned correctly in the duct and that it is not partially closed, which could restrict airflow. If necessary, make adjustments to the damper’s position or angle to optimize air distribution.
Additionally, check for any obstructions in the ductwork that could be causing airflow restrictions. Clear away any debris or objects that may be blocking the passage of air. You may also consider cleaning your ducts to remove any dust or build-up that could be affecting airflow.
If uneven air distribution persists, it could be a sign of an improperly sized or designed HVAC system. In this case, it may be necessary to consult with a professional to determine the best course of action to achieve optimal air distribution throughout your home.
Noisy damper operation
Noise coming from the ceiling diffuser damper can be both annoying and worrisome. However, troubleshooting this issue can often lead to a simple solution.
First, check for any loose components or connections. Sometimes, the noise is caused by a loose damper blade or a loose attachment to the ductwork. Ensure that all parts are securely fastened and tightened to minimize movement and vibrations that can create noise.
If loose components are not the issue, the noise may be due to the damper rubbing against the ductwork. In this case, applying a thin layer of lubricant to the contact points can help reduce friction and eliminate the noise.
In some instances, the noise may be a sign of a larger problem, such as a worn-out or damaged damper. If troubleshooting steps do not resolve the issue, it may be necessary to replace the damper to ensure quiet operation.
Damper not functioning properly
If your ceiling diffuser damper is not functioning as it should, it is essential to troubleshoot the issue promptly to restore proper operation. Here are a few steps you can take:
First, check for any obstructions or debris that may be preventing the damper from opening or closing fully. Clear away any blockages and ensure that the damper has a clear range of motion.
Next, inspect the damper blades for any signs of damage or misalignment. If any blades are bent or out of place, straighten them or adjust them to ensure smooth operation.
Ensure that the damper’s control mechanism, whether it’s a manual lever or an automated system, is functioning correctly. If applicable, test the control mechanism and make any necessary adjustments or repairs to restore proper functionality.
If troubleshooting steps do not resolve the issue, it may be necessary to consult with a professional HVAC technician for further diagnosis and potential repairs or replacements.
Maintenance And Care
Maintenance and care are essential for ensuring optimal performance and longevity of your ceiling diffuser damper. By regularly cleaning, inspecting, and replacing damaged dampers, you can ensure that your HVAC system functions efficiently and provides a comfortable indoor environment. In this section, we will guide you through the important aspects of maintaining and caring for your ceiling diffuser damper.
Cleaning and maintaining the damper
To maintain the cleanliness and functionality of your ceiling diffuser damper, regular cleaning is a must. Accumulated dust, dirt, and debris can restrict airflow and hinder its performance. Follow these steps to effectively clean and maintain your damper:
- Start by turning off the HVAC system to prevent any accidental damage or injury.
- Remove the diffuser cover carefully by loosening the screws or clips.
- Use a soft brush or vacuum cleaner with a brush attachment to gently remove dust and debris from the damper blades and surrounding areas.
- Wipe down the blades and other accessible parts with a damp cloth or sponge dipped in a mild detergent solution. Avoid using harsh chemicals or abrasive materials that may damage the damper.
- Allow the damper to dry completely before reattaching the diffuser cover.
Regular cleaning, at least once every three months, will help maintain the performance of your ceiling diffuser damper and ensure efficient airflow throughout your space.
Replacing a damaged damper
If you notice any signs of damage or wear on your ceiling diffuser damper, it is important to replace it promptly to prevent further issues. Common signs of a damaged damper include excessive noise, difficulty in adjusting airflow, or visible physical damage. Here’s a simple guide to replacing your damper:
- Turn off the HVAC system and remove the diffuser cover as described earlier.
- Inspect the damper for any visible cracks, bent blades, or other signs of damage.
- Disconnect any screws or fasteners securing the damper to the ductwork.
- Carefully remove the damaged damper and dispose of it properly.
- Install a new damper by aligning it with the ductwork and securing it with the appropriate fasteners.
- Reattach the diffuser cover and ensure proper alignment.
- Turn on the HVAC system and test the new damper for smooth operation and desired airflow.
By promptly replacing a damaged damper, you can maintain the efficiency and performance of your ceiling diffuser, leading to better indoor air quality and comfort.
Regular inspection for optimal performance
Regular inspection of your ceiling diffuser damper is vital to ensure its optimal performance. By performing visual checks and functional tests, you can identify any potential issues before they escalate. Follow these steps for a thorough damper inspection:
- Turn off the HVAC system and remove the diffuser cover.
- Visually inspect the damper blades for any signs of dirt, debris, or physical damage.
- Ensure that the blades move freely and adjust smoothly without any resistance.
- Check for any loose or damaged screws, brackets, or other components.
- If necessary, tighten or replace any loose or damaged parts.
- Reattach the diffuser cover and ensure it is properly aligned.
- Turn on the HVAC system and test the damper to verify optimal airflow and adjustability.
Regularly inspecting your ceiling diffuser damper, ideally every six months, will help you maintain its performance and detect any potential issues before they lead to costly repairs or replacements.
Frequently Asked Questions
How Do You Install A Ceiling Diffuser?
To install a ceiling diffuser, follow these steps: 1. Measure and mark the ideal location on your ceiling. 2. Use a screwdriver or drill to create a hole. 3. Attach the diffuser to the ceiling by securing it with screws or clamps.
4. Make sure the diffuser is properly aligned and leveled. 5. Finally, test the diffuser to ensure proper airflow and adjust as needed.
What Is The Difference Between A Damper And A Diffuser?
A damper controls air flow in HVAC systems, while a diffuser distributes air evenly. Dampers regulate air volume, whereas diffusers ensure comfortable temperature and reduce drafts.
How Do You Install A Diffuser In A Drop Ceiling?
To install a diffuser in a drop ceiling, follow these steps: 1. Measure the size of the drop ceiling tile where you want to install the diffuser. 2. Remove the tile by pushing it up and twisting to release it from the metal frame.
3. Place the diffuser over the opening and align it properly. 4. Gently lower the diffuser into the opening until it rests securely. 5. Adjust the diffuser if necessary to ensure a tight fit.
What Is A Ceiling Diffuser Damper?
A ceiling diffuser damper is a device used in HVAC systems to control the air flow from the ceiling vents. It regulates the amount of air entering the room, ensuring proper ventilation and comfort.
Conclusion
To successfully install a ceiling diffuser damper, follow these simple steps. Start by gathering the necessary tools and materials. Measure and mark the correct points for installation. Then, carefully cut the opening and attach the diffuser to the ceiling. Finally, ensure the damper is functioning properly and make any necessary adjustments.
By following these instructions, you can enjoy a well-ventilated and comfortable atmosphere in your space.