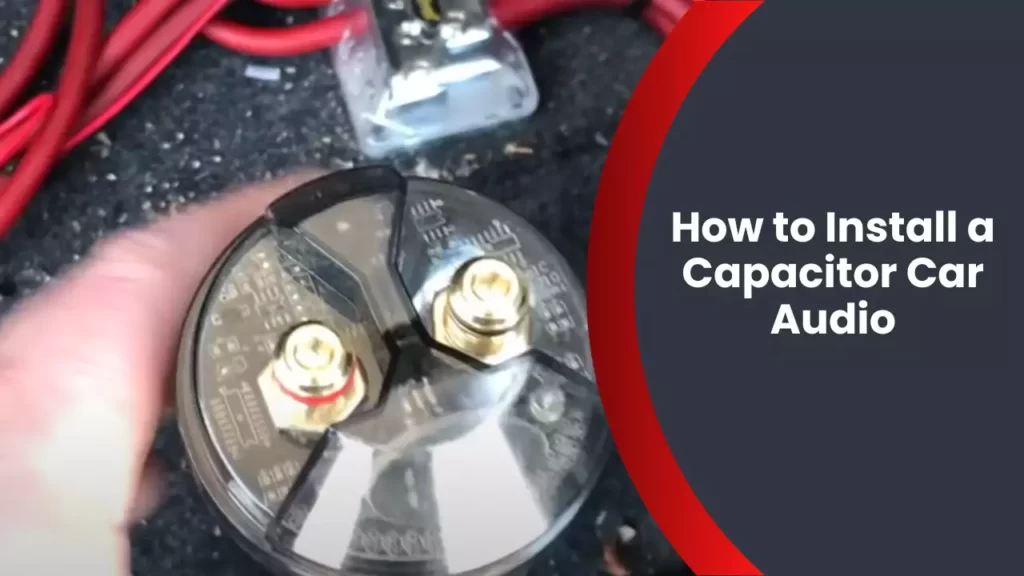
To install a capacitor for car audio, connect the positive terminal of the capacitor to the positive terminal of the car’s battery and the negative terminal to the car’s chassis ground. A capacitor helps provide a stable power supply to your car audio system, preventing voltage drops and improving sound quality.
Car audio enthusiasts often seek ways to improve the performance of their audio systems. One effective method is by installing a capacitor. A capacitor acts as a buffer between the car’s battery and the audio system, assisting in maintaining a stable power supply.
This aids in preventing voltage drops, ensuring a consistent and robust audio output. We will guide you through the process of installing a capacitor for your car audio system, providing step-by-step instructions to help you achieve optimal sound quality. So let’s dive in and begin the installation process.
Understanding The Need For A Capacitor In Car Audio Systems
When it comes to upgrading your car audio system, installing a capacitor is often a necessary step. While it may seem like a small component, a capacitor plays a crucial role in optimizing your audio performance and protecting your system from potential damage.
Importance of a capacitor in car audio systems
A capacitor, in the context of car audio systems, serves as a power storage device that helps regulate the power supply to your amplifiers. It essentially acts as a buffer between the battery and the amplifiers, ensuring consistent power delivery.
By storing excess electrical energy, the capacitor can provide quick bursts of energy to your amplifiers when they demand it the most, such as during heavy bass or musical peaks. This prevents sudden voltage drops and ensures that your audio system functions optimally, delivering clean, distortion-free sound.
Role of a capacitor in stabilizing power supply
The primary function of a capacitor in a car audio system is to stabilize the power supply. When your amplifiers draw more power than the battery and alternator can supply, voltage fluctuations occur. These fluctuations can lead to audio distortion, engine noise interference, and unreliable performance.
By acting as a reservoir, the capacitor fills in the gaps of insufficient power, smoothing out the voltage and preventing these issues. It essentially provides a stable and regulated power supply to your amplifiers, enabling them to operate efficiently and produce high-quality sound.
Problems that can arise from insufficient power supply
Insufficient power supply to your car audio system can result in several undesirable consequences. Without a capacitor, the power demands of your amplifiers may strain your vehicle’s electrical system and lead to:
- Dimming of headlights and interior lights
- Engine stalling or hesitation
- Reduced performance and sound quality
- Noise interference, such as alternator whine
- Damage to audio equipment or other electrical components
These problems not only impact your audio experience but can also potentially harm your vehicle. By installing a capacitor, you can mitigate these risks and ensure a stable power supply to your car audio system.
In conclusion, a capacitor is an indispensable component when it comes to optimizing the performance and longevity of your car audio system. Its ability to stabilize the power supply, provide quick bursts of energy, and protect against voltage fluctuations is essential. By understanding the need for a capacitor and its role in enhancing your car audio experience, you can take full advantage of your sound system without compromising on quality and reliability.
Choosing The Right Capacitor For Your Car Audio System
When it comes to upgrading your car audio system, installing a capacitor can make a significant difference in the performance and efficiency of your setup. A capacitor acts as a power storage device, ensuring that your amplifiers receive a steady flow of voltage, especially during peak power demands. However, it’s important to choose the right capacitor that meets the specific requirements of your car audio system. In this section, we will discuss the factors to consider when selecting a capacitor, including its size, capacity, and the different types available.
Factors to Consider When Selecting a Capacitor
Before diving into the technical aspects of capacitors, it’s crucial to understand the factors you need to consider before making a purchase. Here are a few important factors:
- Power Requirements: Assess the power needs of your car audio system. Look for capacitors that can handle the power demands of your amplifiers and avoid overloading them.
- Available Space: Evaluate the available space in your car for capacitor installation. Measure the dimensions and ensure that the capacitor you choose fits comfortably.
- Budget: Determine your budget for the capacitor. Capacitors come in various price ranges, so it’s important to find one that meets your requirements without breaking the bank.
Capacitor Size and Capacity Requirements
The size and capacity of a capacitor are essential considerations for optimal performance. The size of a capacitor is usually measured in Farads (F). To determine the right capacitance for your car audio system, consider the power requirements of your amplifiers and the intensity of the bass you desire.
As a general guideline, you should aim for 1 Farad of capacitance for every 1,000 watts of power your system outputs. For example, if your car audio system produces 2,000 watts, you should opt for a 2 Farad capacitor.
Keep in mind that while larger capacitors can store more power, they also require more space for installation. Ensure that you have enough room to accommodate the capacitor without compromising the functionality of your vehicle.
Capacitor Types and Their Suitability for Different Systems
Capacitors come in various types, each designed to cater to different audio systems. Let’s explore the different types:
| Type | Suitability |
|---|---|
| Standard Capacitors | Great for systems with moderate power demands |
| Hybrid Capacitors | Provide a balance between capacitance and internal resistance, suitable for both low and high-powered systems |
| Super Capacitors | Capable of delivering high power bursts, ideal for systems with intense bass and high-powered amplifiers |
Before selecting a specific type of capacitor, consider the power demands of your car audio system and the type of music you typically listen to. This will help you choose a capacitor that can handle the demands of your system while delivering enhanced audio performance.
Taking into account these factors, you can make an informed decision and choose a capacitor that will not only meet your car audio system’s requirements but also provide optimal power management. Installing the right capacitor will help enhance your music experience and ensure smooth power delivery, preventing voltage drops and improving overall audio quality.
Preparing For The Installation
Tools and materials required for the installation
Before you start installing a capacitor for your car audio system, it’s important to gather all the necessary tools and materials. Here’s a list of what you’ll need:
- Socket set
- Adjustable wrench
- Wire cutters/strippers
- Wire crimpers
- Electrical tape
- Zip ties
- Capacitor wiring kit
- Owner’s manual or wiring diagram of the audio system
Safety precautions to take before starting the installation
Your safety is paramount when working with car audio systems. Here are some safety precautions you should keep in mind before you begin:
- Disconnect the negative terminal of the car’s battery to prevent any electrical accidents.
- Wear protective gloves and eyewear to avoid any injuries or potential hazards.
- Ensure that your work area is well-ventilated to prevent the buildup of potentially harmful fumes.
- Read and understand the owner’s manual or wiring diagram of the audio system to avoid any mistakes during the installation process.
Preparing the car and audio system for the capacitor installation
To ensure a smooth capacitor installation, it’s essential to prepare both your car and the audio system. Here are the steps to follow:
- Choose a suitable location for your capacitor. It should be close to the amplifier but away from excessive heat sources.
- Clean the chosen location thoroughly to ensure a solid connection between the capacitor and the car’s chassis.
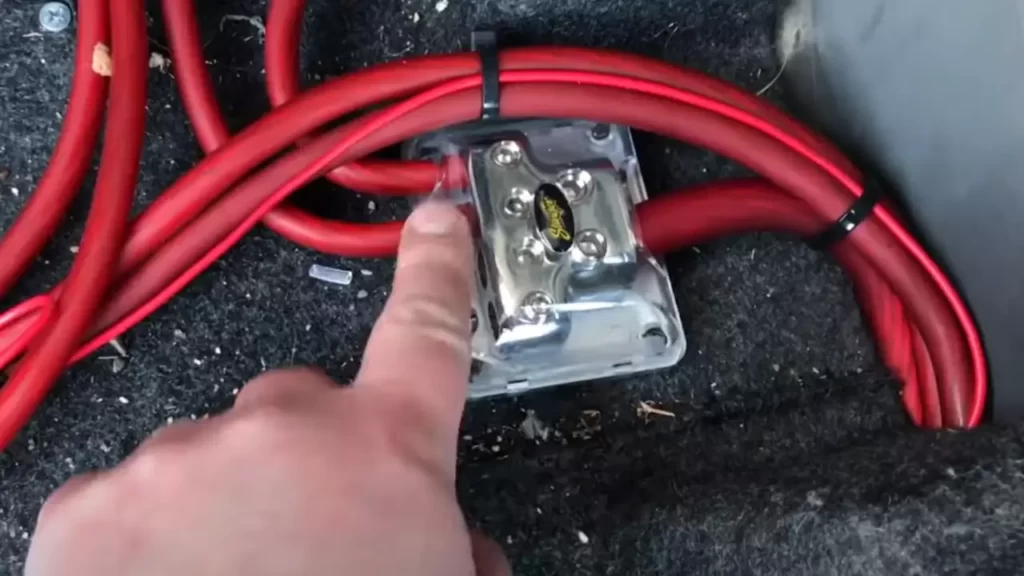
- Identify a convenient location to mount the capacitor’s mounting bracket using screws or adhesive, ensuring it is secure and will not interfere with any other car components.
- Disconnect the car’s negative battery terminal using the appropriate tools to prevent any electrical accidents.
- Locate the car’s amplifier and identify the power input terminal.
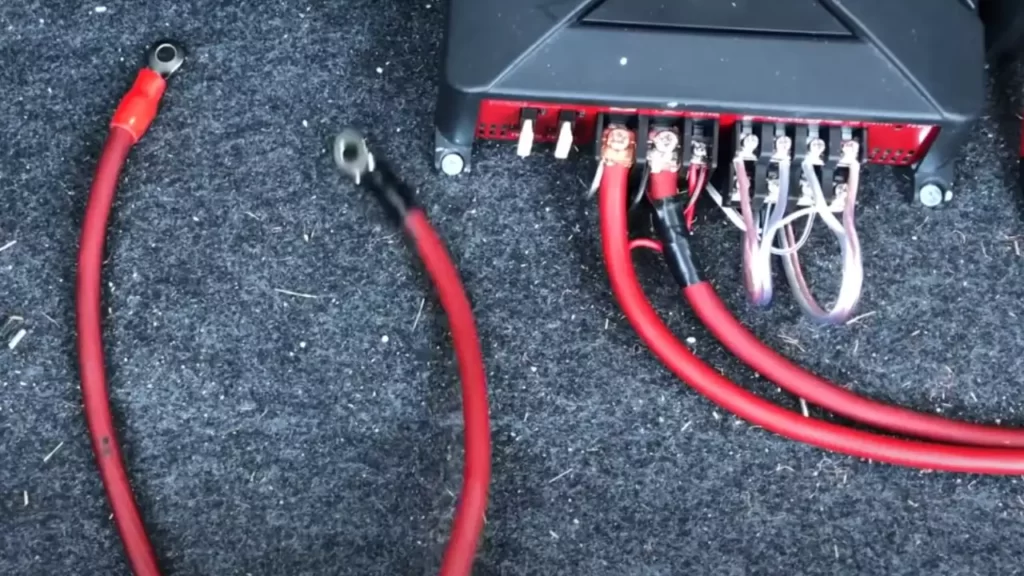
- Measure and cut the appropriate length of power cable from the capacitor wiring kit to connect the capacitor and the amplifier.
- Strip the insulation off the ends of the power cable and the amplifier’s power input terminal.
- Using wire crimpers, securely attach the power cable to the capacitor’s positive terminal and the amplifier’s power input terminal.
- Securely fasten the ground cable from the capacitor wiring kit to a suitable grounding point in the car’s chassis.
- Ensure all connections are tight and secure, and use zip ties and electrical tape to tidy up the wiring and prevent any potential damage or interference.
By following these steps, you’ll be well-prepared and ready to successfully install a capacitor for your car audio system. Remember to always prioritize safety and refer to your specific car and audio system’s documentation for any additional instructions or precautions.

Step-By-Step Guide To Installing A Capacitor In Your Car Audio System
Installing a capacitor in your car audio system can greatly enhance its performance by providing a steady flow of power. Capacitors act as a buffer to prevent voltage drops and surges, allowing your amplifier to deliver optimal performance. If your car audio system is suffering from sound distortion or dimming headlights, it might be time to install a capacitor. In this step-by-step guide, we will walk you through the process of installing a capacitor in your car audio system, ensuring that you have a smooth and hassle-free experience.
Step 1: Disconnecting the battery
The first step in installing a capacitor is to disconnect the battery to ensure your safety and prevent any damage to the electrical components of your car. To do this, follow these simple steps:
- Locate the car’s battery and identify the negative terminal, marked with a “-” sign.
- Using a wrench or socket, loosen the nut on the negative terminal.
- Once the nut is loose, remove the negative cable from the battery and secure it away from the terminal to prevent accidental contact.
Step 2: Locating the capacitor installation position
Next, you need to find the ideal location to install the capacitor in your car. Here are a few things to consider when choosing the capacitor’s placement:
- Make sure the installation location is easily accessible and does not obstruct any other components in your car.
- Ensure that the capacitor is positioned away from any sources of heat or moisture.
- Choose a spot that allows for proper ventilation to prevent overheating.
Once you have determined the appropriate location, proceed to the next step.
Step 3: Mounting the capacitor securely in the car
Now that you have identified the installation position, it’s time to mount the capacitor securely. Follow these steps:
- Using a drill or a screwdriver, mount the capacitor bracket or holder in the desired location.
- Make sure the capacitor fits snugly in the bracket, ensuring it won’t move during driving.
- Double-check the mounting to ensure stability and security.
Step 4: Connecting the capacitor to the power supply
With the capacitor securely in place, it’s time to connect it to the power supply. Follow these steps:
- Identify the positive terminal of the car battery, usually marked with a “+” sign.
- Attach the positive power cable from the capacitor to the positive terminal of the battery.
- Tighten the nut on the positive terminal to ensure a secure connection.
Step 5: Connecting the capacitor to the car audio system
Now that the capacitor is connected to the power supply, it’s time to integrate it into your car audio system. Follow these steps:
- Identify the amplifier in your car audio system.
- Locate the positive power input on the amplifier.
- Connect the positive power cable from the capacitor to the positive power input on the amplifier.
- Tighten any necessary connections to ensure a secure fit.
Step 6: Testing the capacitor installation
Finally, it’s essential to test the capacitor installation to ensure it is functioning correctly. Follow these steps:
- Reconnect the negative cable to the battery’s negative terminal.
- Start your car and turn on the car audio system.
- Monitor the performance of your audio system, listening for any improvements in sound quality and observing any changes in headlight brightness.
- If everything is functioning properly, congratulate yourself on a successful capacitor installation!
By following these step-by-step instructions, you can install a capacitor in your car audio system without any hassle. Enjoy enhanced sound quality and a reliable power supply, ensuring your car’s audio system performs optimally.
Troubleshooting And Common Issues
Installing a capacitor in your car audio system can significantly enhance the performance and efficiency of your audio setup. However, like any other car audio component, you may encounter some common issues during the installation process.
Common problems that may arise during the capacitor installation
While installing a capacitor, it’s important to be aware of potential issues that can occur. Here are some common problems you may encounter:
- Incorrect wiring connections
- Insufficient power supply
- Inadequate grounding
- Overcharged or undercharged capacitor
- Failed capacitor
Identifying and troubleshooting issues with capacitor installation
Identifying and resolving problems with your capacitor installation requires careful examination and troubleshooting. Here are a few tips to help you identify and troubleshoot potential issues:
- Check the wiring: Ensure that all wiring connections are correct and secure. Incorrect wiring can lead to poor performance or even damage to the capacitor.
- Inspect the power supply: Make sure that your capacitor is connected to a stable and adequate power supply. Insufficient power can hinder the capacitor’s functionality.
- Verify grounding: Proper grounding is crucial for the capacitor to function effectively. Check for any loose or faulty grounding connections and ensure they are securely in place.
- Test the capacitor charge: Use a multimeter to measure the voltage across the capacitor terminals. If it shows a significantly lower or higher voltage than the capacitor’s rating, it may indicate an overcharged or undercharged capacitor.
- Replace a failed capacitor: If you have tried troubleshooting and the capacitor is still not functioning correctly, it may be necessary to replace it with a new one.
Tips for resolving common capacitor-related problems
Resolving common problems related to capacitors can ensure optimal performance of your car audio system. Here are a few tips to help you get your capacitor installation back on track:
- Double-check the manual: Always refer to the installation manual provided by the manufacturer for specific instructions and guidelines.
- Ensure proper installation location: Capacitors should be installed away from heat sources to prevent overheating. Mounting it in a well-ventilated area can help avoid temperature-related issues.
- Seek professional help if needed: If you are unable to troubleshoot or resolve the issues on your own, it is advisable to consult a professional car audio technician.
By following these troubleshooting tips and being proactive in resolving common capacitor-related problems, you can ensure that your car audio system operates smoothly and delivers an enhanced audio experience.
Additional Tips And Best Practices For Maintaining A Capacitor
Installing a capacitor in your car audio system can greatly improve its overall performance and ensure a steady power supply. However, simply installing a capacitor is not enough – regular maintenance and proper care are necessary to keep it functioning optimally in the long run. In this section, we will discuss some additional tips and best practices for maintaining a capacitor, extending its lifespan, and knowing when it’s time for an upgrade or replacement.
Regular maintenance and inspection of the capacitor
Maintaining a capacitor doesn’t have to be a complicated task. By regularly inspecting and taking care of your capacitor, you can avoid potential issues and keep it in excellent condition. Here are some maintenance tips:
- Ensure the capacitor is securely mounted in an appropriate location in your vehicle. Avoid placing it near sources of heat or direct sunlight, as excessive heat can negatively impact its performance.
- Inspect the wiring and connections regularly to ensure they are secure and free from any damage or corrosion. Loose or damaged connections can result in poor performance or even potential accidents.
- Keep the capacitor clean by wiping it with a soft, dry cloth. Avoid using any harsh chemicals or abrasive materials that may damage the surface.
- Check the voltage levels using a multimeter periodically to ensure the capacitor is charging and discharging properly. Refer to the manufacturer’s instructions for the optimal voltage range.
Best practices for extending the lifespan of the capacitor
Extending the lifespan of your capacitor not only ensures its longevity but also saves you from the hassle of frequent replacements. Here are some best practices to keep in mind:
- Avoid overloading the capacitor by installing one that matches the power requirements of your audio system. Using a capacitor with a lower rating may result in frequent charging and discharging, leading to premature failure.
- Utilize a voltage display or meter to monitor the capacitor’s voltage level. This helps you identify any issues early on and take the necessary steps to rectify them.
- Consider investing in a high-quality capacitor from a reputable manufacturer. While it may cost a bit more initially, a reliable and durable capacitor will prove to be a worthwhile investment in the long run.
- Protect the capacitor from extreme temperature conditions. If your vehicle is frequently exposed to hot or cold environments, consider using additional insulation or heat shields to shield the capacitor.
Upgrading and replacing the capacitor when necessary
Even with regular maintenance, there may come a time when replacing or upgrading your capacitor becomes necessary. Here are a few indicators that it’s time for a change:
- If you notice a significant decrease in audio performance or experience frequent voltage drops, it may be a sign that your capacitor is no longer functioning optimally.
- When upgrading your car audio system, it’s essential to evaluate if the current capacitor can handle the increased power demand. If not, consider upgrading to a higher-capacity capacitor that can accommodate the new system requirements.
- In case of any physical damage, such as visible leaks or bulging, it’s crucial to replace the capacitor immediately. Operating a damaged capacitor can be dangerous and may even lead to other electrical issues in your vehicle.
By adhering to these additional tips and best practices, you can ensure your capacitor remains in excellent condition, providing clean and stable power to your car audio system. Regular maintenance, combined with proper care and timely replacements or upgrades, will help you enjoy a superior audio experience for years to come.
Frequently Asked Questions
Is A Capacitor Necessary For Car Audio?
Yes, a capacitor is necessary for car audio. It helps regulate power flow to prevent voltage drops and maintain consistent performance. By storing and releasing energy when needed, a capacitor improves sound quality, reduces distortion, and protects the car’s electrical system.
How Do You Wire A Capacitor To A Car?
To wire a capacitor to a car, connect the positive terminal of the capacitor to the car’s battery’s positive terminal, and the negative terminal to the car’s chassis. Ensure proper insulation and secure connections to avoid electrical issues and protect your car’s electrical system.
Will A Capacitor Drain My Battery?
No, a capacitor will not drain your battery. It stores and releases energy, but does not draw power continuously.
Can You Ground An Amp And A Capacitor To The Same Spot?
Yes, you can ground an amp and a capacitor to the same spot. It helps to reduce noise interference and improves the performance of the audio system.
Conclusion
Installing a capacitor for your car audio system is a simple yet effective way to improve the performance and reliability of your audio setup. By stabilizing voltage fluctuations, a capacitor ensures consistent power delivery to your amplifier, preventing issues like dimming headlights or reduced bass response.
With the step-by-step guide provided in this blog post, you can confidently tackle this installation yourself. So, go ahead and enjoy the enhanced audio experience that a capacitor brings to your car.