To install a capacitor, first, locate the positive (+) and negative (-) terminal on your vehicle’s battery. Then, connect the positive terminal of the capacitor to the positive terminal of the battery and the negative terminal of the capacitor to a grounded metal surface in the vehicle’s chassis.
This will help improve electrical performance and stabilize voltage levels in the car’s electrical system. Adding a capacitor is a popular upgrade for car audio systems, as it can help prevent dimming lights and improve overall sound quality. By following a simple installation process, you can effectively harness the benefits of a capacitor for your vehicle.
Getting Started
Installing a capacitor in an electrical system can help improve the performance and reliability of the system. Whether you are a DIY enthusiast or an electrician, understanding the purpose of a capacitor and gathering the necessary tools and materials are crucial steps to ensure a successful installation. In this guide, we will walk you through these initial steps to help you get started on installing a capacitor in your electrical system.
Understanding the purpose of a capacitor in an electrical system
Before diving into the installation process, it’s essential to understand why a capacitor is needed in an electrical system. A capacitor is an electronic component that stores and releases electrical energy. It acts as a power reservoir, supplying a surge of energy to electrical devices when they need it the most. This surge of energy can help overcome temporary power fluctuations, stabilize voltage levels, and prevent damage to sensitive equipment.
Gathering the necessary tools and materials
Now that you know the importance of a capacitor let’s move on to gathering the tools and materials required for the installation. Here’s a checklist of what you’ll need:
| Tools | Materials |
|---|---|
|
|
Having all the necessary tools and materials ready before starting the installation process will save time and ensure a smooth and efficient process. Make sure to check the specifications of the capacitor to ensure compatibility with your electrical system.
Now that you have a better understanding of the purpose of a capacitor and have gathered all the tools and materials, you are ready to move on to the next step of the installation process. Stay tuned for our next blog post where we will guide you through the actual installation steps in detail.
Preparing For Installation
Identifying the Correct Capacitor Type and Specifications for Your Specific System
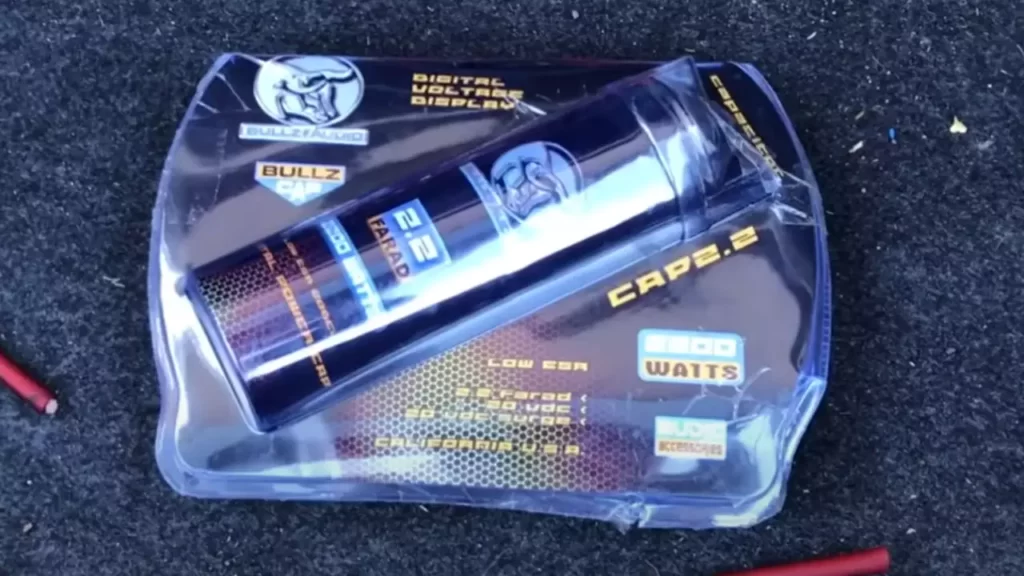
Before you start installing a capacitor in your electrical system, it is crucial to identify the correct type and specifications that are suitable for your specific system. Choosing the wrong capacitor can lead to inefficiencies, malfunctions, or even damage to your system.
To identify the correct capacitor, you should refer to the manufacturer’s documentation for your equipment. This documentation will provide you with the necessary information, such as the capacitance rating, voltage rating, and any other specifications required for your system.
Take note of the specific model number or part number mentioned in the documentation. This information will help you in purchasing the correct capacitor, ensuring compatibility and optimal performance.
Ensuring Safety Precautions are Followed Before Starting the Installation Process
Before beginning the installation process, it is essential to prioritize safety. Capacitors store electrical energy and can pose a risk if mishandled. Strict adherence to safety precautions will minimize the risk of electrical shock and prevent any potential accidents.
Make sure to wear appropriate personal protective equipment, such as safety gloves and eyewear, to protect yourself from any potential hazards.
Furthermore, ensure that the power source to your system is completely disconnected. This means turning off the circuit breaker or removing the fuse that supplies power to the equipment. Additionally, it is important to discharge any residual energy stored in the capacitors to avoid the risk of electrical shock.
To discharge the residual energy, carefully use a short-circuited insulated screwdriver. With one hand firmly holding the insulated handle, touch the metal end of the screwdriver across the capacitor terminals to create a short circuit. This will discharge any remaining energy and make the installation process safer.
Removing The Old Capacitor
When it comes to installing a capacitor in an electrical system, one of the first steps you’ll need to take is removing the old capacitor. This is an important part of the process as it ensures a clean installation and avoids any potential issues down the line. In this section, we’ll walk you through each step of removing the old capacitor.
Locating the existing capacitor in the system
The first step in removing the old capacitor is to locate its position in the system. In most cases, the capacitor is located near the air conditioner condenser unit or the furnace blower motor. It may be mounted on a metal bracket or secured to the unit with screws. Take a moment to familiarize yourself with its location before proceeding to the next step.
Properly disconnecting the wires from the old capacitor
Once you’ve located the old capacitor, you’ll need to disconnect the wires attached to it. This is crucial for safety reasons and to avoid any potential damage to the wires or other components. Start by making note of which wires are connected to which terminals on the capacitor. Using a pair of insulated pliers, carefully remove the wires by loosening the terminal screws. It’s important to handle the wires with caution to avoid any electrical shocks.
Safely removing the old capacitor from its mounting location
With the wires disconnected, you can now focus on removing the old capacitor from its mounting location. Depending on the type of mounting, you may need a screwdriver or a wrench to remove any screws or bolts holding it in place. Once the mounting hardware is removed, take the old capacitor out of its position carefully, avoiding any unnecessary force or damage to nearby components. Remember to handle the capacitor with caution as it may still hold an electrical charge.
By following these steps, you can safely and efficiently remove the old capacitor from your system. This will pave the way for the installation of a new capacitor, ensuring optimal performance and functionality.
Selecting The Mounting Location For The New Capacitor
Assessing Available Space and Considering Environmental Factors
Before installing a new capacitor, it is crucial to carefully consider the most suitable mounting location. This ensures optimal performance and easy access for maintenance or future replacements. The first step in selecting the right spot is to assess the available space.
Take a look at your vehicle or electronic equipment and identify potential areas where the capacitor can be mounted. Measure the dimensions of the capacitor and compare them with the available space to ensure a proper fit. It’s essential to choose a location that can accommodate the size of the capacitor without compromising other crucial components or obstructing any moving parts. Keep in mind that the capacitor should be placed securely to prevent any damage or vibration.
In addition to space considerations, environmental factors play a significant role in determining the ideal mounting location. Capacitors are sensitive to heat, so it is vital to avoid areas that are exposed to direct sunlight or close to heat-generating components like engines or exhausts. Similarly, areas with excessive moisture or vibration should be avoided to prevent any potential damage to the capacitor.
Choosing an Appropriate Mounting Location for Optimal Performance and Access
Once you have assessed the available space and considered the environmental factors, the next step is to evaluate the different options and choose the most appropriate mounting location for your new capacitor. Here are a few key factors to keep in mind:
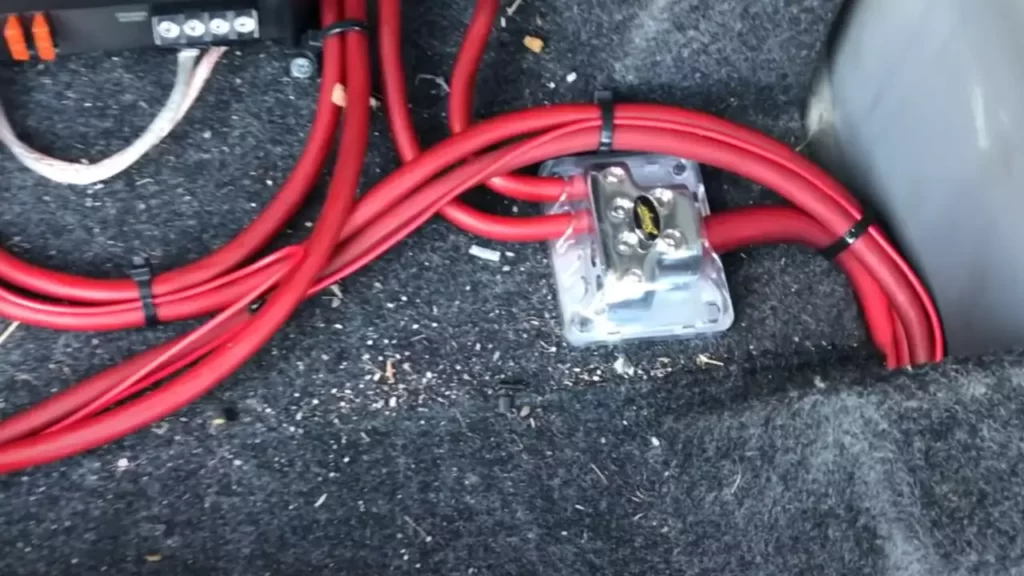
- Proximity to Power Source: Select a location that allows for a direct and short connection to the power source. This ensures efficient energy flow and minimizes the risk of power loss or interference.
- Cable Accessibility: Consider the ease of running the necessary cables or wires to connect the capacitor to the system. Avoid locations that require excessive or complicated routing, as this can make installation and future maintenance more challenging.
- Sturdy Mounting Surface: Look for a solid, flat surface to mount the capacitor. A sturdy mounting surface ensures stability and minimizes the risk of vibrations or movements that may affect the capacitor’s performance and longevity.
- Adequate Ventilation: Proper airflow is crucial for dissipating heat generated by the capacitor. Choose a location that allows for adequate ventilation to prevent overheating and ensure optimal performance.
By considering these factors and evaluating the available options, you can select the most suitable mounting location for your new capacitor. Remember to follow the manufacturer’s recommendations and guidelines, as they may provide specific instructions or restrictions for mounting locations. Taking the time to choose the right spot ensures optimal performance, longevity, and easy access for future maintenance needs.
Wiring The New Capacitor
Properly Connecting the Wires to the New Capacitor
When it comes to wiring a new capacitor, it is crucial to ensure that the connections are made properly. Improper connections can lead to malfunctioning or even damage to the electrical system. To make sure you get it right, follow these steps:
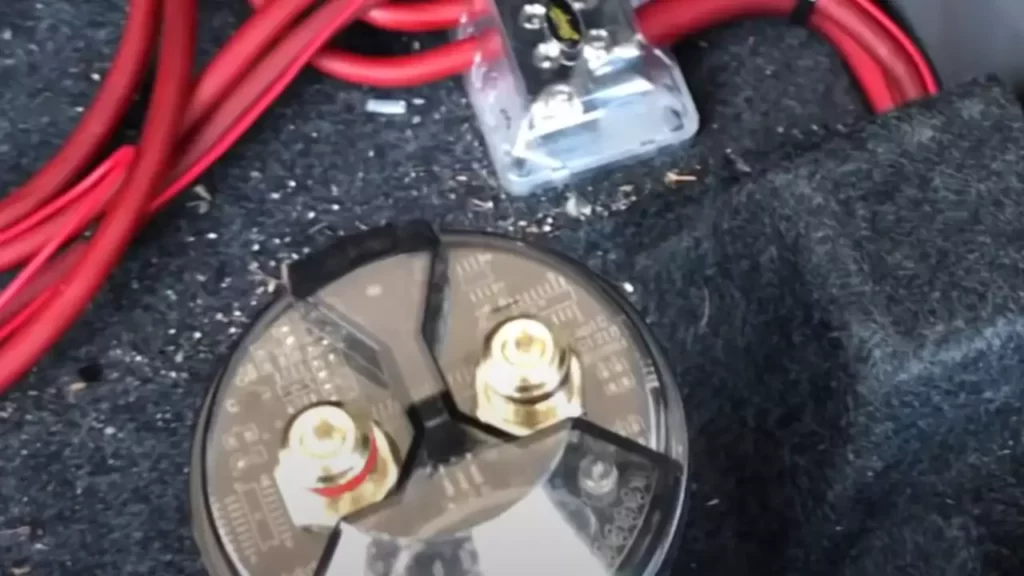
- Begin by identifying the different terminals on the capacitor. The terminals are often labeled “C” for common, “F” for fan, and “H” for hermetic. Refer to the manufacturer’s instructions to be certain of the correct terminal configuration for your specific capacitor model.
- Next, identify the corresponding wires that need to be connected. The wires may vary in color and size, so it’s essential to match them correctly to the right terminals on the capacitor.
- Carefully strip the wire insulation using wire strippers, ensuring that enough bare wire is exposed for a secure connection.
- Start with the common wire, which is usually colored white or labeled with “C,” and connect it to the common terminal on the capacitor. Make sure the connection is tight and secure. In some cases, it may be necessary to use a crimping tool to ensure a solid connection.
- Now, move on to the fan wire, which is typically colored brown or labeled with “F.” Connect this wire to the fan terminal on the capacitor. Again, ensure the connection is secure and tight.
- Lastly, connect the hermetic wire, which is usually colored purple or labeled with “H,” to the hermetic terminal on the capacitor. Double-check that the connection is tight and secure.
Following the Manufacturer’s Instructions for Correct Wiring Configuration
To ensure the correct wiring configuration, it is crucial to follow the manufacturer’s instructions. Every capacitor may have specific instructions for the terminal connections, wire color codes, and any additional steps unique to that model. Here’s how you can make sure you’re following the correct wiring configuration:
- Refer to the instruction manual or label that came with the new capacitor. These documents often contain detailed diagrams and explanations on how to wire the capacitor correctly.
- Pay close attention to any specific instructions regarding wire color codes, as they can vary between capacitor models and manufacturers.
- If the manufacturer’s instructions are not available or unclear, reach out to the manufacturer directly for clarification. They will be able to provide guidance and ensure you wire the capacitor correctly.
Securing the Connections and Ensuring Proper Insulation
Once the wires are properly connected to the new capacitor, it is essential to secure the connections and ensure proper insulation. This will help prevent any accidents or electrical issues down the line. Follow these steps to secure the connections and guarantee proper insulation:
- Use electrical tape to wrap around each connection, ensuring that the bare wire and terminal are completely covered. This provides an extra layer of insulation and protects against any accidental contact.
- Tug gently on each wire to make sure they are securely attached to the capacitor terminals. If any wire feels loose, recheck the connection and tighten it if necessary.
- Once all the connections are secure, use zip ties or cable clamps to neatly organize and bundle the wires together. This will help prevent any accidental tugging or tripping hazards.
- Finally, visually inspect the wired capacitor to ensure no bare wires are exposed and that all connections are securely enclosed in insulation. This step is crucial for safety and the overall performance of the electrical system.
Mounting And Securing The New Capacitor
Properly mounting and securing a capacitor is essential to ensure its functionality and longevity. In this section, we will guide you through the process of installing the new capacitor in your chosen location, using the appropriate mounting hardware, and checking for proper alignment and stability.
Installing the new capacitor in the chosen location
Before installing the new capacitor, carefully select a suitable location that meets the specifications and requirements of your specific capacitor model. Keep in mind factors such as proximity to the power source and proper ventilation to prevent overheating.
Once you have determined the ideal location, follow these steps to install the new capacitor:
- Ensure the power supply is disconnected and the capacitor is discharged to avoid any electrical shocks.
- Position the capacitor in the chosen location, making sure it is mounted securely and does not interfere with any surrounding components.
- Double-check the manufacturer’s instructions for any specific guidelines or recommendations regarding the orientation or positioning of the capacitor.
- If necessary, use mounting brackets or brackets provided by the manufacturer to attach the capacitor securely to the mounting surface.
- Make sure the mounting hardware is tightened securely but not overly tightened to avoid damaging the capacitor.
Using appropriate mounting hardware to secure the capacitor
Using the right mounting hardware is crucial to ensure the capacitor stays securely in place. Follow these guidelines when selecting and using mounting hardware:
- Refer to the capacitor’s manual or manufacturer’s guidelines to determine the recommended type and size of mounting hardware.
- Choose hardware that is suitable for the mounting surface and capable of withstanding the weight and vibrations associated with the capacitor.
- When attaching the mounting hardware, ensure it is positioned securely and that all the necessary screws, bolts, or clamps are tightened correctly.
- Inspect the mounting hardware periodically to ensure it remains tight and secure, tightening it if necessary.
Checking for proper alignment and stability
After mounting and securing the new capacitor, it is crucial to check for proper alignment and stability to avoid any potential issues. Follow these steps to ensure your capacitor is correctly aligned and stable:
- Perform a visual inspection to ensure the capacitor is positioned level and parallel to the mounting surface.
- Examine the surrounding area to ensure no other components or objects are pressing against or interfering with the capacitor’s positioning.
- Gently wiggle or apply slight pressure to the capacitor to verify that it remains stable and firmly in place.
- If any misalignment or instability is detected, double-check the mounting hardware and make any necessary adjustments.
- Always follow the manufacturer’s instructions and guidelines when checking for alignment and stability.
By following these steps and guidelines for mounting and securing your new capacitor, you can ensure its proper installation and reliable performance in your electrical system.
Testing And Verifying The Capacitor Installation
After successfully installing a capacitor in your system, the important next step is to test and verify its installation to ensure its functionality and that the system is operating within the desired parameters. In this section, we will guide you through the process of reconnecting power, turning on the system, testing the functionality of the new capacitor, and verifying that the system is operating properly. Let’s dive in!
Reconnecting Power and Turning on the System
Once you have installed the capacitor, it is time to reconnect the power and turn on the system. Follow these steps to ensure a seamless reconnection:
- Double-check all the connections and make sure they are secure. Look for any loose wires or incorrect connections that might have occurred during the installation process.
- With caution, switch the power back on. Take note of any unusual noises or malfunctions during the process. It is important to be vigilant at this stage to ensure the safety of the system.
- If you notice any sparks, smoke, or burning smells, immediately switch off the power and investigate the issue. These signs may indicate a problem with the capacitor installation or other electrical components in the system.
By carefully reconnecting power and turning on the system, you can ensure a smooth transition to the testing phase.
Testing the Functionality of the New Capacitor
Testing the functionality of the new capacitor is crucial to ensure that it is working as intended. Here, we outline the steps to help you perform this test:
- Measure the voltage across the capacitor terminals using a multimeter. This will indicate whether the capacitor is holding the charge properly.
- If the capacitor is charged, discharge it using a suitable discharge resistor to prevent any accidental electrical shocks. Safety is paramount during this process.
- Recharge the capacitor by reconnecting it to the power supply, ensuring that it is disconnected from the system to avoid any interference during this test.
- Repeat the voltage measurement across the capacitor terminals. Compare the results with the manufacturer’s specifications to determine whether the capacitor is functioning within the desired parameters.
By performing these tests, you can confidently assess the functionality of the new capacitor before proceeding further.
Verifying That the System Is Operating Within the Desired Parameters
Once you have confirmed that the new capacitor is functioning properly, the final step is to verify that the system, as a whole, is operating within the desired parameters. Here are some key points to consider:
- Monitor the system for any signs of overheating or excessive noise that might indicate a malfunction. Proper functioning should ensure a smooth operation without any noticeable issues.
- Check the overall power consumption of the system. If you observe any significant increase or decrease beyond the expected range, it may indicate a problem that needs further investigation.
- Review the system’s performance under different load conditions. This will help you identify any fluctuations or inconsistencies that may require adjustments or fine-tuning.
By verifying that the system is operating within the desired parameters, you can confidently ensure the successful installation and functionality of the new capacitor.
Testing and verifying the capacitor installation is essential to ensure its functionality and the proper operation of the system. By following the steps outlined in this section, you can confidently reconnect power, test the capacitor’s functionality, and verify that the system is operating within the desired parameters. This thorough testing process will provide peace of mind and help maintain the efficiency and longevity of your system.
Troubleshooting And Common Issues
When it comes to installing a capacitor, it’s essential to be prepared for any potential issues that may arise during or after the installation process. Troubleshooting and resolving these common issues will not only ensure a successful installation but also help prevent future capacitor-related problems. In this section, we will identify common issues, provide troubleshooting steps, and share tips for preventing capacitor-related issues.
Identifying common issues that may occur during or after the installation:
During or after the installation of a capacitor, you may encounter several common issues. Identifying these issues early on will help you take the necessary corrective steps to ensure proper functioning and performance of your electrical system. Here are some common issues to watch out for:
- Incorrect connections: Improper wiring or faulty connections can lead to a malfunctioning capacitor. Always double-check your connections and ensure they are secure and accurate.
- Defective capacitor: Sometimes, a capacitor may be defective right from the start. This can result in poor electrical performance or even a complete failure. Inspect the capacitor for any visible signs of damage or defects before installation.
- Overheating: Overheating can occur if the capacitor is under excessive load or if there is inadequate airflow around it. Monitor the temperature during operation and check if there are any obstructions preventing proper airflow.
- Improper sizing: Using a capacitor that is too small for the electrical load can cause issues such as overheating or premature failure. Ensure you choose a capacitor that matches the specifications of your electrical system.
Troubleshooting steps to resolve any problems or errors:
If you encounter any issues during or after installing a capacitor, it’s important to troubleshoot and resolve them promptly. Here are some steps you can take to troubleshoot and rectify common problems:
- Check connections: Inspect all connections to ensure they are properly secured and correctly wired.
- Test the capacitor: Use a multimeter to measure the capacitance and voltage of the capacitor. Compare the readings to the manufacturer’s specifications to determine if the capacitor is functioning correctly.
- Monitor temperature: Ensure adequate airflow around the capacitor and check for any potential obstructions. If the temperature is too high, make sure to address the issue to prevent overheating.
- Consult a professional: If the troubleshooting steps mentioned above don’t resolve the problem, it’s advisable to seek assistance from a qualified electrician or technician who can further diagnose and rectify any issues.
Tips for preventing future capacitor-related issues:
Taking preventive measures can go a long way in avoiding future capacitor-related problems. Here are some tips to help you prevent such issues:
- Regular maintenance: Schedule regular inspections and maintenance for your electrical system, including capacitors, to detect and address any potential issues early on.
- Proper installation: Ensure that capacitors are installed correctly, following the manufacturer’s guidelines and specifications.
- Avoiding overloading: Avoid exceeding the recommended electrical load for capacitors. Make sure to calculate the load accurately and choose the appropriate capacitor for your system.
- Monitoring temperature: Regularly check the temperature of the capacitor during operation and ensure that there is adequate airflow to prevent overheating.
Frequently Asked Questions
What Is The Right Way To Connect A Capacitor?
To connect a capacitor correctly: 1. Identify the positive and negative terminals. 2. Connect the positive terminal of the capacitor to the positive supply voltage source. 3. Connect the negative terminal of the capacitor to the desired circuit node. 4. Ensure a secure and reliable connection using appropriate terminals or soldering.
5. Take precaution and double-check for correct polarity to avoid damaging the capacitor or circuit.
Where Should You Put The Capacitor?
Place the capacitor near the source or load to minimize wire length, reduce interference, and improve power factor. Position it as close as possible to the device it is intended to support for optimum performance.
How Do You Charge A Capacitor Without A Resistor?
To charge a capacitor without a resistor, connect the capacitor directly to a power source. This allows the capacitor to charge rapidly, but it can be dangerous as it may cause damage to the capacitor or the power source. Exercise caution when attempting this.
Will A Capacitor Drain My Battery?
No, a capacitor will not drain your battery. It acts as a temporary storage device, providing power when needed but does not draw power from the battery.
Conclusion
Installing a capacitor can greatly improve the performance of your electrical system. By following the steps outlined in this guide, you can achieve a smoother and more efficient operation of your electronic devices. Remember to use caution and follow safety guidelines throughout the process.
With the right tools and a little bit of knowledge, you’ll be able to install your capacitor with ease. So, go ahead and give it a try – your electronics will thank you!