To install a cable box, connect the cables from the box to your TV and power source. Adjust the input settings on your TV to recognize the cable box.
Introduction (120 words): Installing a cable box is an essential step in setting up your home entertainment system. Whether you’re a movie buff, sports enthusiast, or binge-watcher, a cable box facilitates access to a wide range of channels and content. However, the process of setting up a cable box can seem daunting for beginners.
Fear not! In this guide, we will walk you through the simple and straightforward process of installing a cable box. By following a few easy steps, you’ll be able to enjoy your favorite shows and movies in no time. So, let’s dive right in and get your cable box up and running!
Understanding The Equipment
Types of cable boxes available in the market
When it comes to installing a cable box, it’s important to understand the different types available in the market. Here, we’ll take a closer look at the three main types of cable boxes:
- Standard Cable Box: This is the most basic type of cable box you’ll find. It allows you to receive and watch digital cable channels on your TV. While it doesn’t offer any advanced features, it is a cost-effective option for those who simply want access to basic cable programming.
- DVR Cable Box: The DVR, or Digital Video Recording, cable box takes things a step further. It not only allows you to watch digital cable channels but also gives you the ability to record your favorite shows and movies. With a DVR cable box, you can easily schedule recordings, pause live TV, and even rewind or fast-forward through recorded content. It’s a great option for those who want more control over their TV viewing experience.
- Smart Cable Box: If you’re looking to bring your TV into the digital age, a smart cable box is the way to go. This type of cable box not only provides access to digital cable channels but also offers additional features like internet connectivity, streaming apps, and on-demand content. With a smart cable box, you can stream your favorite shows and movies from popular platforms like Netflix, Hulu, and Amazon Prime, all from the comfort of your living room.
Key components of a cable box and their functions
To successfully install a cable box, it’s essential to be familiar with the key components and their functions. Let’s take a closer look:
| Component | Function |
|---|---|
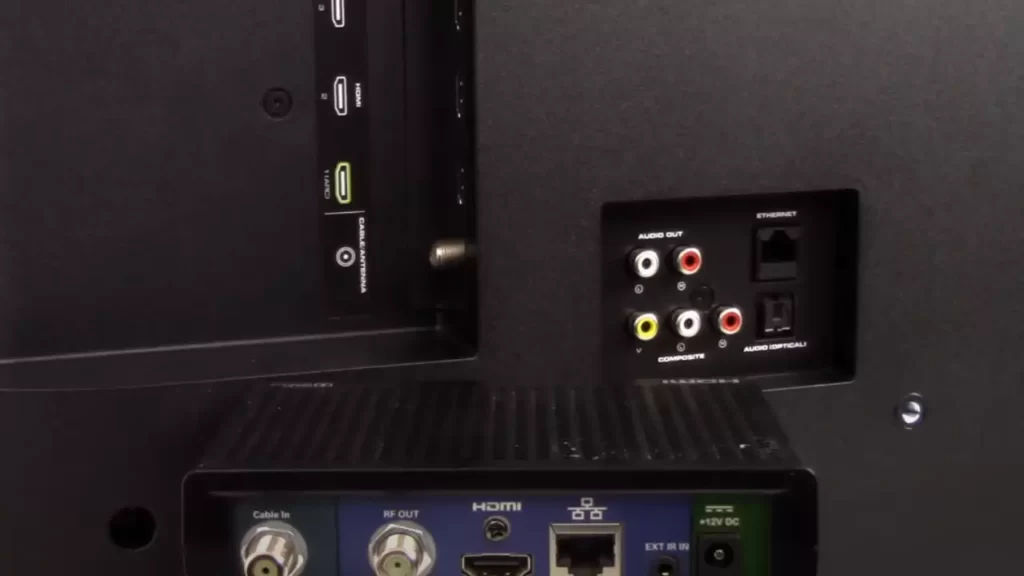
| Coaxial Cable | The coaxial cable is responsible for transmitting the cable signals from your provider to the cable box. It connects to the “Cable In” port on the back of the box. |
| HDMI or AV Cable | This cable connects the cable box to your TV and carries both audio and video signals. HDMI cables provide better quality, while AV cables are the older, red, yellow, and white cables. |
| Power Cord | The power cord supplies electricity to the cable box, allowing it to function properly. |
| Remote Control | The remote control allows you to navigate through channels, adjust volume, and control other functions of the cable box. |
| User Interface | The user interface, typically displayed on the TV screen, provides a user-friendly way to navigate channels, access menus, and customize settings. |
| Ethernet or Wi-Fi Connectivity | Some cable boxes offer Ethernet or Wi-Fi connectivity options, allowing you to connect the box to your home network for internet access and streaming capabilities. |
By understanding the key components and their functions, you can ensure a smooth installation process and make the most of your cable box’s features and capabilities.
Preparing For Installation
Before you start installing your cable box, it’s important to take some time to prepare for the process. Proper preparation will ensure a smooth and hassle-free installation experience. There are three key steps you need to follow: assessing the cable box placement location, checking cable signal strength, and gathering necessary tools and materials. Let’s dive into each of these steps in detail.
Assessing the cable box placement location
First and foremost, you need to determine the ideal location for your cable box. Keep in mind that accessibility, ventilation, and cable signal strength are crucial factors to consider when selecting the perfect spot. Here are a few tips to help you with this process:
- Look for a centralized location: Choose a spot that is easily accessible and allows you to connect your cable box to your TV and other devices without any inconvenience.
- Ensure proper ventilation: Your cable box generates heat while in use, so it’s important to place it in a well-ventilated area. Avoid hiding it in a closed cabinet or covering it with other objects.
- Avoid interference: Keep your cable box away from appliances and devices that can cause interference, such as microwaves, cordless phones, and speakers. This will help maintain the quality of your cable signal.
Checking cable signal strength
Once you have selected the placement location, it’s essential to check the cable signal strength for optimal performance. Here’s how you can do it:
| Steps to Check Cable Signal Strength |
|---|
| 1. Connect your cable box to your TV using the provided coaxial cable. |
| 2. Turn on the TV and cable box. |
| 3. Navigate to the signal strength menu on your cable box. This option is usually found in the settings or configuration section. |
| 4. Follow the on-screen instructions to check the cable signal strength. Aim for a signal strength of at least 75% for optimal viewing experience. |
Gathering necessary tools and materials
Before you start the installation process, ensure you have all the required tools and materials readily available. Here’s a checklist of items you’ll need:
- Coaxial cable: Ensure you have a high-quality coaxial cable of the appropriate length to connect your cable box to the TV.
- Remote control: Keep the remote control handy, as you’ll need it for programming and navigating through the cable box menu.
- Batteries: Make sure you have fresh batteries for your remote control.
- Screwdriver: A screwdriver may be needed to secure the cable box cables.
- Power outlet: Ensure there’s a nearby power outlet to connect your cable box.
By following these steps and gathering the necessary tools and materials, you will be well-prepared to install your cable box. Next, we will move on to the installation process itself, where we’ll guide you through the steps to connect and set up your cable box.
Installing The Cable Box
Setting up your cable box is an essential step in enjoying your favorite TV channels and shows. Whether you’re a novice or experienced, this guide will walk you through the process of installing the cable box with ease. In this section, we will cover the necessary steps from connecting the cable box to the TV to activating and setting it up.
Connecting the cable box to the TV
One of the first steps in installing a cable box is connecting it to your TV. There are two common methods for establishing this connection: using HDMI or coaxial cables.
Using HDMI or coaxial cables
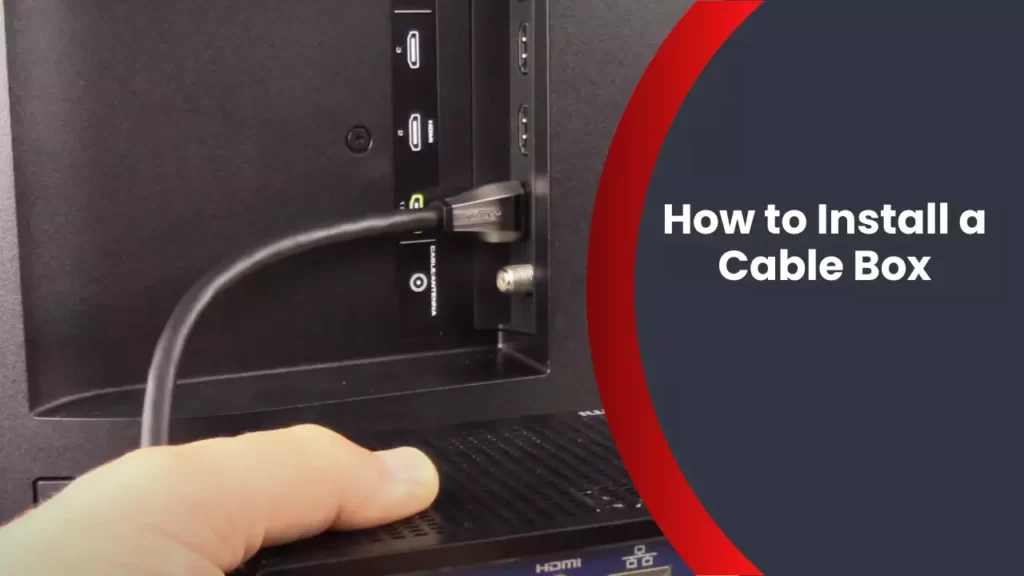
If your TV supports HDMI (High-Definition Multimedia Interface), it is recommended to use an HDMI cable for a high-quality digital connection. HDMI cables carry both audio and video signals, making it convenient and easy to set up. Simply plug one end of the HDMI cable into the HDMI port on the back of your cable box and the other end into the HDMI input on your TV.
If your TV does not have an HDMI port, you can use a coaxial cable. Coaxial cables are the traditional TV cables with a metal connector at each end. Connect one end of the coaxial cable to the “Cable Out” or “RF Out” port on your cable box and the other end to the cable input on your TV. Ensure that the connections are secure to avoid any signal loss.
Ensuring secure connections
It’s important to ensure that all the connections between the cable box and the TV are secure. Loose connections can result in poor picture or sound quality. Make sure the cables are plugged in firmly and do a visual check to ensure there are no bent or damaged pins on the cables or ports.
Connecting the cable box to the power source
After connecting your cable box to the TV, the next step is to provide power to the device. This involves using the provided power cord and plugging it into a power outlet.
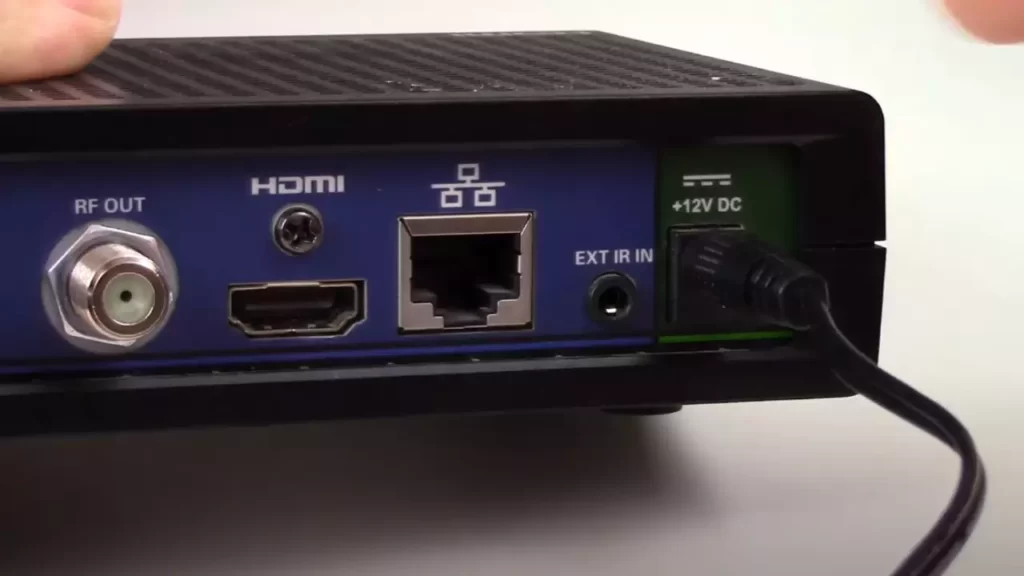
Using the provided power cord
Locate the power input on the cable box and plug one end of the provided power cord into it. Then, plug the other end of the power cord into a nearby power outlet. Make sure that the power outlet is easily accessible and not obstructed by furniture or other objects.
Plugging into a surge protector, if desired
For added protection against power surges, you may choose to plug your cable box into a surge protector. A surge protector helps safeguard your devices from sudden voltage spikes that can damage electronic components. Simply connect the power cord of the cable box to one of the available outlets on the surge protector.
Activating the cable box and setting it up
Once the cable box is connected and powered on, you will need to activate it and complete the setup process. This typically involves following the device-specific activation process provided by your cable service provider.
Following the device-specific activation process
Contact your cable service provider either by phone or online to initiate the activation process. They will guide you through the necessary steps such as providing account information and any activation codes that may be required. Stay connected to the internet during this process to ensure a smooth activation.
Once the cable box is activated, follow the on-screen prompts to set up language preferences, channel lineup, and any additional settings specific to your cable service provider. You may also need to perform a channel scan to ensure that all available channels are detected and properly programmed.
By following these steps, you can install your cable box with ease and start enjoying your favorite TV programs hassle-free.
Troubleshooting Common Issues
While installing a cable box, you may encounter certain common issues that can disrupt your viewing experience. By troubleshooting these problems, you can quickly resolve them and enjoy seamless cable TV. In this section, we will explore some frequent issues and provide practical solutions.
No Power or Signal Issues
If your cable box is not receiving power or displaying a signal, it can be frustrating. However, before calling your service provider, try the following steps:
- Make sure that the power cord is securely plugged into both the cable box and the power outlet.
- Check if the power outlet is functioning properly by connecting another device to it.
- Inspect the power cord for any damage or frayed wires. If found, replace it with a new one.
Ensuring Connections are Secure
Properly connecting your cable box is crucial for optimal performance. To ensure secure connections, follow these steps:
- Check that all cables are tightly connected to their respective ports on both the cable box and the TV.
- Verify if the coaxial cable is securely connected to the cable box’s “Cable In” or “RF In” port.
- Inspect the HDMI or AV cables to ensure they are securely plugged into the corresponding ports on the TV.
Checking Power Source and Cable Signal Strength
When troubleshooting issues with power source or cable signal strength, consider the following:
- Switch the cable box off and unplug it from the power source. Wait for a minute, then plug it back in and turn it on. This may reset the box and resolve power-related problems.
- Ensure that the coaxial cable connection between the cable box and the wall outlet is tight and operational.
- Consider checking the cable signal strength by accessing the cable box’s diagnostics or settings menu. This will help identify any signal-related issues.
Audio or Video Problems
If you’re experiencing audio or video problems with your cable box, try the following troubleshooting steps:
- Check the audio and video cables for any visible damage or loose connections. Replace or reconnect them if necessary.
- Verify that the TV’s volume is turned up and not muted.
- Try changing the audio and video settings on both the cable box and the TV to ensure compatibility.
Adjusting TV Settings
Occasionally, modifying TV settings can help resolve compatibility issues. Follow these steps:
- Access the TV’s settings menu and navigate to the input or source settings.
- Select the input/source corresponding to the cable box connection (HDMI, AV, etc.).
- Ensure the TV’s display settings are correctly adjusted for the best picture quality.
Trying Different Connection Cables
If all else fails, trying different connection cables might resolve the issue. Consider the following:
- Use alternate HDMI or AV cables to check if the existing ones are faulty.
- Try connecting the cable box to a different HDMI or AV port on your TV to rule out port-related problems.
- If available, attempt to use a different type of cable connection (e.g., HDMI instead of AV) to test compatibility.
By troubleshooting these common issues with your cable box installation, you can quickly identify and resolve any problems that may arise. Following these steps will ensure a seamless viewing experience with your new cable box.

Additional Tips And Considerations
When it comes to installing a cable box, there are a few additional tips and considerations that can further enhance your experience. From selecting the right cable package for your needs to optimizing the cable box performance, these steps will ensure you get the most out of your cable service. Let’s delve into these tips and considerations:
Selecting the right cable package for your needs
When installing a cable box, one of the crucial decisions you need to make is selecting the right cable package that suits your needs. With the plethora of options available, it can be overwhelming to choose the perfect package. Here are some points to consider:
- Consider the channels and programs you frequently watch. Compile a list of your must-have channels to ensure they are included in the package.
- Take note of any premium channels you might be interested in, such as HBO or Showtime. Check if these channels are available in the package or can be added on as an extra.
- Compare the cost of the packages and the value they offer. Look for discounts or promotional deals that might be available, as well as any additional perks like on-demand content or DVR capabilities.
- Consider the contract terms and cancellation policies. Make sure you are comfortable with the commitment before finalizing your choice.
Optimizing cable box performance
Once you have your cable box installed, optimizing its performance can significantly enhance your viewing experience. Here are some tips to optimize your cable box:
- Ensure your cable box is placed in a well-ventilated area to prevent overheating. Avoid stacking other electronic devices on top of it.
- Connect your cable box directly to the HDMI port of your television for the best picture quality.
- Regularly check for software updates for your cable box. Manufacturers often release updates to improve performance and add new features.
- Optimize your cable box settings by adjusting the display resolution and aspect ratio to match your television. This will ensure the best possible picture quality.
- Consider using an external hard drive for extra storage space if you frequently record shows or use DVR functionality.
Updating firmware and software
To ensure your cable box operates at its optimum level, it is essential to keep its firmware and software up to date. Firmware and software updates often include bug fixes, security enhancements, and performance improvements. Here are the steps to update your cable box firmware and software:
- Access the settings menu on your cable box using the provided remote control.
- Navigate to the “System” or “Software Update” section.
- Select the option to check for updates.
- If an update is available, follow the on-screen instructions to download and install it.
- Once the update is complete, restart your cable box to ensure the changes take effect.
Clearing cache and memory regularly
To maintain optimal performance, it is essential to clear the cache and memory of your cable box regularly. This helps eliminate any unnecessary data and ensures smooth operation. Here’s how you can clear the cache and memory:
- Access the settings menu on your cable box using the provided remote control.
- Navigate to the “Storage” or “Memory” section.
- Select the option to clear cache or clear memory.
- Follow the on-screen instructions to confirm the action.
- Once the cache and memory are cleared, you may need to restart your cable box for the changes to take effect.
By following these additional tips and considerations, you can ensure a seamless and optimized cable box installation experience. Whether it’s selecting the right package or taking steps to optimize performance, these actions will enhance your enjoyment of your cable service. Stay connected and enjoy your favorite shows!
Frequently Asked Questions
How Do I Connect My Cable Box To My Tv?
To connect your cable box to your TV, follow these steps: 1. Locate the HDMI or coaxial cable ports on both the cable box and TV. 2. Connect one end of the HDMI or coaxial cable to the output port on the cable box.
3. Connect the other end of the cable to the input port on your TV. 4. Turn on the TV and cable box. 5. Select the appropriate input source on your TV to display the cable channels.
How Do I Hook Up My Cable Box?
To hook up your cable box, connect the coaxial cable from your cable wall outlet to the “Cable In” or “RF In” port on the back of the cable box. Then, connect an HDMI or audio/video cable from the cable box to your TV.
Turn on the cable box and your TV, and follow the on-screen instructions to complete the setup.
Do I Need A Cable Box With A Smart Tv?
No, a smart TV does not require a cable box. It can access various streaming services and channels directly through the internet.
Can You Have Cable Tv Without A Cable Box?
Yes, you can have cable TV without a cable box. With the advancement in technology, cable TV providers now offer streaming services through their apps or websites. By subscribing to these services, you can access cable channels on your smart TV or other streaming devices without needing a cable box.
Conclusion
Installing a cable box can be a simple task if you follow the steps outlined in this blog post. By ensuring your equipment is compatible, connecting the necessary cables, and activating your service, you will be able to enjoy your favorite shows and movies in no time.
Remember to always refer to the manufacturer’s instructions and consult with your cable provider if you encounter any difficulties along the way. Happy cable box installation! Keywords: cable box installation, steps, compatible, cables, activating service, enjoy shows, movies, manufacturer’s instructions, cable provider, difficulties.