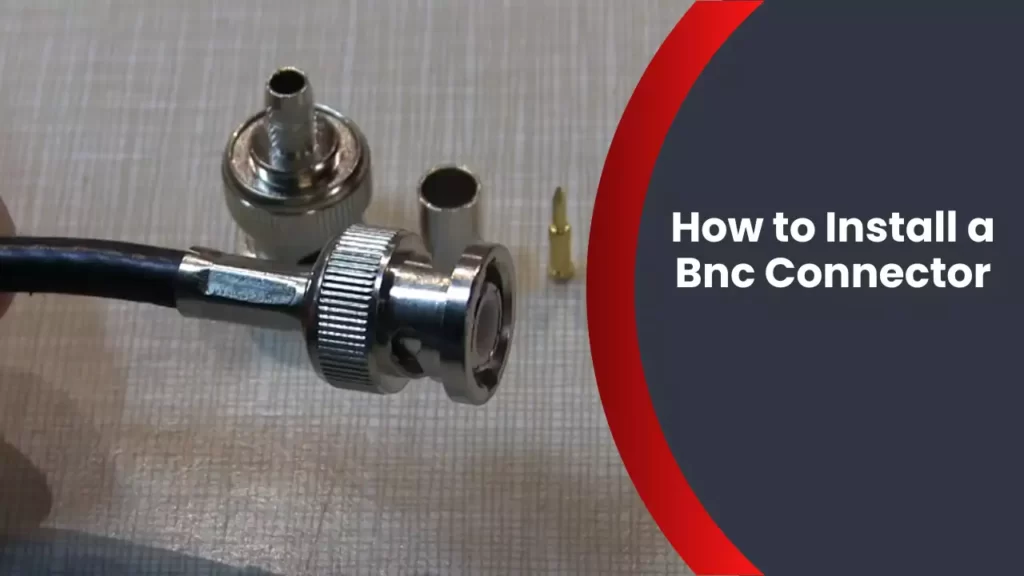
To install a BNC connector, strip the coaxial cable, insert it into the connector, and secure it with the connector’s nut. The process is quick and straightforward.
BNC connectors are widely used in various industries for their ability to provide reliable and secure connections for coaxial cables. Whether you’re setting up a CCTV system or working on an electronics project, knowing how to install a BNC connector is a useful skill.
By following a few simple steps, you can ensure a solid connection that will transmit signals efficiently. We will guide you through the process of installing a BNC connector, from stripping the coaxial cable to securing the connector in place. So let’s get started and learn how to install a BNC connector effectively and efficiently.
Gathering The Necessary Tools And Equipment
Installing a BNC (Bayonet Neill–Concelman) connector is a crucial step in establishing a secure and stable connection for various electronic devices. Whether you are setting up a CCTV system, connecting a radio frequency cable, or working on other audio/video applications, having the right tools and equipment is essential. In this section, we will guide you through the process of gathering the necessary tools and equipment for a smooth installation of a BNC connector.
Understanding the Purpose of a BNC Connector
Before you start gathering the tools and equipment, it’s important to understand the purpose of a BNC connector. A BNC connector is widely used in the telecommunications and electronics industry to provide a reliable and consistent connection between cables and devices. With its unique bayonet-style coupling mechanism, the BNC connector ensures quick and secure connections while minimizing signal loss or interference.
Identifying the Required Tools and Equipment
Now let’s move on to identifying the tools and equipment you will need to install a BNC connector. Ensuring you have the right tools will not only make the installation process easier but also help you achieve an optimal and long-lasting connection. Here is a list of the essential tools and equipment required:
| Tools | Equipment |
|---|---|
|
|
Ensuring Safety Precautions
Prioritizing safety is crucial when working with electronic devices and installations. Before starting any work on the BNC connector installation, make sure to follow these safety precautions:
- Turn off the power to the device or equipment you will be connecting.
- Wear protective gloves and safety glasses to prevent any injury.
- Ensure the working area is well-lit and free from any potential hazards.
- Double-check the specifications and compatibility of the tools, equipment, and connectors you are using to avoid any mishaps.
By taking these safety precautions, you can minimize the risk of accidents or damage during the installation process.
In conclusion, gathering the necessary tools and equipment is the first step towards successfully installing a BNC connector. Understanding the purpose of a BNC connector, identifying the required tools and equipment, and ensuring safety precautions will contribute to a smooth and efficient installation process. Now that you have gathered the right tools, you are ready to move on to the next step of installing the BNC connector.
Preparing The Cable For Installation
Before you can install a BNC connector onto your cable, it’s crucial to prepare the cable properly. This ensures a secure and reliable connection. In this section, we’ll walk you through the necessary steps to prepare your cable for installation. We’ll cover everything from choosing the right BNC connector for your cable type to measuring and cutting the cable and stripping the cable insulation. Let’s dive in!
Choosing the Right BNC Connector for the Cable Type
To ensure a proper fit and optimal performance, it’s essential to choose the right BNC connector based on your cable type. There are various types of BNC connectors, such as male and female connectors, as well as connectors designed for specific cable types like RG-59 and RG-6. Consider the following factors when selecting your BNC connector:
- Identify the cable type: Determine if you have RG-59, RG-6, or another type of coaxial cable.
- Match the connector type: Ensure that the connector matches the gender and thread size requirements of your equipment.
- Verify impedance compatibility: Check that the connector and cable have matching impedance ratings, typically 75 ohms for most video applications.
By choosing the right BNC connector for your cable type, you’ll set the stage for a successful installation and reliable signal transmission.
Measuring and Cutting the Cable
Once you have the appropriate BNC connector, the next step is to measure and cut the cable to the desired length. Follow these simple steps:
- Measure the required cable length: Using a measuring tape or ruler, determine the length of cable needed for your installation.
- Make a clean cut: Once you’ve measured the correct length, use sharp cable cutters or a cable stripping tool to make a clean and precise cut.
Remember to account for any additional length needed to allow for proper BNC connector attachment. Taking care in measuring and cutting the cable ensures a neat and professional-looking installation.
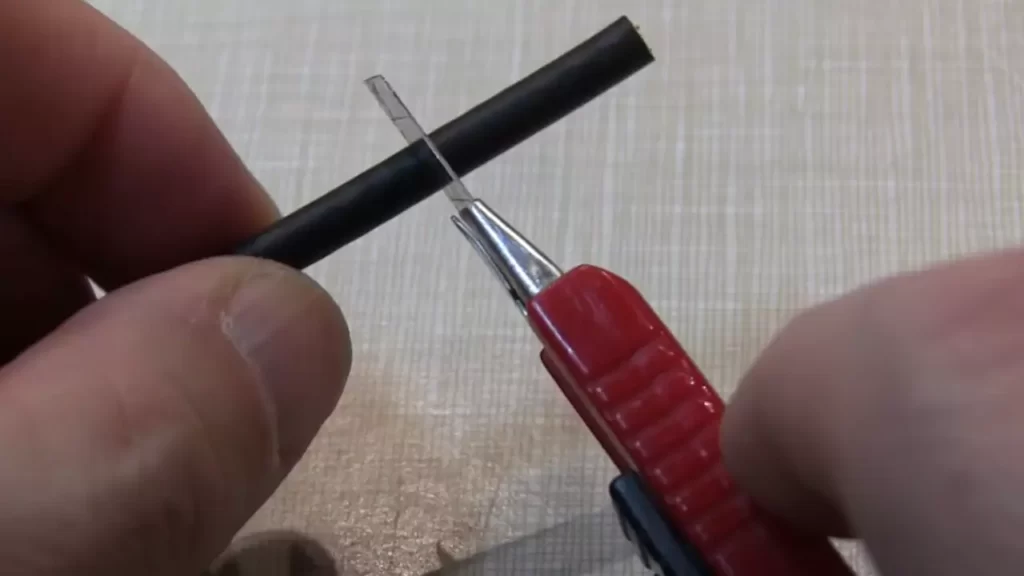
Stripping the Cable Insulation
Properly stripping the cable insulation is crucial for a secure connection and optimal signal transmission. Use caution and follow these steps:
- Mark the strip length: Measure and mark the strip length on the cable, typically around 3/8 inch (9.5mm) for RG-59 and 1/4 inch (6.4mm) for RG-6.
- Prepare the cable stripper: Adjust the cutting blades of your cable stripper according to the marked strip length.
- Strip away the insulation: Place the cable into the stripper with the marked point aligned with the cutting blades. Rotate the stripper around the cable several times to remove the insulation, taking care not to nick the conductors.
By correctly stripping the cable insulation, you ensure a clean and reliable connection between the cable and BNC connector.
Ensuring Proper Cable Preparation
Lastly, it’s vital to verify that your cable is correctly prepared before attaching the BNC connector. Inspect the cable for any damaged or frayed conductors, as these can affect signal quality. Additionally, ensure that the cable is clean and free from debris or moisture that could interfere with the connection. By taking the time to ensure proper cable preparation, you’ll set the stage for a successful BNC connector installation and optimal signal transmission.
And there you have it! By following these steps for preparing your cable, you’re well on your way to installing a BNC connector like a pro!
Installing The Bnc Connector
Installing the BNC Connector
When it comes to setting up a stable and reliable coaxial connection, a BNC connector is the go-to choice for many professionals. Whether you’re in the field of broadcasting, telecommunications, or security systems, knowing how to install a BNC connector is an essential skill. In this article, we’ll walk you through the process step by step, ensuring a secure and proper connection every time.
Preparing the Connector for Installation
Before you begin attaching the BNC connector to the cable, it’s important to properly prepare it. This involves stripping the cable’s outer insulation to expose the inner conductor. To do this, follow the steps:
- Measure the appropriate length on the cable where the connector will be installed.
- Using a cable stripper tool, strip off the outer insulation, being careful not to damage the inner conductor.
- Once the insulation is removed, check the exposed conductor for any frayed or damaged sections. Trim them if necessary.
Attaching the Connector to the Cable
Now that the cable is well-prepared, it’s time to attach the BNC connector. Here’s the procedure:
- Slide the BNC connector over the exposed conductor until it reaches the end of the cable.
- Ensure that the inner pin of the connector is properly aligned with the center conductor.
- If applicable, insert any necessary insulating sleeves that came with the connector, ensuring a snug fit.
Ensuring Proper Connection and Contact
To establish a solid signal transmission, it’s crucial to verify that the BNC connector is making proper contact with the cable. Follow these steps:
- Check that the connector’s center pin is securely making contact with the conductor.
- Inspect the connection between the connector’s outer metal shell and the cable’s shielding to ensure they are properly joined.
- Tug gently on the connector to confirm it’s firmly attached and won’t easily detach.
Using Crimping or Compression Tools
Depending on the type of BNC connector you have, you may need to utilize crimping or compression tools to secure the connection. Here’s a brief overview of each technique:
| Crimping | Compression |
|---|---|
| 1. Place the connector in a crimping tool. | 1. Slide the connector into a compression tool. |
| 2. Apply sufficient pressure to crimp the outer metal shell onto the cable. | 2. Compress the tool to securely fasten the connector to the cable. |
Verifying the Secure Connection
Before considering the installation complete, it’s crucial to double-check the connection’s security. Take the following steps:
- Visually inspect the BNC connector to ensure it’s completely closed and no parts are sticking out.
- Perform a signal test to verify that the connection is transmitting correctly.
- If any issues arise, recheck the installation steps and make necessary adjustments.
By meticulously following these steps, you can confidently install a BNC connector, ensuring a stable and reliable connection for your coaxial needs. Now you’re ready to move forward with your broadcasting, telecommunications, or security projects.

Testing And Troubleshooting
Once you have successfully installed a BNC connector, it’s crucial to conduct thorough testing and troubleshooting to ensure a proper connection and signal transmission. In this section, we will discuss some essential tests to perform and common installation issues to troubleshoot.
Conducting Continuity Tests
To check the integrity of the connection, conducting continuity tests is necessary. Here’s a step-by-step guide to help you conduct continuity tests for your BNC connectors:
- Disconnect any power sources or cables connected to the BNC connector.
- Using a digital multimeter, set it to the continuity test mode.
- Touch one multimeter probe to the center pin of the BNC connector and the other probe to the outer ring of the BNC connector.
- If the multimeter displays a reading of zero ohms or near zero ohms, it indicates that the connection is intact.
- If the multimeter displays an open circuit or a reading significantly higher than zero ohms, there might be a loose or faulty connection that needs to be fixed.
Checking for Proper Signal Transmission
Once you have verified continuity, it’s time to check for proper signal transmission. Here are a few steps to follow to ensure the signal is transmitting correctly through your BNC connector:
- Connect the BNC connector to the appropriate device, such as a security camera or monitor.
- Turn on the power to the devices and observe the signal output.
- If you are using a security camera, check the video feed on the monitor to ensure a clear and stable image.
- If you are using the BNC connector for audio transmission, use headphones or speakers to listen for clear audio output.
- If you notice any distortions, flickering, or lack of signal, double-check the connections and consider replacing the BNC connector if necessary.
Troubleshooting Common Installation Issues
Even with proper installation, issues may arise. Here are some common installation issues you may encounter and ways to troubleshoot them:
| Issue | Troubleshooting Steps |
|---|---|
| No signal or weak signal | 1. Check all cable connections and ensure they are securely fastened. 2. Make sure the devices are powered on and functioning properly. 3. Replace the BNC connector if necessary. |
| Interference or noise in the signal | 1. Check for any nearby sources of electromagnetic interference. 2. Use shielded cables to minimize interference. 3. Ensure the BNC connectors are properly grounded. |
| Inconsistent or distorted video/audio | 1. Check the cable quality and replace if necessary. 2. Verify the compatibility of the devices and replace any incompatible components. |
By following these steps for testing and troubleshooting, you can ensure a reliable and efficient BNC connector installation. Remember, thorough testing and prompt troubleshooting are vital for maintaining a seamless connection and optimal signal transmission.
Frequently Asked Questions
How To Install Bnc Twist On Connector?
To install a BNC twist-on connector, follow these steps: 1. Strip the coaxial cable’s outer jacket and expose the inner conductor. 2. Slide the BNC connector over the exposed conductor. 3. Twist the connector clockwise until it tightens securely onto the cable.
4. Check that the connector is properly installed by gently tugging on it. 5. Ensure a reliable connection by testing the signal.
How Do I Connect My Bnc To Cable?
To connect your BNC to a cable, simply insert the BNC connector into the corresponding port on the cable. Ensure a secure fit and tighten any screws if necessary. This will establish a reliable connection between the BNC and the cable for seamless data or signal transmission.
How Do You Install A Bnc Compression Connector On A Coaxial Cable?
To install a BNC compression connector on a coaxial cable, strip the cable to expose the inner conductor and insulating layer. Then, insert the cable into the connector until the inner conductor reaches the pin inside. Use a compression tool to compress the connector onto the cable, ensuring a secure connection.
How Do You Crimp A Bnc Connector?
To crimp a BNC connector, follow these steps: 1. Strip about a quarter-inch of the cable’s outer insulation. 2. Carefully expose the braided shield by folding it back over the cable. 3. Strip the inner insulation, leaving only the copper core exposed.
4. Insert the connector over the cable, ensuring the shield fits snugly inside the connector. 5. Use a crimping tool to crimp the connector onto the cable, securing it tightly. Remember, accurate crimping is crucial for a strong and reliable connection.
Conclusion
Installing a BNC connector may seem daunting at first, but with the right tools and guidance, it can be a straightforward process. By following the step-by-step instructions outlined in this guide, anyone can successfully install a BNC connector and ensure a secure and reliable connection.
Remember to double-check your work and enjoy the benefits of having a well-connected system. Happy installing!