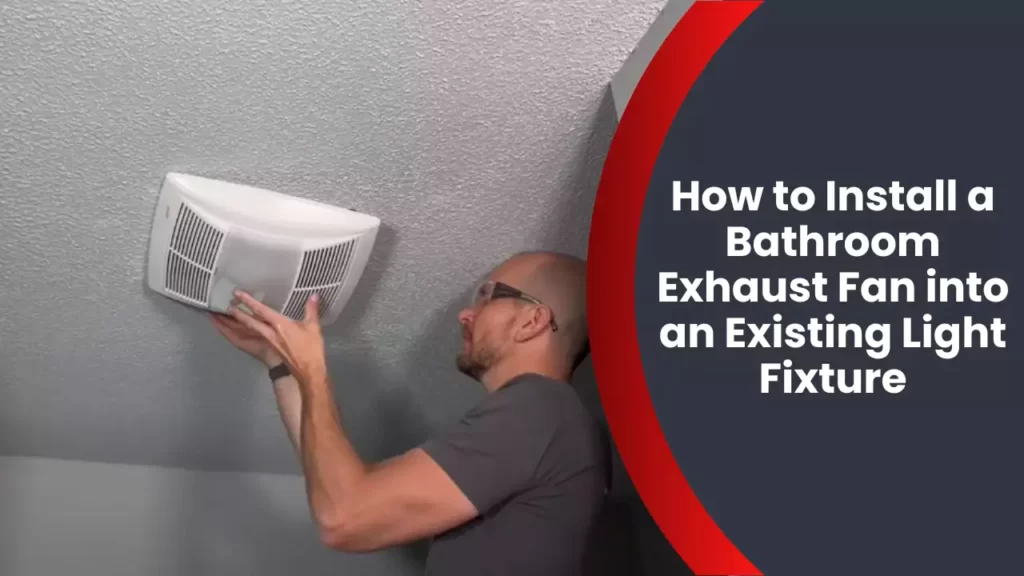
To install a bathroom exhaust fan into an existing light fixture, first turn off the power, remove the light fixture, attach the fan housing to a joist, connect the ductwork and wire the fan. Installing a bathroom exhaust fan into an existing light fixture is an important step in improving air circulation and removing excess moisture from your bathroom.
This can help prevent mold growth and maintain a fresh and odor-free environment. In this guide, we will walk you through the step-by-step process of installing a bathroom exhaust fan into an existing light fixture. Remember, safety is paramount, so make sure to turn off the power before starting any electrical work.
Let’s get started with the installation process.
Gathering The Necessary Tools And Materials
In order to successfully install a bathroom exhaust fan into an existing light fixture, it’s essential to have the right tools and materials at your disposal. This ensures a smooth installation process and a properly functioning fan that effectively removes excess moisture from your bathroom. Here are the tools and materials you’ll need:
Screwdriver
A screwdriver is a versatile tool that will be needed to remove screws and detach the existing light fixture from the ceiling. Make sure to choose a screwdriver that fits the type of screws in your fixture to avoid damaging them.
Pliers
Pliers are essential for gripping and manipulating wires during the installation process. They come in handy when you need to strip insulation from wires or attach wire nuts securely.
Wire nuts
Wire nuts are small plastic connectors that join electrical wires together. These connectors help ensure a safe and secure connection between the fan and the existing electrical wiring in your bathroom. Select wire nuts of appropriate size to accommodate the wires you’ll be working with.
Ventilation duct
A ventilation duct is a crucial component of the exhaust system. It directs the moist air from your bathroom to the outside, preventing mold and mildew buildup. Ensure the duct is of the appropriate size and length to effectively remove the moisture from your bathroom.
Exhaust fan kit
An exhaust fan kit includes the fan unit, grille, housing, and any necessary hardware. The kit should be specifically designed for bathroom use to ensure it can handle the moisture and humidity typically found in these areas. Make sure the kit is compatible with your existing wiring and light fixture setup.
Electrical tape
Electrical tape is used to insulate and protect the connections between wires. It helps prevent any accidental contact between live wires, reducing the risk of electrical hazards. Use high-quality electrical tape that is durable and provides sufficient insulation.
Wire stripper
A wire stripper is a specialized tool used to remove the insulation from electrical wires, exposing the conductive core. This tool ensures clean and precise wire stripping, facilitating proper connections between the fan and the existing wiring in your bathroom.
By gathering these necessary tools and materials, you’ll be well-prepared for the installation of a bathroom exhaust fan into an existing light fixture. Having everything at hand will make the process efficient and ensure that your bathroom remains well-ventilated and free from excess moisture.
Turning Off The Power And Removing The Existing Light Fixture Safely
When installing a bathroom exhaust fan into an existing light fixture, it is crucial to start with the first step: turning off the power to the bathroom from the circuit breaker. This will ensure your safety throughout the installation process. Here’s a step-by-step guide on how to shut off the power:
Shut off the power to the bathroom from the circuit breaker
- Locate the circuit breaker panel in your home. It is usually found in the basement, garage, or utility room.
- Identify the circuit breaker that controls the bathroom. Most circuit breakers are labeled, but if they are not, you can turn off each one to determine which controls the bathroom.
- Once you have identified the correct circuit breaker, firmly switch it to the “off” position.
- Double-check that the power is off by attempting to turn on the bathroom light switch. If the light does not turn on, you have successfully shut off the power.
Now that you have ensured the power is off, you can proceed with removing the existing light fixture safely.
Remove the light fixture cover and bulbs
- Using a screwdriver, carefully remove the screws that hold the light fixture cover in place.
- Once the screws are removed, gently pull the cover away from the ceiling or wall. Be cautious as there may be wires attached to the cover.
- Set the cover aside and remove the bulbs from the light fixture. Place them in a safe location to avoid accidental breakage.
Disconnect the wires from the light fixture
- With the cover and bulbs removed, you will now see the wires connected to the light fixture.
- Before proceeding, it is essential to understand the wiring connections. If you are unsure, consult a professional electrician.
- Using wire strippers, carefully remove the insulation from the wires, exposing the bare metal.
- Loosen the wire nuts that secure the wires together, and untwist them to separate the connections.
- Once the wires are disconnected, carefully tuck them back into the electrical box to prevent accidental contact.
Now that you have successfully turned off the power and removed the existing light fixture, you are ready to proceed with installing the bathroom exhaust fan. Stay tuned for our next blog post on how to install the fan into the existing wiring!
Preparing The Exhaust Fan For Installation
Assembling the exhaust fan kit according to the manufacturer’s instructions
When it comes to installing a bathroom exhaust fan into an existing light fixture, preparation is key. The first step in preparing the exhaust fan for installation is assembling the fan kit according to the manufacturer’s instructions. This ensures that all the necessary components are in order and ready to be installed. Follow these simple steps to assemble the exhaust fan kit:
- Start by carefully unpacking the contents of the fan kit.
- Read the manufacturer’s instructions thoroughly to familiarize yourself with the assembly process.
- Identify the main components, such as the fan housing, fan motor, fan blades, and any accompanying hardware.
- Assemble the fan housing by following the provided diagrams or step-by-step instructions. Double-check that all the connections are secure.
- Attach the fan motor to the housing, ensuring it is firmly attached and aligned correctly.
- Insert and secure the fan blades onto the motor shaft according to the instructions provided.
- Lastly, verify that all the electrical connections are secure and properly insulated.
By carefully assembling the exhaust fan kit according to the manufacturer’s instructions, you’ll ensure that the fan operates efficiently and effectively in your bathroom.
Making necessary adjustments to fit the fan into the existing light fixture area
Once you have the exhaust fan kit assembled, the next step in preparing for installation is making any necessary adjustments to fit the fan into the existing light fixture area. This may require some minor modifications to the existing wiring, ventilation ducts, or ceiling structure. Follow these steps to ensure a proper fit:
- Turn off the power to the light fixture at the circuit breaker before proceeding.
- Remove the existing light fixture cover and disconnect any electrical connections.
- Assess the dimensions of the exhaust fan and compare them to the available space in the ceiling. Make note of any obstructions or obstacles that may need to be addressed.
- If necessary, enlarge the existing opening to accommodate the fan using a saw or suitable cutting tool. Take caution to avoid any electrical or structural components.
- Adjust the electrical wiring if needed to align with the fan’s electrical connections. Use wire nuts or other appropriate connectors to ensure secure connections.
- Secure the fan housing to the ceiling using the provided mounting brackets or screws. Ensure that it is level and securely fastened.
- Reconnect the electrical wires, making sure the color-coded wires are properly matched.
- Test the fan by turning on the power and checking for proper operation.
By making necessary adjustments to fit the exhaust fan into the existing light fixture area, you’ll ensure proper functionality and ventilation in your bathroom. With these steps, you’re now ready to move on to the next phase of the installation process.
Wiring The Exhaust Fan Into The Existing Light Fixture
Connecting the Exhaust Fan’s Wires to the Existing Electrical Wires
Now that you have identified the correct wires and have your tools ready, it’s time to connect the exhaust fan to the existing electrical wires. Follow these steps for a successful installation:
- Begin by stripping the insulation off the ends of the wires. Using wire strippers, carefully remove approximately 1/2 inch of insulation from both the exhaust fan wires and the existing electrical wires.
- Next, match the colors of the wires together. Typically, black wires are hot, white wires are neutral, and green or bare copper wires are grounding wires. Take the black wire from the exhaust fan and match it with the black wire from the existing electrical wires. Repeat this process for the white and green/bare copper wires.
- After matching the wires, twist them together in a clockwise direction. This motion helps ensure a secure connection.
- Once the wires are twisted together, it’s crucial to cover the exposed connections with wire nuts. These nuts are specifically designed to protect the connections and prevent any accidental electrical shocks. Simply place the wire nut over the twisted wires and twist it clockwise until it feels snug. Make sure the wires are securely fastened inside the wire nut.
- After securing the connections with wire nuts, it’s a good practice to wrap electrical tape around the wire nuts. This provides an extra layer of insulation and keeps the connections more secure. Wrap the tape tightly around the wire nuts, covering the exposed area where the wires and wire nuts meet.
Testing the Connections to Ensure They Are Secure and Functioning Properly
Once all the connections are made and secured, it’s important to test them to ensure they are functioning properly. Follow these steps to perform a basic test:
- Turn on the power to the circuit at the breaker box. Make sure the light switch associated with the exhaust fan is in the “off” position.
- Turn on the bathroom’s light switch. The existing light fixture should turn on without any issues.
- If the light is functioning correctly, proceed to test the exhaust fan. If your bathroom does not have a separate switch for the exhaust fan, it should turn on automatically when you switch the light on.
- Listen for the sound of the exhaust fan running and feel for any air movement around the vent. If both are present, it indicates the exhaust fan is working properly.
- If there are any issues with the connections or the exhaust fan doesn’t function as expected, it’s crucial to turn off the power at the breaker box and revisit the connections. Check for any loose wires or improperly secured wire nuts. Make the necessary adjustments and test again until everything is working correctly.
By properly connecting the exhaust fan’s wires to the existing electrical wires and testing the connections, you can ensure a safe and functional installation. Remember to follow all safety precautions and consult a professional electrician if you are unsure about any step in the process.
Mounting The Exhaust Fan And Ventilation Ducts
Once you have removed the existing light fixture and prepared the area for installation, it’s time to mount the bathroom exhaust fan and position the ventilation ducts. This step is crucial in ensuring proper air flow and efficient removal of excess moisture from your bathroom. We will guide you through each subheading to help you complete this task successfully.
Attaching the exhaust fan securely to the ceiling or wall
When it comes to attaching the exhaust fan to the ceiling or wall, it is important to ensure a secure and stable installation. Follow these steps to achieve a robust mounting:
- Before attaching the fan, turn off the power source to the existing light fixture at the circuit breaker to ensure safety.
- Carefully remove the cover plate of the exhaust fan and locate the mounting brackets.
- Align the brackets with the holes provided in the ceiling joists or wall studs. Use screws or other appropriate fasteners to secure the brackets in place.
- Gently lift the fan and position it onto the mounting brackets. Ensure it is level and centered within the designated area.
- Tighten the screws or fasteners to securely hold the fan in place.
- Reattach the cover plate and ensure it is firmly secured to the fan housing.
- Turn on the power source to test the fan and ensure it functions properly.
Positioning the ventilation ducts to direct air flow outside
To effectively direct the air flow outside, proper positioning of the ventilation ducts is crucial. Follow these steps to ensure optimal ventilation:
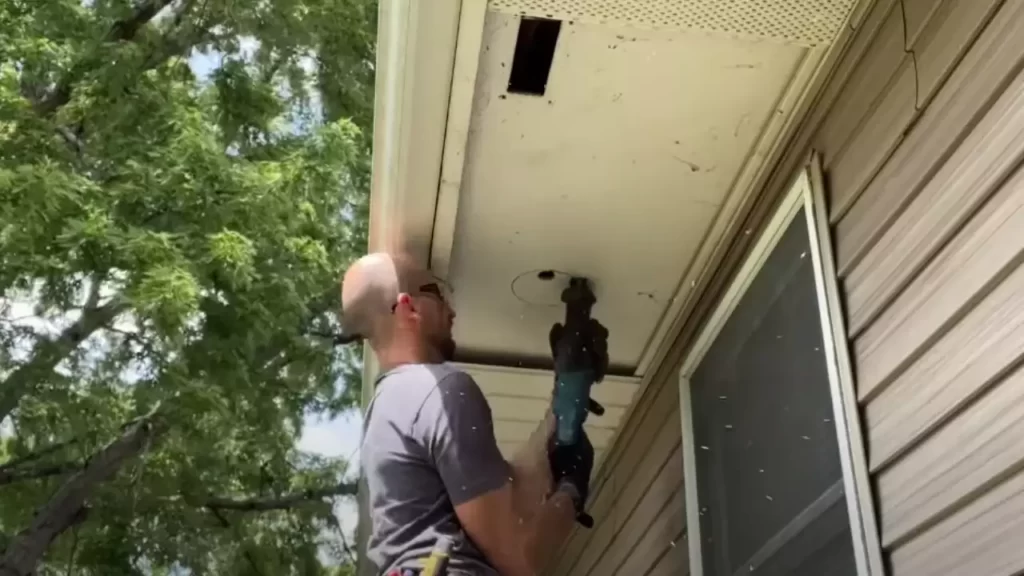
- Determine the ideal location to install the ventilation ducts. The ducts should lead directly to the exterior of your home.
- Measure and mark the desired path for the ducts, considering obstacles such as pipes and joists.
- Use a suitable saw or cutter to create openings in the ceiling or walls for the ducts.
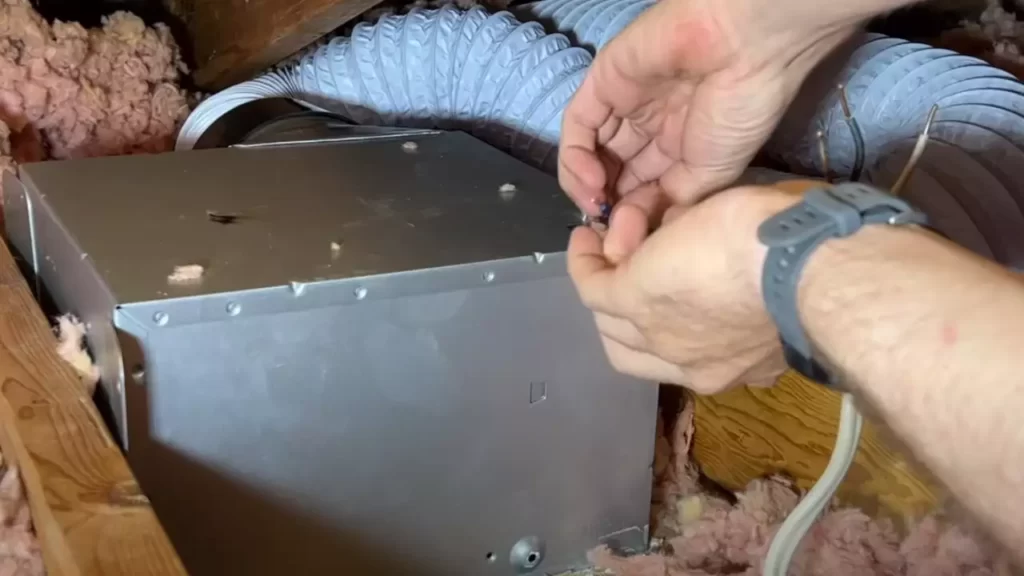
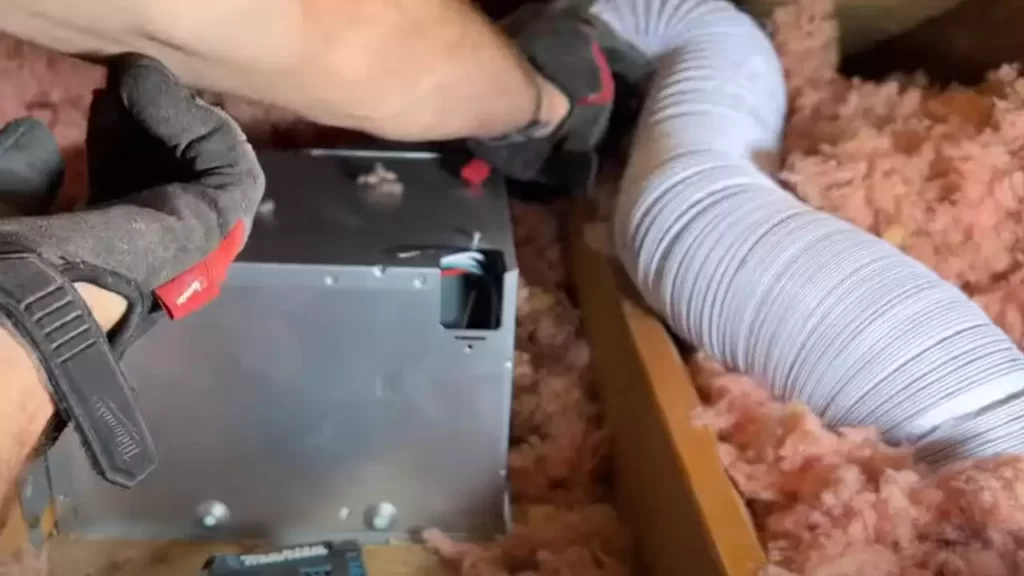
- Connect the ventilation ducts to the outlet of the exhaust fan. Ensure a tight and secure connection to prevent air leakage.
- Extend the ducts through the designated path, making sure they are aligned correctly.
- Ensure that the ducts are sloped slightly downward towards the exterior vent to facilitate proper drainage of condensation.
Securing the ducts in place to prevent leaks or loose connections
Securing the ventilation ducts is essential to prevent leaks and maintain the efficiency of your bathroom exhaust fan. Follow these steps to achieve a secure installation:
- Inspect the connections between the ventilation ducts and the exhaust fan for any signs of gaps or loose fittings.
- Use foil tape or duct mastic to seal any connections that appear loose or prone to air leakage.
- Secure the ducts to the ceiling or walls using appropriate hangers or clamps. Ensure they are tightly fastened to prevent movement or dislodging.
- Inspect the ducts for any bends or obstructions that may hinder proper air flow. Adjust the ducts as necessary to ensure a straight and clear path.
By following these steps, you can successfully mount your bathroom exhaust fan and position the ventilation ducts to create an efficient and effective ventilation system for your bathroom.
Reconnecting The Power And Testing The Exhaust Fan
In the final steps of installing a bathroom exhaust fan into an existing light fixture, you’ll need to reconnect the power and test that the exhaust fan is working correctly. Follow the steps below to ensure a smooth and successful installation process.
Restoring power to the bathroom from the circuit breaker
Before you can test the newly installed exhaust fan, you’ll first need to restore power to the bathroom from the circuit breaker. Locate the circuit breaker panel in your home and identify the circuit that supplies power to the bathroom area. Flip the corresponding circuit breaker switch to its “on” position.
If you’re unsure which circuit breaker controls the bathroom, you can identify it by testing the lights and outlets in the room. Simply turn off a circuit breaker, then check if the lights and outlets in the bathroom are no longer working. Keep repeating this process until you find the correct circuit breaker.
Once you’ve restored power to the bathroom, you can move on to testing the exhaust fan.
Testing the exhaust fan to ensure it is working correctly
Now that the power is restored, it’s time to test the exhaust fan and make sure it’s functioning as expected. Turn on the bathroom light switch, and the exhaust fan should also start running simultaneously.
Listen for the sound of the fan motor and check if the fan blades are spinning properly. You can also feel for any airflow coming from the fan vent. Ensure that the fan is effectively removing moisture and odors from the bathroom.
If the exhaust fan is not functioning or experiencing any issues, you may need to troubleshoot the problem and make any necessary adjustments or repairs.
Making any necessary adjustments or repairs
If you encounter any problems during the testing phase, it’s essential to address them promptly. Here are some common issues and their possible solutions:
- If the exhaust fan is not turning on: check the wiring connections to make sure they are secure and correct. Ensure that all wire nuts are tightly fastened. If the issue persists, consult a qualified electrician.
- If the fan motor is noisy or vibrating excessively: check if the fan blades are properly balanced and tightened. Ensure that the fan is securely mounted to the ceiling and that there are no obstructions blocking the blades.
- If there is limited airflow from the exhaust fan: inspect the vent duct for any blockages or restrictions. Clean or remove any debris that may be obstructing the airflow. Additionally, ensure that the ductwork is properly sized for the fan and is installed without any kinks or bends that could restrict airflow.
By troubleshooting and making the necessary adjustments or repairs, you can ensure that your newly installed bathroom exhaust fan will operate efficiently and effectively.
Cleaning And Removing Dust Buildup
Cleaning and removing dust buildup from your bathroom exhaust fan is an essential maintenance task that ensures proper functioning and optimal air ventilation in your bathroom. Over time, dust, dirt, and other particles can accumulate on the fan blades and cover, impeding airflow and reducing the fan’s effectiveness. In this section, we will guide you through the necessary steps to clean and remove dust buildup from your bathroom exhaust fan.
Switching off power to the fan before cleaning
Before you start cleaning your bathroom exhaust fan, it is crucial to prioritize safety and switch off the power supply to the fan. This step will prevent any accidental injuries and ensure a secure environment to conduct your cleaning. Locate the breaker or switch that controls the power supply to the fan and turn it off. Always remember to put safety first!
Removing the fan cover and gently cleaning with a brush or vacuum
Once you have safely disabled the power supply to the fan, you can proceed to remove the fan cover. Most bathroom exhaust fans feature easily removable covers that can be carefully taken off without much effort. Detach the cover by either unscrewing it or gently prying it away from the fan housing. Take note of any screws or clips that may be holding the cover in place.
After removing the fan cover, you will likely notice a layer of dust and debris accumulated on its surface. To clean the cover, you have two effective options: you can either use a brush or a vacuum cleaner. If you prefer using a brush, ensure it has soft bristles to prevent any damage to the cover. In gentle sweeping motions, brush off the dust and dirt from both sides of the cover. If you opt for a vacuum cleaner, attach a soft brush attachment and carefully vacuum away the dust. Be thorough in your cleaning to remove all visible particles.
Ensuring the fan blades are free from any debris
Cleaning the fan blades is equally crucial to maintain optimal performance of your bathroom exhaust fan. With the cover already removed, inspect the blades for any dirt, dust, or debris that might have accumulated over time. If you notice any significant buildup, it’s time to get rid of it.
Using a brush or vacuum cleaner, gently remove any loose debris from the fan blades. Take extra care not to bend or damage the blades during the cleaning process. Use a damp cloth or sponge to wipe down the blades, ensuring optimal cleanliness. Ensure that the fan blades are completely dry before reattaching the cover.
Regularly cleaning and removing dust buildup from your bathroom exhaust fan will not only enhance its efficiency but also improve the air quality in your bathroom. By following these simple steps and making it a habit to clean your fan regularly, you can maintain its functionality and extend its lifespan. So, allocate some time to this maintenance task and enjoy a well-ventilated bathroom free from dust and allergens.
Regular Inspections And Maintenance
Regular inspections and maintenance are crucial to ensure the optimal performance and longevity of your bathroom exhaust fan. By regularly checking for any signs of damage or wear, lubricating fan parts if necessary, and testing the fan’s effectiveness and performance, you can keep your bathroom well ventilated and free from excess moisture. Below, we will discuss each of these important tasks in more detail.
Checking for any signs of damage or wear
To maintain the functionality of your bathroom exhaust fan, it’s important to periodically inspect it for any signs of damage or wear. By doing so, you can identify and address potential issues before they become major problems. Here are a few key things to look out for:
– Check the fan blades for any cracks or deformities. If there is any visible damage, it may affect the fan’s ability to properly ventilate the bathroom.
– Inspect the motor housing for any signs of rust or corrosion. This can occur due to moisture exposure and may impact the fan’s overall performance.
– Ensure that the fan grille is securely in place and free from any damage. If the grille is loose or broken, it may not effectively direct airflow and could allow debris to enter the fan.
Lubricating fan parts if necessary
Proper lubrication of the fan’s moving parts is essential for maintaining smooth and efficient operation. Over time, the fan motor and bearings may require lubrication to reduce friction and prevent excessive wear. Here are some steps to follow when lubrication is needed:
– Refer to the manufacturer’s guidelines to identify the specific parts that require lubrication and the type of lubricant to use. Different fan models may have different requirements.
– Turn off the power supply to the fan before attempting any maintenance work. This ensures your safety and prevents any accidental damage to the fan or yourself.
– Apply a small amount of lubricant to the designated areas according to the manufacturer’s instructions. Be careful not to over-lubricate, as this can lead to excessive oil buildup.
Testing the fan’s effectiveness and performance
Regularly testing the effectiveness and performance of your bathroom exhaust fan is vital to ensure that it is adequately ventilating the space. Here’s how you can assess its performance:
– Turn on the fan and observe the airflow. Is it strong enough to effectively remove steam and odors from the bathroom? If not, this may indicate a problem with the fan’s motor or ventilation ducts.
– Use a piece of tissue paper or a smoke test to check if the fan is pulling air effectively. Hold the paper or smoke near the fan grille and observe if it is being drawn towards the grille. If the paper or smoke is not being drawn in, it may be an indication of an airflow obstruction or a malfunctioning fan.
– Listen for any unusual noises coming from the fan while it is running. A properly functioning fan should operate quietly without any excessive noise or vibrations.
By regularly inspecting your bathroom exhaust fan for damage or wear, lubricating the necessary parts, and testing its effectiveness and performance, you can ensure that your bathroom remains well-ventilated and free from excessive moisture. This simple maintenance routine will help keep your bathroom clean, fresh, and comfortable for years to come.
Frequently Asked Questions
Can You Wire A Bathroom Fan To An Existing Light Switch?
Yes, you can wire a bathroom fan to an existing light switch. It is a common practice and can be done by connecting the fan’s wiring to the switch’s wiring. However, it is recommended to consult a professional electrician for safety and to ensure proper installation.
Does A Bathroom Exhaust Fan Need To Be On Its Own Switch?
No, a bathroom exhaust fan does not need to be on its own switch. It can be connected to the same switch as the bathroom lights or on a separate switch for independent control.
Is There A Bathroom Fan That Doesn’T Vent Outside?
Yes, there are bathroom fans available that don’t require external venting. These fans are called recirculating or ductless fans, and they filter and purify the air before recirculating it back into the room. They are ideal for bathrooms without access to an external vent.
What Kind Of Light Switch Do I Need For A Bathroom Light Fan?
For a bathroom light fan, you need a combination switch or a dual switch. These switches allow you to control both the light and fan separately. Make sure to check the electrical specifications to ensure compatibility and consult an electrician if necessary.
Conclusion
Installing a bathroom exhaust fan into an existing light fixture is a practical and efficient way to improve ventilation in your bathroom. With a few simple steps, you can ensure a healthier and more comfortable environment. By following this guide, you can easily upgrade your bathroom and enjoy the benefits of proper air circulation.
Take the initiative to make this improvement and reap the rewards of a fresher, moisture-free bathroom.