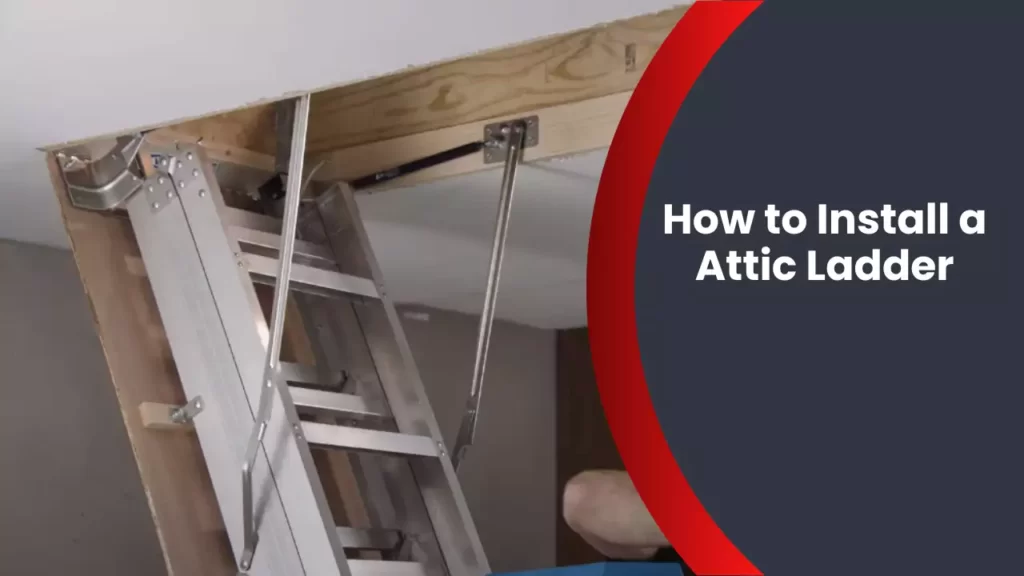
To install an attic ladder, start by measuring and marking the opening in your ceiling. Then, cut out the opening and assemble the ladder according to the manufacturer’s instructions.
Assessing The Attic Space
Before installing an attic ladder, it’s crucial to assess the available space and evaluate the structural integrity of your attic. Proper assessment will help ensure a safe and efficient installation process, allowing you to make the most of your attic space. In this section, we will discuss two important aspects to consider: measuring the available space and evaluating structural integrity.
Measuring the Available Space
In order to install an attic ladder, you need to determine the size of the ladder that will fit within your attic opening. This involves measuring the distance between the floor and the ceiling of your attic. Follow these steps to accurately measure the available space:
- Clear the area around the attic entrance by removing any obstructions such as furniture or storage items.
- Take a tape measure and measure the floor-to-ceiling distance at the center of the attic entrance. Make sure to measure from the highest point of the floor to the bottom of the ceiling joists.
- Record the measurements carefully, ensuring accuracy.
By taking precise measurements, you will be able to select an attic ladder that fits perfectly in your attic space, allowing for easy access and safe usage.
Evaluating Structural Integrity
An important aspect of installing an attic ladder is ensuring that your attic’s structure can support the added weight and movement. Before proceeding with the installation, assess the structural integrity of your attic using the following guidelines:
- Examine the attic floor to detect any signs of damage or weakness, such as sagging or cracks. If you notice any issues, it is advisable to have a professional inspect and repair them before proceeding.
- Check the ceiling joists and rafters to ensure they are solid and adequately support the attic’s weight. Look for signs of rot, insect infestations, or any other structural issues that may compromise the integrity of the attic.
Remember, a structurally sound attic is essential for the safe installation and use of an attic ladder. If you have any doubts about your attic’s structural integrity, consult with a professional before proceeding with the installation.
By thoroughly assessing the available space and evaluating the structural integrity of your attic, you can proceed confidently with the installation of your attic ladder. Taking these precautions will not only ensure a safe and secure ladder installation, but also help maximize the functionality of your attic space.
Choosing The Right Attic Ladder
When it comes to installing an attic ladder, choosing the right one is crucial. The attic ladder you choose should not only be safe and durable but also suitable for your specific needs. Understanding weight capacity requirements and considering different types of ladders are two important factors to consider when choosing the right attic ladder.
Understanding weight capacity requirements
Before selecting an attic ladder, it is essential to understand the weight capacity requirements. Each ladder has a maximum weight limit that it can support. Exceeding this weight limit can not only compromise your safety but also lead to structural damage to your attic. To determine the weight capacity you require, consider not only your own weight but also the weight of any items you may be carrying up and down the ladder.
Considering different types of ladders
There are various types of attic ladders available in the market, each offering unique features and benefits. The right type of ladder for you will depend on factors such as the size and layout of your attic, as well as your personal preferences. Here are some common types of attic ladders to consider:
- Folding attic ladder: This is the most common type of ladder and is designed to fold and unfold easily. It is a popular choice due to its simplicity, ease of installation, and affordability. Folding attic ladders are suitable for attics with limited space.
- Telescoping attic ladder: Unlike folding ladders, telescoping ladders slide out from a compact position to a full length. Their unique design makes them ideal for attics with restricted access or those with limited overhead space.
- Scissor attic ladder: Scissor attic ladders are known for their stability and sturdiness. They feature a folding design similar to folding ladders but utilize scissor-like mechanisms for added strength and support.
- Electric attic ladder: If convenience is a top priority for you, an electric attic ladder may be a suitable option. These ladders operate with the help of an electric motor, making them effortless to open and close. However, they are typically more expensive than other types.
By considering the weight capacity requirements and exploring different types of attic ladders, you can make an informed decision that suits your needs and ensures both functionality and safety. It is always recommended to consult a professional or follow manufacturer guidelines for installation to avoid any mishaps or accidents.
Gathering Necessary Tools And Materials
Creating a checklist
Before installing an attic ladder, it is important to gather all the necessary tools and materials to ensure a smooth and efficient installation process. By creating a checklist, you can stay organized and avoid any last-minute trips to the hardware store. Here is a simple checklist to help you get started:
- Safety equipment: Protective gloves, goggles, and a dust mask are essential to ensure your safety during the installation process.
- Measuring tools: A measuring tape will come in handy when determining the dimensions of your attic opening and the ladder length required.
- Power tools: Depending on the type of ladder you choose, you may need a drill, a screwdriver, and a jigsaw to complete the installation.
- Attic ladder kit: Make sure you have the complete ladder kit, including the ladder itself, hinges, springs, and any other hardware required for installation.
- Fasteners: You will need screws or other suitable fasteners to secure the ladder to the attic opening and the surrounding framing.
- Lumber or plywood: If your attic opening needs reinforcement, you may require additional lumber or plywood to create a sturdy mounting surface.
- Pencil and level: These basic tools will help you mark the cutting lines and ensure that your ladder installation is level.
- Flashlight: A flashlight or headlamp will be invaluable when working in the dimly lit attic space.
- Assistance: Depending on the size and weight of the ladder, you may need an extra pair of hands to help you lift and position it during installation.
Acquiring the required items
Now that you have a checklist of the tools and materials you need, it’s time to gather them all before starting the installation process. Here are some tips to help you acquire the required items:
- Check your existing tools: Before making any purchases, go through your toolbox to see if you already have some of the required tools. This can help you save money and reduce waste.
- Visit a local hardware store: Head to your nearest hardware or home improvement store to acquire any missing tools or materials. The staff can also provide guidance and recommendations based on your specific needs.
- Shop online: If you prefer the convenience of online shopping, many reputable websites offer a wide range of tools and materials with detailed product descriptions and customer reviews.
- Compare prices: To ensure you get the best value for your money, compare prices between different stores or online platforms. Don’t forget to consider shipping costs if buying online.
- Read product specifications: When purchasing the attic ladder kit and other materials, carefully read the product specifications to ensure they are compatible with your attic opening and the dimensions you measured.
Having gathered all the necessary tools and materials, you are now ready to move on to the next step of the installation process. Stay tuned for our next blog post, where we will guide you through the steps of preparing the attic and cutting the opening for your new ladder.
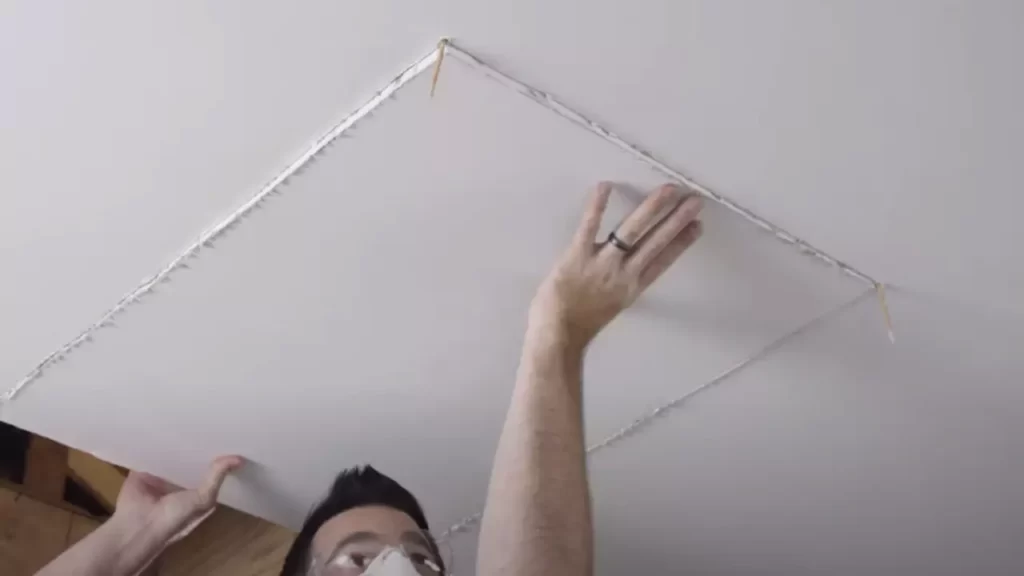
Step 1: Preparing The Attic Opening
Before you can install a new attic ladder, it’s essential to prepare the attic opening properly. This step ensures a smooth installation process and helps create a safe and accessible entry point to your attic. To get started, follow the two sub-steps below:
Clearing Obstructions and Debris
The first task is to clear any obstructions and debris from the attic opening. This step is crucial for safety and to allow the ladder to operate smoothly. Here’s what you need to do:
- Remove any loose objects or debris that may be blocking the opening. This includes boxes, old insulation, or any other items that could impede the ladder installation.
- Inspect the surrounding area for any structural elements or wires that may obstruct the ladder’s operation. Ensure there are no electrical wires or ductwork in the way, as these may need to be relocated before proceeding.
Creating a Safe and Accessible Entry Point
Once the attic opening is clear of obstructions and debris, it’s time to create a safe and accessible entry point. Follow these steps:
- Measure the opening’s dimensions to determine the right size ladder for your attic. Ensure you have enough clearance for the ladder to extend fully, and make note of any limitations in height or width.
- Consider installing additional insulation or weatherstripping around the edges of the opening to improve energy efficiency and prevent air leakage.
- Inspect the attic floor around the opening for any signs of damage or weakness. Reinforce or repair the area as needed to provide a stable base for the ladder.
- Install handrails or grab bars near the ladder opening for added safety and support.
By clearing obstructions and debris and creating a safe and accessible entry point, you are well on your way to successfully installing your new attic ladder. In the next step, we’ll discuss the process of selecting the right ladder and preparing it for installation.
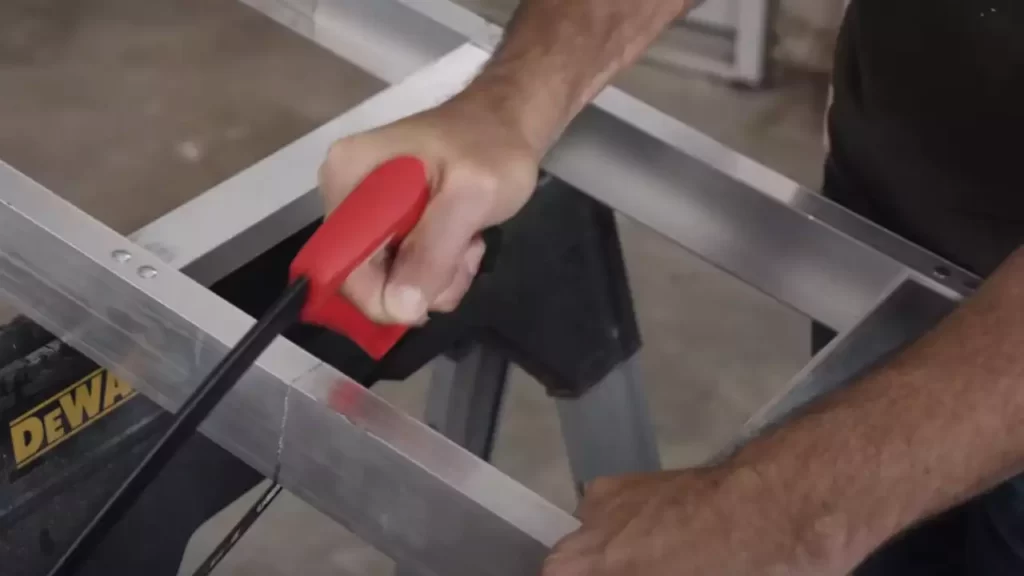
Step 2: Assembling The Ladder
Once you have successfully prepared your attic and gathered all the necessary tools, it’s time to move on to the next step – assembling the ladder. Following the manufacturer’s instructions and ensuring all parts are securely connected are crucial aspects of this process. Taking the time to assemble the ladder correctly will not only guarantee a safe and sturdy installation but also make accessing your attic a breeze. Let’s dive into the details of this essential step.
Following the Manufacturer’s Instructions
Each attic ladder has its own set of assembly instructions provided by the manufacturer. These instructions are specifically tailored to the ladder model you have purchased, ensuring the highest level of safety and efficiency. It is essential to carefully read and follow these instructions step-by-step. Here’s a breakdown of how to assemble your attic ladder while adhering to the manufacturer’s guidelines:
- Start by identifying the different parts of the ladder as specified in the instructions. Lay them out in an organized manner for easy access.
- Next, familiarize yourself with the specific hardware included with your ladder. This may include screws, bolts, nuts, washers, and other fasteners.
- Refer to the manufacturer’s instructions to determine the proper order and method of attaching each part. This may involve using the provided hardware or special tools.
- Throughout the assembly process, make sure to double-check that you are aligning the parts correctly, according to the instructions. This will ensure the ladder functions smoothly and securely.
- Continue following the instructions until you have assembled all the components of the ladder. Take your time to avoid any mistakes that could compromise the ladder’s stability.
Ensuring All Parts are Securely Connected
Once the attic ladder components are correctly assembled, it’s crucial to ensure that all parts are securely connected. This step is vital for the ladder’s stability and durability, providing you with peace of mind while using it. Consider the following tips to guarantee a solid connection:
- Tighten all screws, bolts, and nuts securely, ensuring there is no looseness or wobbling.
- Inspect each joint and connection point to ensure they are properly aligned and fitted together.
- Verify that any locking mechanisms or latches are working correctly, and they engage securely.
- Give the assembled ladder a gentle shake to check for any signs of movement or instability. If any issues are detected, consult the manufacturer’s instructions for troubleshooting or seek professional assistance.
By taking the time to meticulously follow the manufacturer’s instructions and ensuring all parts are securely connected, you’ll have successfully assembled your attic ladder. This careful attention to detail guarantees a safe and reliable installation, making your attic easily accessible whenever required. In the next step, we will delve into the process of installing the ladder into your attic space. Stay tuned!
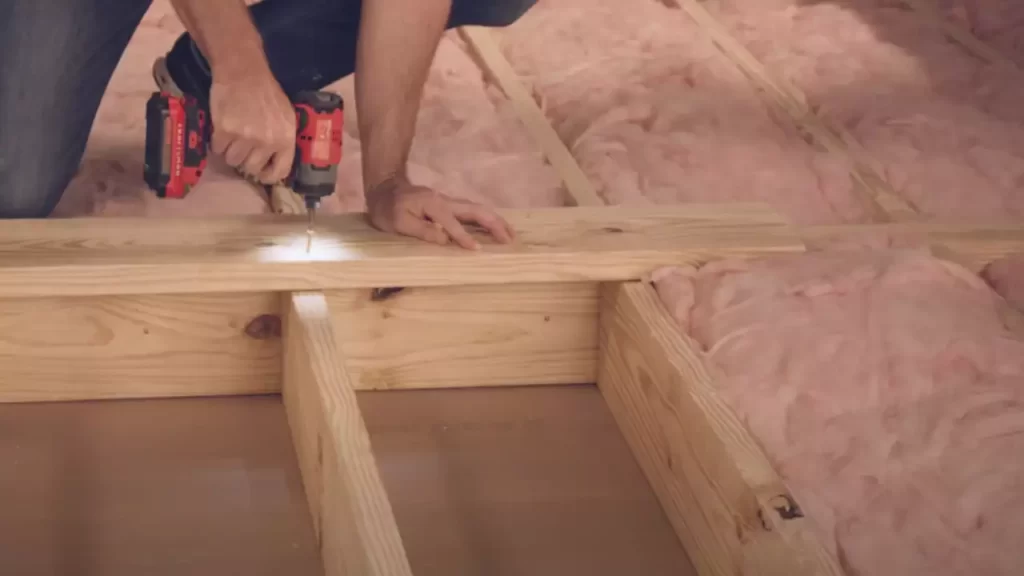
Step 3: Mounting The Ladder Frame
Once you have properly prepared the attic and assembled the ladder frame, it’s time to move on to the next crucial step: mounting the ladder frame. This step involves positioning the ladder correctly and securing the frame to the attic opening. By following the steps below, you’ll ensure a safe and secure installation of your attic ladder.
Properly positioning the ladder
Properly positioning the ladder is essential for a successful installation. Here’s how you can ensure your ladder is in the right place:
1. Measure twice, cut once: Begin by measuring the distance between the floor and the edge of the attic opening. Take this measurement carefully to avoid any errors. This will help you determine the correct location for mounting the ladder frame.
2. Mark the spot: Using a pencil or marker, mark the position where you want to install the ladder frame. Make sure the marks are clearly visible and aligned with the measurements you took earlier.
3. Align with attic joists: Check the joists in the attic to determine their orientation. It’s important to mount the ladder frame perpendicular to the joists for added stability. Use a level to ensure that the ladder frame is in a straight position.
4. Safety first: Ensure that there is enough space around the attic opening to safely extend and retract the ladder. Clear any obstructions such as insulation, wires, or ductwork that may interfere with the ladder’s operation.
Securing the frame to the attic opening
Once you have established the proper positioning of the ladder, it’s time to secure the frame to the attic opening. Follow these steps to ensure a secure installation:
1. Attach the mounting brackets: Place the ladder frame in position and align the mounting brackets with the pre-drilled holes. Secure the brackets to the frame using the provided screws or nails. Be sure to tighten them firmly, but avoid over-tightening as it may damage the frame.
2. Check for evenness: Double-check that the ladder frame is leveled and evenly aligned with the attic opening. Use a level again to ensure accuracy. Make any necessary adjustments if the frame appears uneven.
3. Test stability: Before proceeding, give the ladder frame a gentle shake to ensure it feels sturdy and secure. If there is any wobbling or instability, revisit the attachment points and make any additional adjustments.
4. Finalize the installation: Once you are satisfied with the stability of the ladder frame, secure it to the attic floor by driving screws or nails through the mounting brackets into the floor. This will further reinforce the frame and prevent any shifting or movement during use.
By following these steps, you can confidently mount the ladder frame and ensure a safe and secure installation of your attic ladder. In the next step, we will focus on installing the ladder itself, bringing you one step closer to enjoying easy access to your attic space. Stay tuned!
Step 4: Attaching The Ladder To The Frame
Once you have properly prepared the opening and installed the ladder frame, it’s time to move on to the crucial step of attaching the ladder to the frame. This step ensures that your attic ladder is securely and safely in place for easy access and regular use. Follow the instructions below to complete this step with precision.
Aligning the ladder hinges with the frame
To begin, you need to align the ladder hinges with the frame. This is a critical step that ensures the ladder functions properly and is easy to open and close. Follow the steps below for perfect alignment:
- Position the ladder hinges so they are aligned with the hinges located on the frame.
- Make sure the hinges are flush against the frame and that they are centered, allowing the ladder to fold and unfold smoothly.
- Check that the hinges are securely in place before moving on to the next step. This will ensure the ladder remains stable and safe during its use.
Affixing the ladder securely
Once the ladder hinges are properly aligned with the frame, it’s time to affix the ladder securely in place. This step guarantees that the ladder remains firmly attached and that it can withstand regular usage. Follow the instructions below:
- Using the provided screws, attach the ladder hinges to the frame. Ensure that you fasten them securely to prevent any wobbling or movement.
- Double-check that all screws are tightened properly, as loose screws can compromise the stability and safety of the ladder.
- Give the ladder a gentle shake to confirm that it’s securely attached. If there’s any movement, go back and tighten the screws until the ladder remains steady.
- Finally, test the ladder by folding and unfolding it a few times to ensure it operates smoothly and is securely attached to the frame.
By aligning the ladder hinges with the frame and affixing the ladder securely, you’ve completed the essential steps for attaching the ladder to the frame. This ensures the ladder functions properly and can be safely used for convenient access to your attic space. Proceed to the next step of the installation process to complete the installation of your attic ladder.
Step 5: Testing The Ladder
Installing an attic ladder is a significant undertaking that requires careful attention to detail. Once you have successfully installed the ladder according to the manufacturer’s instructions, it’s essential to test it thoroughly before relying on it for regular use. Testing the ladder ensures that it operates smoothly, is stable, and, most importantly, meets the necessary safety standards. In this final step, we’ll cover two critical aspects of testing your attic ladder: confirming smooth operation and verifying stability and safety.
Confirming smooth operation
To confirm the smooth operation of your newly installed attic ladder, carefully follow these steps:
- Ensure the ladder is fully extended: Pull the ladder down until it reaches its maximum extension. This action not only confirms that the ladder can be easily extended but also helps you check for any obstructions along the way.
- Test the ladder’s springs: Slowly climb up the ladder a few steps and then let go. The ladder should retract smoothly and effortlessly, thanks to its spring mechanism. If you encounter any resistance or notice any jerking movements, inspect the ladder carefully for obvious defects or installation errors.
- Check the ladder’s weight-bearing capacity: While standing on the ladder, distribute your weight evenly on each step. Ascend and descend cautiously to ensure that the ladder can handle your weight without any issues. It’s vital to be confident in the ladder’s ability to withstand your weight to prevent accidents or injuries later on.
- Close the ladder with ease: Once you have finished testing the ladder’s extended position, gently close it back up. The ladder should fold back smoothly and securely without any excessive force or jamming. If you encounter any difficulties during this step, double-check the installation to ensure every component is properly aligned.
Verifying stability and safety
Ensuring the stability and safety of your attic ladder is paramount for a worry-free experience. Follow these steps to complete this essential testing procedure:
- Check the ladder’s sturdiness: Once the ladder is fully extended, try gently shaking it from side to side. A properly installed ladder should remain steady and not wobble excessively. If you notice any instability, carefully inspect the ladder’s attachment points and double-check that each fastener is securely tightened.
- Inspect the ladder’s fasteners: Go over each screw, bolt, or bracket that secures the ladder to your attic opening. Ensure they are all tightly fastened and haven’t come loose during the installation process. Loose fasteners can compromise the ladder’s stability and pose potential hazards while in use.
- Test the ladder’s safety features: Attic ladders are typically equipped with safety mechanisms, such as locking pins or automatic locks. Verify that these features are functioning correctly by unfolding the ladder and attempting to release the safety lock. The ladder should remain securely locked until intentionally released.
- Inspect for any physical damage: Finally, conduct a visual inspection of the ladder, looking for any signs of damage or wear. Pay particular attention to the steps, hinges, and handrails. If you notice any cracks, breaks, or other potential hazards, address them promptly before using the ladder regularly.
By following these testing procedures, you can ensure that your newly installed attic ladder is both functional and safe. Remember, regular maintenance and periodic inspections are vital to keep your ladder in optimal condition, providing convenient access to your attic for years to come.
Adding Insulation And Weatherstripping
Adding insulation and weatherstripping to your attic ladder can greatly enhance energy efficiency and protect against drafts and temperature fluctuations. Proper insulation ensures that heat and air conditioning stay within your living space, reducing energy costs and increasing comfort. Weatherstripping prevents air leakage around the edges of the attic ladder, creating a tight seal and further improving energy efficiency. In this section, we will discuss the steps to properly insulate and weatherstrip your attic ladder.
Enhancing Energy Efficiency
Insulating your attic ladder is a crucial step in enhancing energy efficiency. By reducing heat transfer between your living space and the attic, insulation helps maintain a comfortable temperature and reduces the load on your heating and cooling systems. To insulate your attic ladder, follow these simple steps:
- Measure the dimensions of your attic ladder opening. This will help you determine the amount of insulation needed.
- Choose an appropriate insulation material, such as fiberglass batts or rigid foam boards. Ensure that the insulation has a high R-value to provide effective thermal resistance.
- Cut the insulation to the measured dimensions, allowing a snug fit within the attic ladder framework.
- Place the insulation into the attic ladder opening, ensuring it covers all sides and remains in contact with the surrounding surfaces.
- Use staples or adhesive to secure the insulation in place, preventing it from shifting or sagging over time.
By properly insulating your attic ladder, you create a barrier that minimizes heat flow and enhances energy efficiency in your home.
Protecting Against Drafts and Temperature Fluctuations
In addition to insulation, weatherstripping is essential for protecting against drafts and temperature fluctuations. Weatherstripping seals the gaps around the edges of the attic ladder, preventing air leakage and reducing the entry of outside air. Follow these steps to weatherstrip your attic ladder:
- Clean the edges and surfaces of the attic ladder to ensure proper adhesion of the weatherstripping material.
- Choose a suitable weatherstripping material, such as adhesive-backed foam tape or adhesive door sweeps. The material should be durable and able to withstand repeated opening and closing of the attic ladder.
- Cut the weatherstripping to the required lengths, ensuring a precise fit along the edges of the attic ladder.
- Apply the weatherstripping material to the edges of the attic ladder, pressing firmly to ensure a tight seal.
- Check for any gaps or areas that may require additional weatherstripping and make the necessary adjustments.
Proper weatherstripping not only protects against drafts but also helps maintain a consistent temperature in your living space, improving energy efficiency and overall comfort.
By adding insulation and weatherstripping to your attic ladder, you enhance energy efficiency, protect against drafts, and ensure a comfortable temperature throughout your home. Following these simple steps will help you maximize the benefits of your attic ladder and create a more efficient living environment.
Installing A Handrail
When it comes to installing a handrail for your attic ladder, you are taking an important step towards increasing safety and stability in your home. A handrail not only provides a convenient grip for climbing up and down the ladder but also offers additional support and balance.
Increasing safety and stability
One of the key reasons to install a handrail is to ensure increased safety and stability while using your attic ladder. By providing a sturdy support to hold onto, a handrail significantly reduces the risk of slips, falls, and accidents. This is especially important if you have children or elderly family members who may struggle with maintaining balance on a ladder.
Choosing the appropriate handrail option
When it comes to selecting the right handrail option for your attic ladder, it is important to consider factors such as the ladder type, material, and the available space. Here are a few handrail options to consider:
- Wooden handrail: A wooden handrail offers a classic and timeless look. It is durable and can be easily customized to match your home’s decor. However, keep in mind that wood may require regular maintenance to prevent decay or damage.
- Metal handrail: Metal handrails are known for their strength and durability. They are resistant to weathering and require minimal maintenance. Additionally, metal handrails can be sleek and modern, adding a contemporary touch to your attic ladder.
- Plastic handrail: For a cost-effective and lightweight option, plastic handrails are worth considering. They are easy to install and require minimal maintenance. However, keep in mind that plastic handrails may not offer the same level of durability as wood or metal.
When choosing the appropriate handrail option, it is important to consider factors such as budget, aesthetics, and personal preference. Additionally, ensure that the handrail you choose is compliant with local safety regulations and building codes.
Now that you understand the importance of installing a handrail and have explored different options, you can make an informed decision to enhance safety and stability while using your attic ladder. Remember, a handrail not only provides a visual appeal but also serves as a crucial safety feature, allowing you and your loved ones to navigate the attic space with confidence.
Maintenance And Care Tips
Maintaining and caring for your attic ladder is essential to ensure its longevity and safe usage. By following these maintenance and care tips, you can keep your attic ladder in good condition and address any potential issues promptly.
Periodic Inspection and Cleaning
Regularly inspecting and cleaning your attic ladder is crucial for its upkeep. Here are some steps you can follow:
- Start by removing any dust or debris that may have accumulated on the ladder. Use a soft brush or cloth to gently wipe away the dirt.
- Check the hinges and hardware of the ladder to ensure they are secure and functioning properly. Tighten any loose screws or bolts if necessary.
- Inspect the ladder’s steps or rungs, looking for any signs of wear or damage. If you notice any cracks, splinters, or instability, it’s important to address these issues immediately.
- Make sure the ladder is aligned correctly and opens and closes smoothly. Lubricate the hinges and moving parts if needed, using a silicone-based lubricant to prevent rust and ensure smooth operation.
Addressing Any Issues Promptly
Early detection and prompt action can save you from costly repairs or accidents. If you come across any of the following issues, take immediate steps to address them:
- Loose or damaged hinges: Tighten loose hinges or replace damaged ones to maintain the ladder’s stability.
- Worn-out or broken steps: Replace any worn-out or broken ladder steps to prevent accidents.
- Stuck or difficult operation: If your ladder gets stuck or becomes difficult to open or close, inspect for any obstructions. Clear away any obstacles and lubricate the moving parts to ensure smooth operation.
- Rusty components: If you notice any signs of rust on the ladder’s hinges or hardware, remove the rust and apply a rust-resistant coating or lubricant to prevent further damage.
Remember, addressing these issues promptly will help maintain the safety and functionality of your attic ladder.
Frequently Asked Questions
How Much Does Labor Cost To Install An Attic Ladder?
The labor cost to install an attic ladder varies depending on factors like location and complexity. On average, you can expect to pay between $200 and $500 for professional installation.
How Do You Install An Attic Lader?
To install an attic ladder, follow these steps: 1. Measure the opening and choose the appropriate ladder size. 2. Assemble the ladder according to the manufacturer’s instructions. 3. Secure the ladder to the attic floor above the opening. 4. Test the ladder for stability and smooth operation.
5. Finally, attach any necessary handrails or accessories for added safety.
What Is The Easiest Attic Ladder To Install?
The easiest attic ladder to install is one that comes with pre-assembled components and detailed instructions. Look for a lightweight ladder made of durable materials, such as aluminum or steel, that can be easily adjusted to fit your attic opening.
Do Attic Ladders Need To Touch The Ground?
Attic ladders do not necessarily need to touch the ground. They can be installed with specific measurements to ensure proper functionality and accessibility.
Conclusion
Installing an attic ladder is a worthwhile project that can provide easy access to extra storage space. By following the step-by-step instructions provided in this blog post, you can confidently tackle the installation process. Remember to gather the necessary tools and materials beforehand and take safety precautions.
With a little patience and attention to detail, you’ll have a sturdy and functional attic ladder in no time. Happy DIY-ing!