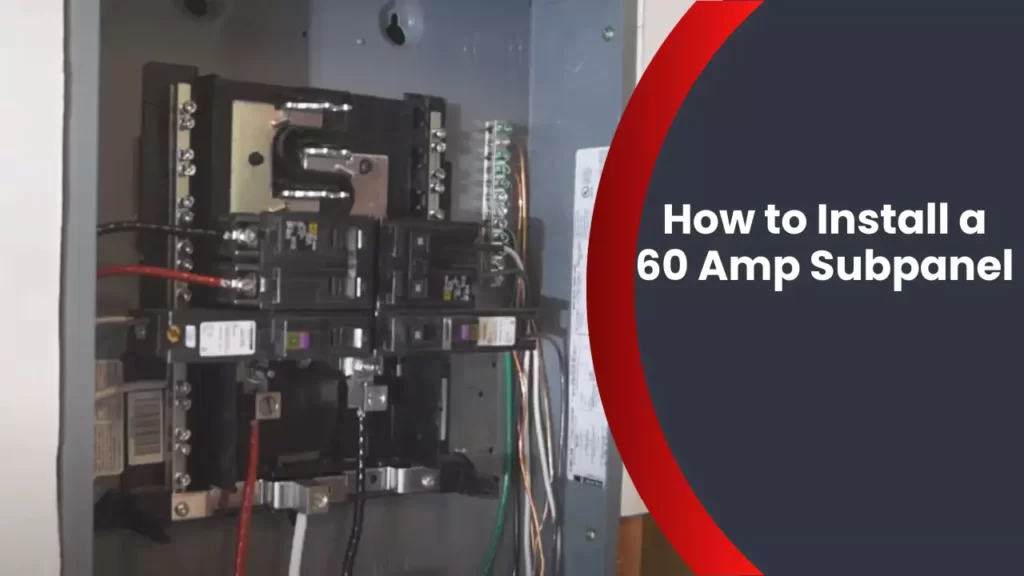
To install a 60 Amp subpanel, follow these steps: 1) Turn off the main power supply; 2) Mount the subpanel on the wall; 3) Connect the ground wire; 4) Install circuit breaker; 5) Wire the subpanel to the main panel; and 6) Activate the power supply. Now, let’s dive into the details of each step to help you successfully install a 60 Amp subpanel.
Installing a 60 Amp subpanel can provide additional electrical capacity for new circuits or equipment in your home or workplace. The subpanel distributes power from the main electrical panel to different areas or appliances within a building. Whether you are an electrician or a DIY enthusiast, this guide will walk you through the installation process, ensuring a safe and efficient setup.
Following the steps and safety precautions will help you accomplish this task without any hiccups. Let’s get started!
Choosing The Right Location For The Subpanel
When it comes to installing a 60 Amp subpanel, one of the crucial decisions you need to make is choosing the right location for it. This step is vital to ensure the efficient functioning of your electrical system while adhering to safety precautions. In this guide, we will cover the key factors to consider when determining the ideal location for your subpanel installation.
Evaluating Electrical Needs
The first step in choosing the location of your subpanel is evaluating your electrical needs. Consider the appliances and circuits that will be connected to the subpanel and determine their power requirements. This will help you determine the size and capacity of the subpanel needed for your electrical system, which will ultimately affect the location.
Ensuring Access to Main Breaker Box
Another crucial aspect to consider is ensuring easy access to the main breaker box. The subpanel needs to be located in a place where you can conveniently connect it to the main panel. It is essential for ease of installation, maintenance, and future upgrades or repairs. Locate a spot that allows sufficient space for the subpanel and provides easy access for electricians to work on it.
Considering Distance from Main Panel
The distance between the main panel and the subpanel should also be taken into consideration. Ideally, the subpanel should be installed as close as possible to the main panel to minimize voltage drop and wiring costs. However, depending on the layout of your property and other factors, it might not always be feasible. In such cases, consulting a qualified electrician can help you determine the best compromise between proximity and practicality.
By evaluating your electrical needs, ensuring easy access to the main breaker box, and considering the distance from the main panel, you can choose the perfect location for your 60 Amp subpanel installation. Remember to consult a professional electrician to ensure compliance with building codes and safety guidelines as well.
Gathering The Necessary Tools And Materials
Before you start the process of installing a 60 Amp subpanel, it’s important to gather all the necessary tools and materials. This will ensure that you have everything you need to successfully complete the project without any interruptions. In this section, we will discuss the different tools and materials you will need to gather before getting started.
Subpanel box
The subpanel box is the heart of the electrical system and provides a safe and organized way to distribute power throughout your home. It’s important to choose a subpanel box that is suitable for a 60 Amp circuit. Look for a box that is rated for at least 60 Amps and has enough space to accommodate the required circuit breakers.
Circuit breakers
Circuit breakers are essential for protecting your electrical system from overloads and short circuits. When installing a 60 Amp subpanel, you will need to select circuit breakers that are rated for 60 Amps. Make sure to choose circuit breakers that are compatible with the subpanel box and can fit securely into the designated slots.
Wire and conduit
The wire and conduit are used to route the electrical current from the main service panel to the subpanel. It’s important to use the correct gauge wire for a 60 Amp circuit to ensure safe and efficient operation. Generally, a 4-gauge wire is suitable for a 60 Amp subpanel. The conduit, on the other hand, provides protection for the wires and ensures they are properly grounded.
Wire connectors
Wire connectors, also known as wire nuts, are used to join and secure the wires together. They provide a safe and reliable connection, preventing any loose wires that could potentially cause electrical hazards. Make sure to select wire connectors that are suitable for the gauge of wire you are using.
Screwdriver and drill
A screwdriver and drill are essential tools for installing a 60 Amp subpanel. The screwdriver is used to tighten the screws on the subpanel box and circuit breakers, ensuring a secure connection. The drill, on the other hand, is used to create holes for mounting the subpanel box and running the conduit.
By gathering all the necessary tools and materials before starting the installation process, you will have a smooth and successful experience. Having everything on hand will not only save you time and frustration but also ensure the safety and efficiency of your newly installed 60 Amp subpanel.
Shutting Off The Electricity
Before starting any electrical work, it is crucial to shut off the power to ensure your safety. The process involves three essential steps: turning off the main power, verifying that the power is off with a voltage tester, and taking necessary safety precautions. Let’s go through each of these steps in detail.
Turning off the main power
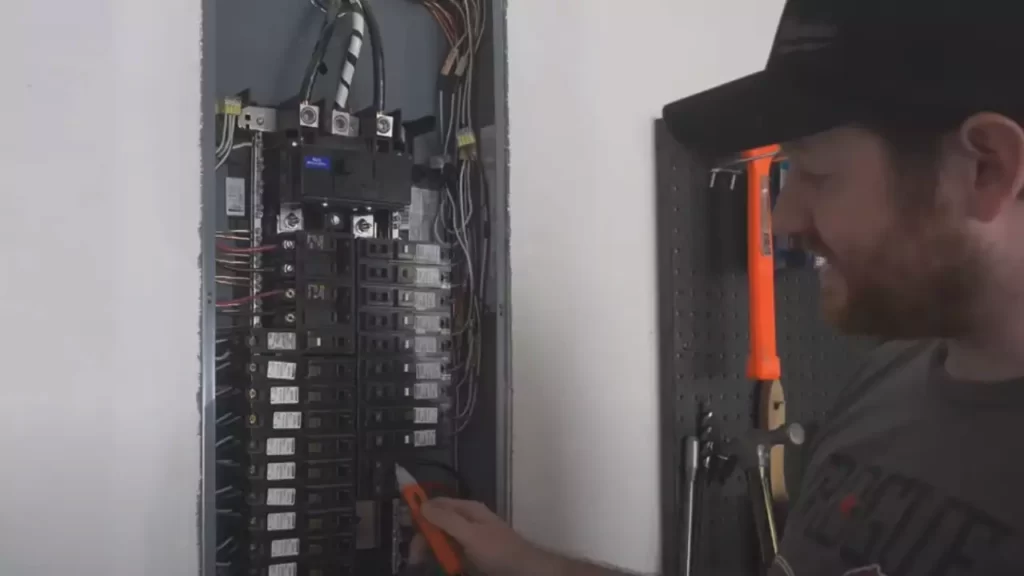
The first step in shutting off the power is to locate your main electrical panel. This panel is usually located near the electric meter and is where the main power comes into your home. Open the panel door, and you will see multiple circuit breakers or fuses.
To turn off the main power, locate the main circuit breaker. It is typically labeled “main” or “main circuit breaker.” Flip this breaker to the “off” position. This will shut off power to the entire house, including the subpanel you will be installing.
Verifying power is off with a voltage tester
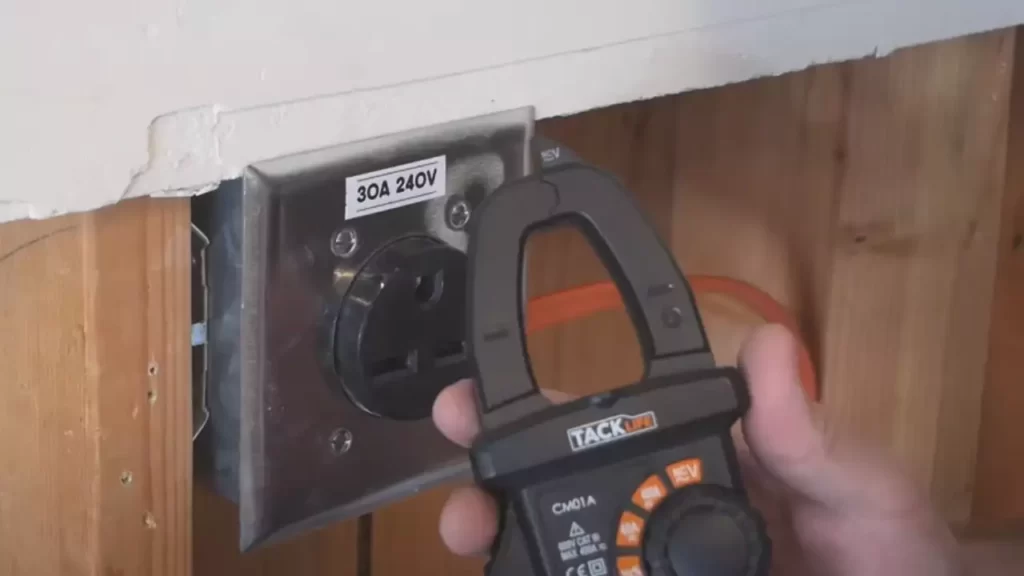
After turning off the main power, it is essential to verify that the electricity is indeed off before proceeding with any electrical work. This is where a voltage tester comes in handy.
Insert the voltage tester into an outlet or touch its leads to a live wire. If the tester lights up or makes a sound, it indicates that there is still power running through the circuit. In this case, recheck your main panel and make sure the main circuit breaker is switched off. Only proceed when the voltage tester shows no signs of electricity.
Ensuring Safety Precautions
Prioritizing safety is crucial when working with electricity. Here are some important safety precautions to follow:
- Wear protective gear: Always wear safety glasses, gloves, and appropriate clothing to protect yourself from potential electrical hazards.
- Use insulated tools: When handling electrical connections, make sure to use tools with insulated handles to prevent electric shocks.
- Work in a well-lit area: Proper lighting will help you identify wires, connections, and potential risks more easily.
- Keep the area dry: Ensure that your work area is dry to minimize the risk of electrical shock.
- Avoid working alone: If possible, have someone present when working on electrical installations or repairs.
By adhering to these safety precautions, you reduce the risk of accidents and ensure a safer working environment.
Now that you understand how to shut off the electricity properly, you are ready to move on to the next steps of installing a 60 Amp subpanel. Stay tuned for our upcoming blog posts, which will guide you through the rest of the installation process.
Determining Wire Size And Panel Capacity
When installing a 60 Amp subpanel, one crucial step is determining the appropriate wire size and panel capacity. By correctly calculating these electrical requirements, you can ensure a safe and efficient installation. In this guide, we will walk you through the process step by step.
Calculating electrical requirements
The first step in determining the wire size for your 60 Amp subpanel is to calculate the electrical requirements of your intended load. You’ll need to add up the total amperage of all the devices and appliances that will be connected to the subpanel.
To make this process easier, you can divide your electrical load into two categories: continuous loads and non-continuous loads. Continuous loads are those that will be running for three hours or more, such as electric heating systems or refrigerators. Non-continuous loads, on the other hand, are devices that will only be on intermittently, like lights or small power tools.
| Device or Appliance | Amperage |
|---|---|
| Electric oven | 30A |
| Electric water heater | 20A |
| Furnace | 15A |
| Air conditioning unit | 10A |
| Lights | 5A |
| Power tools | 8A |
| Total | 88A |
In the table above, we’ve listed some common devices and their respective amperages as an example.
Checking main panel capacity
Before you proceed with selecting the appropriate wire gauge, it’s crucial to check the capacity of your main panel. Your main panel should have a sufficient amperage to accommodate the added load of the subpanel. If your main panel is already at or near capacity, you may need to consider upgrading it.
To determine the capacity of your main panel, you can find this information on the label or panel door. It will usually be listed in amps, such as 100A or 200A. If you’re unsure, it’s best to consult a licensed electrician for assistance.
Selecting the appropriate wire gauge
Once you have determined the total electrical load and confirmed the capacity of your main panel, it’s time to select the appropriate wire gauge for your 60 Amp subpanel. The wire gauge refers to the thickness of the wire and is measured in American Wire Gauge (AWG) sizes. The thicker the wire, the lower the gauge number.
The wire gauge you choose will depend on the distance between the main panel and the subpanel. You’ll need to consider the voltage drop over this distance and select a wire gauge that minimizes this drop to ensure a reliable and efficient electrical supply.
Here is a general guideline for wire gauge selection based on distance:
- 0-50 feet: 6 AWG
- 50-100 feet: 4 AWG
- 100-150 feet: 2 AWG
- 150-200 feet: 1/0 AWG
Keep in mind that these are general recommendations, and you may need to consult the National Electrical Code (NEC) or local building codes for specific requirements in your area.
By following these steps and considering the electrical requirements and panel capacity, you can confidently determine the wire size and panel capacity needed for your 60 Amp subpanel installation. Remember, if you’re unsure or uncomfortable with any part of the process, it’s always best to seek the assistance of a qualified electrician to ensure a safe and compliant installation.
Mounting The Subpanel Box
Once you have chosen a suitable location for your 60 Amp subpanel, the next step is to mount the subpanel box securely to the wall. This is an essential part of the installation process, as it ensures that the subpanel is stable and positioned correctly. In this section, we will discuss how to mount the subpanel box, including choosing a suitable location, marking and drilling mounting holes, and securing the box to the wall.
Choosing a suitable location
The first step in mounting the subpanel box is to select an appropriate location. Before deciding on a spot, make sure to consider several factors such as accessibility, clearance requirements, and proximity to the electrical supply. It is important to choose a location that is easily reachable and provides enough clearance around the subpanel for maintenance and future upgrades. Additionally, ensure the chosen location is close enough to the electrical supply to minimize wiring length and voltage drop.
Marking and drilling mounting holes
Once you have selected the location, the next step is to mark and drill the mounting holes for the subpanel box. Begin by positioning the subpanel box against the wall at the chosen location. Make sure it is level using a spirit level. Once it is correctly positioned, mark the locations of the mounting holes on the wall using a pencil or marker. Ensure that the marks are accurate by using a tape measure.
After marking the holes, drill them using an appropriate drill bit size for the anchor or screw you will use. Remember to follow the manufacturer’s recommendations for drilling into different wall materials. It is essential to drill the holes straight and at the correct depth to ensure a secure and stable mounting of the subpanel box.
Securing the box to the wall
Once the mounting holes are drilled, it is time to secure the subpanel box to the wall. Begin by inserting the appropriate anchors into the drilled holes, or use screws directly if the wall material permits. Gently place the subpanel box against the wall, aligning the mounting holes with the anchors or screws.
Using a suitable screwdriver or drill, carefully drive the screws into the anchors or directly into the wall, securing the subpanel box firmly. Be cautious not to overtighten the screws, as this can damage the box or cause misalignment.
After securing the box to the wall, make sure to double-check its stability and levelness using a spirit level. If necessary, make adjustments by slightly loosening the screws and repositioning the box before retightening them.
By following these steps, you can effectively mount your 60 Amp subpanel box to the wall, ensuring it is secure, stable, and ready for the next phase of the installation process.
Connecting The Power Source To The Subpanel
Now that you have completed running the electrical conduit from the main panel to the subpanel, it’s time to connect the power source. This step is crucial to ensure that the subpanel receives a reliable and safe supply of electricity. In this section, we will be discussing how to feed wires through the conduit and attach them to the subpanel lugs. Let’s get started!
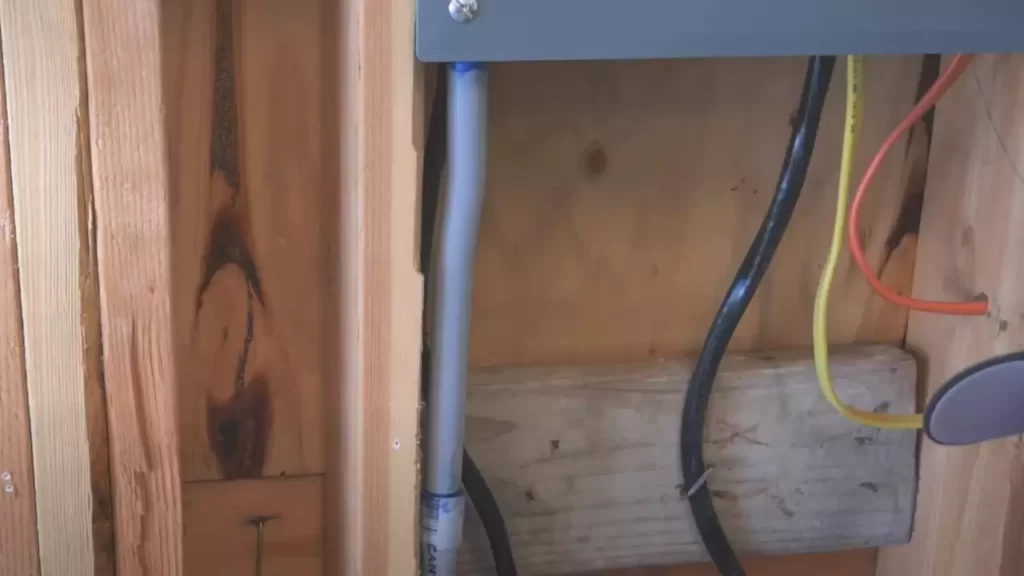
Running electrical conduit from main panel to subpanel
The first step in connecting the power source to the subpanel is to run the electrical conduit from the main panel to the subpanel. The conduit serves as a protective housing for the wires, preventing any potential damage and keeping them organized. Follow these steps to run the conduit:
- Measure the distance between the main panel and the subpanel to determine the length of the conduit needed.
- Select the appropriate size of electrical conduit based on the wire size and local electrical codes.
- Attach the conduit to the main panel using conduit fittings. This ensures a secure connection and protects the wires inside.
- Route the conduit along a safe and accessible path, making sure to avoid obstructions and sharp bends.
- Attach the conduit to the subpanel using conduit fittings at both ends. Make sure the conduit is securely fastened to the subpanel.
Feeding wires through the conduit
Once the electrical conduit is in place, it’s time to feed the wires through. This involves carefully threading the wires through the conduit without causing any damage. Follow these steps to feed the wires:
- Strip off approximately 6 inches of insulation from the ends of the wires.
- Insert the wires into one end of the conduit, ensuring they are aligned properly.
- Gradually push the wires through the conduit, maintaining a steady and even pace.
- Use a pulling grip or fish tape to guide the wires through any tight spots or bends.
- Continue feeding the wires until they reach the other end of the conduit.
Attaching wires to the subpanel lugs
With the wires successfully fed through the conduit, it’s time to attach them to the subpanel lugs. The lugs serve as the connection point between the wires and the subpanel, allowing the electricity to flow. Follow these steps to attach the wires:
- Strip off approximately 1 inch of insulation from the ends of the wires.
- Identify the appropriate lugs in the subpanel that correspond to the wires.
- Insert the stripped ends of the wires into the lugs, ensuring a tight and secure fit.
- Tighten the screws or bolts on the lugs to firmly secure the wires in place.
- Double-check all connections to ensure they are properly tightened and secure.
By following these steps, you have successfully connected the power source to the subpanel. This is a critical step in the installation process, as it ensures a reliable and safe supply of electricity to the subpanel. Take your time and be diligent in making the connections, ensuring they are tight and secure. The next step is to test the subpanel to ensure it is functioning correctly. Stay tuned for the next section!
Installing The Circuit Breakers
Once you have installed the subpanel and connected the main feed wires, it is time to move on to installing the circuit breakers. This crucial step ensures that your subpanel will distribute the electrical power properly and protect each individual circuit from overload. In this section, we will guide you through the process of selecting the appropriate breakers, inserting them into the subpanel slots, and wiring them to the designated circuits.
Selecting the appropriate breakers for your needs
Before you start inserting the breakers, it is important to select the appropriate ones based on your specific electrical needs. Breakers come in different sizes and amperages, so you’ll need to match them to the circuits they will power.
To select the appropriate breakers:
- Determine the amperage requirements of your circuits. This information is usually found on the circuit labels, indicating the maximum amperage the circuit can handle.
- Choose breakers that match the amperage requirements of your circuits. It is crucial not to exceed the maximum amperage specified for each circuit to prevent electrical hazards and equipment damage.
- Ensure compatibility with your subpanel. Different subpanels may require specific breaker models or brands, so double-check the manufacturer’s recommendations.
Inserting the breakers into the subpanel slots
Once you have selected the appropriate breakers, it’s time to insert them into the subpanel slots. This step requires caution and precision to ensure proper alignment and secure connection.
To insert the breakers:
- Identify the slots designated for the breakers in the subpanel. These slots will be labeled or color-coded to correspond to specific circuit configurations.
- Line up the breaker’s mounting clips with the slots and carefully push it into place. Apply gentle pressure until it clicks or snaps securely into position.
- Double-check that the breaker’s connection is stable within the slot, and verify that it is aligned with the other breakers in the subpanel.
Wiring the breakers to the designated circuits
With the breakers properly inserted, the final step is to wire them to the designated circuits. This ensures that electrical power reaches each circuit securely and allows for easy identification in case of troubleshooting or maintenance.
To wire the breakers to the designated circuits:
- Identify the circuit wires specific to each breaker and ensure they are properly labeled for easy identification.
- Connect the circuit wires to the appropriate terminals on the breakers. Follow the manufacturer’s instructions for correct wiring configurations and techniques.
- Tighten the terminal screws securely to establish a reliable electrical connection. Loose connections can lead to overheating and potential electrical hazards.
- After all the breakers have been wired, conduct a thorough inspection to ensure that all connections are secure and free from any signs of damage or loose components.
By following these steps to install and wire the circuit breakers in your 60 amp subpanel, you can ensure a safe and efficient electrical distribution system for your home or building. Remember to consult a qualified electrician or refer to local building codes if you have any doubts or need assistance during the installation process.
Testing And Inspecting The Installation
Once you have successfully installed your 60 Amp subpanel, it is crucial to conduct a thorough test and inspection to ensure that everything is functioning properly. This final step will give you peace of mind and guarantee the safety and efficiency of your electrical system. In this section, we will guide you through the necessary steps to conduct a final check for wire connections, verify the tightness of all screws and connections, and test the subpanel with the power turned on.
Conducting a Final Check for Wire Connections
The first step in testing and inspecting your 60 Amp subpanel installation is to conduct a final check for wire connections. This step is crucial to ensure that all wires are properly connected and secure, minimizing the risk of electrical faults or short circuits. To perform this check, follow these steps:
- Inspect each wire connection to ensure that it is tightened properly. You can lightly tug on the wires to check for any loose connections. If you notice any loose wires, tighten them until they are snug.
- Visually inspect all wire connections for any signs of damage or exposed wiring. Make sure that no bare wires are visible, as this can pose a safety hazard.
- Check that the wire connections are properly labeled according to the subpanel’s labeling system. This will help you identify and troubleshoot any issues that may arise in the future.
Verifying the Tightness of All Screws and Connections
Verifying the tightness of all screws and connections is an essential part of the testing and inspection process. Loose screws and connections can lead to electrical failures or even fires. To ensure that everything is tightened properly, follow these steps:
- Use a screwdriver or a wrench to go through all screws and connections, tightening them carefully.
- Check that all breaker switches are securely fastened to the subpanel’s bus bar. Give each breaker switch a gentle push to make sure it is properly engaged.
- Inspect the ground and neutral bars to ensure that all screws and connections are tightened securely. These connections are critical for the proper functioning of your electrical system.
Testing the Subpanel with Power Turned On
Once you have conducted a final check for wire connections and verified the tightness of all screws and connections, it is time to test the subpanel with the power turned on. This step will help you ensure that all electrical components and circuits are working correctly. Follow these steps to perform the test:
- Turn on the main power switch and ensure that the subpanel’s circuit breaker is in the “off” position.
- Switch on one circuit breaker at a time, starting with the most critical ones. Pay attention to any flickering lights, unusual sounds, or burning smells that may indicate a problem.
- Test all outlets and switches connected to the subpanel to confirm that they are supplying power correctly. You can use a voltage tester to verify the presence of electricity.
By following these testing and inspection steps, you can ensure the proper functioning and safety of your 60 Amp subpanel installation. Remember to consult a licensed electrician if you encounter any issues or if you are unsure about any aspect of the process. Taking the time to test and inspect your subpanel will provide peace of mind and enable you to enjoy a reliable electrical system for years to come.
Frequently Asked Questions
How Do I Choose The Right Size For A 60 Amp Subpanel?
To choose the correct size for a 60 Amp subpanel, you need to consider your power requirements. Calculate the total amperage needed for the circuits you plan to connect to the subpanel and choose a model that meets or exceeds that amperage rating.
Can I Install A 60 Amp Subpanel By Myself?
While it is possible to install a 60 Amp subpanel yourself, it is recommended to hire a licensed electrician. Electrical work can be dangerous if not done correctly, and a professional will ensure the installation meets electrical codes and is done safely.
How Far Can A 60 Amp Subpanel Be Located From The Main Panel?
The location of a 60 Amp subpanel from the main panel depends on the electrical code requirements in your area. Generally, subpanels should be located within 100 feet of the main panel. Consult with a licensed electrician to determine the specific regulations in your region.
Conclusion
Installing a 60 Amp subpanel may seem like a daunting task, but with the right preparation and guidance, it can be done easily and safely. Remember to follow the necessary steps, including shutting off the power, calculating the load requirements, and connecting the wires correctly.
By installing a subpanel, you can ensure a reliable and efficient electrical system in your home. So, don’t hesitate to take on this project and enjoy the benefits it brings. Happy installing!