To install a 50 Amp RV outlet, you need to follow a few steps and guidelines. First, consult an electrician to ensure the proper electrical capacity, and check local codes and regulations.
Then, install a double-pole 50 Amp breaker in the main panel, run appropriate gauge wire from the panel to the outlet location, and install a disconnect box near the outlet. Next, mount the RV outlet and connect the wiring. Finally, test the outlet and ensure it is functioning properly before using it to power your RV.
Installing a 50 Amp RV outlet requires careful planning and adherence to electrical requirements and codes. Having a dedicated outlet for your RV ensures a safe and reliable power supply, allowing you to enjoy your travels comfortably. In this guide, we will walk you through the necessary steps to install a 50 Amp RV outlet. Consulting with an electrician and checking local regulations is essential for a successful installation. Whether you are a seasoned DIYer or a beginner, with the right tools and knowledge, you can complete this project and have your RV powered up in no time. Now, let’s get started with the installation process.
Understanding The Basics Of A 50 Amp Rv Outlet
Differentiating between 30 Amp and 50 Amp RV Outlets
When it comes to RV electrical systems, understanding the difference between a 30 Amp and a 50 Amp RV outlet is crucial. These outlets provide the power needed to run various appliances and devices in your RV, such as air conditioners, refrigerators, microwaves, and more.
A 30 Amp RV outlet, also known as a TT-30 outlet, is the standard choice for smaller RVs and trailers. It provides 120-volt power and can handle a maximum load of 30 Amps. On the other hand, a 50 Amp RV outlet, also known as a NEMA 14-50 outlet, offers more power with a voltage of 120/240 volts and can handle a maximum load of 50 Amps.
Choosing the right outlet for your RV is essential, as using an incorrect plug may lead to electrical issues and potentially damage your RV or appliances. It is important to assess your RV’s electrical requirements before installing a 50 Amp RV outlet.
Assessing Your RV’s Electrical Requirements
Before installing a 50 Amp RV outlet, it is crucial to assess your RV’s electrical requirements. Here’s what you need to consider:
- Power needs: Determine the electrical appliances and devices you typically run in your RV. Take note of their power requirements in terms of wattage or amps. This will help you gauge whether a 50 Amp RV outlet is necessary for your RV.
- Main breaker panel: Locate your RV’s main breaker panel. It is usually found close to where the power cord connects to your RV. Check the amperage rating on the main breaker panel to ensure it can handle a 50 Amp RV outlet. If not, you may need to upgrade the panel.
- Electrical cord and plug: Assess the current electrical cord and plug on your RV. A 50 Amp RV outlet requires a specific type of cord and plug, such as the commonly used NEMA 14-50. Make sure your RV is compatible or purchase the appropriate cord and plug.
By assessing your RV’s power needs, main breaker panel, and electrical cord and plug, you can determine whether a 50 Amp RV outlet is suitable for your RV. If you’re unsure about any aspect of the installation process, it’s always best to consult with a professional electrician who can guide you through the process safely and efficiently.
Identifying The Location For Installation
Evaluating Access to Electrical Panel
Before you start installing a 50 Amp RV outlet, it is important to evaluate the access to your electrical panel. This will ensure that the panel is easily accessible and can handle the additional load. The electrical panel of your house is where the main circuit breakers and fuses are located, controlling the distribution of electricity throughout your home. It is typically found in the basement, garage, or utility room. Take a close look at the panel and confirm it has sufficient space for a new breaker and wiring.
Considering Local Codes and Requirements
When installing a 50 Amp RV outlet, it is crucial to adhere to local codes and requirements. Each area may have specific regulations regarding electrical installations. Check with your local building department or consult a licensed electrician to ensure compliance. This step is essential to guarantee the safety and legality of your installation. By following the local codes, you will have peace of mind knowing that the installation is up to standard and will not cause any issues down the line.
Ensuring Proper Ventilation
Proper ventilation is an important consideration when installing a 50 Amp RV outlet. Ventilation helps dissipate heat generated by electrical components, preventing overheating and potential fire hazards. Ensure that the location you choose for the installation allows for adequate airflow around the outlet. This can be achieved by keeping the outlet away from enclosed spaces, such as cabinets or closets. By providing sufficient ventilation, you can extend the lifespan of your electrical components and maintain their optimal performance.

Creating A Checklist
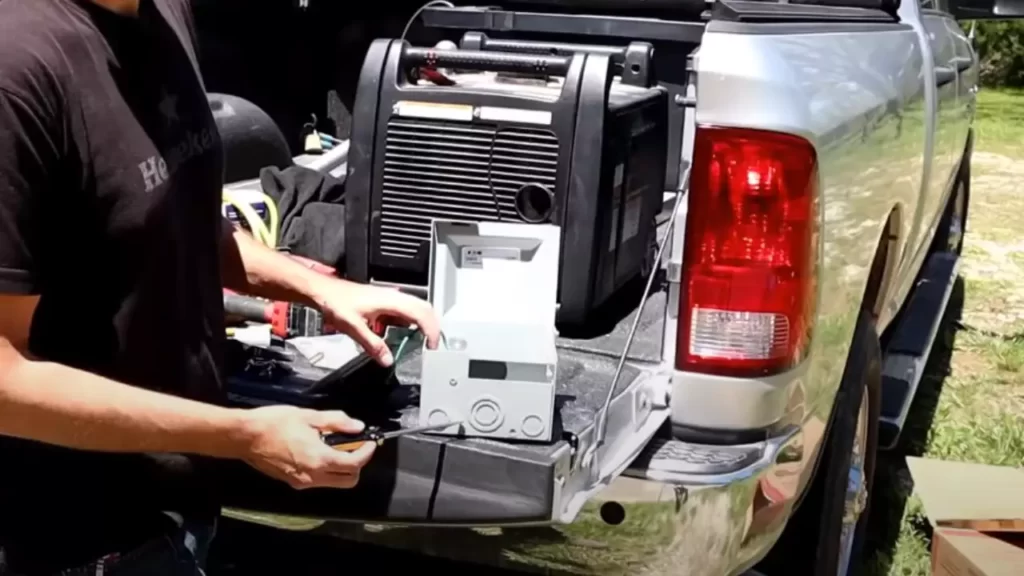
Before you begin the process of installing a 50 Amp RV outlet, it is crucial to have a checklist in place. This will ensure that you have everything you need and understand the steps involved. In this section of the blog post, we will go over the materials and tools you’ll need for the installation.
Understanding the Materials You’ll Need
Before diving into the installation process, it is important to familiarize yourself with the materials you’ll need. This will help you gather everything in advance, avoiding any delays or last-minute trips to the hardware store.
| Materials | Quantity |
|---|---|
| 50 Amp RV outlet | 1 |
| RV electrical cable | As required, depending on the distance from the electrical panel |
| Weatherproof electrical box | 1 |
| Cable connectors | 2 |
| PVC conduit pipes | As required, depending on the distance from the electrical panel |
| Epoxy resin | 1 |
| Wire nuts | As required |
Listing the Necessary Tools
Having the right tools on hand is essential for a successful installation. Here is a list of tools you’ll need:
- Wire strippers
- Tape measure
- Drill
- Non-contact voltage tester
- Adjustable wrench
- Phillips screwdriver
- Flathead screwdriver
- PVC pipe cutter
- Hacksaw
- Level
- Hammer
- Paint scraper
Make sure you have these tools readily available before you start the installation process. This will save you time and frustration later on.
With your materials and tools checklist complete, you are now ready to begin the installation process. Stay tuned for the next section where we will guide you through the step-by-step instructions for installing a 50 Amp RV outlet.
Finding The Right Wire
When it comes to installing a 50 Amp RV outlet, finding the right wire is crucial for ensuring a safe and efficient electrical connection. Determining the appropriate wire size and selecting the correct type of wire are two key factors to consider. Let’s take a closer look at each of these aspects in detail.
Determining the Appropriate Wire Size
The wire size you choose for your 50 Amp RV outlet depends on the distance between the outlet and the main electrical panel. The longer the distance, the greater the voltage drop and the larger the wire size needed for efficient power transfer. To help you determine the appropriate wire size, refer to the National Electrical Code (NEC) and consult a certified electrician if needed. Keep in mind that using a wire size that is too small can result in overheating, while a wire size that is too large can be unnecessary and expensive.
Here is a table showing the recommended wire sizes based on distance:
| Distance (in feet) | Wire Size (AWG) |
|---|---|
| 0-50 | 6 |
| 51-100 | 4 |
| 101-200 | 2 |
| 201-300 | 1/0 |
Selecting the Correct Type of Wire
Once you have determined the appropriate wire size, the next step is selecting the correct type of wire. In most cases, a stranded copper wire is recommended for RV outlets due to its flexibility and durability. The wire should also be rated for outdoor use, as it will be exposed to the elements.
Pro tip: When choosing the wire, consider investing in a wire with a higher temperature rating than the expected operating temperature. This will help ensure that the wire can handle the load without melting or deteriorating.
Now that you know the importance of finding the right wire for your 50 Amp RV outlet, you can confidently continue with the installation process. Remember to follow all safety guidelines, consult a professional if needed, and enjoy the convenience of reliable power on your RV adventures!
Turning Off The Power And Preparing The Electrical Panel
When it comes to installing a 50 Amp RV outlet, one of the first steps you need to take is turning off the power and preparing the electrical panel. This is a crucial step to ensure your safety and the proper installation of the outlet. In this section, we will discuss the necessary safety precautions, how to shut off the power, and the importance of clearing space around the panel.
Safety Precautions
Prioritizing safety is essential when working with electricity. Before starting any electrical work, be sure to follow these safety precautions:
- Always wear personal protective equipment (PPE) such as safety glasses, gloves, and non-conductive footwear.
- Make sure to turn off the main power supply to the panel before beginning any work.
- Use a voltage tester to double-check that the power is indeed off.
- Avoid wearing loose clothing or jewelry that may get caught in the electrical panel.
- Ensure you have a fire extinguisher nearby in case of emergencies.
Shutting off the Power
Before you start installing the RV outlet, it is vital to shut off the power to the electrical panel. Follow these steps:
- Locate the main circuit breaker or fuse box in your home.
- Identify the switch or breaker that controls the power to the electrical panel.
- Flip the switch to the “off” position or remove the fuse to disconnect the power.
- Using a voltage tester, confirm that no electricity is flowing to the panel.
Clearing Space Around the Panel
Once the power is shut off, it is crucial to create a clear and safe working environment around the electrical panel. Here are some tips:
- Remove any obstructions or clutter around the panel to ensure easy access.
- Clear a minimum working space of 30 inches wide by 36 inches deep in front of the panel.
- Ensure there are no flammable materials, water sources, or other hazards near the panel.
- Keep the area well-lit to enhance visibility.
By adhering to these safety precautions, shutting off the power correctly, and clearing space around the panel, you are now ready to proceed with installing the 50 Amp RV outlet. A secure and well-prepared electrical panel ensures a successful installation while minimizing the risk of accidents or electrical hazards.
Running The Wire From The Electrical Panel To The Rv Outlet
One of the crucial steps in installing a 50 Amp RV outlet is running the wire from the electrical panel to the RV outlet. This process involves mapping out the route, protecting the wire, and securing it in place. Let’s dive into each of these steps to ensure a safe and efficient installation.
Mapping Out the Route
Before you start running the wire, it’s important to map out the route from the electrical panel to the RV outlet. Assess the layout of your RV and identify the most direct path. This will help you determine the length of the wire needed and plan accordingly. Take into consideration any obstacles or obstructions that may be in the way, such as walls or furniture, and choose a route that avoids potential hazards.
Protecting the Wire
Once you have determined the route, it’s essential to protect the wire to prevent any damage or hazards. The wire should be sheathed in conduit to shield it from physical impact and environmental factors like moisture and heat. This conduit acts as a protective covering that keeps the wire safe and ensures its longevity, reducing the risk of electrical hazards in the future.
When selecting conduit, opt for one that is suitable for outdoor use and compliant with local building codes. PVC conduit or metal conduit are popular choices for running wires in outdoor installations. Make sure to secure the conduit properly to the walls or surfaces, using appropriate fasteners, to keep it in place and further protect the wire.
Securing the Wire in Place
Once the wire has been protected with conduit, it’s time to secure it in place along the designated route. This step ensures that the wire remains stable and doesn’t pose a tripping hazard or get damaged inadvertently.
Consider using zip ties or cable clamps that are specifically designed for securing wires to walls or other surfaces. These fasteners help keep the wire neatly organized and prevent it from sagging or hanging loose. Secure the wire at regular intervals to ensure even support throughout the route.
Additionally, make sure to keep the wire away from any sources of heat, such as heating vents or other electrical wires. This will prevent any potential damage or overheating that could be caused by the close proximity to heat sources.
By mapping out the route, protecting the wire with conduit, and securing it in place, you can safely run the wire from the electrical panel to the RV outlet. This ensures a stable and reliable power supply to your RV, allowing you to enjoy your travel experiences without any electrical issues.
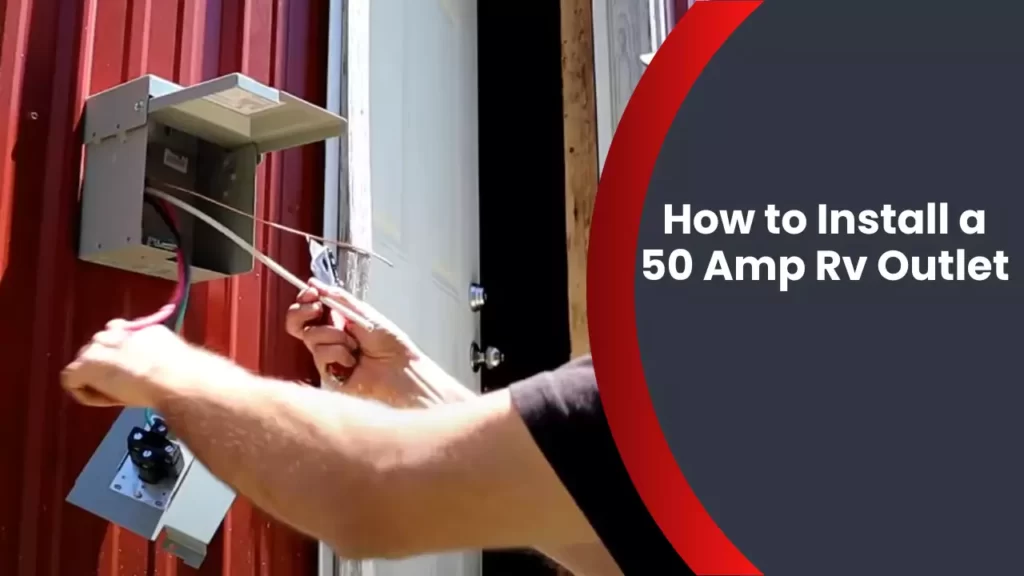
Installing The Rv Outlet
Installing the RV Outlet
Once you have gathered all the necessary materials and determined the appropriate location for your 50 Amp RV outlet, you can begin the installation process. This section will guide you through the three essential steps of installing the outlet: Mounting the Outlet Box, Wiring the Outlet, and Securing the Outlet.
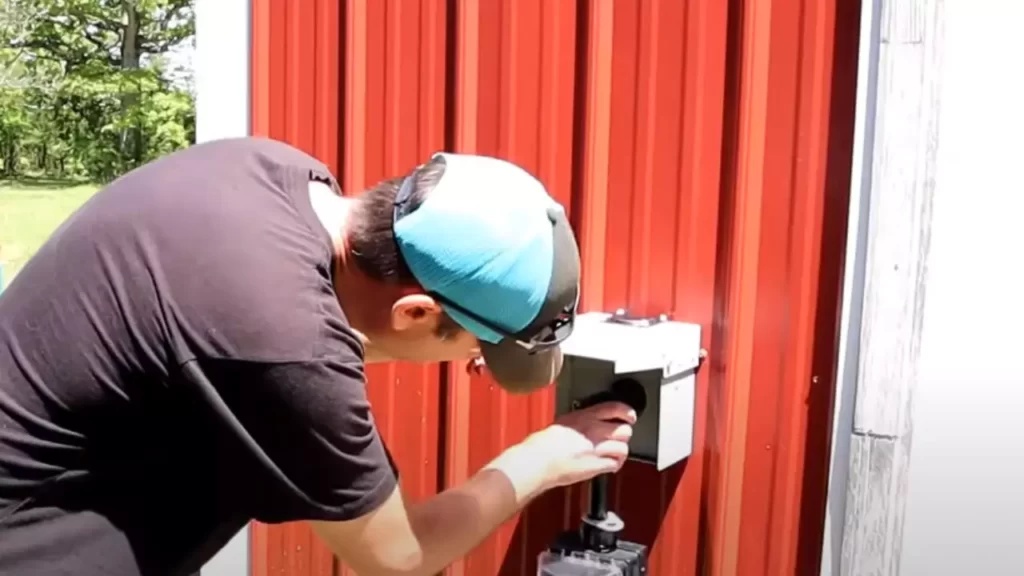
Mounting the Outlet Box
Before starting the installation, ensure you have turned off the power supply to the area where you will be mounting the outlet box. Choose a sturdy, stable surface near the electrical panel to mount the box. Use a level to ensure it is straight.
Once you have found the appropriate location, mark the position of the screw holes on the surface. Drill holes at these marked spots and insert wall anchors if necessary. Secure the outlet box to the surface using screws and a screwdriver.
Wiring the Outlet
Now that the outlet box is securely mounted, it’s time to wire the outlet. Begin by stripping the insulation off the ends of the wires, ensuring a sufficient length to connect to the outlet terminals.
Take the black wire, which is the hot wire, and connect it to the brass terminal on the outlet. The white wire, known as the neutral wire, should be connected to the silver terminal. Finally, connect the green or copper wire, the grounding wire, to the green terminal.
It is crucial to follow the manufacturer’s instructions and adhere to appropriate wiring standards during this process to ensure safety and proper functionality. If you are unsure about the wiring process, consult a professional electrician.
Securing the Outlet
After successfully wiring the outlet, carefully position it inside the outlet box. Ensure that the outlet is level and the terminals are easily accessible.
Once positioned, secure the outlet to the outlet box using the provided mounting screws. Make sure the outlet is securely fastened and does not wobble or move.
After securing the outlet, double-check all connections to ensure they are tight and properly connected. This step is vital to prevent potential hazards and ensure the safe operation of your RV outlet.
By following these steps to install a 50 Amp RV outlet, you will be well on your way to providing reliable power for your RV. Remember, safety should always be prioritized during any electrical installation. If you are uncertain about any aspect of the process, it is advised to seek assistance from a qualified electrician.
Testing The Connection
When it comes to installing a 50 Amp RV outlet, the final step after completing the wiring is testing the connection. This crucial step ensures that the installation has been done correctly and that the outlet is ready to provide the necessary power for your RV. Testing the connection involves double-checking the wiring, reconnecting the power, and verifying the voltage and amperage.
Double-Checking the Wiring
Before proceeding with testing the connection, it is essential to double-check the wiring to ensure that it has been properly installed. Inspect the connections at both ends of the wiring, including the breaker panel and the outlet itself. Ensure that all connections are secure and that there are no loose or exposed wires. Visually inspecting the wiring can help identify any potential issues that need to be addressed before testing the connection.
Reconnecting the Power
Once you have double-checked the wiring and confirmed its integrity, it is time to reconnect the power. Turn off the main breaker in the breaker panel to ensure your safety while working on the connection. Carefully connect the RV’s power cord to the 50 Amp outlet, making sure that the connection is secure. Take extra caution to avoid any accidental power surges or electric shocks during this step.
Verifying the Voltage and Amperage
After reconnecting the power, the final step in testing the connection is to verify the voltage and amperage. To do this, you will need a multimeter, which is a handy tool for measuring electrical voltage and amperage. Set the multimeter to the appropriate voltage setting and carefully insert its probes into the slots of the 50 Amp outlet. The multimeter will display the voltage reading, which should match the specifications of the outlet, typically 240 volts.
Next, you need to measure the amperage. Set the multimeter to the amperage setting and clamp it around one of the hot wires in the wiring leading to the 50 Amp outlet. The multimeter will display the amperage reading, which should match the specified 50 Amps. This verification process confirms that the outlet is providing the correct voltage and amperage required for your RV.
If you find any discrepancies in the voltage or amperage readings, it is crucial to consult a professional electrician to address the issue before using the outlet. Remember, improper voltage or amperage can damage your RV’s electrical system or even pose a safety risk.
After successfully completing the testing process and verifying the voltage and amperage, you can be confident that your 50 Amp RV outlet installation is functioning correctly. Now, you can enjoy the convenience of having a dedicated power supply for your RV, ensuring a comfortable and hassle-free camping experience.
Ensuring Electrical Safety
When it comes to installing a 50 amp RV outlet, ensuring electrical safety is of paramount importance. One crucial aspect of this process is grounding the outlet properly. Additionally, testing for proper ground is necessary to guarantee the safety of your RV and its electrical system. In this section, we will discuss these two important steps in detail.
Grounding the Outlet
Grounding the 50 amp RV outlet is an essential step to protect against electrical faults that may occur. Proper grounding ensures the safe dissipation of electrical currents and prevents potential damage to your RV and appliances. When installing the outlet, make sure to follow these steps to correctly ground it:
- Start by turning off the power supply to the area you will be working on. This will ensure your safety throughout the installation process.
- Locate the grounding bus bar in your electrical panel. This is usually a metal strip or a bar with multiple screw terminals.
- Connect the grounding wire of the 50 amp RV outlet to the grounding bus bar. Use a screwdriver to secure the connection by tightening the screw terminal.
- Ensure that the length of the grounding wire is appropriate and does not exceed any specified limits, as stated in the electrical code.
By grounding your 50 amp RV outlet correctly, you establish a safe pathway for electrical currents to flow, minimizing the risk of electric shocks and potential damage to your RV.
Testing for Proper Ground
After grounding the outlet, it is crucial to test for proper ground to verify if the installation was successful. Testing the grounding connection will give you peace of mind and ensure the safety of your RV. Here is a simple process to test for proper ground:
- Make sure the power supply to the outlet is turned off before conducting any tests.
- Use a multimeter or ground fault circuit interrupter (GFCI) tester to check for continuity between the grounding wire and a known ground source, such as a metal water pipe.
- If the continuity test shows a proper connection, you can be confident that your 50 amp RV outlet is grounded correctly.
Regularly testing for proper ground is essential to ensure the ongoing safety and reliability of your electrical system. By verifying the grounding connection, you can address any issues promptly and prevent potential problems that may arise later.
In conclusion, grounding the 50 amp RV outlet and testing for proper ground are crucial steps in ensuring electrical safety when installing this type of outlet. By following the correct procedures and conducting regular tests, you can have peace of mind knowing that your RV and its electrical system are protected.
Troubleshooting Common Issues
Troubleshooting common issues is an essential part of installing a 50 Amp RV outlet to ensure a safe and reliable electrical connection. Identifying circuit overloads and checking for faulty wiring are two key areas to focus on when troubleshooting. By understanding these common issues and taking necessary precautions, you can optimize your RV’s electrical system for a worry-free experience on the road.
Identifying Circuit Overloads
One common issue that RV owners may encounter is circuit overloads, which can result in blown fuses or tripped breakers. This occurs when the electrical load on a circuit exceeds its capacity. To identify circuit overloads:
- Take note of any appliances or devices that are consistently causing the circuit to trip.
- Ensure that the total electrical demand of all connected appliances and devices does not exceed the amp rating of the circuit.
- If you suspect an overload, try unplugging or turning off some appliances to reduce the overall electrical load.
Remember, it’s crucial to distribute your electrical load evenly across different circuits to prevent overloads. Be mindful of how many appliances you’re using simultaneously and adjust your power usage accordingly.
Checking for Faulty Wiring
Faulty wiring is another common issue that can lead to electrical problems in your RV. To check for faulty wiring:
- Inspect the power cord and electrical connections for any visible damage or signs of wear.
- Use a multimeter to test the continuity of the wires to ensure they are correctly connected and not damaged.
- If you suspect faulty wiring, consult a qualified electrician to address the issue and make any necessary repairs.
Remember, faulty wiring poses a significant safety risk and should be addressed immediately. It’s crucial to prioritize safety and consult a professional if you’re unsure about any electrical components or connections.
Troubleshooting common issues, such as identifying circuit overloads and checking for faulty wiring, is a vital step in ensuring a smooth installation process for your 50 Amp RV outlet. By following these guidelines, you can optimize your RV’s electrical system and enjoy a worry-free journey on the road.
Engaging A Professional Electrician
Engaging a Professional Electrician
Installing a 50 Amp RV outlet requires a solid understanding of electrical systems, wiring, and safety protocols. While it may seem tempting to take on the project yourself, it’s important to recognize the potential risks involved. That’s why engaging a professional electrician is recommended when installing a 50 Amp RV outlet. Not only does hiring a qualified electrician guarantee a proper and safe installation, but it also saves you time, effort, and potential headaches down the line.
Knowing When to Seek Professional Help
Before diving into the installation process, it’s vital to determine whether you have the necessary skills and knowledge to complete the job safely. While some handy individuals might feel confident in taking on electrical projects, it’s important to recognize when professional help is needed. Here are some indicators that it’s time to call in an electrician:
- If you lack experience with electrical work
- If you’re unsure of local building codes and regulations
- If you don’t have the proper tools and equipment
- If you’re dealing with an older or complex electrical system
- If you’re not comfortable working with electricity or in high-risk situations
Knowing when to seek professional help not only ensures your safety but also guarantees a successful installation.
Hiring a Qualified Electrician
When it comes to hiring a professional electrician for your 50 Amp RV outlet installation, there are a few factors to consider. It’s essential to find a qualified electrician who has the expertise and experience in handling electrical installations and understands the unique requirements of an RV outlet. Here’s what to look for when hiring:
- License and Certification: Ensure the electrician is licensed and certified in your state, as this guarantees their adherence to the latest safety standards.
- Experience: Look for electricians who have experience specifically with RV electrical installations. Their familiarity with these systems will ensure a smoother and more efficient installation process.
- Reputation and Reviews: Check online reviews and ask for recommendations from friends or fellow RV owners. A reputable electrician with positive feedback is likely to provide quality service.
- Insurance: Make sure the electrician has liability insurance to protect against any accidents or damages that may occur during the installation.
- Cost: While price shouldn’t be the sole factor in your decision, it’s important to obtain quotes from multiple electricians to ensure you’re getting a fair price.
By hiring a qualified electrician, you can rest assured that your 50 Amp RV outlet will be installed correctly and in compliance with all safety regulations. Their expertise will save you time, effort, and potential costly mistakes.
Conclusion (Do Not Include This Heading/Subheading In Your Outline)
Installing a 50 Amp RV outlet is a task that requires careful planning and execution. By following the step-by-step guide provided in this blog post, you have learned how to prepare for the installation, choose the right location, gather the necessary materials, and safely wire the RV outlet. Now, let’s summarize what you need to keep in mind when installing a 50 Amp RV outlet.
Summary
Installing a 50 Amp RV outlet can provide you with the power needed to run various appliances and devices in your recreational vehicle. To ensure a successful installation, remember the following key points:
Choosing the Right Circuit Breaker
- Use a circuit breaker that can handle the load of a 50 Amp RV.
- Consult a professional electrician if you are unsure about the suitability of your existing circuit breaker.
Finding the Ideal Location for the Outlet
- Choose a location near your RV that provides easy access to the electrical panel.
- Ensure the location is protected from the elements and offers sufficient space for the installation.
Gathering the Necessary Materials
- Obtain all the required materials, including the 50 Amp RV outlet, appropriate wires, conduit, connectors, and junction box.
- Take accurate measurements to ensure you have the correct lengths of wire and conduit.
Wiring the Outlet
- Follow the National Electric Code (NEC) guidelines when wiring the RV outlet.
- Use appropriate wire sizes and techniques for a safe and efficient installation.
- Ensure all connections are secure and properly insulated.
- Test the outlet to verify proper voltage and functionality.
By successfully completing these steps, you can enjoy the convenience and power of a 50 Amp RV outlet. Remember, if you’re unsure about any aspect of the installation, it’s always best to consult a professional electrician.
Frequently Asked Questions
What Is Needed To Install 50 Amp Rv Outlet?
To install a 50 amp RV outlet, you’ll need a few things: a 50 amp circuit breaker, a 50 amp RV outlet, appropriate wiring (6-gauge), and a weatherproof electrical box. Make sure to follow local codes, hire a licensed electrician if needed, and prioritize safety.
Can You Plug A 50 Amp Rv Into Your House?
Yes, you can plug a 50 amp RV into your house as long as you have a compatible electrical outlet. However, it’s important to ensure that your house’s electrical system can handle the RV’s power requirements to avoid overloading or damage.
Can I Plug My 50 Amp Rv Into A 110 Outlet?
No, you cannot plug your 50 amp RV into a 110 outlet. The RV requires a higher voltage to operate properly. Plugging it into a lower voltage outlet can cause damage to the electrical system and potentially be dangerous. Always use the correct outlet for your RV’s power needs.
Can I Plug My Rv Into A 50 Amp Outlet?
Yes, you can connect your RV to a 50 amp outlet. Just make sure your RV is designed to handle this level of power.
Conclusion
To recap, installing a 50 amp RV outlet is a vital step to ensure your RV is powered efficiently and safely. By following the correct wiring process and adhering to the necessary safety precautions, you can enjoy a hassle-free experience on your next camping trip.
Remember to consult a professional electrician if you encounter any difficulties during the installation process. Happy camping!