To install a three-way switch, follow these steps: Turn off the power, remove the old switch, identify the common wire, connect the wires to the new switch, and secure everything in place. Installing a three-way switch requires basic electrical knowledge and following safety precautions.
With the right steps and tools, you can successfully install a three-way switch in your home. In this guide, we will break down the installation process into clear and easy-to-follow steps, so you can confidently complete the task. Whether you are replacing an old switch or installing a new one, this guide will provide all the information you need to get the job done safely and correctly.
Understanding The Basics Of A 3Way Switch
Understanding the Basics of a 3Way Switch
When it comes to lighting control, a 3-way switch is a valuable tool that allows you to power a single light or a group of lights from multiple locations. Whether you’re looking to add convenience to your home or enhance the functionality of your space, installing a 3-way switch can make a significant difference. But before embarking on the installation process, it’s important to have a clear understanding of how a 3-way switch works and the different types available.
How a 3Way Switch Works
A 3-way switch is a device that controls a light fixture or a set of lights from two or more locations. It operates using a special wiring configuration that allows electricity to flow through two separate switches. When one switch is turned on, power is redirected to the fixture or lights, and turning on the other switch will reverse the power flow, turning off the lights.
A key concept when it comes to 3-way switches is the traveler wire. This wire connects the two switches together and allows the power to travel between them. It is crucial to understand how these wires are connected to ensure proper functionality of your 3-way switch.
Different Types of 3Way Switches
There are two main types of 3-way switches: toggle switches and dimmer switches. Toggle switches are the conventional switches that you’re likely familiar with. They have a simple up and down switch action and are commonly used in residential settings. Dimmer switches, on the other hand, offer the added functionality of adjusting the intensity of the lights. They are perfect for creating different lighting moods and enhancing the ambiance of any room.
When choosing between toggle switches and dimmer switches, consider factors such as personal preference, functionality requirements, and the overall aesthetic of your space. Both options have their own advantages, so it’s important to select the one that best meets your needs.
Choosing the Right Switch for Your Needs
Before you start the installation process, be sure to choose the right switch for your needs. Consider factors such as the number of switches required, the type of switch functionality desired, and any specific design preferences. It’s also important to ensure that the switch you choose is compatible with the electrical wiring in your home.
If you’re unsure about which switch to select or the compatibility of the switch with your wiring, consult a professional electrician. They have the expertise to guide you through the selection process and ensure that the installation is done safely and efficiently.
By understanding the basics of a 3-way switch, including how it works and the different types available, you’re now ready to choose the right switch for your needs. Installing a 3-way switch may seem complex, but with the right knowledge and guidance, you’ll be able to enhance the lighting control in your space and enjoy the convenience it brings.

Step-By-Step Guide To Installing A 3Way Switch
Are you looking to upgrade your home’s lighting system? Installing a 3Way switch is a great way to enhance the functionality and convenience of your lighting setup. Whether you want to control a single light source from multiple switches or create a more flexible lighting arrangement in your home, a 3Way switch can provide the solution you need. In this step-by-step guide, we will walk you through the process of installing a 3Way switch, from gathering the necessary tools and materials to testing the switch’s functionality.
Gathering the Necessary Tools and Materials
Before you begin the installation process, it’s essential to gather all the necessary tools and materials. This ensures that you have everything you need at hand, saving you time and avoiding unnecessary interruptions. Here’s a list of the tools and materials you will need:
| Tools | Materials |
|---|---|
| Wire stripper | 3Way switch(es) |
| Screwdriver | Electrical tape |
| Wire cutter | Wire connectors |
| Voltage tester | Electrical box |
| Electrical tape | Wire nuts |
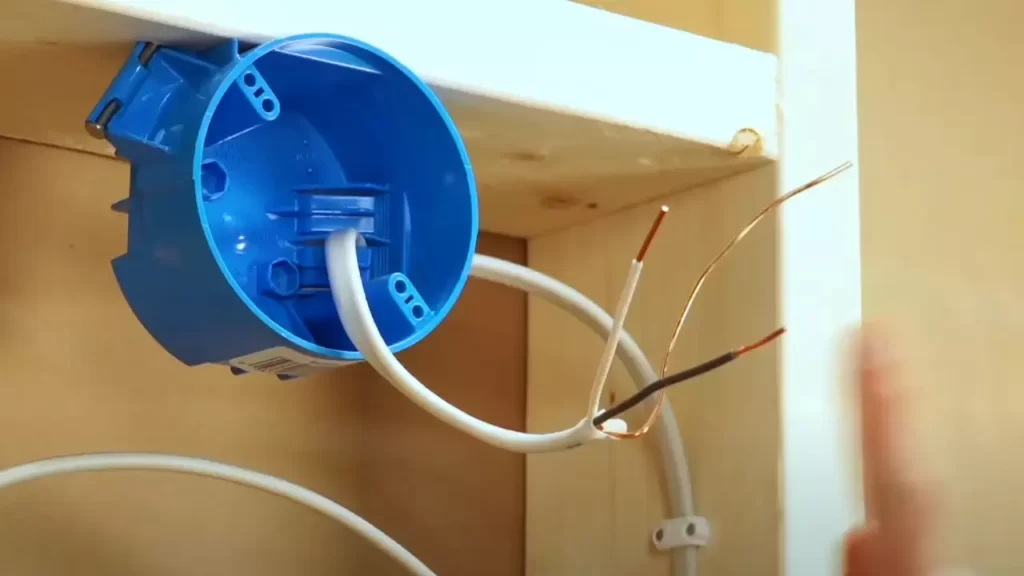
Identifying the Existing Wiring Setup
In order to successfully install a 3Way switch, it’s important to first identify the existing wiring setup in your home. This will help you understand how the current switch controls the power to your lighting system. Here’s what you need to do:
- Begin by turning off the power to the circuit at the circuit breaker.
- Use a voltage tester to confirm that the power is off.
- Remove the cover plate from the existing switch.
- Carefully disconnect the existing switch from the electrical box.
- Inspect the wiring connections and take note of how they are connected.
Removing the Old Switch
Once you have identified the existing wiring setup, the next step is to remove the old switch. Follow these steps to remove the old switch:
- Disconnect the wires from the existing switch.
- Loosen the terminal screws on the sides of the switch.
- Remove the old switch from the electrical box.
Wiring the New 3Way Switch
Now that you have removed the old switch, it’s time to wire the new 3Way switch. Follow these steps for proper wiring:
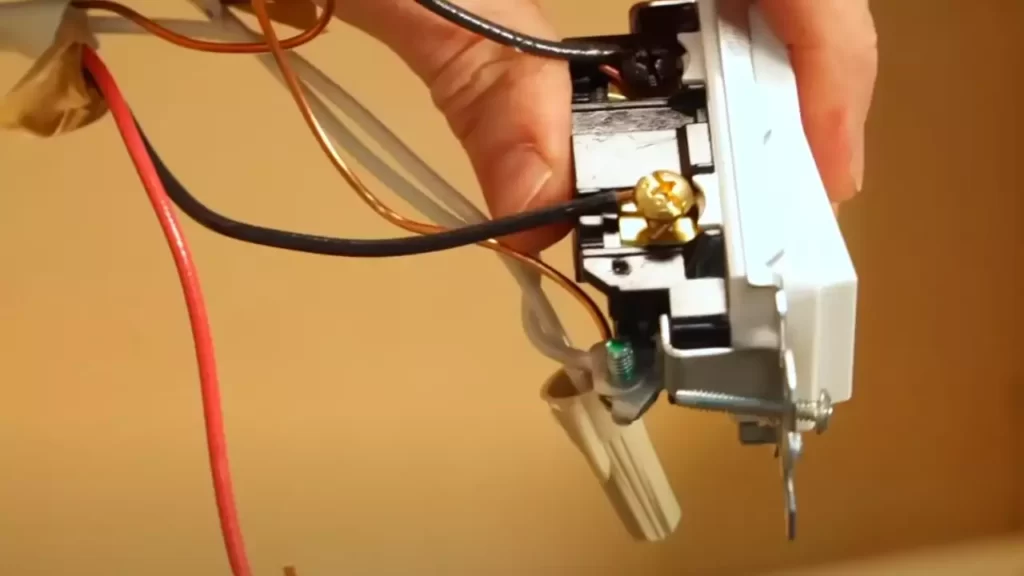
- Identify the common terminal on the new 3Way switch.
- Connect the common wire from the existing wiring to the common terminal on the new switch.
- Identify the remaining two traveler terminals on the new switch.
- Connect one traveler wire to each of the traveler terminals on the new switch.
- Secure all the wiring connections with wire nuts.
- Attach the new switch to the electrical box using the provided screws.
Testing the Switch’s Functionality
After wiring the new 3Way switch, it’s crucial to test its functionality. This will ensure that the switch is working correctly and controlling the power to your lighting system as intended. Here’s how you can test the switch:
- Turn the power back on at the circuit breaker.
- Flip the switch to different positions and observe the response from the lighting system.
- If the switch operates as expected, congratulations! You have successfully installed a 3Way switch.
- If there are any issues or the switch does not function correctly, double-check your wiring connections and troubleshoot accordingly.
By following this step-by-step guide, you can easily install a 3Way switch and enjoy enhanced lighting control in your home. Remember to always prioritize safety and consult a professional electrician if you feel unsure about any steps in the process.
Troubleshooting Common Issues With 3Way Switch Installation
Installing a 3-way switch may seem daunting at first, but with the right guidance, it can be a straightforward process. However, like any electrical project, problems can arise during the installation that may leave you scratching your head. In this section, we will discuss some common issues that you may encounter while installing a 3-way switch and provide troubleshooting tips to help you overcome them.
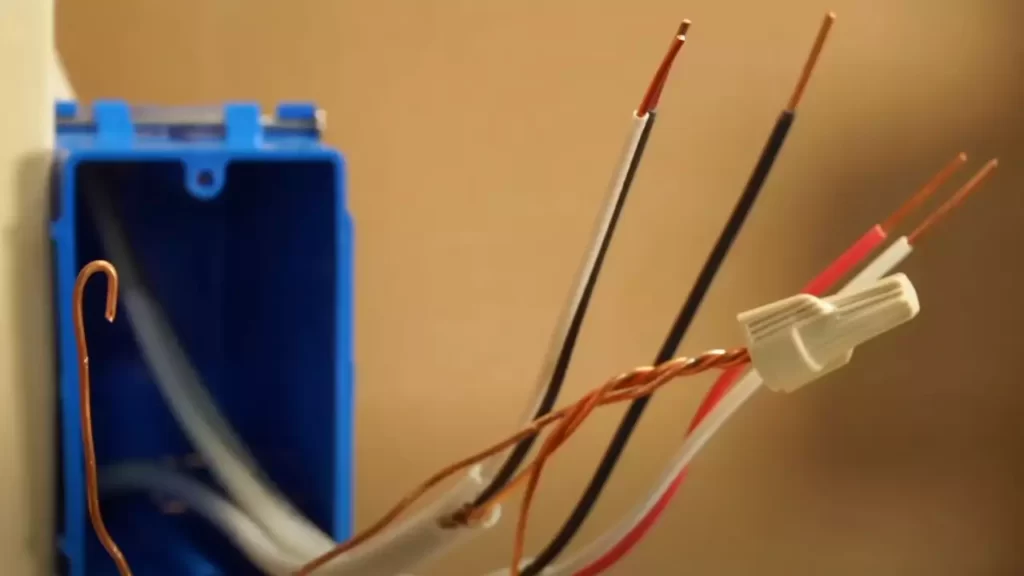
Identifying Wiring Mistakes
One of the most common issues homeowners face when installing a 3-way switch is making wiring mistakes. Incorrectly connecting the wires can not only prevent the switch from functioning properly but also pose a safety risk. Here are some common wiring mistakes to watch out for:
- Switching the Line and Load Wires: The line wire is the one supplying power to the switch, while the load wire is the one carrying power to the light fixture. Swapping these wires will lead to inconsistent switch operation.
- Crossed Traveler Wires: Traveler wires are used to connect the two switches in a 3-way switch setup. Crossed traveler wires can cause the switches to behave erratically or not work at all.
- Missing or Loose Ground Wire: The ground wire is an essential safety feature that prevents electric shocks. Forgetting to connect or properly tighten the ground wire can compromise the safety of your 3-way switch.
If you find yourself facing any of these wiring mistakes, it’s important to correct them promptly. Double-check the wiring diagram for your specific switch model and ensure the wires are correctly connected. If you are unsure about anything, it is always best to consult a professional electrician to avoid any potential hazards.
Dealing with Inconsistent Switch Operation
Another common issue that may arise after installing a 3-way switch is inconsistent switch operation. This can include switches not turning the lights on or off reliably or switches not working from one location.
To troubleshoot inconsistent switch operation, follow these steps:
- Check the Connections: Ensure all wires are securely attached to the correct terminals on the switches. Loose connections can lead to erratic switch behavior.
- Replace Defective Switches: If you have confirmed that all the connections are correct, but the switches are still not working correctly, it is possible that one or both of the switches are defective. Replace them with new ones and test the operation again.
- Inspect the Light Fixture: In some cases, the issue may not lie with the switches but rather with the light fixture itself. Check the connections at the fixture and make sure they are secure.
Handling Dimmer Compatibility Issues
If you are installing a 3-way dimmer switch, compatibility issues can arise if the dimmer is not designed to work with the type of light bulbs you have. Some dimmers are not compatible with LED bulbs, for example. If you experience flickering lights or inconsistent dimming performance, here’s what you can do:
- Check Dimmer and Bulb Compatibility: Ensure that the dimmer switch you have is compatible with the type of bulbs you are using. Check the dimmer’s specifications or consult the manufacturer’s guidelines.
- Consider using a Different Bulb: If the dimmer and bulb are not compatible, you may need to switch to a different type of bulb that is compatible with the dimmer switch.
- Upgrade to a Universal Dimmer: If you frequently encounter compatibility issues or plan on using different types of bulbs in the future, consider installing a universal dimmer that works with a wide range of bulb types.
By following these troubleshooting tips, you can address common issues that may arise during the installation of a 3-way switch. Remember to always prioritize safety and consult a professional electrician if you are unsure about anything.
Tips And Best Practices For Installing A 3Way Switch Efficiently And Safely
Installing a 3-way switch can seem intimidating, but by following a few tips and best practices, you can ensure a smooth and safe installation process. In this section, we will cover three important aspects: labeling wires for easy identification, securing proper grounding, and following electrical safety procedures.
Labeling Wires for Easy Identification
Labeling the wires during a 3-way switch installation is crucial to avoid confusion and mistakes. Here are some steps to follow:
- Start by turning off the power to the circuit at the breaker box.
- Use a voltage tester to ensure that the power is indeed off.
- Once confirmed, carefully remove the switch cover and examine the existing wiring.
- Before disconnecting any wires, take clear, legible labels and attach them to each wire’s end using electrical tape or small plastic tags.
- Label each wire with its corresponding terminal location, such as “common,” “traveler,” or “hot.”
- This labeling will make it easier for you to connect the new switch correctly.
Securing Proper Grounding
Proper grounding is crucial for the safe operation of a 3-way switch. Follow these steps to ensure a secure ground connection:
- Start by turning off the power to the circuit at the breaker box.
- Verify that the power is off using a reliable voltage tester.
- Once confirmed, identify the grounding wire, which is usually green or bare copper.
- Ensure that the grounding wire is securely connected to the switch’s grounding terminal.
- If there is no grounding wire present, consult a professional electrician to ensure compliance with electrical codes and standards.
- Remember, proper grounding is essential for the safety of your electrical system.
Following Electrical Safety Procedures
Electrical safety should be a top priority when installing a 3-way switch. Adhere to these guidelines to ensure a safe process:
- Always turn off the power at the breaker box before starting any electrical work.
- Use a voltage tester to confirm that the power is off.
- Handle all wiring with care, avoiding any frayed or damaged wires.
- Wear appropriate safety gear, such as gloves and safety goggles, to protect yourself from potential electrical hazards.
- If you encounter any difficulties or are unsure about any steps, consult a qualified electrician.
By following these tips and best practices, you can confidently install a 3-way switch efficiently and safely. Remember always to prioritize safety and seek professional assistance if needed.
Enhancing Your 3Way Switch Installation With Additional Features
Installing a 3Way switch in your home is a great way to add convenience and control to your lighting system. But why stop there? With a few additional features, you can take your installation to the next level. In this section, we’ll explore three ways to enhance your 3Way switch installation, including installing dimmer switches, adding remote control abilities, and expanding the system with multiple switches.
Installing Dimmer Switches
If you want to create a more customizable lighting experience in your space, installing dimmer switches is the way to go. Dimmers allow you to adjust the brightness of your lights, setting the perfect ambiance for any occasion. Whether you’re hosting a cozy dinner party or relaxing with a book, having the ability to control the intensity of your lighting adds both convenience and style to your home.
When installing dimmer switches, it’s important to choose the right type for your needs. There are two main options to consider: leading-edge dimmers and trailing-edge dimmers. Leading-edge dimmers are compatible with incandescent and halogen bulbs, while trailing-edge dimmers are designed for use with LED and CFL bulbs. Make sure to select the appropriate dimmer switch for your lighting setup to ensure compatibility and optimal performance.
Adding Remote Control Abilities
Imagine being able to control your lights from the comfort of your couch or even when you’re away from home. With remote control abilities, you can do just that. By incorporating a wireless remote or integrating your 3Way switch system with a smart home hub, you gain the flexibility of controlling your lights from anywhere in your home.
There are various options available for remote control, each with their own features and capabilities. Some remotes allow you to create customizable lighting scenes, adjusting multiple switches simultaneously to achieve the perfect ambiance. Others provide scheduling capabilities, allowing you to automate your lighting based on your daily routine or preferences. By adding remote control abilities to your 3Way switch installation, you’ll have full control over your lighting system at your fingertips.
Expanding the System with Multiple Switches
If you have a larger space or multiple entryways, expanding your 3Way switch system with multiple switches is a logical next step. With additional switches strategically placed throughout your home, you can conveniently control your lights from various locations. This eliminates the need to walk to a single switch, making it more convenient for you and your family to operate the lighting system.
When expanding your system with multiple switches, make sure to follow the proper wiring instructions to ensure proper functionality. Each switch should be connected correctly to maintain the 3Way switch configuration. It’s also important to use compatible switches to ensure seamless integration and avoid any compatibility issues.
Now that you know how to enhance your 3Way switch installation with additional features, you can take your lighting control to the next level. Whether it’s adjusting the brightness with dimmers, gaining remote control abilities, or expanding the system with multiple switches, these added features will enhance the convenience, flexibility, and overall functionality of your lighting system.
Frequently Asked Questions
If you’re considering installing a 3-way switch in your home, you might have some questions about the process. In this section, we’ll answer some of the most common questions that people have about installing 3-way switches.
How long does it take to install a 3-Way switch?
The time it takes to install a 3-way switch can vary depending on your electrical experience and the complexity of the project. On average, it takes about 1-2 hours to install a 3-way switch. However, if you’re new to electrical work or if you encounter any complications during the installation process, it may take longer. It’s always a good idea to set aside a few hours for the installation to ensure that you have enough time to complete the project.
Can I install a 3-Way switch without previous electrical experience?
While it’s possible to install a 3-way switch without previous electrical experience, it’s important to proceed with caution. Electrical work can be dangerous if not done properly, so if you’re unsure of your abilities, it’s best to hire a professional electrician to handle the installation for you. However, if you’re confident in your skills and follow proper safety precautions, you can successfully install a 3-way switch on your own.
What are the safety precautions to keep in mind during installation?
When installing a 3-way switch, it’s crucial to prioritize safety to prevent any accidents or electrical hazards. Here are some safety precautions to keep in mind:
- Turn off the power: Before beginning the installation process, make sure to turn off the power to the circuit you’ll be working on. This can be done by switching off the corresponding breaker in your electrical panel.
- Test the wires: Use a circuit tester to ensure that the power is off before touching any wires. Verify that there is no electrical current flowing through the wires you’ll be working with.
- Wear protective gear: To protect yourself from potential shock or injury, wear safety goggles and non-conductive gloves.
- Follow the instructions: Read and follow the manufacturer’s instructions carefully, ensuring that you understand each step before proceeding.
- Secure connections: Make sure all wire connections are tightly secured using wire nuts or screw terminals. Loose connections can cause electrical issues or shorts in the circuit.
- Test before finishing: After completing the installation, test the switch to ensure it’s working properly before installing any wall plates or covers.
By following these safety precautions and taking your time during the installation process, you can successfully install a 3-way switch and enhance the functionality of your lighting system.
Frequently Asked Questions For How To Install A 3Way Switch
How Do You Wire Up A 3-Way Switch?
To wire up a 3-way switch, first, turn off the power. Then, connect the black wire from the power supply to the common terminal on one switch. Connect the black wire going to the light fixture to the common terminal on the other switch.
Finally, connect the traveler wires from each switch to the traveler terminals on the opposite switch. Always follow the specific instructions provided with the switch.
Does It Matter How You Wire A 3-Way Switch?
Wiring a 3-way switch correctly is crucial. Incorrect wiring can cause the switch not to work or cause a short circuit. Make sure to follow the correct wiring diagram and connect the wires to the appropriate terminals.
How Do You Wire A 3-Way Switch To One Way?
To wire a 3-way switch to a one-way switch: 1) Turn off the power supply. 2) Connect the common terminal of the 3-way switch to the line terminal of the one-way switch. 3) Connect the traveler terminals of the 3-way switch to the load terminal of the one-way switch.
4) Restore power and test the switches.
What Equipment Is Needed To Wire A Three-Way Switch?
To wire a three-way switch, you will need a few essential equipment: two three-way switches, electrical wires, wire connectors, wire strippers, a voltage tester, and a screwdriver. Make sure to follow proper safety precautions while working with electrical equipment.
Conclusion
Installing a 3-way switch may seem daunting, but with the right guidance, it becomes a breeze. By following the step-by-step instructions outlined in this blog post, you can successfully install a 3-way switch in your home. Remember to always prioritize safety and consult a professional if needed.
With this newfound knowledge, you can confidently tackle this electrical project and enhance the functionality of your home. Happy wiring!