To install a 30 amp RV outlet, first turn off the power, locate the appropriate circuit breaker, run a new cable from the main electrical panel to the location of the outlet, mount the outlet box, connect the wires to the outlet, and test the connection to ensure it’s working properly. Installing a 30 amp RV outlet is crucial for safely powering your RV while camping or traveling.
With the right steps and precautions, you can easily set up a dedicated outlet to accommodate the power needs of your RV. This comprehensive guide will provide you with clear instructions on how to install a 30 amp RV outlet, ensuring a reliable power source for your RV appliances and systems.
Whether you’re a seasoned DIY enthusiast or a beginner, these steps will help you complete the installation process successfully. So, let’s get started and ensure your RV stays powered up wherever your adventures take you.
Why A 30 Amp Rv Outlet Is Necessary For Rv Owners
A 30 Amp RV outlet is necessary for RV owners to ensure they have sufficient power for all their appliances and devices, while also preventing electrical overload and damage to their RV’s electrical system. Let’s take a closer look at why a 30 Amp RV outlet is so important.
Provides sufficient power for appliances and devices
RVs are equipped with various appliances and devices that require a significant amount of power to operate efficiently. These can include air conditioners, refrigerators, microwaves, televisions, and other electronic devices.
By installing a 30 Amp RV outlet, you are providing your RV with enough power to run all these appliances simultaneously without any issues. This means you can enjoy all the comforts of home while on the road, knowing that you have the necessary power supply to support your needs.
Prevents electrical overload and damage to the RV’s electrical system
One of the biggest risks of not having a dedicated RV outlet is the potential for electrical overload. When you use regular household outlets or extension cords to power your RV, you run the risk of exceeding the electrical capacity of these outlets, leading to overheating, short circuits, and potentially damaging your RV’s electrical system.
A 30 Amp RV outlet is designed specifically to handle the power requirements of your RV. It has the capacity to provide a consistent and stable power supply without overloading the system. This not only ensures the longevity of your RV’s electrical components but also minimizes the risk of electrical mishaps and accidents.
By installing a 30 Amp RV outlet, you are taking proactive steps to protect both your RV and yourself from potentially hazardous electrical situations. It’s a small investment that can save you from costly repairs and potential safety hazards in the long run.
So, if you’re an RV owner, make sure to install a 30 Amp RV outlet to provide sufficient power for all your appliances and devices, while also safeguarding your RV’s electrical system. It’s a crucial step in ensuring a smooth and trouble-free experience on your RV adventures.
Planning For The Installation Process
In order to successfully install a 30 Amp RV outlet, proper planning is essential. This involves assessing the electrical capacity of your property and determining the optimal location for the outlet. By taking these steps, you can ensure a smooth and efficient installation process.
Assessing the Electrical Capacity of Your Property
Before installing a 30 Amp RV outlet, it is crucial to assess the electrical capacity of your property. This involves understanding the capability of your electrical system to handle the additional load that the RV outlet will require. Here are some key considerations:
- Check your electrical panel: Start by identifying the amperage of your main breaker. Most residential properties have a 100 Amp or 200 Amp main breaker.
- Calculate the existing electrical load: Determine the total amperage being used by your current appliances and devices. This information can usually be found on the nameplates or product manuals.
- Consider future electrical demands: If you plan on adding more electrical appliances or expanding your property, take those future needs into account when assessing the electrical capacity.
By conducting a thorough assessment, you can ensure that your electrical system can accommodate the additional demand of an RV outlet without overloading or damaging the system.
Determining the Optimal Location for the RV Outlet
Once you have assessed the electrical capacity of your property, the next step is determining the optimal location for the RV outlet. This involves finding a suitable spot for easy access, convenience, and safety. Consider the following factors:
- Proximity to your RV parking spot: The RV outlet should be located close to where you typically park your RV. This will minimize the length of the electrical cord needed and reduce the risk of accidents or tripping hazards.
- Accessibility for installation: Choose a location that allows for easy installation. Consider the distance from the electrical panel and the route the wiring will need to take.
- Protection from the elements: Ensure the location provides adequate protection from rain, snow, and direct sunlight. This will help prolong the lifespan of the RV outlet and prevent any potential damage.
By carefully considering these factors, you can determine the optimal location for the RV outlet, providing convenience and safety for future use.
Components Of A 30 Amp Rv Outlet
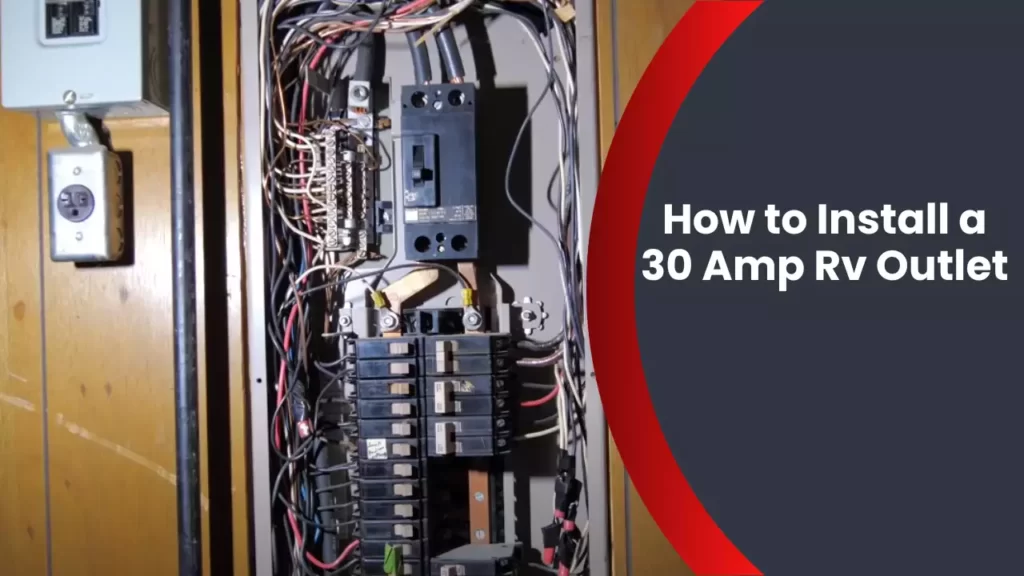
The main electrical panel
The main electrical panel is the heart of your RV’s electrical system. It acts as a central hub, distributing power to various circuits throughout the vehicle. Typically located inside the RV, near the entrance or in a compartment, the main panel houses the circuit breakers and controls the flow of electricity. It is essential to ensure that the main electrical panel is properly sized to accommodate a 30 Amp RV outlet.
Circuit breaker
The circuit breaker is a crucial component of a 30 Amp RV outlet. It is responsible for protecting the electrical system from overloads and short circuits. The circuit breaker automatically trips and shuts off power in case of an excessive current flow, preventing damage to your RV’s electrical system and appliances. When installing a 30 Amp RV outlet, it is important to choose a circuit breaker that matches the outlet’s capacity and comply with the electrical code.
Electrical conduit
The electrical conduit is a pipe or tubing used to protect and route electrical wiring. It provides a safe and secure pathway for the wires, shielding them from potential damage. When installing a 30 Amp RV outlet, it is recommended to use electrical conduit to protect the wiring from external elements and ensure compliance with safety standards. The conduit should be properly sized based on the number and size of wires used.
Outlet box
The outlet box serves as the connection point between the electrical conduit and the RV outlet. It provides a safe and enclosed space for the wiring connections and helps keep everything organized. The outlet box should be made of durable materials that can withstand outdoor conditions. When installing a 30 Amp RV outlet, it’s important to choose an outlet box that is designed for outdoor use and meets the necessary electrical code requirements.
RV outlet
The RV outlet is the final component of a 30 Amp RV outlet setup. It provides the interface between your RV and the electrical system, allowing you to connect your vehicle and power it up. The RV outlet should be specifically designed for 30 Amp applications and have the appropriate connectors to ensure a secure and reliable connection. It is important to carefully follow the manufacturer’s instructions when installing the RV outlet to ensure proper functionality and safety.
To summarize, the components of a 30 Amp RV outlet include the main electrical panel, circuit breaker, electrical conduit, outlet box, and RV outlet. Each component plays a significant role in safely and efficiently supplying power to your RV. When installing a 30 Amp RV outlet, it is important to ensure that all components are properly installed, sized, and comply with electrical code requirements.

Wiring Requirements For A 30 Amp Rv Outlet
Installing a 30 Amp RV outlet requires careful attention to the wiring requirements. The proper wiring ensures the safe and efficient delivery of electricity to your RV. In this section, we will discuss the important aspects of wiring, including understanding wire gauges and amperage ratings, as well as proper grounding and bonding techniques.
Understanding Wire Gauges and Amperage Ratings
When it comes to wiring a 30 Amp RV outlet, selecting the correct wire gauge is essential. The wire gauge determines the thickness and capacity of the wire. A smaller wire gauge indicates a thicker wire, capable of handling higher amperage ratings.
For a 30 Amp RV outlet, you will need to use a wire gauge of 10 AWG (American Wire Gauge) or larger. This wire gauge can handle the current required by most RVs that have a 30 Amp electrical system. It is important to use the appropriate wire gauge to prevent overheating and potential electrical hazards.
Additionally, it is crucial to know the amperage rating of the wire you are using. The amperage rating indicates the maximum amount of current the wire can safely carry without overheating. To ensure a safe installation, make sure that the wire you choose has a higher amperage rating than the maximum current draw of your RV.
Proper Grounding and Bonding Techniques
Proper grounding and bonding are crucial for the safety and effectiveness of your RV electrical system. Grounding refers to connecting the electrical system to the earth’s surface, providing a path for electrical faults to dissipate safely. Bonding, on the other hand, involves connecting metal parts of the electrical system to prevent the buildup of static electricity and ensure electrical continuity.
To ensure proper grounding, you should connect the grounding wire from the RV outlet to a grounding rod. The grounding rod should be buried in the earth and provide a direct connection to the ground. This grounding connection helps protect your RV from electrical faults and reduces the risk of electric shock.
Bonding is achieved by connecting metal parts, such as the RV’s frame and the grounding wire, with bonding jumpers or other suitable methods. This connection ensures electrical continuity, preventing the buildup of static electricity and potential electrical hazards.
In conclusion, when installing a 30 Amp RV outlet, it is essential to adhere to the proper wiring requirements. Understanding wire gauges and amperage ratings will help you select the appropriate wire for your RV’s electrical system. Proper grounding and bonding techniques ensure safety and efficiency, protecting both your RV and its occupants. By following these wiring guidelines, you can enjoy a reliable and worry-free power supply for your RV adventures.

Gathering The Necessary Tools And Materials
Before you begin installing a 30 Amp RV outlet, it is important to gather all the necessary tools and materials. Having everything you need on hand will not only save you time, but it will also make the installation process smoother and more efficient.
Below is a list of tools and materials you will need for the installation:
Wire cutter/stripper
Use a wire cutter/stripper to cut and strip the electrical wires accurately. This tool will ensure clean cuts and easy removal of insulation.
Screwdriver
A screwdriver is essential for securing electrical components, such as the outlet box and wire connectors. Make sure to have a variety of screwdriver sizes to accommodate different types of screws.
Electrical tape
Electrical tape is used to insulate and protect exposed electrical connections. It provides a reliable barrier against moisture and prevents any accidental touching of wires.
Wire connectors
Wire connectors, also known as wire nuts, are used to join electrical wires securely. These connectors create a strong and reliable connection, ensuring the safety and efficiency of your RV outlet.
Outdoor-rated electrical box
An outdoor-rated electrical box is a sturdy and weather-resistant container that houses the RV outlet and protects it from the elements. Ensure that the electrical box you choose is suitable for outdoor use, as it needs to withstand various weather conditions.
Once you have gathered all these tools and materials, you will be well-prepared to install a 30 Amp RV outlet. Having everything readily available will allow you to proceed with confidence and get the job done efficiently.
Shutting Off The Power And Preparing The Main Electrical Panel
One of the most crucial steps in installing a 30 Amp RV outlet is shutting off the power and preparing the main electrical panel. This ensures your safety and prevents any electrical mishaps during the installation process. Here’s a step-by-step guide on how to shut off the power and prepare the main electrical panel:
Disconnecting the Main Power Supply
The first step is to locate your main electrical panel. This is usually located in the basement, garage, or utility room of your home. Once you’ve found it, it’s time to disconnect the main power supply.
To do this, you’ll need to find the main circuit breaker, which is typically located at the top or bottom of the electrical panel. It is usually marked with a large handle or switch. Turn the main circuit breaker to the “off” position to shut off the power supply to your entire home.
Identifying the Breaker for the RV Outlet Circuit
With the power to your home shut off, it’s time to identify the breaker for the RV outlet circuit. This breaker will be responsible for supplying power to your new RV outlet.
To identify the breaker, follow these steps:
- Start by looking for a breaker labeled specifically for the RV outlet circuit. This could be marked as “RV,” “30 Amp,” or something similar.
- If you can’t find a clearly labeled breaker, don’t worry. You can identify the correct breaker by turning off each individual breaker one at a time while someone inside the RV checks for power. When the correct breaker is turned off, the power inside the RV should be cut off.
- Make sure to inform everyone in your home that you are turning off the power and let them know when it’s safe to use electrical appliances again.
Once you’ve identified the breaker for the RV outlet circuit, keep it in the “off” position throughout the installation process to prevent any accidental power surges or electrical hazards.
By shutting off the power and preparing the main electrical panel before installing a 30 Amp RV outlet, you ensure a safe and efficient installation process. Remember to follow all necessary precautions and consult a professional if you’re unsure about any steps.
Running The Wiring And Installing The Outlet Box
Now that you have chosen the appropriate electrical conduit for your RV outlet and have determined the best route to run the wiring from the main electrical panel to the outlet location, it’s time to dive into the nitty-gritty of installing the outlet box itself. This crucial step ensures a safe and efficient power supply for your RV.
Choosing the appropriate electrical conduit
Before you start running the wiring, it’s essential to select the right electrical conduit to protect the wiring from any potential damage. The conduit acts as a protective sleeve that shields the wiring from exposure to elements, such as moisture and physical impact. Some commonly used conduits include:
| Conduit Type | Description |
|---|---|
| Metal Conduit (EMT) | This conduit is durable and provides excellent protection against physical damage. It’s a popular choice for outdoor installations. |
| PVC Conduit | PVC conduits are affordable and corrosion-resistant. They are suitable for both indoor and outdoor installations. |
Choose the conduit type that suits your specific installation requirements and ensure it is wide enough to accommodate the electrical wires comfortably.
Running the wiring from the main electrical panel to the outlet location
Once you have the appropriate conduit, you can begin running the wiring from the main electrical panel to the location where you plan to install the RV outlet. Take the following steps to ensure a smooth and error-free wiring installation:
- Turn off the power: Before you start anything, ensure that the power to the main electrical panel is turned off to avoid any electrical hazards.
- Measure and cut the conduit: Measure the distance between the main electrical panel and the outlet location, and then cut the conduit accordingly.
- Feed the wire through the conduit: Insert the electrical wires into the conduit and carefully feed them through until they reach the outlet location. Make sure the wires are secured and not tangled.
- Secure the conduit to the wall: Attach the conduit to the wall using appropriate conduit straps or supports to ensure it stays in place and doesn’t sag or hang loosely.
Remember to always follow local building codes and regulations when running the wiring. If you are not confident with electrical work, it’s advisable to hire a licensed electrician for this part of the installation.
Mounting and wiring the outlet box
After successfully running the wiring, the next step is to mount and wire the outlet box. This is where the power supply for your RV will be connected. Follow these steps for a successful installation:
- Choose an appropriate location for the outlet box: Select a location that is easily accessible and away from any potential obstructions. Ensure there is enough space to accommodate the outlet box and any necessary wiring connections.
- Mount the outlet box: Securely mount the outlet box to the wall using appropriate screws or fasteners. Ensure it is level and properly aligned.
- Connect the wires: Carefully connect the electrical wires from the conduit to the outlet box. Follow the manufacturer’s instructions and ensure proper wire connections using wire nuts or terminal connectors.
- Test the wiring: Once the connections are made, test the wiring using a voltage tester to ensure proper power supply. It’s crucial to make sure everything is functioning correctly before moving on.
By carefully following these steps, you will successfully run the wiring and install the outlet box for your 30 Amp RV outlet. Remember, safety should always be a top priority when working with electricity, so don’t hesitate to seek professional assistance if you’re unsure about any aspect of the installation process.
Connecting The Wires And Installing The Rv Outlet
Stripping and Connecting the Wires
Once you have secured the outlet box and prepared the wiring, it’s time to strip and connect the wires. Follow these steps to ensure a safe and proper connection:
- Start by stripping the outer insulation of the RV cable, exposing the individual wires inside. Use a wire stripper tool to carefully remove approximately 1 inch of the outer sheathing.
- Next, strip about 1/2 inch of insulation from the ends of each wire: the black (hot) wire, the white (neutral) wire, and the green or bare (ground) wire.
- Once the wires are stripped, you can start connecting them to the outlet. Refer to the manufacturer’s instructions or the wiring diagram on the outlet itself to determine the correct placement of each wire.
- In most cases, you will connect the black wire to the brass or dark-colored screw terminal, the white wire to the silver-colored screw terminal, and the green or bare wire to the green screw terminal. Ensure that the connections are secure by tightening the screws with a screwdriver.
- Double-check all the wire connections to make sure they are properly fastened. You can give them a gentle tug to ensure they are secure.
- Once the connections are complete, carefully push any excess wire back into the outlet box, ensuring that no wires are exposed or at risk of being pinched or damaged.
Securing the RV Outlet in the Outlet Box
Now that the wires are properly connected, it’s time to secure the RV outlet in the outlet box. Follow these steps to ensure a sturdy installation:
- Place the outlet inside the outlet box, aligning the screw holes with the designated areas on the box. Ensure that the wires are not pinched or obstructed by the outlet.
- Using a screwdriver, insert the screws into the screw holes and tighten them until the outlet is firmly secured to the outlet box.
- Double-check that the outlet is level and straight. If necessary, adjust the position of the outlet or tighten the screws further to achieve a secure and even fit.
- Finally, replace the outlet box cover by aligning it with the screw holes on the box and using a screwdriver to tighten the screws. Ensure that the cover is flush with the box and there are no gaps or exposed wiring.
- Once everything is securely in place, you are ready to test the RV outlet by plugging in your RV and turning on the power.
By following these steps for stripping and connecting the wires and securing the RV outlet in the outlet box, you will have successfully installed a 30 amp RV outlet. Remember to always prioritize safety and consult a professional if you are unsure at any step of the process.
Testing And Safely Restoring Power
Testing and Safely Restoring Power:
When it comes to installing a 30 amp RV outlet, testing and safely restoring power is a crucial step in the process. It ensures that the electrical connection is secure and functioning properly, minimizing the risk of any accidents or damage. In this guide, we will explore two essential steps in this process: Using a multimeter to test the circuit and Turning the power back on and verifying functionality. Let’s dive in and ensure a safe and successful installation.
Using a multimeter to test the circuit:
Before turning the power on, it’s essential to test the circuit using a multimeter. This handy tool measures electrical voltage, resistance, and continuity, providing accurate readings that can help identify any potential issues. Follow these steps to use a multimeter effectively:
- Start by turning off the power supply to the RV outlet to avoid any electrical shock or damage.
- Set the multimeter to the voltage mode and select the appropriate voltage range, which in this case is 120 volts.
- Place one probe on the neutral (white) wire and the other probe on the hot (black) wire of the outlet.
- Check the multimeter display for a reading of around 120 volts, indicating a properly functioning circuit.
- If there is no reading or a significantly lower reading, there might be a wiring issue that needs to be addressed before proceeding further with the installation.
Turning the power back on and verifying functionality:
Once you have successfully tested the circuit and ensured its integrity, it’s time to turn the power back on and verify functionality. Follow the steps below to safely restore power to the 30 amp RV outlet:
- Carefully switch on the power supply, ensuring that the circuit breaker is in the off position before doing so.
- Once the power is restored, visually inspect the outlet for any signs of damage or overheating. Ensure that all connections are secure and tight.
- Next, plug in a device such as a lamp or small appliance into the newly installed 30 amp RV outlet.
- If the device powers on and operates as expected, congratulations! You have successfully installed and restored power to the outlet.
- If the device does not function or there are any signs of electrical issues, immediately turn off the power supply and consult a licensed electrician for further assistance.
By following these steps, you can test the circuit using a multimeter and safely restore power to the newly installed 30 amp RV outlet. Remember to prioritize safety at all times and consult a professional if you encounter any issues.
Adhering To Electrical Codes And Regulations
When installing a 30 Amp RV outlet, it is crucial to adhere to electrical codes and regulations to ensure the safety and proper functioning of your RV electrical system. Familiarizing yourself with local electrical codes, obtaining necessary permits and inspections are essential steps in this process.
Familiarizing yourself with local electrical codes
Before you start installing a 30 Amp RV outlet, it is essential to familiarize yourself with the local electrical codes and regulations. These codes vary from one area to another, and it is crucial to comply with them to avoid any potential hazards or legal issues.
Start by researching the electrical codes applicable in your area. Contact your local building department or electric utility company for information and guidance. They can provide you with the specific requirements and restrictions related to RV outlets.
Pay close attention to regulations regarding distances from other structures, clearance requirements, installation methods, and necessary grounding or bonding. Understanding these codes will help you ensure that your RV outlet meets all the necessary safety standards.
Obtaining necessary permits and inspections
Once you have familiarized yourself with the local electrical codes, the next step is to obtain the necessary permits and inspections. This is a crucial part of the installation process as it ensures that your installation is done correctly and meets all safety requirements.
Contact your local building department to inquire about the permits required for installing the 30 Amp RV outlet. They will provide you with the appropriate forms and guidelines to follow. Be sure to submit all the required documents and fees promptly to avoid any delays in the process.
After obtaining the necessary permits, schedule an inspection with the building department. A qualified inspector will visit your property to assess the installation and ensure that it meets all the electrical codes and regulations. It is important not to skip this step, as an inspection will give you peace of mind knowing that your RV outlet is safe and compliant.
During the inspection, make sure that all wiring, connections, grounding, and bonding are done correctly. Address any issues or concerns raised by the inspector promptly to ensure compliance. Once the inspection is passed, you can proceed with connecting your RV to the 30 Amp outlet and enjoy a safe and reliable electrical connection.
By adhering to electrical codes and regulations, you can ensure the safety and efficiency of your RV electrical system. Familiarize yourself with local codes and obtain the necessary permits and inspections. This way, you can have confidence that your 30 Amp RV outlet meets all the necessary standards and provides a reliable power source for your RV adventures.
Taking Precautions During The Installation Process
When it comes to installing a 30 Amp RV outlet, taking proper precautions is essential for your safety and the longevity of your RV’s electrical system. In this section, we will cover two important safety measures that should be followed during the installation process: turning off the power before starting work and installing ground fault circuit interrupters (GFCIs) for added safety.
Turning off the power before starting work
Before you begin installing your 30 Amp RV outlet, it is crucial to ensure that the power to the installation area is turned off. This step is important to avoid any electrical shocks and accidents during the installation process. To turn off the power, follow these steps:
- Locate your main electrical panel.
- Identify the circuit breaker that controls the power supply to the installation area.
- Switch off the circuit breaker by flipping it to the “Off” position.
- Double-check that the power is indeed turned off by using a voltage tester.
By following these steps, you can ensure that you are working in a safe environment and minimize the risk of electric shock.
Installing ground fault circuit interrupters (GFCIs) for added safety
In addition to turning off the power, installing ground fault circuit interrupters (GFCIs) is an important safety measure during the installation of a 30 Amp RV outlet. GFCIs are devices designed to immediately detect and interrupt electrical faults, preventing electrical shock hazards. Here’s how you can install GFCIs:
- Choose a suitable location for the GFCI outlet near the installation area.
- Turn off the power to the installation area from the main electrical panel.
- Remove the cover plate from the chosen electrical box.
- Carefully connect the GFCI outlet to the existing electrical wiring, following the manufacturer’s instructions.
- Securely attach the GFCI outlet to the electrical box.
- Restore power to the installation area and test the GFCI outlet to ensure it is functioning correctly.
Installing GFCIs provides an additional layer of safety, ensuring that any electrical faults are detected and the power is promptly interrupted, protecting you and your RV from potential dangers.
By taking these precautions, turning off the power before starting work, and installing GFCIs, you can ensure a safe and successful installation of a 30 Amp RV outlet.
Hiring A Professional Electrician
When it comes to installing a 30 Amp RV outlet, many individuals prefer to hire a professional electrician to ensure a safe and efficient installation process. Hiring an expert in electrical work not only ensures compliance with local codes and regulations but also provides peace of mind knowing that the job will be done right.
When to consider hiring an electrician for the installation process
While some individuals may have the necessary knowledge and skills to undertake the installation themselves, there are several situations where it is advisable to hire a professional electrician:
- If you have limited or no experience in working with electrical systems
- If you are unsure about the wiring requirements and safety protocols
- If you are dealing with complex electrical systems or outdated wiring
- If you want to ensure the installation is done correctly and up to code
- If you require a permit to complete the installation, as electricians are often licensed and authorized to obtain permits on your behalf.
Benefits of professional expertise and experience
There are numerous benefits to hiring a professional electrician for the installation of a 30 Amp RV outlet. These include:
- Knowledge and Experience: Electricians possess the necessary knowledge and experience to handle the complexities of electrical work. Their expertise ensures that the installation is done safely, efficiently, and without any potential hazards.
- Compliance with Codes and Regulations: Electricians are familiar with local codes and regulations regarding electrical installations. By hiring a professional, you can be confident that your RV outlet meets all the necessary requirements.
- Time and Cost Efficiency: Professional electricians have the tools, equipment, and skills to complete the installation in a timely manner. Their expertise helps to prevent costly mistakes and ensures that the job is done right the first time.
- Warranty and Insurance: When you hire a professional electrician, you may have access to warranties on their workmanship and the materials they use. Additionally, they are often insured, providing protection in case of any accidents or damages that may occur during the installation process.
By hiring a professional electrician for the installation of your 30 Amp RV outlet, you can enjoy the peace of mind that comes with knowing the job will be completed safely, efficiently, and in compliance with all relevant codes and regulations.
Frequently Asked Questions
How Do I Add A 30 Amp Rv Outlet To My House?
To add a 30 amp RV outlet to your house, follow these steps: 1. Consult an electrician to determine if your current electrical panel can handle the load. 2. Obtain the necessary permits and a proper RV outlet box. 3.
Install the outlet box at a suitable location outside your house. 4. Connect the wires from the outlet to the electrical panel. 5. Test the outlet to ensure it’s functioning correctly.
How Is A 30 Amp Rv Plug Wired?
A 30 amp RV plug is wired by connecting the hot, neutral, and ground wires to the corresponding terminals. The hot wire carries power, the neutral wire completes the circuit, and the ground wire provides safety. It’s important to follow the proper wiring diagram to ensure safe and correct installation.
What Size Breaker Do I Need For A 30 Amp Rv Outlet?
For a 30 amp RV outlet, you will need a breaker of the same size, which is 30 amps.
Is A 30 Amp Rv Plug 120 Or 240?
A 30 amp RV plug is generally 120 volts, not 240 volts.
Conclusion
Installing a 30 amp RV outlet doesn’t have to be a daunting task. With the right tools and knowledge, you can have a reliable power source for your recreational vehicle. Remember to follow safety precautions throughout the installation process and consult a licensed electrician if needed.
By taking the time to properly install your RV outlet, you can enjoy hassle-free trips and make the most out of your RV experience. So, get ready to hit the road and embrace the freedom of RV living!