To install a 3-way dimmer switch, first, turn off the power to the circuit at the main electrical panel. Then, follow the manufacturer’s instructions to wire the new switch in place and attach the faceplate.
Installing a 3-way dimmer switch can add convenience and ambiance to your home lighting. Whether you want to set the mood for a romantic dinner or simply adjust the brightness of your lights, a dimmer switch provides flexibility and energy savings.
In this guide, we will walk you through the steps of installing a 3-way dimmer switch, highlighting the importance of safety precautions and providing clear instructions. With some basic electrical knowledge and the right tools, you can easily upgrade your light switches and transform your living space. So let’s get started with the installation process and enjoy the benefits of adjustable lighting.
Reasons To Install A 3-Way Dimmer Switch
Reasons to Install a 3-Way Dimmer Switch
Are you tired of the harsh, glaring light that fills your living room every time you turn on the overhead lights? Or maybe you’re looking for ways to reduce your energy consumption and lower your electricity bill? Installing a 3-way dimmer switch might be the solution you’ve been searching for. Not only does it allow you to control the brightness of your lights, but it also creates a warm and inviting ambiance in any room. In this article, we’ll explore the benefits of dimming lights, including creating ambiance and saving energy.
Benefits of Dimming Lights
Creating Ambiance
One of the most significant advantages of installing a 3-way dimmer switch is the ability to create ambiance in your home. Whether you’re hosting a romantic dinner for two or having friends over for a movie night, the lighting plays a crucial role in setting the mood. With a dimmer switch, you have full control over the brightness of your lights. You can easily adjust the lighting level from bright and vibrant to soft and intimate, instantly transforming the atmosphere of any room.
Saving Energy
In addition to setting the perfect mood, installing a 3-way dimmer switch can also help you save energy and reduce your electricity bills. When you dim your lights, you consume less power than when they are at full brightness. By lowering the brightness level by just 25%, you can potentially save up to 20% in energy consumption. This not only benefits the environment but also your wallet. With a dimmer switch, you have the flexibility to choose the ideal lighting level while being mindful of energy conservation.
To summarize, a 3-way dimmer switch offers a range of benefits, including creating ambiance and saving energy. By installing this innovative device, you can easily adjust the brightness of your lights to create the perfect atmosphere for any occasion. Not only does this enhance the overall aesthetic of your home, but it also helps reduce your energy consumption. So, why settle for static, bright lights when you can enjoy the versatility of dimming switches? Upgrade your lighting fixtures today and embrace a new level of control and ambiance.
Understanding The Basics Of A 3-Way Dimmer Switch
What is a 3-way dimmer switch?
A 3-way dimmer switch is a versatile electrical device that allows you to control the brightness of a light from two or more locations. Unlike a traditional switch that only offers on/off functionality, a 3-way dimmer switch lets you adjust the amount of light emitted, giving you greater control over the ambiance of a space.
How does a 3-way dimmer switch work?
To understand how a 3-way dimmer switch works, it’s crucial to know the basic principles behind a standard dimmer switch. A dimmer switch works by regulating the amount of electrical current flowing to a light fixture. This is achieved through a process called pulse width modulation (PWM), where the switch rapidly turns the current on and off at varying intervals to control the amount of power delivered to the light.
In the case of a 3-way dimmer switch, the device is designed to work in conjunction with two standard 3-way switches. Together, the three switches allow you to control the light fixture from multiple locations, providing convenience and flexibility.
Components of a 3-way dimmer switch
A 3-way dimmer switch consists of several key components that work together to ensure proper functionality:
- Slider or knob: This is the part of the dimmer switch that you physically move or turn to adjust the brightness of the light.
- Switch mechanism: The switch mechanism enables you to turn the dimmer switch on or off.
- Driver circuit: The driver circuit is the internal mechanism responsible for controlling the flow of electricity and regulating the dimming process.
- Wiring connections: A 3-way dimmer switch requires specific wiring connections to connect with the light fixture and the other 3-way switches in the circuit. These connections may include line, load, neutral, traveler, and ground wires.
Understanding the basics of a 3-way dimmer switch is essential before attempting to install or replace one. By knowing what a 3-way dimmer switch is, how it works, and the components it comprises, you’ll be better equipped to handle the installation process with confidence.
Preparing For The Installation Process
Before you begin installing a 3-way dimmer switch, it’s crucial to ensure that you are well-prepared. By gathering the necessary tools and materials, switching off the power supply, and understanding electrical safety precautions, you can proceed with confidence. Let’s take a closer look at each of these steps in detail.
Gathering the necessary tools and materials
When it comes to installing a 3-way dimmer switch, having the right tools and materials at hand is essential. Here is a list of items you will need:
| Tools | Materials |
|---|---|
|
|
Switching off the power supply
Before you begin working on any electrical installation, it is crucial to switch off the power supply. This will minimize any risk of electric shock or damage. Here’s how:
- Go to your electrical panel or circuit breaker box.
- Locate the circuit breaker that controls the power supply to the area where you will be installing the dimmer switch.
- Flip the switch to the “off” position to cut off the electrical power.
- For an extra precaution, use a voltage tester to ensure that there is no residual power in the wires you’ll be working with.
Understanding electrical safety precautions
When working with electricity, it’s important to prioritize safety. Here are a few key electrical safety precautions to keep in mind:
- Always wear safety goggles and rubber gloves to protect yourself from potential electrical hazards.
- Avoid working on wet surfaces to prevent electric shock.
- Ensure that you are working in a well-ventilated area to minimize the risk of inhaling any fumes or dust.
- Follow the manufacturer’s instructions carefully to ensure proper installation and operation.
By following these steps and taking the necessary precautions, you can safely proceed with installing a 3-way dimmer switch. Next, we’ll dive into the step-by-step process of actually installing the switch. Stay tuned!
Step 1: Removing The Existing Switches
Removing the existing switches is the first step in installing a 3-way dimmer switch. In this guide, we will walk you through the process, ensuring you can complete the task smoothly and efficiently. Identifying the existing switches in a 3-way switch setup, carefully removing the faceplates, and disconnecting the wiring from the switches are the primary tasks that need to be accomplished in this initial step. Let’s delve into each of these tasks in detail.
Identifying the existing switches in a 3-way switch setup
Before you begin, it’s essential to familiarize yourself with the current setup of your 3-way switch system. The 3-way switch setup typically consists of two switches that control a single light or group of lights from different locations. These switches work together to provide convenience and flexibility in operating the lights. To identify the existing switches:
- Locate the switches controlling the specific lights you wish to install the dimmer switch for.
- Confirm that these switches are part of a 3-way switch system by checking if there is another switch that also controls the same lights.
- Take note of the location and arrangement of each switch, as this will help you during the installation process.
Removing the faceplates
Now that you have identified the switches in your 3-way setup, the next step is to remove the faceplates of these switches. Removing the faceplates allows you access to the underlying wiring. Carefully follow these steps:
- Turn off the power to the switches by switching off the circuit breaker that supplies electricity to the switches. This ensures your safety during the removal process.
- Take a flathead screwdriver and insert it into the small slot located at either the top or bottom edge of the faceplate.
- Gently leverage the screwdriver to pry the faceplate away from the wall. Be cautious not to damage the surrounding wall.
- Once the faceplate is loose, carefully pull it away to fully remove it from the wall.
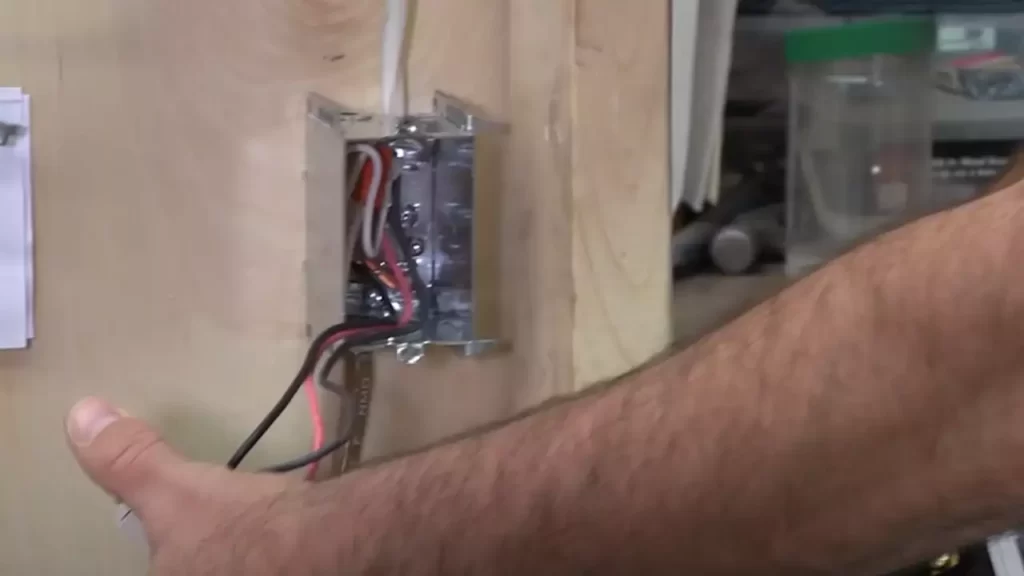
Disconnecting the wiring from the switches
Now that you have removed the faceplates, it’s time to disconnect the wiring from the switches. This step requires attention to detail and adherence to safety guidelines. Follow these steps to disconnect the wiring:
- Using a screwdriver, loosen the screws holding the switch in place.
- Slowly pull the switches out from the wall, exposing the wiring connections.
- Take note of the wire terminals connected to each switch. These terminals will typically be labeled “Common,” “Traveler,” and sometimes “Ground.”
- Unscrew the terminal screws to disconnect the wiring from each switch. Carefully remove the wires.
By completing these tasks, you have successfully removed the existing switches in your 3-way switch setup. With the faceplates removed and the wiring disconnected, you are now ready to move on to the next step of installing your 3-way dimmer switch.
Step 2: Preparing The Dimmer Switch
Now that you have chosen the right dimmer switch for your needs, it’s time to prepare the switch for installation. This step is crucial to ensure a smooth and successful installation process. Follow these sub-steps to get your dimmer switch ready:
Choosing the right dimmer switch for your needs
Before you start preparing the dimmer switch, it’s important to choose the right one for your specific requirements. There are different types of dimmer switches available, each designed to control specific types of lights. Consider factors such as load capacity, compatibility with the lighting fixtures, and the type of dimming you desire. For instance, if you have LED lights, you will need a dimmer switch compatible with LEDs that can handle their low wattage. Take the time to research and select the right dimmer switch that suits your needs perfectly.
Reading the manufacturer’s instructions
Once you have the dimmer switch in hand, it’s crucial to read the manufacturer’s instructions before proceeding with the installation. Every dimmer switch may have specific requirements, wiring diagrams, and safety precautions that you need to be aware of. By carefully reading and understanding the instructions, you can ensure that you are following the correct installation steps and using the switch properly. Ignoring the manufacturer’s instructions may lead to improper installation or voiding the warranty. So, take the time to familiarize yourself with the instructions provided.
Adjusting the dimmer switch settings
Before you install the dimmer switch, you may need to adjust its settings according to your preferences. Some dimmer switches come with adjustable features like dimming speed, fade rates, brightness levels, or even programmable settings. If your dimmer switch offers these options, refer to the manufacturer’s instructions on how to adjust the settings. This step will ensure that the dimmer switch is customized to your liking and works exactly as desired. Make sure to double-check the settings before installing the switch to avoid any inconvenience or manual adjustments later.
By following these preparatory steps, you are ensuring a smooth installation process and maximizing the functionality of your 3-way dimmer switch.
Step 3: Installing The Dimmer Switch
Now that you have successfully identified the wires and prepared them for installation, it’s time to tackle the next step: installing the dimmer switch. This crucial step ensures the safe and efficient operation of your 3-way dimmer switch. Follow the instructions below to wire, connect, and mount your dimmer switch with ease.
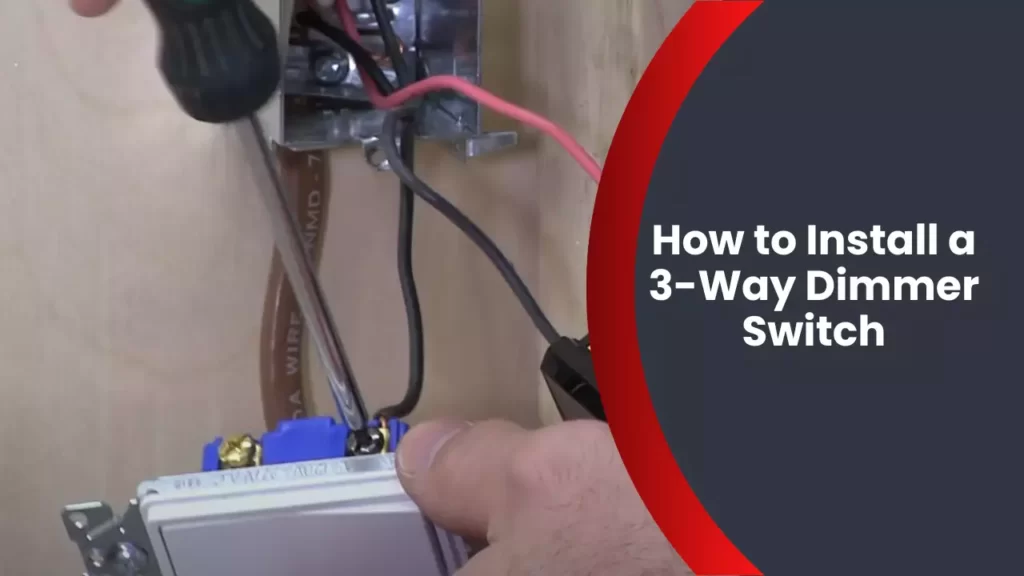
Wiring the Dimmer Switch Correctly
Properly wiring your dimmer switch is vital to ensure that it functions correctly and safely. To wire the dimmer switch correctly, follow these steps:
- Start by turning off the power supply to the circuit at your circuit breaker box. This step is crucial to prevent any accidents while working with electricity.
- Next, remove the existing switch plate and unscrew the switch from the electrical box.
- Identify the common wire, which is typically black or labeled with a “COM” or “COMMON” marker. Connect this wire to the black wire from the dimmer switch using a wire nut. Alternatively, you can use electrical tape to secure the connection.
- Locate the two traveler wires, usually colored red or labeled “TRAV” or “TRAVELER.” Connect one traveler wire to the black or brass screw terminal on the dimmer switch and secure it with a wire nut. Connect the other traveler wire to the remaining black or brass screw terminal using another wire nut.
- Finally, connect the ground wire from the dimmer switch to the grounding wire in the electrical box. Again, use a wire nut or electrical tape to ensure a secure connection.
Connecting the Wires Using Wire Nuts
Wire nuts are essential in safely connecting the wires while preventing electrical shorts and loose connections. Follow these guidelines when using wire nuts:
- Select wire nuts that match the size and number of wires you are connecting.
- Strip the ends of the wires approximately 3/8 of an inch to expose the bare copper.
- Twist the stripped ends of the wires together in a clockwise direction.
- Place the wire nut over the twisted wires and twist it firmly in a clockwise direction until it is securely fastened.
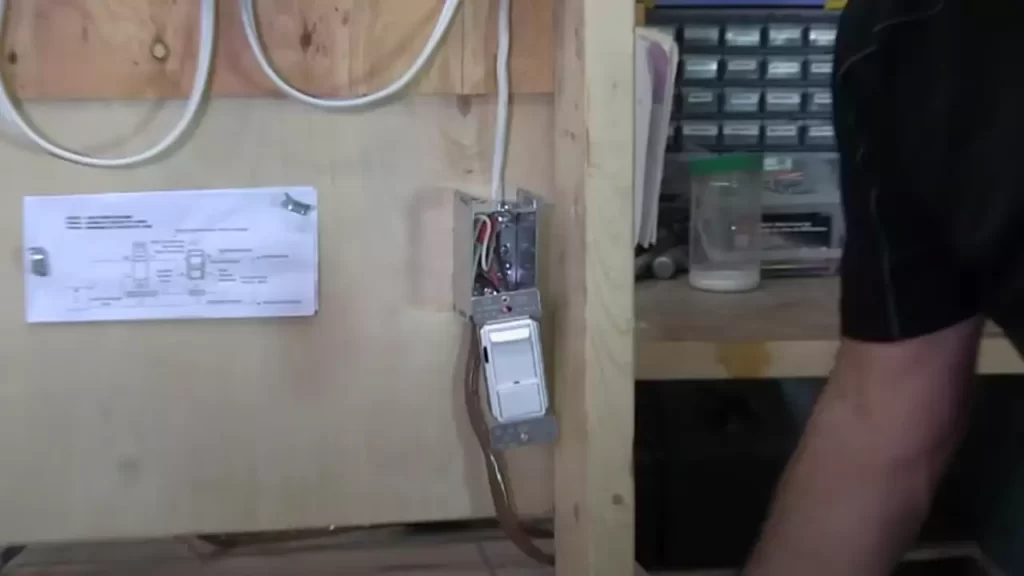
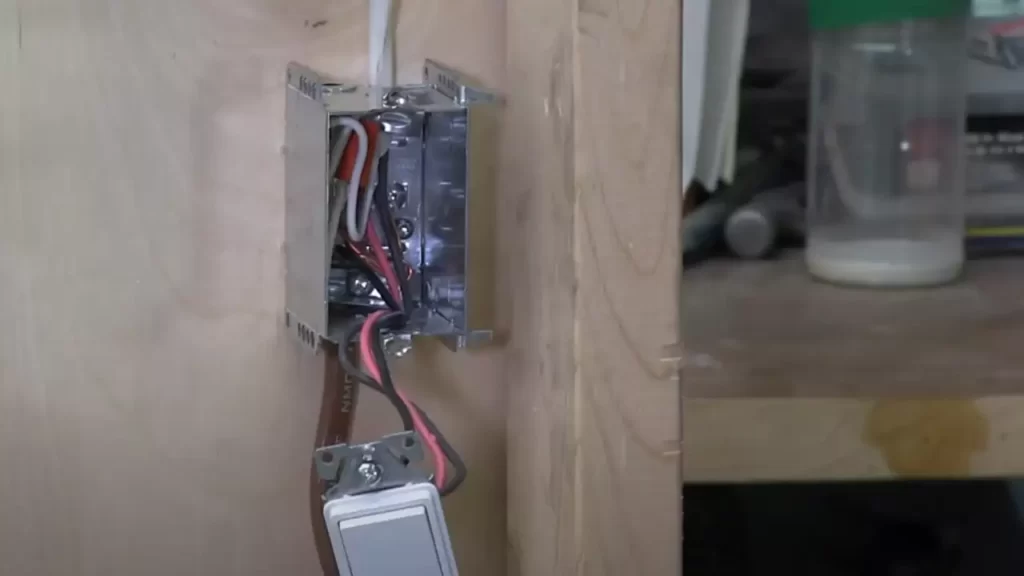
Mounting the Dimmer Switch onto the Electrical Box
Properly mounting the dimmer switch onto the electrical box is crucial to ensure its stability and functionality. Follow these steps to securely mount your dimmer switch:
- Insert the dimmer switch into the electrical box, ensuring that the wires are neatly tucked inside.
- Align the screw holes on the dimmer switch with the holes in the electrical box.
- Using a screwdriver, insert the screws into the holes and tighten them until the dimmer switch is firmly attached to the box.
- Reattach the switch plate cover by aligning it with the dimmer switch and tightening the screws.
By following these steps, you will successfully install your 3-way dimmer switch, providing you with the convenience and control over your lighting ambiance.
Step 4: Testing And Adjusting The Dimmer Switch
After successfully wiring the 3-way dimmer switch, it’s time to move on to the crucial step of testing and adjusting its functionality. This step ensures that your dimmer switch is working correctly and that you can achieve the desired lighting levels in your space. Let’s go through the process step-by-step:
Restoring power to the circuit
Before testing the dimmer switch, it is important to restore power to the circuit. To do this, head over to your electrical panel and locate the breaker that controls the circuit you were working on. Flip the breaker back on to restore power to the switches and the dimmer.
Testing the functionality of the dimmer switch
Once the power is restored, it’s time to test whether the dimmer switch is working properly. Follow these steps to test the functionality:
- Turn the switch on: Flip the switch to the “on” position and observe the lights connected to the dimmer switch. They should illuminate and function as normal.
- Dimming test: Gradually slide the dimmer switch to decrease the lighting level. Observe if the lights dim accordingly. Similarly, slide the switch back up to increase the lighting level. The dimmer switch should smoothly adjust the brightness of the lights.
- On/Off test: Switch the dimmer off and then back on again. Ensure that the lights turn off and on smoothly without any flickering or delays.
If any of these tests fail, double-check the wiring connections and ensure that everything is properly connected. It’s important to troubleshoot any issues at this stage before proceeding further.
Adjusting the dimmer switch settings for desired lighting levels
Now that you have confirmed the dimmer switch is functioning correctly, the next step is to adjust its settings to achieve the desired lighting levels in your space. Follow these steps:
- Turn the switch on: Flip the switch to the “on” position, ensuring that the lights are illuminated.
- Slide the dimmer switch: Gradually move the dimmer switch up or down to find your preferred lighting level. Observe the lights and adjust until you achieve the desired brightness.
- Test different settings: Experiment with different positions of the dimmer switch to find the ideal lighting levels for different activities or moods in your space.
Remember, every dimmer switch may have slightly different settings and controls, so refer to the specific instructions provided by the manufacturer to make the most out of your dimmer switch.
By following these steps to test and adjust your dimmer switch, you can ensure that your lighting environment is tailored to your preferences, bringing both functionality and ambience to your space.
Tips And Troubleshooting
Installing a 3-way dimmer switch can be a great way to enhance the ambiance of your home while providing convenient lighting control. However, as with any electrical project, there may be some challenges along the way. In this section, we’ll discuss common issues and solutions that you may encounter during the installation process, offer tips for a successful installation, and discuss when it might be necessary to seek professional help.
Common issues and solutions during installation
While installing a 3-way dimmer switch, you may come across a few common issues. Here are some solutions to help you troubleshoot:
- Improper wiring connections: One of the most common issues is improper wiring connections, which can result in the switch not functioning correctly. Ensure that you have correctly identified the “hot” wire, “traveler” wires, and load wires. Refer to the manufacturer’s instructions or consult an electrician if you are unsure.
- Incompatible switch or bulbs: Sometimes, the dimmer switch may not work properly with certain types of bulbs or may be incompatible with the existing wiring setup. Check the switch’s compatibility with the bulbs you plan to use and verify that the switch is compatible with a 3-way setup.
- Flickering or buzzing lights: If you notice flickering or buzzing lights after installing the dimmer switch, it could be due to incompatible dimming technologies or excessive wattage on the switch. Consider using dimmable LED bulbs or reducing the total wattage to resolve this issue.
- Overheating: Overheating can occur if the dimmer switch is not installed properly or if it is overloaded with wattage. Ensure that the dimmer switch has proper ventilation and that the total wattage does not exceed its specified rating.
Tips for a successful installation process
To ensure a successful installation process, here are some helpful tips:
- Gather the necessary tools and materials: Before starting the installation, make sure you have all the required tools and materials handy. These may include a screwdriver, wire strippers, wire connectors, and the dimmer switch itself.
- Turn off the power: Always turn off the power at the circuit breaker before working on any electrical components. This step is crucial for your safety.
- Take pictures or label the wiring: Taking pictures or labeling the existing wiring can be extremely helpful when reconnecting the new dimmer switch. This will help you avoid confusion and ensure proper connections.
- Double-check the wiring: Before fully installing the dimmer switch, double-check all the wiring connections to ensure that they are secure and properly connected. Loose connections can cause the switch to malfunction.
- Test the switch: After installation, test the switch by turning it on and off. Verify that the lights respond accordingly and smoothly dim as desired. If any issues arise, refer to the troubleshooting section or seek professional help.
Seeking professional help if needed
While installing a 3-way dimmer switch can be a DIY project for many homeowners, there may be situations where professional help is necessary. Consider seeking professional assistance in the following scenarios:
- Complex wiring: If the wiring in your home is complex or you are uncertain about the connections, it is best to consult an electrician.
- Old or outdated wiring: If your home has old or outdated wiring, it may not be compatible with a dimmer switch. An electrician can assess the wiring and determine if any updates are needed.
- Safety concerns: If you have any safety concerns or doubts about your ability to safely install the dimmer switch, it is wise to hire a professional. Your safety should always be the top priority.
Remember, when it comes to electrical projects, it’s better to be safe than sorry. Hiring a professional can provide peace of mind and ensure that the installation is done correctly.
Final Thoughts
After successfully installing a 3-way dimmer switch, you can now bask in the enjoyment of its numerous benefits. The ease and functionality of dimming lights in your living spaces provide a whole new level of customizability and ambience. Gone are the days of harsh lighting or struggling to find the right level of brightness. With a 3-way dimmer switch, you have complete control over the mood and atmosphere of any room. Let’s take a moment to appreciate all the advantages and convenience that dimmer switches bring into our lives.
Enjoying the Benefits of a 3-way Dimmer Switch
With a 3-way dimmer switch, your lighting options are expanded, allowing you to create the perfect ambiance for any occasion. Whether you want a cozy and intimate setting for a romantic dinner, a bright and energetic atmosphere for a lively gathering, or a calm and relaxing ambiance for winding down at the end of the day, a dimmer switch empowers you to effortlessly achieve it all.
The ability to control the intensity of your lights not only enhances the mood but also offers practical advantages. Adjusting the brightness can help reduce eye strain when reading or working on tasks that require focused attention. It also helps conserve energy, as dimming the lights reduces electricity consumption, leading to potential cost savings on your energy bills.
Additionally, dimmer switches extend the lifespan of your light bulbs by reducing the strain on them. By lowering the voltage and heat produced by the bulbs, dimming not only makes them last longer but also saves you money in the long run as you won’t have to replace bulbs as frequently.
Appreciating the Ease and Functionality of Dimming Lights
Installing a 3-way dimmer switch is a relatively simple task that can be accomplished even by those with limited electrical knowledge and experience. The intuitive design of these switches ensures straightforward operation, giving you effortless control over your lighting environment. With just a few quick adjustments, you can effortlessly transform the ambiance of any room from bright and vibrant to warm and cozy.
The convenience of dimmer switches extends beyond the ability to set the perfect lighting level. Imagine waking up in the middle of the night and stumbling through a dark hallway. With a dimmer switch installed, you can set the lights to a dim glow, providing a safe and guiding path without jolting your eyes awake with bright lights. It’s the small details like these that make a big difference in our daily lives.
In conclusion, the installation of a 3-way dimmer switch not only enhances the mood and atmosphere of your living spaces but also offers practical advantages such as energy savings and extended bulb lifespan. With the ease and functionality they provide, dimmer switches are a worthwhile investment that brings a new level of convenience and customization to your home. Say goodbye to one-size-fits-all lighting and embrace the versatility and control that dimmer switches bring.
Frequently Asked Questions
How Do You Wire A 3-Way Switch Dimmer?
To wire a 3-way switch dimmer, you need to connect the common wire from the dimmer switch to the common terminal of the first 3-way switch. Then, connect the traveler wires from both switches to their respective terminals. Lastly, connect the hot wire to the dimmer switch’s input and the remaining wire to the output.
How To Install A 3-Way Dimmer Switch Lutron?
To install a 3-way dimmer switch by Lutron, follow these steps: 1. Turn off the power. 2. Remove the old switch. 3. Connect the wires. 4. Install the dimmer switch. 5. Turn the power back on. Make sure to read the manual for specific instructions.
Can A 3-Way Switch Have A Dimmer On Both Ends?
No, a 3-way switch cannot have a dimmer on both ends. Typically, only one end of a 3-way switch can accommodate a dimmer, allowing you to control the brightness from that specific location.
Can I Put A Dimmer Switch On A 3-Way Switch?
Yes, you can install a dimmer switch on a 3-way switch. However, it’s important to note that not all dimmer switches are compatible with 3-way wiring. Make sure to choose a dimmer switch specifically designed for 3-way switches for proper functionality.
Conclusion
Installing a 3-way dimmer switch can transform the ambiance of your space effortlessly. With just a few simple steps, you can enhance your lighting experience and create a cozy atmosphere. Whether you’re a beginner or an experienced DIY enthusiast, this guide has provided you with a comprehensive overview of the installation process.
Now that you understand the basic steps, you can confidently take on this electrical project and enjoy the benefits of adjustable lighting in your home. So, go ahead and upgrade your dimmer switch today!