To install a 3 prong outlet, shut off the power, remove the old outlet, attach the ground wire, connect the hot and neutral wires, and secure the outlet in place. Installing a 3 prong outlet is a straightforward process that can be completed by following a few simple steps.
First, make sure to turn off the power to the area where you will be working. Then, remove the old outlet from the wall, disconnecting the wires. Next, attach the ground wire to the grounding screw on the new outlet.
Connect the hot and neutral wires to their corresponding terminals on the outlet, ensuring they are securely attached. Finally, carefully tuck the wires back into the electrical box and secure the outlet in place with screws.
Tools And Materials Needed For Installing A 3 Prong Outlet
When it comes to installing a 3 prong outlet, having the right tools and materials is essential. Not only will this ensure that the installation process goes smoothly, but it will also help to maintain the safety of your electrical system. In this section, we will take a look at the various tools and materials that you will need to successfully install a 3 prong outlet in your home.
Screwdriver
The first tool you will need for installing a 3 prong outlet is a screwdriver. This will be used to remove the cover plate from the existing outlet and to secure the new outlet in place. Make sure to choose a screwdriver that fits the screws on your outlet plate to avoid any damage.
Wire stripper
Another important tool you will need is a wire stripper. This tool is used to remove the insulation from the electrical wires, allowing you to connect them securely to the new outlet. Make sure to choose a wire stripper that is suited for the size of the wires you will be working with.
Outlet tester
An outlet tester is a handy tool to have when installing a 3 prong outlet. It is used to check if the outlet has been wired correctly and to ensure that it is providing the correct amount of voltage. This will help to prevent any potential electrical hazards and ensure the safety of your electrical system.
Electrical tape
Electrical tape is an essential material for any electrical installation. It is used to insulate and protect electrical connections, reducing the risk of shock or short circuits. When installing a 3 prong outlet, make sure to use electrical tape to secure the wire connections and cover any exposed wires.
Wire connectors
Wire connectors, also known as wire nuts, are used to securely connect the electrical wires together. When installing a 3 prong outlet, you will need wire connectors to join the wires from the outlet to the existing electrical wiring in your home. Make sure to choose wire connectors that are suitable for the size of the wires you will be working with.
Preparing For Installation
To ensure a safe and successful installation of a 3 prong outlet, proper preparation is essential. This involves turning off the power supply and gathering all the necessary tools and materials. By following these steps, you can tackle this project with confidence and peace of mind.
Turn off the power
Before you begin any electrical work, it is crucial to turn off the power supply to the designated area. This prevents any potential accidents or injuries. Locate the circuit breaker panel in your home. Using a flashlight, carefully examine the panel to find the breaker that controls the electricity to the outlet you wish to replace. Flip the corresponding breaker switch to the “off” position, making sure it is securely in place.
Gather necessary tools and materials
To successfully install a 3 prong outlet, you will need a few key tools and materials. By gathering everything you need beforehand, you can work efficiently and avoid unnecessary interruptions. Here is a list of the essential items:
| Tools | Materials |
|---|---|
|
|
Ensure that you have these tools and materials readily available before starting the installation process. This will save you time and frustration.
With the power turned off and all the necessary tools and materials in hand, you are now ready to move on to the next step: removing the old outlet. Stay tuned for our next blog post to learn how to remove an old 3 prong outlet safely and efficiently.
Replacing An Existing Outlet
Replacing an existing outlet is a relatively simple task that can be done by following a few basic steps. By replacing an old, worn-out outlet with a new 3-prong outlet, you can ensure the safety and functionality of your electrical system. In this guide, we will walk you through the process of replacing an existing outlet, with a focus on checking the existing outlet’s wiring, removing the old outlet, disconnecting the wires, and securing the new outlet in place. Let’s get started!
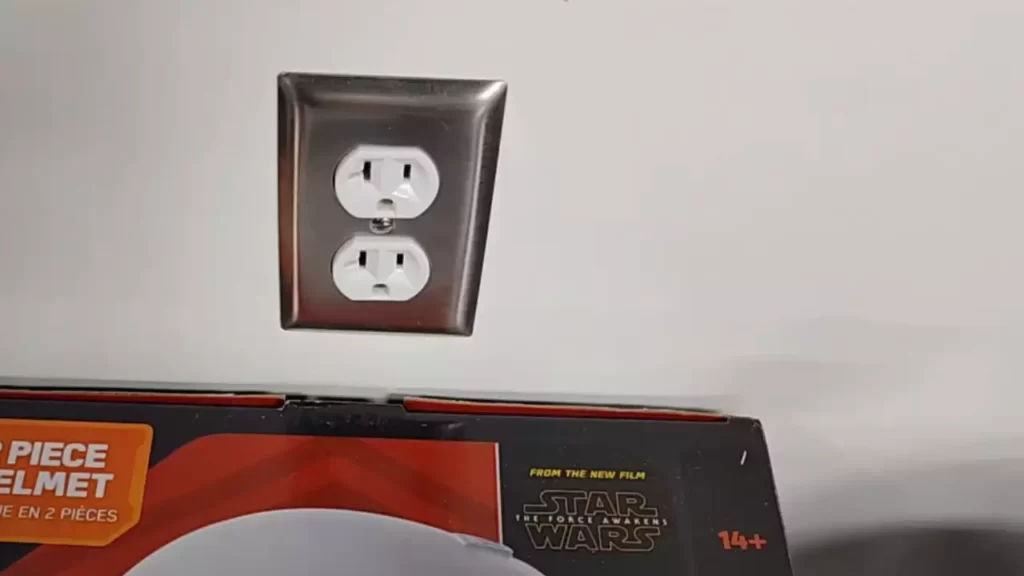
Checking the existing outlet’s wiring
Before replacing an existing outlet, it’s important to check the wiring to ensure everything is in order. Start by turning off the power to the outlet at the circuit breaker. Use a voltage tester to confirm that the power is indeed off. Once you’ve confirmed that the power is off, unscrew the outlet’s cover plate and carefully pull it away from the wall. Take note of how the wires are connected to the existing outlet. Check for any signs of damage or wear on the wires, and make sure they are securely fastened to the outlet. If everything looks good, you can proceed to remove the old outlet.
Removing the old outlet
To remove the old outlet, start by unscrewing the screws that hold it in place. Once the screws are removed, gently pull the outlet away from the wall. You will see that the wires are connected to the back of the outlet. Carefully loosen the screws on the sides of the outlet to release the wires. Take care not to damage the wires as you remove them. Once the wires are disconnected, set the old outlet aside and prepare to install the new one.
Disconnecting the wires
Now that you have removed the old outlet, it’s time to disconnect the wires. Start by stripping the insulation off the ends of the wires, about half an inch to expose the bare copper. Once the wires are exposed, bend them into a U shape and hook them around the screws on the side of the new outlet. Tighten the screws to securely fasten the wires in place. Ensure that the black (hot) wire is connected to the brass screw, the white (neutral) wire is connected to the silver screw, and the green (ground) wire is connected to the green screw. Once the wires are properly connected, it’s time to secure the new outlet in place.
Securing the new outlet in place
To secure the new outlet in place, simply align it with the mounting screws on the electrical box and use a screwdriver to tighten the screws. Make sure the outlet is flush against the wall and the cover plate will fit properly. Once the outlet is securely in place, attach the cover plate and screw it on. Finally, turn the power back on at the circuit breaker and test the outlet to ensure it’s working properly. Congratulations, you have successfully replaced an existing outlet with a new 3-prong outlet!
Wiring The New Outlet
Installing a 3 prong outlet is a straightforward process that requires a basic understanding of electrical wiring. With the right tools and guidance, you can easily complete this task. In this section, we will guide you through the process of wiring the new outlet, ensuring that you do it safely and correctly.
Identifying the wires and their functions
Before you can start wiring the new outlet, it’s crucial to identify the different wires and understand their functions. Most electrical outlets have three wires: hot, neutral, and ground. Here’s a quick rundown of what each wire does:
| Wire | Function |
|---|---|
| Hot (black or red) | Carries the current from the source to the outlet. |
| Neutral (white) | Completes the circuit and returns the current to the source. |
| Ground (green or bare copper) | Provides a path for electrical faults and offers protection against electrical shock. |
Stripping the wires
Once you have identified the wires, the next step is to strip away the insulation from the ends of each wire. This allows for a smooth and secure connection. Follow these steps to strip the wires:
- Gather the necessary tools: You will need a wire stripper tool specifically designed for the gauge of your wires.
- Measure the strip length: Check the manufacturer’s instructions or use a wire gauge tool to determine the appropriate strip length.
- Hold the wire: Firmly hold the wire near the end, ensuring you have a good grip.
- Position the stripper: Place the wire stripper over the insulation, holding it in a perpendicular position to the wire.
- Strip the wire: Apply gentle pressure and make a circular motion with the stripper around the wire, cutting through the insulation.
- Remove the insulation: After completing the circular motion, carefully pull the insulation away from the wire, ensuring not to damage the underlying conductors.
- Repeat for each wire: Repeat the process for all the wires you need to strip.
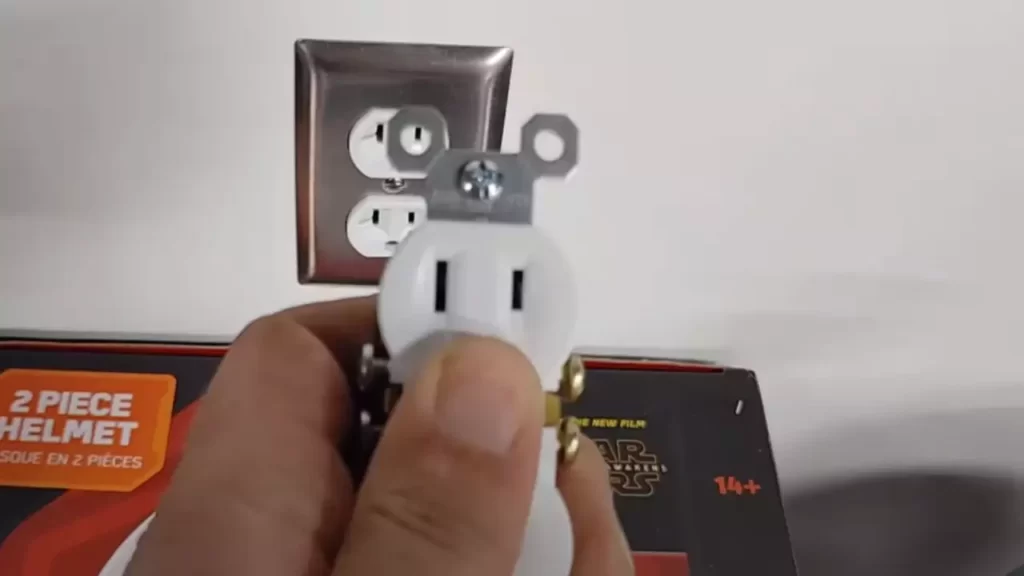
Connecting the wires to the new outlet
Now that you have identified and stripped the wires, it’s time to connect them to the new outlet. Follow these steps to ensure a proper connection:
- Prepare the outlet: Make sure the power is turned off before working with the outlet. Remove the cover plate and screws, exposing the terminal screws.
- Attach the wires: Identify the hot, neutral, and ground screws on the outlet. Connect the corresponding wires to their respective screws, making sure they are securely fastened.
- Secure the outlet: Once all the wires are connected, carefully fold them back into the electrical box. Attach the outlet to the box using the provided screws, making sure it is flush with the wall.
- Replace the cover plate: Place the cover plate back onto the outlet and secure it with the screws.
- Test the outlet: Turn the power back on and use a voltage tester to ensure the outlet is functioning correctly.
By following these steps and taking the necessary precautions, you can successfully wire your new 3 prong outlet. Always remember to prioritize your safety and consult a professional if you have any doubts or concerns.
Testing The Outlet
Once you have successfully installed the 3-prong outlet, the next crucial step is to test it to ensure it is working properly and wired correctly. Testing the outlet is important for your safety and to prevent any potential electrical hazards. In this section, we will walk you through the different steps involved in testing the outlet.
Turning the power back on
Before you start testing the outlet, make sure the power is turned off. This step is essential to prevent any electrical shock. Locate the circuit breaker panel in your home and find the breaker that controls the power to the area where you installed the outlet. Switch off the breaker to cut off the power supply.
Once the power is turned off, you can proceed with testing the outlet to ensure it is wired correctly. Although the power is turned off, we recommend taking additional precautions by wearing rubber gloves and using a non-contact voltage tester to confirm that there is no electrical current flowing through the outlet.
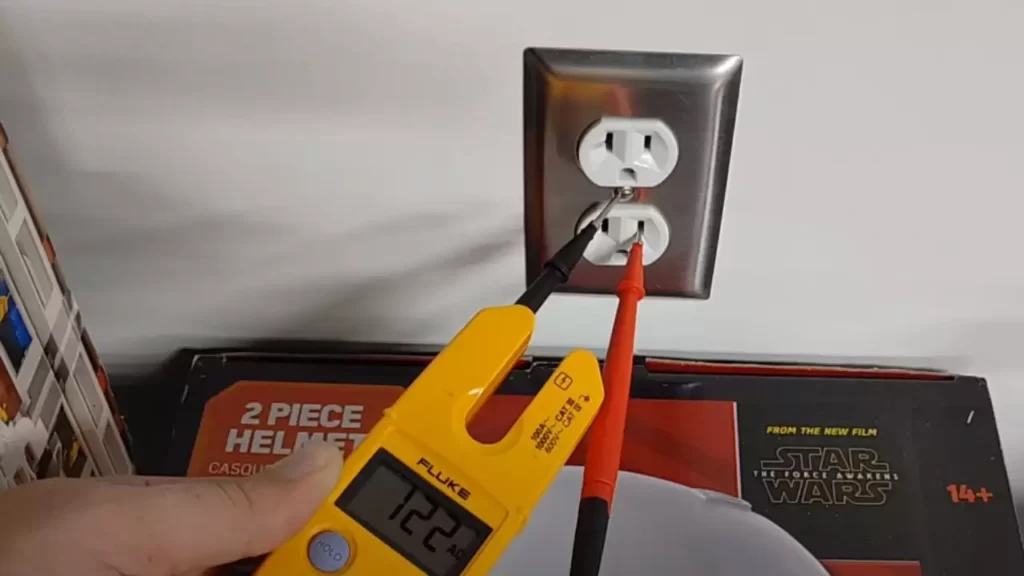
Using an outlet tester to check for correct wiring
An outlet tester is a handy tool that allows you to quickly and easily verify the correct wiring of an electrical outlet. It provides visual indications to identify various wiring issues such as open grounds, reversed polarity, and open neutrals. To use an outlet tester, follow these steps:
- Insert the prongs of the outlet tester into the slots of the installed 3-prong outlet.
- Observe the lights or LED indicators on the tester. Each light corresponds to a specific wiring condition.
- Refer to the instructions provided with the tester to interpret the results based on the light patterns.
The outlet tester will help you determine if the outlet is wired correctly and if there are any potential wiring issues that need to be addressed.
Fixing any issues discovered during testing
If the outlet tester indicates any wiring issues, it is crucial to address them promptly to ensure the outlet is safe and properly functioning. Here are some common issues and their respective solutions:
| Issue | Solution |
|---|---|
| Open Ground | Check the grounding wire connections and ensure they are properly connected. If necessary, consult a qualified electrician to fix the grounding issue. |
| Reversed Polarity | Swap the hot and neutral wires at the outlet. It is important to turn off the power before making any changes to the wiring. |
| Open Neutral | Double-check the neutral wire connections and ensure they are securely connected. Seek professional help if necessary. |
After fixing any wiring issues, retest the outlet using the outlet tester to confirm that the problem has been resolved. Once the outlet passes the test, you can proceed with plugging in your devices with confidence.
Testing the outlet is a crucial step to ensure the safety and proper functioning of your newly installed 3-prong outlet. By carefully following the testing procedures and addressing any issues discovered, you can have peace of mind knowing that your electrical connections are secure and reliable.
Safety Precautions
When it comes to installing a 3 prong outlet, safety should be your utmost priority. In this section, we will discuss the key safety precautions you need to take to ensure a secure installation.
Avoiding contact with live wires
One of the most important safety measures when installing a 3 prong outlet is to avoid any contact with live wires. Here are some steps you should follow to stay safe:
- Before starting the installation process, make sure to turn off the power to the area where you will be working. Locate the correct circuit breaker in your electrical panel and switch it off.
- Use a non-contact voltage tester to confirm that no electricity is running through the wires. Hold the tester near the wires and if it doesn’t beep or light up, it means they are safe to work with.
- Wear insulated gloves while handling the wires to minimize the risk of electric shock. Do not touch the bare ends of the wires with your bare hands.
- When connecting the wires to the outlet, make sure to tighten the screws securely to ensure a proper connection. Loose connections can lead to overheating and potential hazards.
- After completing the installation, use an electrical tape to secure the wires in place and prevent accidental contact with other objects.
Ensuring proper grounding
Proper grounding is essential for the safe operation of a 3 prong outlet. Follow these steps to ensure that your outlet is adequately grounded:
- Check if your electrical panel has a grounding wire. If it doesn’t, consult a professional electrician to install one.
- When connecting the new outlet, make sure to connect the grounding wire securely to the grounding screw on the outlet. Use a wire stripper to remove the insulation from the end of the grounding wire before making the connection.
- Verify the effectiveness of the grounding by using a continuity tester. This will help ensure that the outlet is properly connected to the grounding wire.
- Never use a 3 prong adapter to connect a 3 prong outlet to a 2 prong circuit. This can create a potential hazard as it bypasses the grounding system.
Using a surge protector
Installing a surge protector alongside your 3 prong outlet provides additional protection against power surges and fluctuations. Here’s why it’s important:
- A surge protector diverts excess voltage away from your valuable electronics, preventing damage and extending their lifespan.
- Make sure to choose a surge protector that suits your needs and has a high joule rating for optimal protection.
- Plug your sensitive electronic devices into the surge protector instead of directly into the outlet.
- Regularly inspect the surge protector for any signs of wear or damage. If you notice any issues, replace it immediately to maintain a high level of protection.
By following these safety precautions when installing a 3 prong outlet, you can ensure a safe and worry-free electrical setup in your home. Remember to always prioritize safety and consult a professional electrician if you have any concerns or doubts.
Troubleshooting Tips
When it comes to installing a 3 prong outlet, it’s important to not only know how to do it correctly, but also how to identify and fix any potential issues that may arise. In this section, we will discuss some common outlet wiring problems and provide troubleshooting tips to help you navigate through them.
Identifying common outlet wiring problems
Before you begin the installation process, it’s crucial to be able to identify common outlet wiring problems. By understanding these issues, you can address them promptly and ensure a safe and effective installation. Here are some common problems you may encounter:
| Problem | Solution |
|---|---|
| Reversed polarity | Swap the hot and neutral wires to correct polarity |
| Open ground | Connect the ground wire securely to the outlet |
| Overloaded circuit | Upgrade the circuit capacity or redistribute the load |
| Loose or damaged wires | Secure or replace wires as needed |
Checking for loose connections
. One of the common problems with outlet wiring is loose connections. Loose connections not only pose a safety hazard but can also result in power outages or malfunctioning outlets. To check for loose connections, follow these steps:
- Turn off the power to the outlet at the circuit breaker.
- Remove the outlet cover plate using a screwdriver.
- Carefully inspect the connections and tighten any screws that are loose.
- If you notice any damaged wires, replace them following proper electrical safety procedures.
- Once all connections are secure, carefully put the outlet cover plate back in place.
- Turn the power back on and test the outlet to ensure it is working correctly.
Consulting a professional if necessary
In some cases, outlet wiring problems may be too complex or dangerous to handle on your own. If you encounter any issues that you are unsure how to handle or if you are uncomfortable working with electrical wiring, it is best to consult a professional electrician. They have the expertise and knowledge to troubleshoot and resolve any problems safely.
Remember, electrical work should always be done by a licensed professional unless you are fully confident in your abilities and have a clear understanding of electrical safety procedures.
By familiarizing yourself with common outlet wiring problems, checking for loose connections, and knowing when to consult a professional, you can ensure a successful and safe installation of your 3 prong outlet.
Frequently Asked Questions
How Do I Install A 3 Prong Outlet?
To install a 3 prong outlet, first turn off the power to the circuit. Then, remove the old outlet cover and disconnect the wires. Connect the black wire to the brass screw, the white wire to the silver screw, and the green or bare wire to the green screw.
Finally, screw the outlet back into the electrical box, attach the cover, and turn the power back on.
What Are The Tools Needed For Installing A 3 Prong Outlet?
To install a 3 prong outlet, you will need a few tools. These include a screwdriver, wire strippers, pliers, and a voltage tester. The screwdriver is used to secure the outlet to the electrical box, while the wire strippers are necessary for removing the insulation from the wires.
Pliers can help with manipulating and bending the wires, and a voltage tester is essential for checking if the power is off before starting the installation process.
Can I Install A 3 Prong Outlet Without An Electrician?
Yes, it is possible to install a 3 prong outlet without hiring an electrician. However, it is important to have some basic knowledge of electrical wiring and follow safety precautions. Make sure to turn off the power to the circuit, use the correct tools, and follow step-by-step instructions or watch tutorial videos.
If you are not confident or comfortable, it is always best to hire a licensed electrician to ensure safety and compliance with electrical codes.
Do I Need To Upgrade To A 3 Prong Outlet?
If you have older two-prong outlets in your home, upgrading to a 3 prong outlet is recommended. Three-prong outlets provide an additional ground wire, which helps protect against electrical shock. This is particularly important for modern appliances and electronics that require a grounded outlet.
Upgrading to a 3 prong outlet ensures that you can safely use and connect your devices without the risk of electrical hazards.
Conclusion
Updating your home’s electrical system by installing a 3 prong outlet is a simple and worthwhile project. With the right tools and following the correct steps, you can ensure the safety and functionality of your electrical connections. Remember to turn off the power before starting the installation process and use caution throughout.
By following this guide, you’ll have a new outlet in no time and enjoy the convenience it brings. Don’t hesitate to reach out for professional help if needed, and happy DIYing!