To install a 220-volt outlet, first turn off the power and locate the circuit breaker box. Then, carefully attach the new outlet by connecting the wires according to the manufacturer’s instructions.
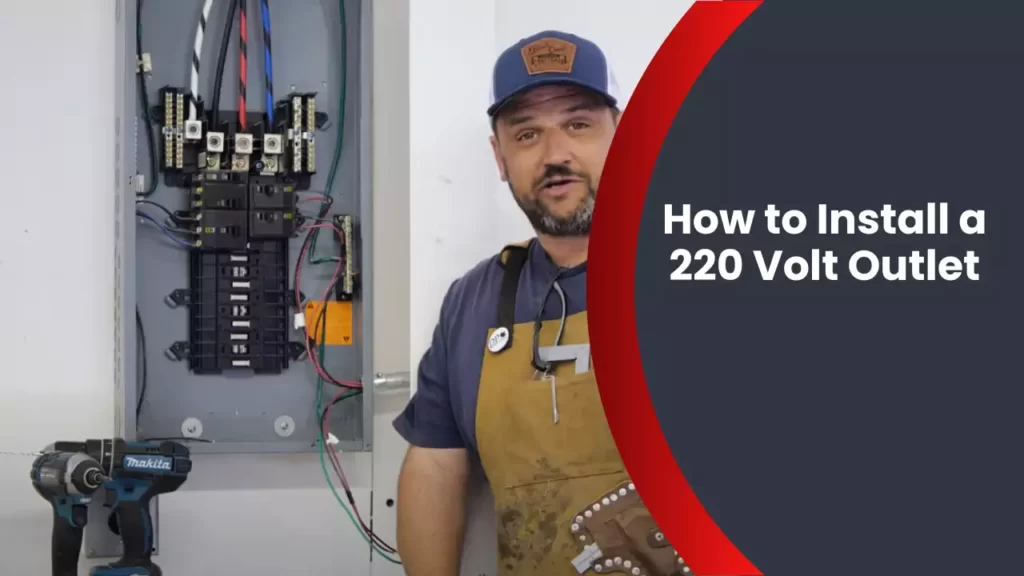
Installing a 220-volt outlet requires caution and adherence to electrical safety guidelines to ensure proper functionality. We will guide you through the step-by-step process of installing a 220-volt outlet, providing you with all the necessary information to complete the task correctly and safely.
Assessing The Electrical Panel’S Proximity
Assessing the electrical panel’s proximity is a crucial step in installing a 220 volt outlet. This step involves evaluating the distance to the circuit breaker panel and determining if any obstacles are present. By understanding the proximity to the electrical panel, you can plan the installation process more efficiently and ensure a safe and effective outcome.
<h3>Evaluating the distance to the circuit breaker panel</h3>
One of the first things you need to do when installing a 220 volt outlet is to assess the distance between your desired outlet location and the circuit breaker panel. This step helps determine the feasibility of the installation and enables you to plan for any necessary wiring or cable lengths.
To evaluate the distance to the circuit breaker panel effectively, follow these steps:
- Locate the circuit breaker panel in your home or workplace.
- Measure the distance between the panel and the desired outlet location using a tape measure.
- Consider any potential obstacles, such as walls or floors, that may affect the routing of the wiring.
Once you have evaluated the distance to the circuit breaker panel, you can determine the appropriate length of wiring needed to connect the outlet to the panel. This ensures that the wiring can reach the desired location without any issues.
Determining if any obstacles are present
When assessing the electrical panel’s proximity, it is essential to check for any obstacles that may hinder the wiring installation process. Obstacles can include walls, floors, or other structures that may impede the route from the panel to the requested outlet location.
To determine if any obstacles are present, follow these steps:
- Inspect the area between the circuit breaker panel and the desired outlet location.
- Identify any obstructions, such as walls, flooring materials, or furniture, that may interfere with the wiring installation.
- Consider alternative routes or necessary modifications to overcome these obstacles.
By identifying and addressing potential obstacles early on, you can ensure a smooth and efficient installation process. This prevents any delays or complications that may arise due to obstructions.
Considering The Appliance’S Placement
Identifying the appliance’s location
Before proceeding with the installation of a 220-volt outlet, it is crucial to consider the proper placement of the appliance. Identifying the right location for your appliance will not only ensure efficient functioning but also make the installation process much easier. Here are a few things to keep in mind when determining the spot for your appliance:
- Consider the power requirements: The first step is to understand the power needs of your appliance. Whether it is a heavy-duty machinery or a power-hungry gadget, knowing its electrical demands will help you decide where to install the outlet.
- Assess the proximity to the main electrical panel: It is important to select a location that is in close proximity to your main electrical panel. This will minimize the length of the wiring required, reducing potential voltage drops and electrical losses.
- Ensure proper ventilation: Appliances that generate heat, such as dryers or ovens, require adequate ventilation for safety. Look for a space that allows for proper airflow to prevent overheating and potential fire hazards.
- Consider access for maintenance: Take into account the accessibility needed for future maintenance or repairs. Select a location that allows easy access to the appliance’s wiring and other components, making it convenient for electricians or technicians to troubleshoot if needed.
Ensuring accessibility and safety
When installing a 220-volt outlet, ensuring accessibility and safety are of paramount importance to avoid any electrical hazards. Here’s how to ensure both:
- Keep clear space around the outlet: When choosing the location, ensure there is enough space around the outlet for easy plug insertion and removal. Avoid placing the outlet behind furniture or in tight corners that might obstruct access.
- Install a suitable wall box: Use a wall box that complies with local electrical codes and is appropriate for the appliance’s size and weight. This will provide adequate support and prevent any hazards caused by loose or hanging components.
- Secure the wiring: Properly secure and route the wiring to the outlet, ensuring it is protected and away from potential damage or accidental disconnection. Use appropriate cable clamps to secure the wiring and avoid strain on the connections.
- Create a safety barrier: If the appliance’s location is in an area accessible to children or pets, consider installing a safety barrier or cover for the outlet. This will prevent accidental contact with live electrical parts and reduce the risk of electrical shocks.
By carefully considering the appliance’s location and ensuring accessibility and safety during the installation process, you can set up a 220-volt outlet that meets your power needs while prioritizing your wellbeing.
Checking Local Electrical Codes And Regulations
Researching the requirements in your area
Before diving into the process of installing a 220 volt outlet, it is crucial to check the electrical codes and regulations set by your local authorities. Each area may have different requirements, so it’s important to do your research in order to ensure a safe and compliant installation.
Start by visiting the official website of your local government or electrical regulatory body. Look for information on electrical codes and regulations, paying particular attention to any specific guidelines for installing a 220 volt outlet. These resources often provide valuable information on the specific wiring and safety standards that need to be followed.
In addition to online resources, it’s a good idea to reach out to a licensed electrician or inspector in your area. They can provide insights and guidance based on their expertise and local knowledge. Don’t hesitate to ask questions or clarify any doubts you may have. Remember, it’s always better to be well-informed and compliant than to rush into something that might be unsafe or against regulations.
Understanding the necessary permits and inspections
Once you have familiarized yourself with the local electrical codes and regulations, it’s important to understand the permits and inspections required for installing a 220 volt outlet. These safeguards are in place to ensure that the installation is done correctly and does not pose any risk to you, your property, or others.
Start by determining if a permit is required for this specific electrical project. Check with your local building department or electrical authority to understand the application process and any fees associated with obtaining a permit. It may involve submitting detailed plans, including circuit diagrams, load calculations, and other essential information.
After obtaining the necessary permit, make sure to schedule inspections at various stages of the installation process. These inspections are carried out by qualified electrical inspectors who will ensure that your installation adheres to the applicable codes and regulations. Inspections typically occur before and after specific milestones, such as installing the wiring, connecting the outlet, and completing the final installation.
Keep in mind that failing to obtain the required permit or skipping inspections can result in serious consequences. Neglecting these steps may not only compromise your safety but could also lead to substantial fines or legal issues. So, it’s always better to follow the correct procedures and prioritize safety and compliance.
Essential Tools For The Installation
When it comes to installing a 220 volt outlet, having the right tools is essential. These tools will not only make the installation process easier but also ensure that the job is done safely and correctly. Whether you are a seasoned DIYer or just starting out, having the following tools on hand is crucial:
Screwdriver |
|---|
|
A screwdriver is a must-have tool for any electrical installation. It allows you to loosen and tighten the screws that hold the wires in place. When choosing a screwdriver, opt for one that has a non-slip handle and magnetic tip for added convenience. With a screwdriver, you’ll be able to securely connect the wires to the outlet without any hassle. |
Wire stripper |
|---|
|
A wire stripper is another essential tool for installing a 220 volt outlet. This tool is used to remove the insulation from the end of the wires, exposing the bare metal. It ensures that you have a clean and proper connection. Look for a wire stripper that has multiple cutting and stripping options, allowing you to work with different wire gauges. |
Voltage tester |
|---|
|
A voltage tester is crucial for ensuring safety during the installation process. This tool is used to check if the wires are live or not, helping you avoid any potential electrical hazards. Before working on any electrical connections, always test the voltage using a tester. Choose a voltage tester with a clear and easy-to-read display, ensuring accurate and reliable results. |
These three tools are the absolute essentials for installing a 220 volt outlet. They will help you complete the installation with ease and safety. Having them on hand will save you time and frustration, allowing you to enjoy the benefits of your new outlet without any worries. So, make sure to have a screwdriver, wire stripper, and voltage tester handy before you start the installation process.
Necessary Materials For The Project
When it comes to installing a 220-volt outlet, having the right materials is crucial to ensure a safe and successful installation. Here are the essential materials you will need:
220-volt outlet
The first item on your list is, of course, the 220-volt outlet itself. This outlet is designed to accommodate the higher voltage needed for larger appliances such as electric dryers, water heaters, and air conditioners. It is important to choose a high-quality outlet that meets the necessary safety standards. Make sure to check the specifications and ensure it is compatible with your specific appliance requirements.
NM cable
The next key material you will need is the NM cable, also known as Romex cable. This type of cable contains multiple wires bundled together, including a hot wire, a neutral wire, and a ground wire. It is important to choose the appropriate gauge of cable for your specific installation, considering the length of the run and the amperage rating of your circuit breaker. Remember, using the correct gauge will ensure safe and efficient electrical flow.
Circuit breaker
As you are dealing with higher voltage, it is crucial to have a circuit breaker that can handle the load. The circuit breaker acts as a safety device, automatically shutting off the power supply in the event of a short circuit or overload. Make sure to choose a circuit breaker with the appropriate amperage rating for your specific appliance. This will ensure proper protection and prevent electrical hazards.
Junction box
Another essential material needed for this installation is a junction box. The junction box serves as a protective enclosure for the electrical connections and helps to prevent accidents like electric shocks or fires. It is important to choose a junction box that is UL-listed and appropriately sized for the number of wires and connections you will be making. Proper installation of the junction box will ensure the longevity and safety of your electrical system.
By having these necessary materials at hand, you can proceed with confidence and ensure a successful installation of your 220-volt outlet. Remember to always follow the manufacturer’s instructions and consult with a qualified electrician if you are unsure about any aspect of the installation process.
Identifying The Correct Circuit Breaker
Before installing a 220-volt outlet, one of the essential steps is identifying the correct circuit breaker in your electrical panel. This ensures that you can safely disconnect the power to the circuit and avoid any electrical hazards. Here’s how you can identify the correct circuit breaker:
Locating the Corresponding Breaker in the Panel
Step 1: Open the electrical panel door by removing the screws or unlatching the cover.
Step 2: Once the panel is open, you’ll see a series of circuit breakers arranged vertically or horizontally. Each circuit breaker is labeled with a number or letter to identify the corresponding circuit it powers.
Step 3: Review the circuit breaker labels or refer to the panel diagram if available. Look for the breaker that controls the circuit you intend to work on, typically labeled based on the area it supplies power to (e.g., kitchen, laundry room, or garage).
Step 4: If the breakers are not labeled or the labels are unclear, you can use a circuit breaker finder tool. This device makes locating the correct breaker an easier task. Simply plug the transmitter into the outlet you plan to work on and scan the circuit breakers with the receiver until it indicates the correct one.
Step 5: Once you have identified the corresponding breaker, take note of its position in the panel. This will help you easily locate it again in case you need to turn off the power later on.
Turning Off the Power to the Circuit
Now that you have determined the correct circuit breaker, it’s time to turn off the power to the circuit. Follow these steps to ensure a safe working environment:
- Position yourself away from any water or conductive surfaces.
- Using either your hand or a pair of insulated gloves, firmly grasp the handle of the identified breaker.
- Apply steady and firm pressure to switch the breaker into the “Off” position. You should feel it click into place.
After switching off the breaker, confirm that the power to the specific circuit is truly off by using a non-contact voltage tester. This handheld tool will indicate if there is any live electricity present in the wires. If the tester beeps or lights up, the circuit is still live, and you should recheck the breaker and try again.
Once you have confirmed the power is off, you can safely proceed with installing your 220-volt outlet. However, always exercise caution and follow the necessary safety precautions to minimize the risk of electrical accidents.
Testing The Circuit With A Voltage Tester
Testing the circuit with a voltage tester is an essential step in safely installing a 220-volt outlet. It allows you to ensure that there is no live electricity flowing through the wires before proceeding with the installation. By following these guidelines, you can verify that the power is off and avoid any potential risks or hazards.
Ensuring the power is off before proceeding
Before you start testing the circuit, ensure that you have taken proper precautions to turn off the power to the outlet. This is crucial to prevent any potential electric shocks or accidents. Follow these steps:
- Locate the electrical panel or breaker box in your home. It is usually found in the basement, utility room, or garage.
- Open the panel cover using a screwdriver or by flipping the latch, depending on the design of your panel.
- Find the breaker that controls the circuit you are working on. Look for a breaker that is labeled specifically for the outlet or the room where you are installing the 220-volt outlet.
- Switch off the breaker by pushing it firmly in the opposite direction of the ON position. You may hear a click or see the switch move to indicate that it has been turned off.
- Double-check that the power is off by testing the outlet with a lamp or another device.
Once you have completed these steps, you can proceed with testing the circuit using a voltage tester.
Verifying there is no live electricity
To determine whether there is any live electricity in the circuit, you will need to use a voltage tester. Here’s how to proceed:
- Make sure you have a voltage tester designed for the specific voltage you are working with, in this case, 220 volts. Using the wrong voltage tester can lead to inaccurate readings or potential damage.
- Before using the voltage tester, familiarize yourself with its instructions and safety guidelines provided by the manufacturer.
- Insert the probe of the voltage tester into one of the slots of the outlet you are testing.
- Carefully touch the other probe to the metal screw of the outlet’s plate or any exposed wire.
- Observe the indicator lights or display on the voltage tester. If there is no voltage, the tester will typically show no signal or zero volts.
- If the voltage tester indicates that there is still live electricity present, stop immediately and consult a professional electrician.
By following these steps, you can ensure that there is no live electricity in the circuit and proceed with installing your 220-volt outlet safely and confidently.
Choosing The Appropriate Route For The Cable
Assessing the shortest and safest path
Choosing the appropriate route for the cable is a crucial step when installing a 220 volt outlet. Assessing the shortest and safest path will ensure that your electrical system functions effectively and that you avoid any potential hazards. Here are a few key considerations to keep in mind:
- Evaluate the distance: Measure the distance between the main electrical panel and the desired location for the 220 volt outlet. This will help you determine the length of cable needed and any potential obstacles along the way.
- Determine the route: Identify the most direct route for the cable to reach the outlet location. Consider existing walls, ceilings, and floors, as well as any existing wiring or plumbing that may be present. It’s best to choose a path that minimizes the number of obstacles or obstructions.
- Plan for future access: While choosing the route, it’s important to keep future access in mind. Consider any future renovations or changes that may require accessing the wiring. Avoid routes that may be difficult to access in the future, as it may lead to unnecessary hassle and additional expenses.
Avoiding obstructions and hazards
When choosing the route for the cable, it’s crucial to avoid obstructions and hazards that may compromise both the safety and functionality of the electrical system. Here are some essential tips to follow:
- Stay away from water pipes and conduits: Ensure that your chosen route avoids any water pipes or conduits, as contact with them can pose a serious risk of electrical shock.
- Keep distance from flammable materials: Maintain a safe distance from flammable materials such as insulation, wood, or other combustible substances. This will help reduce the risk of fire hazards.
- Inspect the surroundings: Before finalizing the route, carefully inspect the surrounding area for any potential hazards. Look for exposed wires, damaged insulation, or any signs of wear and tear that may require repair before proceeding with the installation.
By assessing the shortest and safest path and avoiding obstructions and hazards, you’ll be well on your way to successfully installing a 220 volt outlet. Following these guidelines will not only ensure the efficient operation of your electrical system but also help maintain a safe environment within your home or office.
Fishing The Cable Through Walls Or Ceilings
Using a fish tape or wire coat hanger
When it comes to fishing the cable through walls or ceilings during the installation of a 220-volt outlet, using a fish tape or wire coat hanger can prove to be immensely helpful. These tools make it easier to navigate the cable through tight spaces and ensure a smooth and efficient installation process.
To begin, gather a fish tape or a wire coat hanger for this task. A fish tape is a long flexible metal wire housed in a reel-like container, while a wire coat hanger can be bent and manipulated to fit into various spaces. Both tools are readily available at most hardware stores and are indispensable for this task.
Here is how you can use a fish tape or wire coat hanger to fish the cable through walls or ceilings:
- Identify the starting and ending points for your cable. Take into consideration the shortest and most efficient route possible.
- Starting at the electrical panel, feed the fish tape or wire coat hanger through the hole or conduit where the cable will be entering the wall.
- Gradually push the tape or hanger through the wall or ceiling cavity, using gentle but firm pressure to navigate any bends or obstructions.
- Keep in mind that existing wiring or piping may be present within the walls or ceilings. Be cautious and avoid damaging or interfering with any existing systems.
- As you advance with the fish tape or wire coat hanger, have another person on the receiving end ready to receive the tip and guide it towards the exit point.
- Once the fish tape or hanger reaches the exit point, carefully attach the cable to the end. Ensure it is securely fastened to prevent it from detaching as you pull it back.
- Slowly and steadily pull the tape or hanger back towards the starting point, guiding the cable through the walls or ceilings.
- Once the cable has been successfully fed through, double-check for any obstructions or issues before proceeding with the rest of the installation process.
By following these steps and utilizing a fish tape or wire coat hanger, you can easily fish the cable through walls or ceilings when installing a 220-volt outlet. Remember to exercise caution around existing wiring or piping, and ensure a smooth and efficient installation process.
Securing The Cable Properly
Using Staples or Cable Clamps
One of the most crucial steps in installing a 220-volt outlet is securing the cable properly. This ensures the safety and durability of the electrical connection. There are two main methods for securing the cable: using staples or cable clamps.
Securing with Staples
Using staples is a popular and cost-effective way to secure the cable. However, it requires careful attention to avoid damaging the cable. Follow these steps to secure the cable using staples:
- Begin by locating the optimal path for the cable. This path should avoid obstructions, excessive heat, or moisture.
- Once you’ve determined the path, measure and cut the cable to the desired length, ensuring there is enough slack for any necessary adjustments.
- Using a staple gun designed for electrical work, **carefully** attach the staples to the surface, ensuring they are positioned in a straight line along the cable’s path.
- Place the cable into the staples, ensuring it sits snugly and is not pinched or squeezed, which could cause damage.
- Continue attaching staples at regular intervals, taking care to maintain the proper tension on the cable.
Securing with Cable Clamps
Alternatively, cable clamps provide a more secure and protective method for securing the cable. Follow these steps to secure the cable using cable clamps:
- Identify the appropriate locations for the cable clamps along the path of the cable. These points should be sturdy enough to hold the clamps securely.
- Position the cable clamps, ensuring they are spaced evenly and aligned parallel to the cable’s path.
- Using a screwdriver or other suitable tool, secure the clamps by tightening the screws until they securely hold the cable in place.
- Check the tension on the cable to ensure it is properly secured but not overly tightened, which could lead to potential damage.
- Inspect the cable and clamps, making sure there are no signs of wear or damage. If any issues are detected, replace the damaged components immediately.
Ensuring the Cable is Protected from Damage
Securing the cable is not enough; it is also crucial to protect it from damage. Whether using staples or cable clamps, these methods should be combined with additional measures for cable protection:
- Install conduit or tubing around the cable, especially in areas where it may be exposed to potential hazards or physical stress.
- Use cable covers or guards to shield the cable from accidental impacts or sharp objects that could cause cuts or abrasions.
- Keep the cable away from areas that are prone to excessive heat or moisture. This can be achieved by using insulation or rerouting the cable away from such areas.
By securing the cable properly and taking necessary protective measures, you can ensure a reliable and safe installation of a 220-volt outlet. Whether using staples or cable clamps, always be mindful of the cable’s condition and follow the appropriate guidelines to safeguard both your electrical connection and the overall safety of your home.
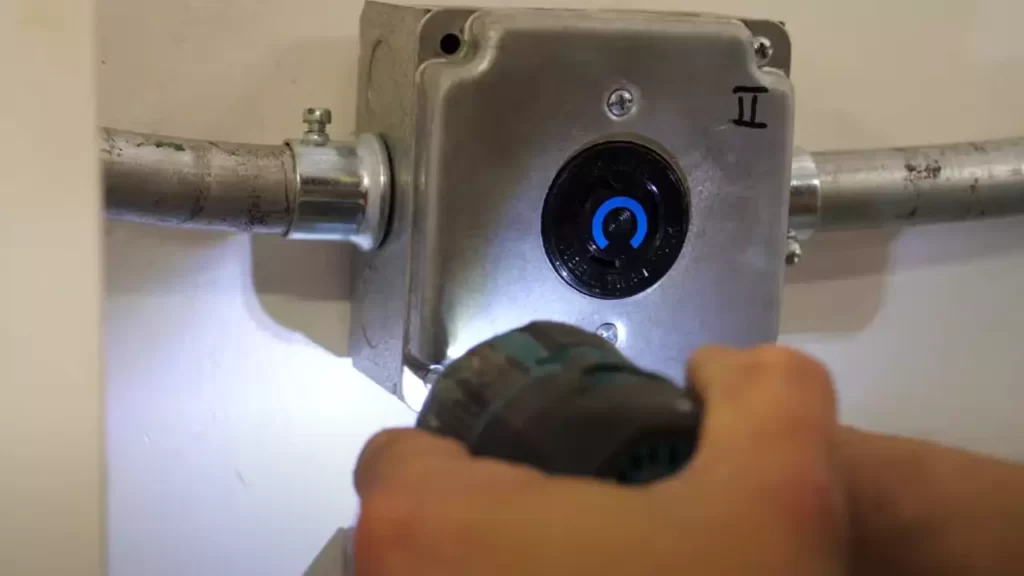
Mounting The Junction Box
When it comes to installing a 220 volt outlet, mounting the junction box is a crucial step that requires careful attention. The junction box serves as a protective housing for the wiring connections, ensuring safety and efficiency. In this section, we will guide you through the process of selecting an appropriate location and attaching the box securely to the wall.
Selecting an Appropriate Location
An essential aspect of installing a junction box is selecting the appropriate location. You need to consider a few factors before finalizing the spot. Here are some key points to keep in mind:
- The junction box should be easily accessible and not obstructed by any furniture or appliances.
- Make sure the location is near the intended electrical devices or appliances you plan to power with the 220 volt outlet.
- Ensure the box is installed at a height where it’s easily reachable while avoiding any potential hazards.
- Take into account the distance from the main electrical panel to keep the wire run as short as possible, minimizing voltage drops.
Attaching the Box Securely to the Wall
Once you’ve selected the ideal location, it’s time to attach the junction box securely to the wall. Follow these steps to ensure a robust installation:
- Using a stud finder, locate and mark the position of the wall studs. This is crucial for a sturdy mount and will support the weight of the junction box.
- If your chosen location aligns with a stud, position the box over it and mark the mounting holes on the stud using a pencil or marker.
- For locations without a stud, you’ll need to install an approved wall anchor or use toggle bolts to securely fasten the junction box to the wall.
- Once the mounting holes are marked, drill pilot holes slightly smaller than the diameter of the mounting screws.
- Align the junction box with the pilot holes and attach it to the wall using appropriate screws or bolts, ensuring a tight and secure fit.
- Double-check the box for stability and ensure it doesn’t wobble or move when pressure is applied.
By adhering to a secure attachment process, you’ll ensure that the junction box remains in place, protecting the electrical connections and providing a reliable foundation for your 220 volt outlet installation.
Wiring The Junction Box
Stripping the cable wires
As you prepare to wire your junction box, the first step is to strip the cable wires. Stripping the wires involves removing the outer insulation to expose the conductors inside. To do this, you will need a wire stripper tool. Here’s how to strip the cable wires:
- Identify the cable wires: In a typical 220 volt installation, you’ll have three wires – a black one, a white one, and a green or bare copper one. The black wire is the hot wire, the white wire is the neutral wire, and the green or bare copper wire is the ground wire.
- Measure and cut the cable: Measure the distance from the junction box to the electrical panel and cut the cable to the appropriate length. Leave some extra length for flexibility.
- Strip the sheathing: Place the cable in the wire stripper tool and locate the notch that matches the size of your cable. Gently squeeze the tool around the cable and pull it along the length of the cable to remove the sheathing. Be careful not to cut or damage the inner wires.
- Strip the individual wires: After removing the sheathing, you will see the individual wires. Strip about 3/4 inch of insulation from the ends of each wire using the wire stripper tool. Take your time and make sure not to nick or expose too much of the conductor.
- Inspect the stripped wires: Once you have stripped the wires, visually inspect them to ensure there are no frayed or damaged strands. If you notice any issues, cut off the stripped portion and strip the wire again.
Connecting the wires to the outlet
Now that you have stripped the cable wires, it’s time to connect them to the outlet. This process requires careful attention to ensure proper and safe connections. Follow these steps to connect the wires:
- Prepare the outlet: Before connecting the wires, make sure the outlet is properly prepared. Remove any screws or plates covering the terminals and clean any debris or dust from the terminals.
- Identify the terminals: The outlet will have three terminals – two brass-colored terminals and one green-colored terminal. The brass terminals are for the hot and neutral wires, while the green terminal is for the ground wire.
- Connect the wires: Start by connecting the black wire to one of the brass terminals. Loosen the terminal screw, insert the wire into the terminal, and then tighten the screw to secure the connection. Repeat this step for the white and green/bare copper wires, connecting them to the remaining brass and green terminals respectively.
- Ensure secure connections: Once all the wires are connected, give each connection a gentle tug to make sure they are secure. Any loose connections can cause electrical issues, so it’s crucial to ensure a tight and reliable connection.
- Attach the outlet to the junction box: With the wires connected, carefully push the outlet into the junction box and secure it in place using the provided screws. Make sure not to pinch or crush any of the wires during this process.
Wiring the junction box and connecting the wires to the outlet are important steps in installing a 220 volt outlet. By following these instructions carefully, you can ensure a safe and reliable electrical connection for your appliances or equipment.
Securing The Outlet In Place
Once you have successfully connected the wires to your 220-volt outlet and properly grounded the circuit, the next step is to secure the outlet in place. This not only ensures the safety of the electrical connections but also prevents any accidental damage or disconnections.
Attaching the outlet to the junction box
The first step in securing your 220-volt outlet is to attach it firmly to the junction box. The junction box acts as the main housing for the outlet, providing protection and support. To attach the outlet to the junction box, follow these steps:
- Align the screw holes on the outlet with the holes on the junction box.
- Insert the screws provided with the outlet into the holes.
- Tighten the screws using a screwdriver or a suitable tool until the outlet is securely attached to the junction box.
Make sure the outlet sits flush against the junction box, with no gaps or looseness. This ensures a secure and proper connection between the outlet and the electrical wiring.
Fastening all screws properly
Fastening all screws properly is crucial to ensure the stability and safety of the outlet installation. Each screw has a specific purpose and should be securely tightened. Here are the screws you need to fasten:
- Grounding screw: This screw is usually green and is used to connect the grounding wire to the outlet. It is essential for providing a safe path for stray electrical currents.
- Screws for wire connections: These screws are located on the sides of the outlet and are used to secure the wires in place. Depending on the outlet design, there may be separate screws for hot (black) wires and neutral (white) wires.
- Mounting screws: These screws are used to secure the outlet to the junction box, as mentioned earlier.
The key is to tighten each screw securely without over-tightening, which could damage the outlet or strip the threads. Use a screwdriver or the appropriate tool to ensure a snug fit for each screw.
By properly attaching the outlet to the junction box and fastening all screws securely, you can complete the installation process of your 220-volt outlet. These steps ensure a stable and safe electrical connection, giving you peace of mind and convenience for your high-powered electrical appliances.
Selecting A Circuit Breaker
When it comes to installing a 220 volt outlet, selecting the right circuit breaker is a critical step. The circuit breaker is responsible for protecting your electrical system from overloading and causing potential hazards. It is essential to choose the correct amperage rating for your circuit breaker and, if necessary, to install a new breaker. In this section, we will discuss the process of selecting a circuit breaker, choosing the correct amperage rating, and installing a new breaker if needed.
Choosing the Correct Amperage Rating
The amperage rating of a circuit breaker determines the maximum amount of electrical current it can handle. It is crucial to select a circuit breaker with the appropriate amperage rating for your 220 volt outlet to ensure safe and efficient power supply. Here are the steps to choosing the correct amperage rating:
- Check the electrical load requirements of the appliance or equipment that will be connected to the 220 volt outlet. This information is typically listed on the product label or in the user manual.
- Determine the amperage requirement of the appliance or equipment.
- Calculate the total amperage requirement if multiple appliances or equipment will be connected to the same circuit. Add up the individual amperage requirements of each device. Make sure not to exceed the maximum amperage capacity of the circuit breaker.
- Select a circuit breaker with an amperage rating that matches or exceeds the total amperage requirement.
For example, if the appliance requires 50 amps and you plan to connect multiple appliances with a total requirement of 60 amps, you would need to choose a circuit breaker with a rating of 60 amps or higher.
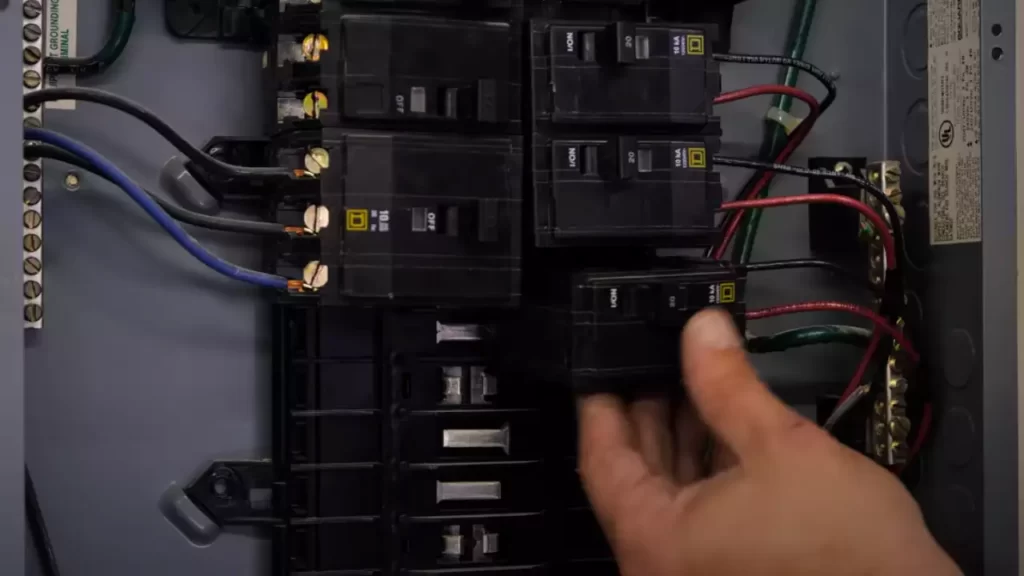
Installing a New Breaker if Necessary
If your existing electrical panel does not have a circuit breaker with the appropriate amperage rating, you may need to install a new breaker. Here is how you can install a new breaker:
- Turn off the main power supply to ensure safety. This can be done by switching off the main breaker in your electrical panel.
- Identify an available slot in the electrical panel for the new breaker.
- Remove the cover from the electrical panel to access the interior.
- Insert the new breaker into the available slot. Make sure it is securely in place.
- Connect the hot wire from the 220 volt outlet to the appropriate terminal on the new breaker.
- Tighten the connection securely, ensuring there is no loose wiring.
- Replace the electrical panel cover and turn on the main power supply.
It is crucial to follow all safety guidelines and consult a qualified electrician if you are unsure about any step in the process of installing a new breaker.
By selecting the correct amperage rating for your circuit breaker and installing a new breaker if necessary, you will ensure the safe and efficient operation of your 220 volt outlet. It is essential to prioritize safety and consult a professional if you have any doubts or concerns.
Wiring The Circuit Breaker
After removing the breaker panel cover, the next step in installing a 220 volt outlet is to wire the circuit breaker. This is a crucial step as proper wiring ensures the safe and efficient operation of your new outlet. Follow the steps below to complete this task:
Removing the Breaker Panel Cover
To access the circuit breaker, you need to remove the breaker panel cover. Before starting, ensure that you have turned off the main power supply to the panel to prevent the risk of electric shock. Here’s how you can do it:
- Locate the main circuit breaker switch, usually at the top or bottom of the panel, and flip it to the “Off” position.
- With a screwdriver, unscrew the screws holding the panel cover in place.
- Carefully lift off the panel cover, making sure not to touch any exposed wires or components.
Connecting the Wires to the Breaker
Once you have removed the breaker panel cover, you can now connect the wires to the circuit breaker. This step requires precision and attention to detail. Follow these instructions to ensure a proper connection:
- Identify the circuit breaker that corresponds to the location where you want to install the 220 volt outlet. It should be labeled accordingly.
- Before connecting the wires, inspect them for any signs of damage or wear. Replace any damaged wires to maintain electrical safety.
- Remove the knockout cover on the circuit breaker panel where you will install the wire. This allows access for the wires to enter the breaker box. Use a punch and hammer to carefully knock out the desired knockout cover.
- Feed the wires through the knockout hole and into the breaker box. Make sure you leave enough extra wire to comfortably connect it to the circuit breaker.
- Strip away about half an inch of insulation from the end of each wire using wire strippers, exposing the bare copper wire inside.
- Insert the stripped ends of the wires into the appropriate terminal slots on the circuit breaker. Normally, there are screw terminals or clamps that secure the wires in place. Make sure to connect the wires according to the diagram provided with your breaker.
- Tighten the terminal screws or clamps securely, ensuring a snug connection. This prevents any loose connections that can lead to overheating or electrical hazards.
- After connecting all the wires, double-check the connections to ensure they are tightened properly and there are no loose strands of wire. This helps to avoid any potential short circuits or electrical faults in the future.
Once you have successfully connected the wires to the circuit breaker, you are one step closer to having a functional 220 volt outlet. But before finalizing the installation, it is essential to test the outlet to ensure it is working correctly. Follow the next steps in the installation process to complete the job efficiently and safely.
Testing The Installation
Performing a final voltage check
Once you have successfully installed a 220 volt outlet, it is essential to perform a final voltage check to ensure that everything is in proper working order. This step will help you avoid any potential electrical hazards and give you the peace of mind that your new outlet is functioning correctly. To perform a final voltage check, follow these simple steps:
- Start by turning off the power to the outlet at the main circuit breaker. It is crucial to always work with the power off to avoid any electrical shock.
- Next, carefully remove the outlet cover plate using a screwdriver.
- Using a non-contact voltage tester, place the tip near the outlet terminals to check for any live voltage. The tester will indicate if the power is still present.
- If the tester indicates the presence of live voltage, double-check that the circuit breaker is turned off and that no other wires are still connected to the outlet.
- Once you have confirmed that no live voltage is present, you can proceed to test the voltage output of the outlet.
Ensuring the outlet is functioning correctly
After performing the final voltage check, you can now test the functionality of your newly installed 220 volt outlet. To ensure that the outlet is functioning correctly, follow these steps:
- Start by using a multimeter set to measure voltage. Set the meter to the appropriate range for 220 volts.
- With the power restored at the circuit breaker, insert the multimeter probes into the outlet’s L1 and L2 terminals. Make sure to follow the proper polarity, with the black probe in L1 and the red probe in L2.
- Once the probes are securely inserted, you should see a voltage reading on the multimeter display. The reading should be around 220 volts, give or take a few volts.
- If the reading is within the expected range, it means that the outlet is functioning correctly, and you can proceed to replace the outlet cover plate. However, if the reading is significantly lower or higher than the expected voltage, consult a professional electrician for further assistance.
By following these steps and performing a final voltage check, you can ensure that your newly installed 220 volt outlet is safe and functioning properly. Always prioritize safety when dealing with electrical installations and, when in doubt, seek the help of a qualified electrician.
Organizing And Securing The Cables
When installing a 220 volt outlet, one crucial step is organizing and securing the cables. This ensures not only a neat and professional appearance but also safety in the long run. Two key aspects of this process are neatly arranging the wires in the junction box and using cable ties or clamps to secure them.
Neatly arranging the wires in the junction box
Properly arranging the wires in the junction box is essential for a clean and efficient installation. This helps prevent any interference or confusion with the electrical connections, making future maintenance and troubleshooting easier. Follow these steps to neatly arrange the wires:
- Identify the different wires: Separate the hot (or live) wires, neutral wires, and grounding wires from each other. This differentiation allows for easier identification and connection.
- Strip the wires: Strip the insulation coating off the ends of the wires using wire strippers. This exposes the bare wire which will be connected to the outlet.
- Group and combine wires: Group the hot wires together by connecting them with wire nuts. Repeat this step for the neutral wires and grounding wires. Always ensure that the wire nuts are properly tightened and secure.
Using cable ties or clamps to secure them
Once the wires are neatly arranged in the junction box, it’s important to secure them properly using cable ties or clamps. This not only helps prevent accidental pulling or disconnection of the wires but also ensures compliance with electrical safety standards. Here’s how to do it:
- Choose the right cable ties or clamps: Select cable ties or clamps suitable for the size of the wires being secured. It’s essential to use high-quality materials that can withstand the electrical load and offer long-lasting support.
- Bundle the wires: Bundle the wires together using the cable ties or clamps. Make sure that the cables are tightly secured without causing any damage to the insulation or wires. Avoid over-tightening, as this can lead to pinching or cutting the cable.
- Secure the ties or clamps: Fasten the cable ties or clamps securely, ensuring they are firmly attached to the junction box or nearby surfaces. This step prevents the wires from moving or coming loose over time.
- Arrange excess cables: If there are any excess cables, neatly fold or arrange them to avoid tangling or interfering with other electrical components in the box. Keeping everything organized reduces the risk of damage or accidental contact.
By following these steps and ensuring the cables are organized and securely fastened, you can complete your 220 volt outlet installation with confidence and peace of mind.
Reattaching The Panel Cover
After successfully completing the necessary steps to wire and install your 220-volt outlet, the final crucial task is reattaching the panel cover. This ensures the safety of the electrical system and keeps the wires protected from any external factors. By following these simple guidelines for reattaching the panel cover, you can complete the installation process smoothly and securely.
Ensuring all wires are safely tucked inside
Before you begin reattaching the panel cover, it is essential to double-check that all the wires are securely tucked inside. This prevents any accidental tampering or damage to the wires and guarantees proper insulation. To ensure that all wires are safely tucked away, follow these steps:
- Inspect each wire and ensure there are no loose ends or exposed parts.
- Use cable ties or tape to bundle the wires neatly, keeping them organized and out of the way.
- Confirm that no wires are obstructing the cover’s path or interfering with other components inside the panel.
| Tip | Description |
|---|---|
| 1 | Securely fasten any loose wires using electrical tape or cable ties. |
| 2 | Ensure no wire is exposed or protruding near the panel cover. |
| 3 | Double-check that all wires are neatly organized and properly aligned. |
Fastening the cover securely
Once you have confirmed that all wires are safely tucked inside, it’s time to fasten the panel cover securely. This step ensures that the cover stays in place and prevents any unwanted movement or exposure to the internal components. To fasten the cover securely, follow these steps:
- Align the panel cover over the panel box, ensuring it fits perfectly into place.
- Secure the cover by reinserting and tightening the screws in their designated slots.
- Check that all screws are properly tightened but be cautious not to overtighten, as this could damage the panel cover or the box.
- Give the cover a gentle push to verify that it is firmly in place.
By adhering to these steps, you can be confident that the panel cover is securely fastened, ensuring the protection and integrity of your newly installed 220-volt outlet.
Restoring The Power
Turning the circuit breaker back on
Now that you have successfully connected and installed your new 220 volt outlet, it’s time to restore power to the circuit. Turning the circuit breaker back on is a crucial step in the installation process. Follow these steps to safely restore the power:
- Locate the main circuit breaker panel in your home. It is usually located in the basement, garage, or utility room.
- Open the circuit breaker panel door and locate the breaker that corresponds to the circuit you worked on. It should be in the “Off” position.
- Using caution, flip the breaker to the “On” position. It is normal to hear a clicking sound when you do this.
- Inspect the 220 volt outlet to ensure that it is receiving power. Look for any indicator lights or signs of electricity.
- If the outlet appears to have power, you can proceed to the testing phase. However, if the outlet doesn’t seem to be receiving power, double-check the wiring connections and ensure that you have properly connected the wires.
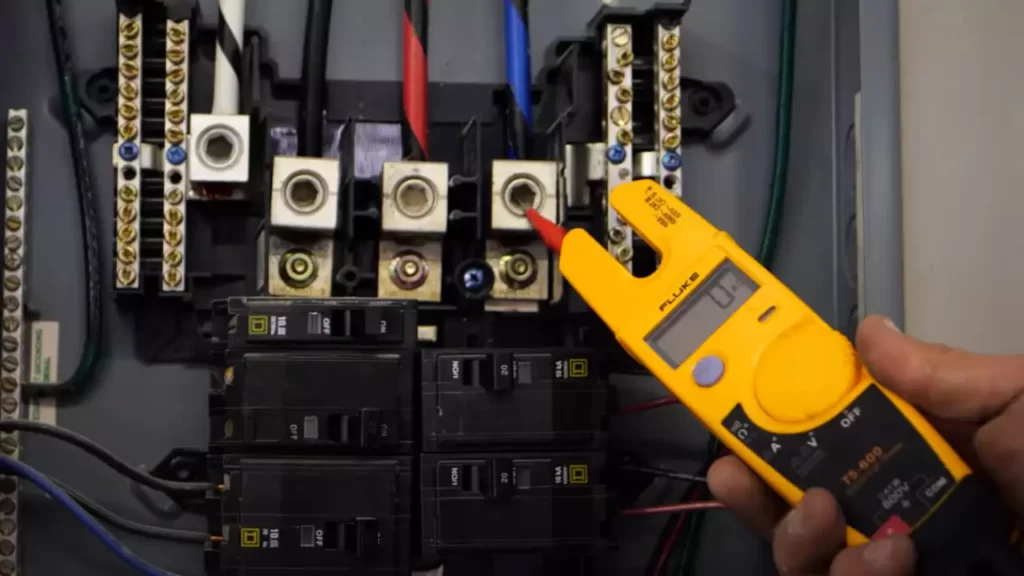
Testing the outlet with a voltage tester
Testing the outlet with a voltage tester is an essential step to confirm that the installation was successful. This will ensure your safety and the proper functioning of the outlet. Follow these steps to test the outlet:
- Start by plugging the voltage tester into the outlet. Make sure the tester is rated for testing 220 volt outlets.
- Turn on the voltage tester and carefully touch the metal tips of the tester to the two vertical slots of the outlet.
- Observe the voltage tester. If the outlet is working correctly, the tester should display a reading of 220 volts. This indicates that power is flowing through the outlet.
- If the voltage tester doesn’t display any reading or shows a different voltage, there may be a wiring issue. Double-check your wiring connections or consult a licensed electrician to investigate and fix the problem.
Congratulations! You’ve successfully installed a 220 volt outlet and restored power to the circuit. Testing the outlet with a voltage tester is crucial to ensure it is functioning correctly before connecting any devices. Now you can confidently use your newly installed outlet for high-powered appliances or equipment in your home.
Common Issues And Solutions
Identifying potential problems during installation
While installing a 220 volt outlet, there are several common issues that may arise. Identifying these problems at an early stage can save you both time and money. Here are some potential problems you may encounter:
- Wiring issues: Faulty or outdated wiring can cause the outlet to malfunction. It is important to inspect the existing wiring thoroughly before installation, ensuring it is in proper condition.
- Inadequate power supply: Insufficient power supply can lead to frequent tripping of the circuit breaker or damage to your appliances. Check the capacity of your breaker and make sure it can handle the load of the new outlet.
- Incorrect wiring connections: A simple mistake in wiring connections can result in an outlet that doesn’t work or poses a risk of electrical shock. Double-check the wiring connections to ensure they are properly aligned.
- Improper grounding: Poor or lack of grounding can cause electrical shocks and equipment damage. Make sure you have a proper grounding wire connected to the outlet for safety purposes.
- Faulty equipment: Sometimes, the problem may not lie in the installation process itself but in the equipment you are using. Ensure that the outlet and the appliances you plan to connect to it are in good working condition.
Troubleshooting methods for faulty outlets
If you encounter a faulty outlet, it is important to troubleshoot and resolve the issue promptly. Here are some troubleshooting methods to help diagnose and fix the problem:
- Visual inspection: Start by visually inspecting the outlet and its wiring for any visible damage or loose connections. If you notice any issues, carefully tighten the connections or replace any damaged components.
- Using a multimeter: A multimeter can be a handy tool to measure voltage and perform continuity tests. Use it to check if the outlet is receiving power and if the wiring connections are intact.
- Testing with another appliance: If the outlet seems to be functioning but the appliance plugged into it is not working, try using a different appliance to rule out any problems with the original one. This can help identify whether the issue lies with the appliance or the outlet.
- Resetting the breaker: If the outlet is not receiving power, check the circuit breaker panel to see if the breaker has tripped. Resetting the breaker might restore power to the outlet.
- Seeking professional help: If you are unable to identify or fix the problem on your own, it is always recommended to consult a licensed electrician. They have the expertise and tools to diagnose and resolve complex electrical issues safely.
By being aware of these common issues during the installation of a 220 volt outlet and using the troubleshooting methods mentioned above, you can ensure a smooth and safe installation process. Remember to prioritize safety and if in doubt, seek professional assistance to avoid any electrical hazards.
Safety Precautions To Observe
When it comes to installing a 220-volt outlet, it is crucial to prioritize safety at every step of the process. Electrical work can be dangerous if not handled properly, so it is essential to follow safety guidelines and take the necessary precautions. This section will outline some important safety measures you should adhere to when installing a 220-volt outlet.
Using Personal Protective Equipment (PPE)
Personal Protective Equipment (PPE) plays a crucial role in safeguarding yourself from potential electrical hazards. Before you begin working on the electrical installation, make sure you have the following PPE available:
| PPE | Description |
|---|---|
| 1. Safety Glasses or Goggles | Protect your eyes from debris and sparks. |
| 2. Insulated Gloves | Prevent electrical shock by providing insulation. |
| 3. Flame-Resistant Clothing | Shield against potential fire hazards. |
| 4. Non-Slip Footwear | Ensure stability while working around electrical equipment. |
By wearing the appropriate PPE, you significantly reduce the risk of injury or electric shock during the installation process.
Following Electrical Safety Guidelines
Adhering to electrical safety guidelines is vital to protect yourself and prevent associated hazards. Here are some important guidelines to keep in mind:
- Ensure the power is completely shut off before beginning any electrical work.
- Use a voltage tester to verify that the circuit is de-energized.
- Never touch live wires with bare hands.
- Use insulated tools to prevent electrical shocks.
- Avoid working in wet or damp conditions.
- Keep flammable items away from the work area.
- Secure all wire connections properly to prevent loose connections or short circuits.
- Regularly inspect electrical cables for any signs of wear or damage.
- Seek professional assistance for any complex electrical work or if you are unsure about any part of the installation process.
By adhering to these electrical safety guidelines, you minimize the risk of accidents and ensure a safe and successful installation of the 220-volt outlet.
Consulting A Professional Electrician If Needed
When it comes to installing a 220-volt outlet, taking the necessary safety precautions is crucial. While some installation projects can be easily handled by confident DIYers, it is important to know when to seek professional assistance. Electrical work can be complex and dangerous if not done correctly, so it is always a good idea to consult a licensed electrician if you are unsure about any aspect of the installation process.
Knowing when to seek professional assistance
Knowing when to seek professional assistance is key to ensuring a successful and safe installation of a 220-volt outlet. If you have never worked with electrical systems before or lack the necessary knowledge and experience, it is best to leave it to the experts. A professional electrician can assess your specific electrical needs and determine the best course of action for the installation, ensuring that all safety standards are met.
Additionally, if you encounter any of the following situations, it is highly recommended to consult a professional electrician:
- If you have an older electrical system that may not be compatible with a 220-volt outlet.
- If you are unsure about the appropriate wire size and circuit breaker requirements.
- If you are planning to install multiple outlets or complex wiring configurations.
- If you are not confident in your ability to work with electrical tools and equipment.
- If you are uncertain about local electrical codes and regulations.
Ensuring the installation meets proper standards
When installing a 220-volt outlet, it is essential to adhere to proper electrical standards to ensure the safety of your home and those who use the outlet. Hiring a professional electrician can help ensure that the installation meets these standards, as they are knowledgeable about local building codes and regulations. They will ensure that the appropriate wire size and circuit breaker are used, the outlet is correctly grounded, and all connections are properly secured.
In addition to following proper electrical standards, a professional electrician will also perform a thorough inspection of the installation to identify and rectify any potential issues or hazards. This includes checking for any loose connections, testing the outlet for correct voltage, and ensuring that there are no overloaded circuits.
By consulting a professional electrician for the installation of your 220-volt outlet, you can have peace of mind knowing that the job will be done correctly and up to code. They have the necessary expertise to handle any electrical challenges that may arise during the installation process, ensuring the safety and reliability of your electrical system.
Frequently Asked Questions
How Much Does It Cost To Install A 220 Volt Outlet?
The cost of installing a 220-volt outlet varies depending on factors like location and complexity of the installation. On average, you can expect to pay between $200 and $500 for a professional installer to handle the job. Factors like wiring and additional materials may also affect the final cost.
Can I Install 220V Myself?
No, it is not recommended to install 220V yourself. Electrical installations require expertise and knowledge to ensure safety and compliance with regulations. Hiring a licensed electrician is the best choice to avoid any risks and ensure a proper installation.
Can I Convert A 110V Outlet To 220V?
You cannot directly convert a 110V outlet to a 220V outlet. It requires rewiring the electrical system and installing a new circuit.
Does A 220 Outlet Have To Be Grounded Up Or Down?
A 220 outlet must be grounded to provide safety and prevent electrical shocks. The grounding can be done either up or down, as long as it is connected to a grounding wire that goes into the ground.
Conclusion
To sum up, installing a 220-volt outlet may seem daunting, but with the right knowledge and tools, it can be a straightforward process. By following these step-by-step instructions, you can ensure a safe and efficient installation. Remember to prioritize your safety by turning off the power and seeking professional help if needed.
By having a 220-volt outlet in your home, you’ll have the power you need for high-demand appliances and equipment. So, go ahead and confidently tackle this project!