To install a 220 volt 4 wire outlet, turn off the power, remove the old outlet, wire the new outlet, and secure it in place with screws. Installing a 220 volt 4 wire outlet requires following safety precautions and adhering to the electrical code guidelines.
By carefully following the steps outlined in this guide, you can successfully install a 220 volt 4 wire outlet and ensure a safe and efficient electrical connection. Proper installation of a 220 volt 4 wire outlet is essential for powering appliances and equipment that require higher voltage.
Planning For The Installation
Before you begin installing a 220 volt 4 wire outlet, it’s essential to plan ahead to ensure a successful and safe installation. This includes determining the electrical requirements, gathering the necessary tools and materials, and assessing the location for the outlet. By taking the time to plan, you can avoid any potential issues and ensure a smooth installation process. Let’s dive into each step in detail.
Determining the electrical requirements
Determining the electrical requirements is the first step in planning for the installation of a 220 volt 4 wire outlet. This involves understanding the power needs of the appliance or equipment that will be connected to the outlet. Check the manufacturer’s specifications or the equipment’s user manual to identify the specific electrical requirements, such as the voltage and amperage.
Once you have gathered this information, you can ensure that your electrical system is capable of providing the necessary power. If you’re unsure about your home’s electrical capacity, it’s advisable to consult a qualified electrician to assess the situation and make any necessary upgrades or modifications.
Gathering the necessary tools and materials
Once you’ve determined the electrical requirements, the next step is to gather the necessary tools and materials for the installation. Having everything you need on hand will save time and frustration during the process. Here’s a list of items you’ll likely need:
| Tools | Materials |
|---|---|
|
|
Make sure you have all the necessary tools and materials readily available before starting the installation to avoid any delays or interruptions.
Assessing the location for the outlet
Assessing the location for the outlet is another crucial step in planning for the installation. You need to consider both safety and convenience factors when choosing the location. Here are a few important considerations:
- Locate the outlet close to the appliance or equipment it will serve, eliminating the need for long and potentially hazardous extension cords.
- Ensure there is adequate space for the outlet and any necessary wiring, allowing for easy and safe installation.
- Choose a location that is easily accessible, both for the installation and future maintenance or repairs.
- Avoid areas that are prone to moisture or excessive heat, as this can pose a safety risk.
By carefully assessing the location, you can ensure the outlet is conveniently located while maintaining safety as a top priority.
By following these planning steps, you can set yourself up for a successful installation of a 220 volt 4 wire outlet. Take the time to determine the electrical requirements, gather the necessary tools and materials, and assess the location for the outlet. Planning ahead will save you time, effort, and potential issues in the long run, allowing you to enjoy your new outlet safely and efficiently.
Preparing The Electrical Circuit
Before installing a 220-volt 4-wire outlet, it’s crucial to prepare the electrical circuit properly. This ensures a safe and successful installation. The steps involved in preparing the electrical circuit include turning off the power supply, removing the existing outlet or breaker, and running a new electrical cable.
Turning off the power supply
To begin with, you must turn off the power supply to the circuit you’ll be working on. This is essential to avoid any electric shock or potential damage. Follow these steps to turn off the power:
- Locate the main electrical panel in your house.
- Open the panel cover using a screwdriver or a similar tool.
- Locate the circuit breaker that supplies electricity to the outlet you’ll be working on.
- Switch off the circuit breaker by flipping it to the “off” position.
- Use a non-contact voltage tester to confirm that the power is indeed off. This handy tool will detect the presence of electrical current.
Once you’ve followed these steps and tested for power, you can proceed with the next phase of preparing the electrical circuit.
Removing the existing outlet or breaker
The next step in preparing the electrical circuit is removing the existing outlet or breaker. This step may vary depending on whether you’re replacing an outlet or upgrading from a 3-wire to a 4-wire configuration. Here’s a general guideline for removing an old outlet:
- Switch off any additional breakers that are connected to the same circuit.
- Remove the outlet cover plate by unscrewing the screws.
- Unscrew the screws holding the outlet to the electrical box.
- Carefully pull the outlet out of the box, making sure not to damage any wires.
- Disconnect the wires from the outlet, noting their respective positions.
If you’re replacing a breaker, it’s important to consult the manufacturer’s instructions or seek professional assistance. Remember, safety should always be your top priority.
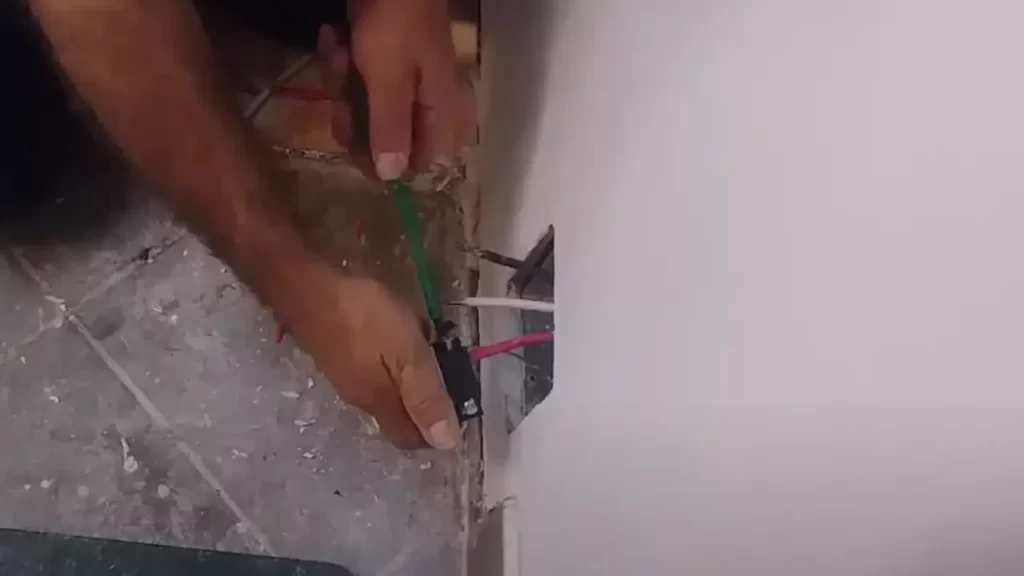
Running a new electrical cable
After removing the existing outlet or breaker, the next step is to run a new electrical cable. This step involves carefully routing the cable from the main electrical panel to the location where you’ll be installing the new 220-volt 4-wire outlet. Here are the basic steps for running a new electrical cable:
- Determine the optimal route for the new cable, ensuring it’s away from any potential hazards or obstructions.
- Measure the distance from the main electrical panel to the outlet location and add a few extra feet to accommodate any necessary slack.
- Drill holes through walls and joists as needed to route the cable.
- Carefully pull the new electrical cable through the drilled holes, ensuring it remains intact and undamaged.
Once you’ve successfully run the new electrical cable, you’re ready to proceed with the actual installation of the 220-volt 4-wire outlet. This phase will be covered in the next section of this blog post.

Wiring The 220 Volt Outlet
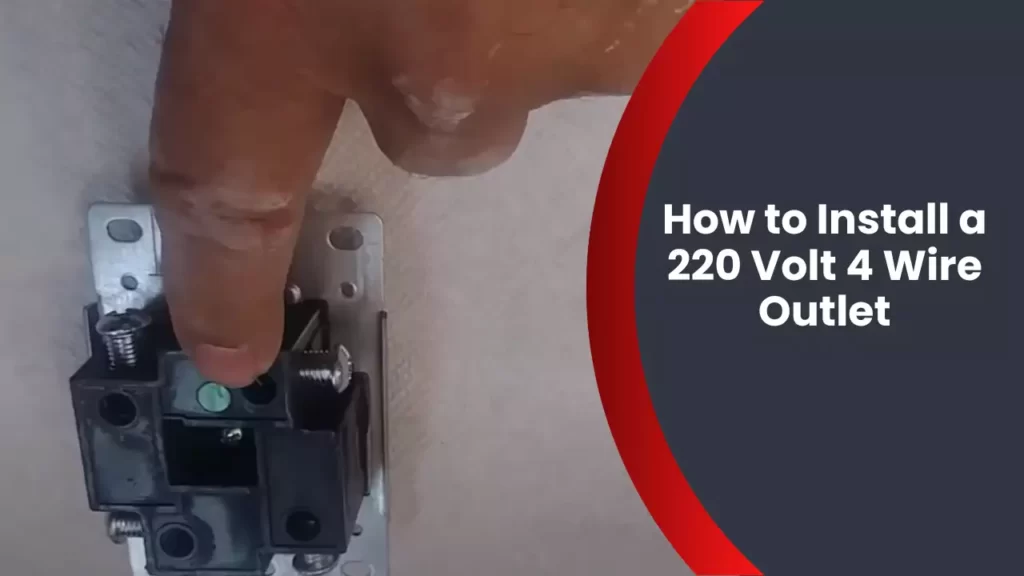
Connecting the wires to the outlet
Connecting the wires to the 220-volt outlet is an essential part of the installation process. It ensures the proper flow of electricity and prevents any electrical hazards. Follow these simple steps to connect the wires to the outlet:
- First, strip the insulation off the ends of the wires using a wire stripper. This will expose the copper wires underneath, allowing for a secure connection.
- Identify the four wires: black (hot), red (hot), white (neutral), and green or bare (ground). These wires will correspond to the terminals on the 220-volt outlet.
- Attach the black wire to the brass terminal screw on the outlet. Make sure it is tightly secured to prevent any loose connections.
- Similarly, connect the red wire to the other brass terminal screw on the outlet.
- The white wire should be connected to the terminal screw labeled “neutral.”
Remember, it’s important to double-check the connections to ensure they are secure. Loose connections can lead to electrical issues or even fires.
Properly grounding the outlet
Proper grounding is crucial for the safety of the outlet and your electrical system. Grounding provides a path for excess electrical energy to dissipate, reducing the risk of electric shock. Here’s how you can properly ground the 220-volt outlet:
- Locate the green or bare wire, which is the grounding wire.
- Connect one end of the grounding wire to the green screw on the outlet.
- Attach the other end of the grounding wire to a solid ground source, such as a grounding rod or a metal grounding plate.
Make sure the grounding wire is securely fastened. This will ensure the outlet is properly grounded and minimize the potential for electrical accidents.
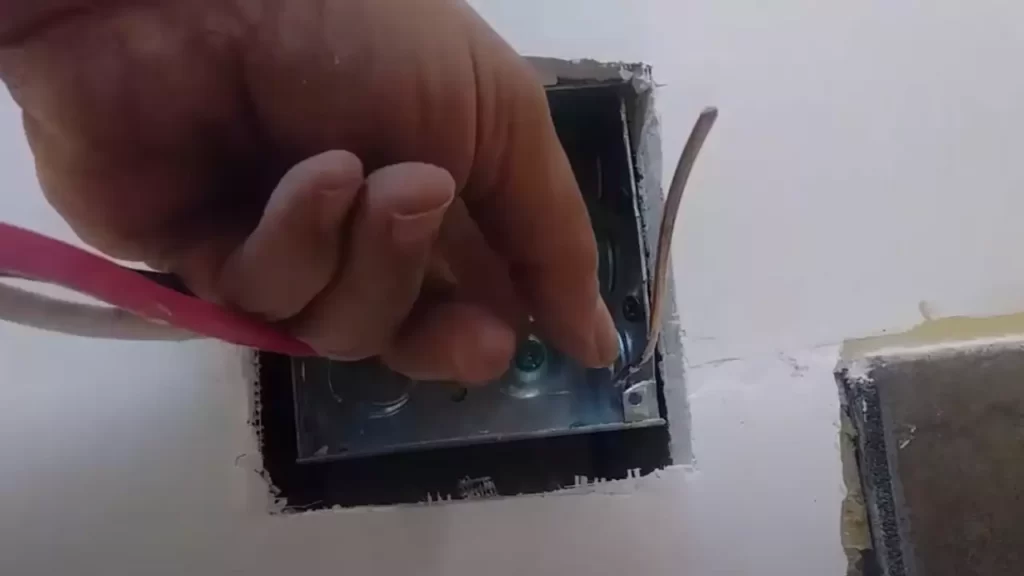
Securing the wires and outlet in place
Once the wires are connected and the outlet is properly grounded, it’s essential to secure them in place. This will prevent any accidental disconnection and maintain the integrity of the installation. Follow these steps to secure the wires and outlet:
- Use cable clamps or conduit connectors to secure the wires entering the outlet box. This will protect them from damage and ensure a neat and organized installation.
- Secure the outlet itself to the outlet box using screws, ensuring it is tightly fastened and flush with the wall surface.
By properly securing the wires and outlet, you can avoid potential hazards and ensure a safe and reliable electrical connection.
Testing And Finalizing The Installation
Once you have successfully connected the wires and secured the 220 volt 4 wire outlet, it’s time to test and finalize the installation. This step is crucial to ensure that everything is properly functioning and safe to use. In this section, you will learn how to turn on the power supply, ensure the outlet is working correctly, and troubleshoot common issues that may arise.
Turning on the power supply
To turn on the power supply for your newly installed 220 volt 4 wire outlet, follow these simple steps:
- Locate the main circuit breaker panel in your home or building.
- Identify the breaker that corresponds to the outlet you just installed. It should be clearly labeled.
- Flip the breaker switch into the “on” position to supply power to the outlet.
Once the power supply is switched on, you should see lights or indicators turn on if your outlet has them. Now, it’s time to ensure that the outlet is working correctly.
Ensuring the outlet is working correctly
After turning on the power supply, it’s crucial to verify that the 220 volt 4 wire outlet is functioning correctly. To do this, follow these steps:
- Get a voltage tester and ensure that it is working properly.
- Insert the voltage tester into the outlet slots. It should indicate the presence of electricity.
- If the voltage tester confirms the outlet is working, you can proceed to test the specific appliances or devices you plan to connect to the outlet.
- Plug in an appliance or device that requires 220 volts and turn it on. If it powers up without any issues, congratulations, your outlet is working correctly!
If, however, you encounter any problems during the testing process, it’s essential to troubleshoot those issues promptly.
Troubleshooting common issues
If your 220 volt 4 wire outlet is not working correctly, here are some common issues to troubleshoot:
| Issue | Possible Solution |
|---|---|
| No power to the outlet | Check if the circuit breaker tripped and reset it. If the breaker keeps tripping, there may be a wiring problem that requires professional assistance. |
| Incorrect wiring connections | Inspect the wiring connections to ensure they are properly connected. Double-check the color coding and make sure all connections are secure. |
| Faulty outlet | If all the wiring connections are correct and the outlet still doesn’t work, there may be a defect in the outlet itself. Consider replacing it with a new one. |
If none of these solutions resolve the issue, it’s best to seek professional help to diagnose and repair any electrical problems. Remember, safety should always be the top priority when dealing with electrical installations.
By following these steps to test and finalize the installation of your 220 volt 4 wire outlet, you can ensure that you have a fully functional and safe power source for your appliances and devices. Performing these checks and troubleshooting any issues will provide you with peace of mind and a reliable power supply.
Safety Considerations
Importance of understanding electrical safety
Before embarking on any electrical project, it is crucial to recognize the significance of electrical safety. Working with electricity can be hazardous if not handled with caution, and there are certain precautions that must be taken to ensure both personal safety and the integrity of the electrical system. Understanding electrical safety principles is essential for anyone attempting to install a 220 volt 4 wire outlet.
Using personal protective equipment (PPE)
Personal protective equipment (PPE) plays a vital role in minimizing the risk of electrical accidents. When working with electricity, it is imperative to wear appropriate protective gear to protect yourself from potential harm. PPE may include insulating gloves, safety glasses, flame-resistant clothing, and non-conductive footwear. Wearing the correct PPE not only safeguards against electrical shocks but also provides insulation against potential arc flashes or sparks that could result from electrical contact.
Following local electrical codes and regulations
Adhering to local electrical codes and regulations is a fundamental aspect of maintaining electrical safety. These codes are in place to ensure that electrical installations are done correctly and meet the required safety standards. Each locality may have specific guidelines and requirements for installing electrical outlets, such as the 220 volt 4 wire outlet. It is crucial to research and familiarize yourself with the applicable codes and regulations in your area before proceeding with the installation.
When installing a 220 volt 4 wire outlet, it is essential to consider safety as the top priority. Understanding electrical safety, using personal protective equipment, and following local electrical codes and regulations are crucial steps in ensuring the overall safety of the installation process. By taking these precautions, you can confidently complete the installation of a 220 volt 4 wire outlet while minimizing the risk of electrical accidents. Remember, the safety of yourself and others should never be compromised when working with such potentially dangerous electrical systems.
Frequently Asked Questions
Why Do Some 220 Plugs Have 4 Wires?
Some 220 plugs have 4 wires to accommodate different types of electrical systems. These wires include two hot wires, a neutral wire, and a ground wire. This configuration allows for more efficient and safer electric power distribution.
What Are The 4 Wires For 220?
The 4 wires for 220 volts are the two hot wires, one neutral wire, and one ground wire.
What Is The Difference Between A 3-Wire 220 And A 4-Wire 220?
A 3-wire 220 setup has two hot wires and a ground wire, while a 4-wire 220 setup includes two hot wires, a neutral wire, and a ground wire. The additional neutral wire in the 4-wire setup provides more safety and flexibility for connecting devices.
How To Wire A 220 Single Phase Outlet?
To wire a 220 single phase outlet, follow these steps: 1. Turn off the power. 2. Install a double-pole breaker in the breaker box. 3. Connect the black wire to one pole and the white wire to the other pole.
4. Attach the ground wire to the grounding terminal. 5. Securely mount the outlet box and connect the wires to the outlet.
Conclusion
Installing a 220 volt 4-wire outlet doesn’t have to be complicated. By following the step-by-step guide provided in this blog post, you can successfully complete the installation process. Remember to prioritize safety by turning off the power and consulting an electrician if necessary.
With a little time and effort, you’ll have your new outlet up and running, ready to power your appliances efficiently. Stay informed and empowered to tackle electrical projects with confidence.