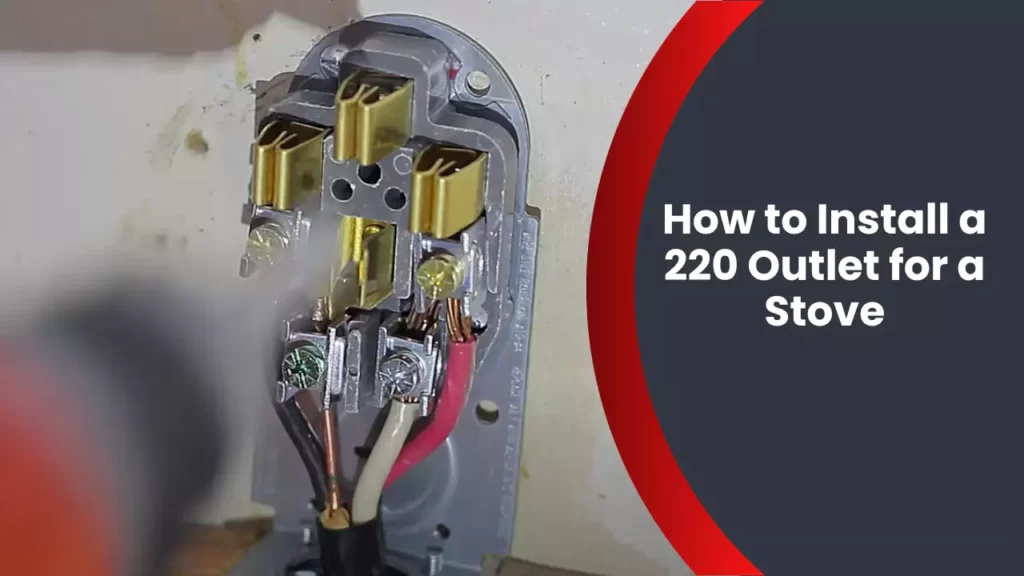
To install a 220 outlet for a stove, you need to first turn off the power to the designated circuit, remove the existing outlet or junction box, attach the new outlet box to the wall, connect the wires to the outlet, and secure the outlet box in place. Once completed, you can then turn the power back on and test the outlet to ensure it is functioning properly.
Installing a 220 outlet for a stove is an essential task for anyone who wants to upgrade their kitchen appliances or replace an old stove. With the installation complete, you’ll be able to power your stove efficiently, ensuring it operates at optimal performance.
However, it’s crucial to follow the correct steps to install the outlet safely and accurately. In this guide, we’ll walk you through the process of installing a 220 outlet for a stove, providing you with the necessary information to complete the task with ease. So, let’s get started and transform your kitchen into a functional and modern space.
Understanding The Electrical Requirements For A Stove
Basic principles of electrical connections
Before diving into the installation process, it is crucial to understand the basic principles of electrical connections when installing a 220 outlet for a stove. This knowledge will not only ensure a safe and efficient installation but also provide a solid foundation for any future electrical work you may undertake.
When working with electrical connections, it is important to remember that safety should always come first. To establish a secure connection, you must follow some fundamental principles:
- Ensure the power source is turned off before starting any electrical work. This can be done by flipping the corresponding breaker in the electrical panel.
- Use proper safety equipment, such as insulated gloves and goggles, to protect yourself from potential electrical hazards.
- Ensure all wires are securely connected using appropriate connectors or terminal blocks.
- Follow the manufacturer’s instructions and local electrical codes when making connections or wiring the outlet.
Determining the voltage requirements
Next, let’s discuss how to determine the voltage requirements for your stove. Stoves typically require a 220-volt supply, also known as a 240-volt supply. This higher voltage is necessary to provide the necessary power for the heating elements and other electrical components of the stove.
To confirm the voltage requirement for your stove, refer to the manufacturer’s specifications. This information is usually indicated on a label or plate located near the power cord or on the back of the stove. It is important to ensure that the voltage of your electrical system matches the voltage requirement of the stove to avoid any potential damage or safety hazards.
Importance of dedicated circuits for appliances
Now let’s explore the importance of dedicated circuits for appliances, including stoves. A dedicated circuit refers to an electrical circuit that is solely dedicated to a specific appliance, ensuring that it has its own dedicated power source.
Having a dedicated circuit for your stove is crucial due to its high power demands. Stoves require a significant amount of electricity to operate safely and efficiently. By having a dedicated circuit, you can prevent overloading the circuit or causing other electrical appliances to trip the breaker.
Additionally, dedicated circuits provide a higher level of safety by reducing the risk of electrical fires. If multiple appliances share the same circuit, the cumulative power draw can exceed the circuit’s capacity, leading to overheating and potential fire hazards.
To install a dedicated circuit for your stove, consult a qualified electrician who can assess your electrical panel’s capacity and ensure the correct wiring is installed.
By understanding the basic principles of electrical connections, determining the voltage requirements, and appreciating the importance of dedicated circuits for appliances, you are now equipped with the necessary knowledge to proceed with the installation of a 220 outlet for your stove.
Gathering The Necessary Tools And Materials
Gathering the necessary tools and materials is the first step in installing a 220 outlet for a stove. This guide will walk you through the process, ensuring you have everything you need to complete the installation. Remember, safety is paramount when working with electricity, so it’s essential to gather the right tools, wires, and safety equipment before getting started.
Tools needed for the installation:
| Tool | Description |
|---|---|
| Screwdriver | A flat-head or Phillips-head screwdriver may be required for removing panel covers or securing wires. |
| Wire stripper | This tool is used to strip the insulation from the ends of electrical wires. |
| Needle-nose pliers | These pliers come in handy for cutting and bending wires, as well as gripping small objects. |
| Wire connectors | Wire connectors ensure proper and secure connections between electrical wires. |
| Tape measure | Use a tape measure to accurately measure and mark the location for the outlet. |
| Utility knife | A utility knife is useful for cutting and stripping insulation from wires. |
| Flashlight | Having a flashlight handy will help you see in dark or tight spaces during the installation process. |
Types of electrical wires required:
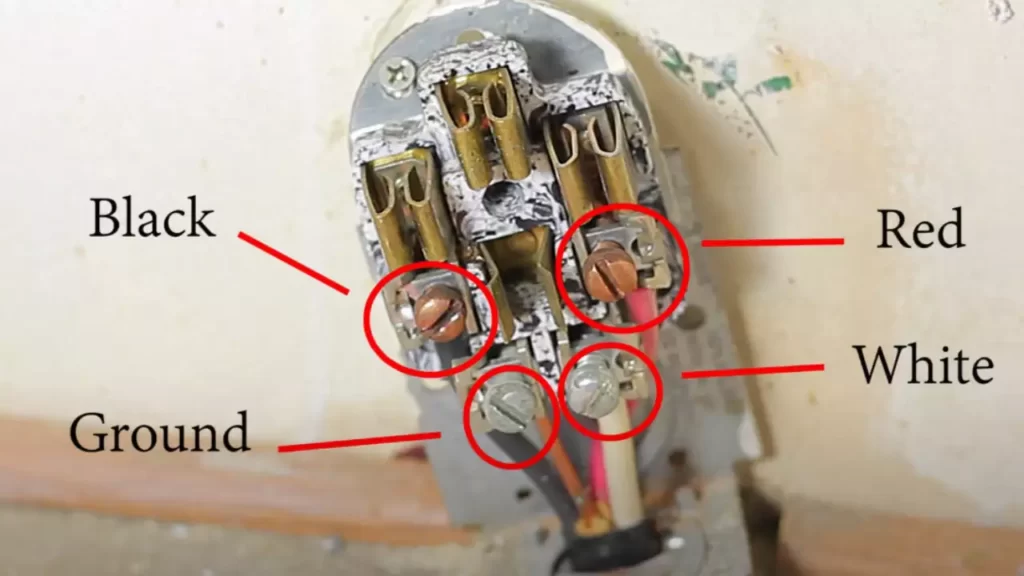
When it comes to installing a 220 outlet for a stove, you’ll need three types of electrical wires:
- Black (hot) wire: This wire carries the electrical current and is responsible for providing power to the stove.
- White (neutral) wire: The neutral wire completes the circuit and is essential for the safe operation of the stove.
- Bare copper (ground) wire: The ground wire provides a safe path for electrical current in case of a fault.
Safety equipment for handling electrical work:
Ensuring your safety while handling electrical work is crucial. Be sure to gather the following safety equipment:
- Gloves: Wear insulated gloves to protect yourself from electric shock.
- Safety glasses: Protect your eyes from any potential hazards or flying debris by wearing safety glasses.
- Voltage tester: A voltage tester helps you identify whether an electrical circuit is energized or not.
- Circuit breaker lockout: Use a circuit breaker lockout device to prevent accidental power restoration while working on the circuit.
- Fire extinguisher: Keep a fire extinguisher nearby in case of any electrical fire emergencies.
With the necessary tools and materials gathered, you are now ready to move on to the next step of installing a 220 outlet for your stove. Remember to follow safety guidelines and proceed with caution throughout the process for a successful and safe installation.
Steps To Install A 220 Outlet For A Stove
Installing a 220 outlet for a stove can be a challenging task, but with the right guidance, it can be done easily and safely. In this section, we will walk you through each step of the installation process, ensuring that you have a clear understanding of what needs to be done.
Step 1: Shutting off the power supply
The first step in installing a 220 outlet for a stove is to shut off the power supply. This is crucial for your safety as it will prevent any accidental electric shock. Locate the circuit breaker that controls the power to the stove area and switch it off. Use a voltage tester to ensure that there is no power running through the wires before proceeding to the next step.
Step 2: Removing the old outlet (if applicable)
If you are replacing an existing outlet, you will need to remove it before installing the new one. Start by removing the outlet cover plate and unscrewing the screws that hold the outlet in place. Gently pull the outlet out and disconnect the wires from the terminals. Make sure to label the wires or take a picture for reference, as you will need to reconnect them later.
Step 3: Installing the new outlet box
Next, you need to install the new outlet box. Choose a suitable location for the box, keeping in mind that it should be within reach of the stove and comply with local electrical codes. Trace the outline of the box on the wall and cut a hole using a drywall saw. Insert the outlet box into the hole and secure it in place using the provided screws. Ensure that the box is flush with the wall surface.
Step 4: Running the electrical cable from the panel to the outlet box
Now it’s time to run the electrical cable from the circuit breaker panel to the outlet box. Measure the distance between the panel and the box, adding a few extra feet for flexibility. Cut the cable to the appropriate length using wire cutters. Strip the outer sheathing of the cable using a wire stripper and separate the individual wires inside.
Step 5: Wiring the outlet and connecting it to the cable
Once the cable is in place, it’s time to wire the outlet. Begin by connecting the grounding wire to the grounding terminal on the outlet. Next, connect the black wire to the brass terminal and the white wire to the silver terminal. Use wire nuts to secure the connections and ensure they are tight. Double-check that all connections are secure and well-insulated.
Step 6: Mounting the outlet in the box
With the wiring complete, it’s time to mount the outlet in the box. Gently push the wires back into the box, making sure not to damage any connections. Align the outlet with the screw holes on the box and secure it in place using the provided screws. Ensure that the outlet is level and flush with the wall surface.
Step 7: Testing the outlet for proper functionality
The final step is to test the outlet for proper functionality. Turn on the power supply at the circuit breaker panel and use a voltage tester to check if there is power running to the outlet. Plug in a device, such as a lamp, into the outlet to verify that it is working correctly. If there are any issues, double-check your connections and consult a professional if needed.
By following these steps carefully, you can successfully install a 220 outlet for your stove, ensuring a safe and efficient power supply for your cooking needs.

Additional Considerations For A Successful Installation
Installing a 220 outlet for a stove requires careful planning and adherence to local building codes and regulations. To ensure a successful installation, there are a few additional considerations to keep in mind. Understanding the local building codes and regulations, hiring a professional electrician if necessary, and troubleshooting common issues with stove outlets are all crucial steps to take. Let’s delve into each of these factors for a seamless and safe installation.
Understanding Local Building Codes and Regulations
When it comes to electrical installations, following the local building codes and regulations is of utmost importance. Each area has its own set of rules which must be complied with to ensure safety and avoid any legal issues. Before starting the installation process, take the time to familiarize yourself with the codes and regulations specific to your location.
Here are a few key points to consider:
- Find out the required permits and approvals needed for the installation.
- Ensure that you are using the correct wiring and equipment according to the guidelines.
- Double-check the specifications for the breaker size and type that are appropriate for your stove.
Hiring a Professional Electrician, If Necessary
While some homeowners may have the necessary electrical knowledge and skills to complete the installation themselves, it’s important to know your limitations. If you are unsure about any aspect of the installation process or if you are not confident in your abilities, it is best to hire a professional electrician.
A licensed electrician will ensure that the installation is done safely and in compliance with the local codes and regulations. They have the expertise to handle complex wiring and equipment, bringing you peace of mind and saving you from any potential hazards.
Troubleshooting Common Issues with Stove Outlets
Even with careful planning and professional installation, problems can still arise with stove outlets. Understanding and troubleshooting common issues can help you rectify problems quickly and efficiently.
Here are some common issues you may encounter:
- Power fluctuations: If you experience power surges or fluctuations when using your stove, it could indicate a problem with the electrical circuit or the outlet itself. Check the connections and wiring to ensure they are secure and properly grounded.
- No power to the outlet: If your stove outlet is not receiving any power, check the circuit breaker to see if it has tripped. If the breaker is in the ‘ON’ position and there is still no power, it may be necessary to call a professional electrician to assess the problem.
- Insufficient voltage: If your stove is not functioning at full power or taking longer than usual to heat up, there may be an issue with the voltage supply. In such cases, consulting a professional electrician is recommended to diagnose and resolve the problem.
By understanding these common issues and knowing when to seek professional help, you can keep your stove outlet running smoothly and safely.
In conclusion, additional considerations such as understanding local building codes and regulations, hiring a professional electrician when necessary, and troubleshooting common issues are crucial for a successful installation of a 220 outlet for a stove. By following these guidelines, you can ensure a safe and efficient power supply to your stove, making your cooking experience seamless and hassle-free.
Frequently Asked Questions
Do You Need A 220 Outlet For An Electric Stove?
Yes, an electric stove typically requires a 220 outlet. This outlet provides the necessary voltage to power the stove and ensure proper functionality. Be sure to consult with a professional electrician to install this outlet correctly.
How Much Does It Cost To Install A 240V Outlet For A Stove?
The cost to install a 240v outlet for a stove varies. It usually ranges between $200 and $500, including materials and labor. Electricians will consider factors such as the complexity of the installation and the distance from the main electric panel.
How Much Does It Cost To Install A 220V Outlet?
The installation cost of a 220V outlet varies depending on factors such as location, wiring requirements, and labor fees. Generally, it can range from $200 to $500, including materials and professional installation.
What Is A 220 Outlet For A Range?
A 220 outlet for a range is a specialized electrical outlet that provides the necessary power for an electric range. It uses a 220-volt electrical circuit to deliver the higher voltage and current needed to operate the range’s heating elements and other features.
Conclusion
Installing a 220 outlet for a stove can seem daunting, but with the right guidance, it becomes a manageable task. By following the steps outlined in this blog post, you can ensure a safe and efficient installation process. Remember to always prioritize safety and consult a professional if needed.
With the right tools and knowledge, you’ll soon have your stove up and running in no time. Happy cooking!