To install a 220 breaker, turn off the main power supply, match the breaker size with the wire gauge, and securely connect the wires to the breaker. When installing a 220 breaker, safety precautions are important and the process should be done by a professional electrician if you are not experienced in electrical work.
The breaker must be the correct size for the wire gauge, as using an incorrect size can lead to overheating and electrical hazards. Always turn off the main power supply before starting the installation process to ensure your safety. We will provide a step-by-step guide on how to safely install a 220 breaker.
Choosing The Right Breaker
When installing a 220 breaker, it is crucial to choose the right one to ensure the safety and proper functioning of your electrical system. Factors to consider when selecting a 220 breaker include understanding the electrical requirements for your appliances. By keeping these factors in mind, you can make an informed decision and install a breaker that meets your needs.
Factors to consider when selecting a 220 breaker
1. Amps rating: The first factor to consider is the amps rating of the breaker. This rating indicates the maximum amount of current the breaker can safely handle without tripping. To choose the correct amps rating, you need to know the total current draw of the appliances that will be connected to the breaker. Add up the current ratings of all the appliances and select a breaker with a rating that is equal to or higher than the total.
2. Breaker type: There are different types of breakers available, including single-pole and double-pole breakers. Single-pole breakers are used for circuits that require 120 volts, while double-pole breakers are designed for 220-volt circuits. Make sure you select a double-pole breaker for your 220 installation.
3. Brand and quality: It is important to choose a reputable brand and high-quality breaker to ensure safety and reliability. Opting for a well-known brand can give you peace of mind knowing that the breaker has been manufactured to the highest standards and undergone rigorous testing.
4. Compatibility: The breaker you select should be compatible with your electrical panel. Check the make and model of your panel and consult the manufacturer’s guidelines or a professional electrician to determine which breakers are compatible.
5. Additional features: Some breakers come with additional features such as ground fault circuit interrupters (GFCI) or arc fault circuit interrupters (AFCI). These features provide added protection against electrical faults and can be beneficial depending on the specific needs of your installation.
To summarize, when choosing a 220 breaker, consider the amps rating, breaker type, brand and quality, compatibility with your electrical panel, and any additional features that may be required. By taking these factors into account, you can ensure a safe and successful installation of your 220 breaker.
Gathering The Necessary Tools And Materials
Before you can begin installing a 220 breaker, it’s important to gather all the necessary tools and materials. Having everything you need on hand will ensure a smooth and efficient installation process. In this section, we will outline the list of tools you’ll need as well as the required materials and their specifications.
List of tools needed for the installation
To successfully install a 220 breaker, you will need the following tools:
- Screwdriver set
- Wire stripper
- Electrical tape
- Voltage tester
- Drill with a bit suitable for your mounting surface
- Wire cutters
- Pliers
Having these tools ready before you start the installation will save you time and prevent any unnecessary delays.
Required materials and their specifications
In addition to the tools listed above, there are several materials that you will need to have on hand for the installation. These materials and their specifications include:
| Material | Specification |
|---|---|
| 220 breaker | Amp rating: 30 or whatever is specified by your electrical system |
| Wire | Gauge: 10 AWG (American Wire Gauge) |
| Conduit | Type: Metal or PVC |
| Connector fittings | Type: Suitable for your chosen conduit |
| Cable connectors | Type: Suitable for your chosen wire gauge |
It’s vital to ensure that all materials meet the specified requirements to ensure a safe and effective installation. Taking the time to gather the proper materials will help you avoid any potential issues or complications during the installation process.
Preparing For The Installation
Before you start installing a 220 breaker, it is crucial to prepare yourself and your workspace. This involves ensuring safety precautions are taken and shutting off the power to the circuit. By following these steps, you can ensure a smooth and safe installation process.
Ensuring Safety Precautions are Taken
Prioritizing safety is paramount when dealing with electrical installations. Here are a few safety precautions you should consider before proceeding:
- Wear non-conductive gloves and safety goggles to protect yourself from any potential electrical shocks or debris.
- Ensure that you have the appropriate tools for the installation, such as wire cutters, pliers, and a voltage tester, to avoid any unnecessary accidents.
- Clear the area around the breaker panel and ensure there are no flammable materials nearby.
- Keep children and pets away from the workspace to prevent any accidents.
Shutting off the Power to the Circuit
Before beginning the installation, you will need to shut off the power to the circuit that you are working on. This is to prevent any electrical hazards and ensure your safety. Follow these steps to shut off the power:
- Locate the circuit breaker panel in your home. It is usually found in the basement, garage, or utility room.
- Open the panel door to access the breakers. In some cases, you might need a screwdriver to remove the panel cover.
- Locate the breaker that corresponds to the circuit you will be working on. The breaker should be clearly labeled.
- Switch the breaker to the “off” position. It should click into place, indicating that the power to that particular circuit has been cut off.
- For added safety, use a voltage tester to verify that the power to the circuit has indeed been shut off. This will ensure that you can work on the installation without any risk of electric shock.
By taking these safety precautions and shutting off the power to the circuit, you can create a safe environment to install a 220 breaker. Remember, electrical work can be dangerous, so it’s crucial to follow the necessary steps to protect yourself and your home.
Removing The Existing Breaker
Steps to Safely Remove the Old Breaker
Before you can install a new 220 breaker, you’ll need to remove the existing one. This process can be simple and straightforward if you follow these step-by-step instructions:
- Always start by turning off the power to the breaker panel. Safety should be your top priority, so locate the main breaker and switch it to the “off” position. This will cut off power to the entire panel.
- Next, open the panel door and locate the breaker you want to remove. Take note of its position and make sure you understand its wiring connections.
- Using an insulated screwdriver, carefully loosen the screws that secure the breaker to the panel’s bus bar. Gently pull the breaker away from the bar, making sure not to damage any of the surrounding wires.
- Once the screws are removed, detach the wires from the breaker. Take note of the wire colors and their corresponding positions on the breaker. This will be important when installing the new breaker.
- Set the old breaker aside in a safe place. This could be a labeled box or container to ensure it doesn’t get lost or mixed up with other electrical components.
Properly Disposing of the Old Breaker
Now that you’ve successfully removed the old breaker, it’s crucial to dispose of it properly. Here’s what you should do:
- Contact your local recycling center to inquire about electronic waste disposal. Old breakers often contain hazardous materials that shouldn’t be discarded in regular trash bins.
- Follow the recycling center’s instructions for packaging and delivering the old breaker. They may require you to tape exposed ends or bundle the breaker with other electrical components for safe transportation.
- Make sure to bring any necessary identification or paperwork as required by the recycling center. This will help ensure a smooth and efficient drop-off process.
By responsibly disposing of your old breaker, you’re not only contributing to a cleaner environment, but you’re also adhering to local regulations and promoting sustainability in the electrical industry.
Installing The New Breaker
Once you have successfully positioned the 220 breaker in the breaker box, it is time to install it correctly. This step-by-step guide will walk you through the process, ensuring that your installation is seamless and safe.
Step-by-step guide to installing the 220 breaker
Follow these steps carefully to ensure a proper and secure installation:
- Before beginning any installation work, ensure that the power to the breaker box is turned off. Safety should always be your top priority when working with electrical components.
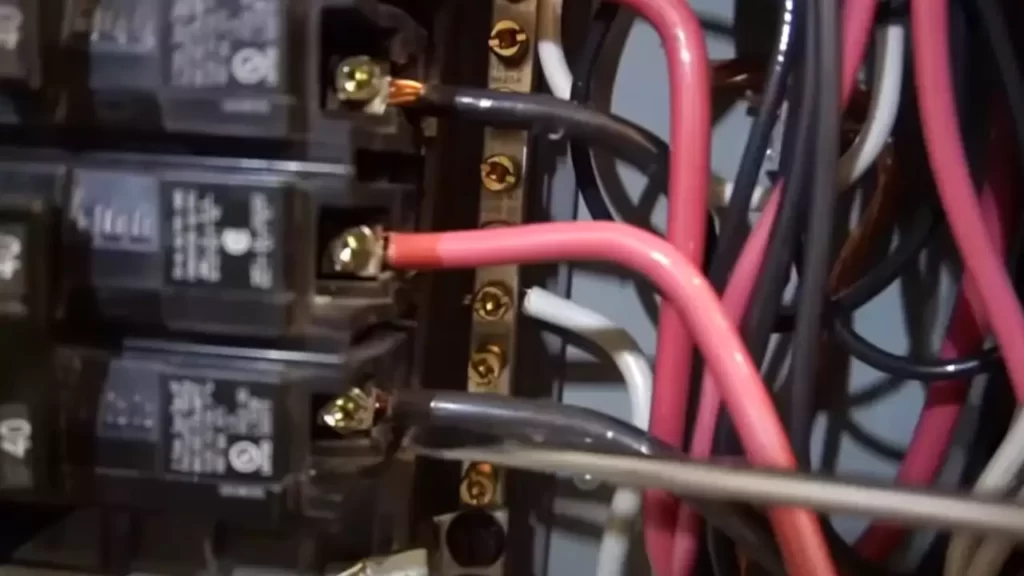
- Identify the two hot wires that will connect to the 220 breaker. These wires are typically colored red and black, but double-check your specific wiring guidelines to be sure.
- Strip the insulation from the end of each hot wire, exposing about 1/2 inch of bare wire.
- Insert one hot wire into the breaker’s terminal and tighten the screw securely. Repeat this step with the second hot wire, ensuring that the connection is tight and secure.
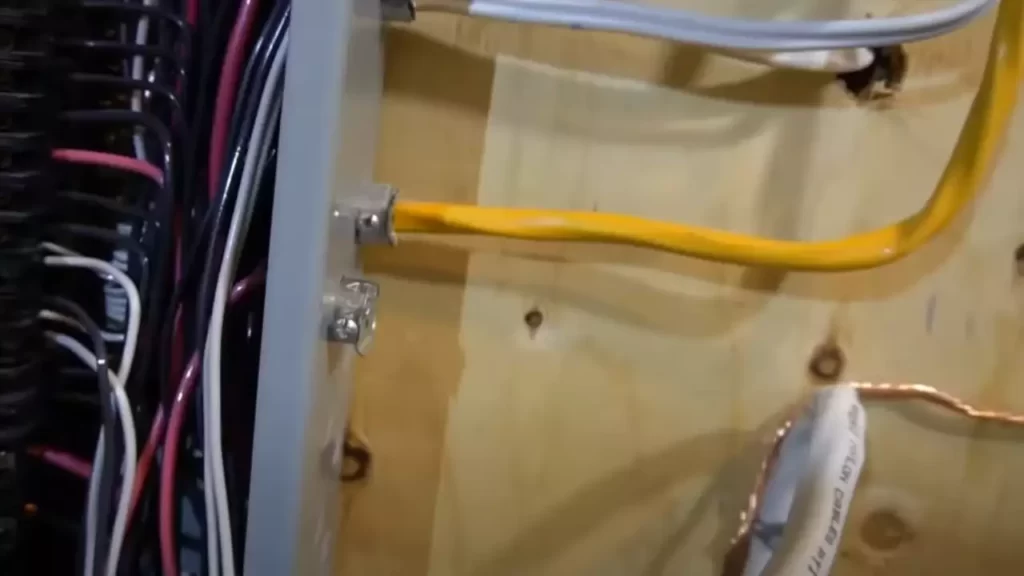
- Next, locate the neutral wire, typically colored white, and connect it to the neutral bus bar in the breaker box. Ensure that the connection is snug and secure.
- Finally, connect the ground wire to the grounding bar in the breaker box. This wire is usually colored green or bare copper. Again, double-check for a secure connection.
- Before restoring power, carefully double-check all your connections to ensure they are correct and secure. This is a crucial step to prevent any potential electrical hazards.
- Once you have verified everything, you can now restore power to the breaker box by flipping the main breaker switch to the ‘On’ position.
In conclusion, installing a 220 breaker requires careful attention to detail and adherence to safety guidelines. By following this step-by-step guide, you can confidently complete the installation process and enjoy the benefits of a reliable electrical circuit.
Testing The Circuit
Checking for proper voltage and functionality
Before considering the installation of a 220 breaker, it is crucial to test the circuit for proper voltage and functionality. This step ensures the safety and effectiveness of your electrical system. To perform these tests, follow the steps below:
- Step 1: Turn off the main power supply
- Step 2: Use a voltage tester
- Step 3: Inspect the wiring connections
- Step 4: Test the circuit breaker
- Switch on the breaker and listen for the distinct click sound, indicating that it is engaged.
- Verify that the breaker is delivering the correct voltage by using a multimeter or another suitable testing device.
- If the voltage reading is within the expected range, the circuit breaker is functioning properly. Move on to troubleshooting common issues if necessary.
Before conducting any tests, make sure to shut off the main power supply to avoid any electrical accidents.
Put safety first by using a voltage tester to ensure the absence of electrical current.
| Voltage Tester | Proper Voltage Reading |
|---|---|
| Non-contact voltage tester | No voltage detected |
| Multimeter | Zero volts |
Ensure that all wiring connections are securely fastened, without any loose or damaged parts. Correct any issues before proceeding.
Turn on the main power supply and test the circuit breaker for functionality. Follow these steps:
Troubleshooting common issues
Despite careful installation, electrical systems can sometimes encounter issues. Troubleshooting common problems ensures the smooth operation of your circuit breaker. Take these steps if you encounter any issues:
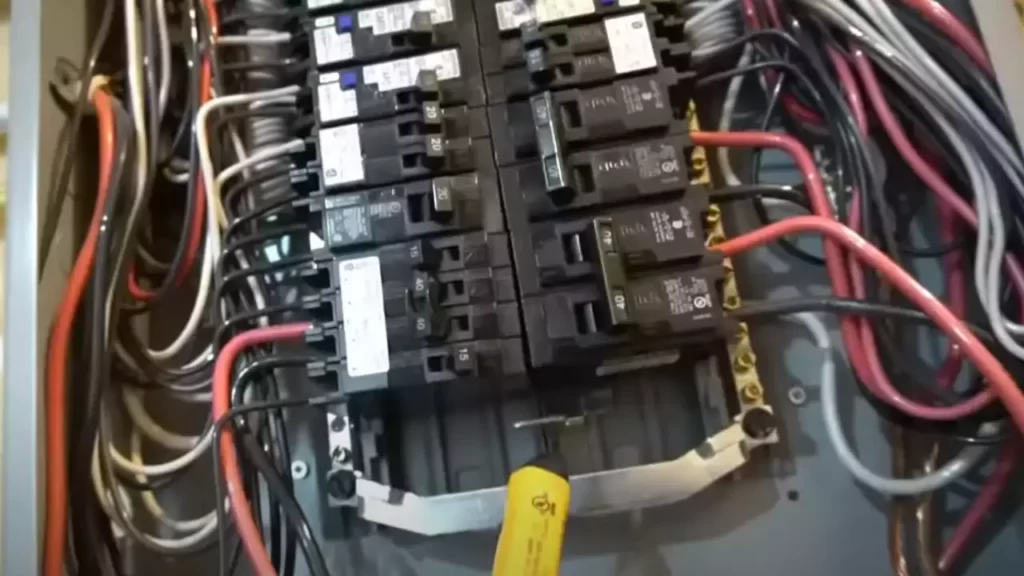
- Step 1: Inspect the circuit breaker panel
- Step 2: Reset the breaker
- Step 3: Check for overloaded circuits
- Step 4: Contact a professional electrician
Check for any loose connections, damaged wiring, or tripped breakers inside the circuit breaker panel. Address and correct any issues found.
If you notice a tripped breaker, reset it by switching it to the “off” position and then back to the “on” position. Observe if it holds without tripping again.
An overloaded circuit can cause breakers to trip frequently. Reduce the load on the circuit by unplugging unnecessary devices or redistributing the power usage among multiple circuits.
If the issue persists or if you are unsure about performing further troubleshooting, it is recommended to seek assistance from a qualified electrician. They have the expertise to diagnose and resolve complicated electrical problems.
By following these steps for testing the circuit and troubleshooting common issues, you can ensure the safe and efficient operation of your 220 breaker installation.
Restoring Power And Finalizing The Installation
Once you have successfully installed a 220 breaker, it is important to restore power safely and finalize the installation. This involves cutting power back on safely and verifying the proper operation of the circuit. In this section, we will outline the steps you need to follow to restore power and ensure everything is working as it should.
Cutting power back on safely
Before you restore power, make sure you have completed all the necessary steps for installing the 220 breaker. This includes properly wiring the circuit, securely connecting the breaker, and double-checking all the connections. It is crucial to follow proper safety precautions to avoid any accidents or damage.
- Begin by turning off the main power supply to your home. Locate the main electrical panel and flip the main breaker to the “off” position.
- Next, locate the new 220 breaker that you installed. Ensure that it is in the “off” position. If it is not, switch it off before proceeding.
- Now, at the main electrical panel, flip the breaker switch for the 220 circuit you just installed to the “off” position.
- Before restoring power, perform a visual inspection of all the connections to ensure they are secure and correctly installed. Look for any signs of loose wires or damage.
- Once you have verified the connections, you can start restoring power. First, switch the breaker for the 220 circuit to the “on” position.
- Finally, go back to the main electrical panel and turn the main power supply back on by flipping the main breaker to the “on” position.
Verifying proper operation of the circuit
Now that power has been restored, it is important to verify the proper operation of the circuit. This will ensure that everything is functioning correctly and that there are no issues that need to be addressed.
To verify the proper operation of the circuit:
- Double-check that the breaker for the 220 circuit remains in the “on” position.
- Test all the outlets or devices connected to the circuit to ensure they are receiving power.
- If there are any issues, such as no power to the outlets or devices, double-check the wiring and connections to ensure they are correct.
- If everything is working as it should, you can consider the installation complete.
Remember, if you are unsure about any step or encounter any difficulties during the installation process, it is always recommended to consult a licensed electrician for assistance. Safety should be your top priority when working with electrical systems.
Frequently Asked Questions
How Do You Install A 220 Breaker?
To install a 220 Breaker, turn off the main power, mount the breaker in the panel, connect the hot wires, and attach the ground wire. Test the breaker before turning the main power back on.
What Size Wire Is Needed For A 220 Breaker?
For a 220 Breaker, you will need a wire that can handle the load of the appliance. Typically, a 10-gauge wire is suitable for most household appliances, but it’s essential to check the specific requirements of the appliance.
Can I Install A 220 Breaker Myself?
If you have experience with electrical work, you can install a 220 Breaker yourself. However, it’s recommended to hire a licensed electrician to ensure proper installation and compliance with local building codes and safety regulations.
Conclusion
Installing a 220 breaker may seem daunting at first, but with the right steps, it can be done easily. By carefully following the instructions provided in this blog post, you can safely and efficiently install a 220 breaker in your home.
Remember to always prioritize safety and consult a professional if you have any doubts. With this newfound knowledge, you can confidently tackle this electrical task and enjoy a more efficient power supply in your home. Happy installing!