To install a 200 Amp breaker box, first, turn off the main power supply to your home. Then, carefully remove the panel cover and connect the incoming power wires to the appropriate lugs, ensuring a secure connection.
Next, attach the neutral and ground wires to their designated terminals. Lastly, insert the circuit breakers into their slots, making sure they are firmly seated. Are you planning to upgrade your electrical system to accommodate higher power demands? Installing a 200 Amp breaker box is a crucial step in this process.
By following the proper guidelines, you can ensure a safe and efficient installation that complies with electrical codes. We will outline the step-by-step procedure for installing a 200 Amp breaker box, empowering you to take on this project confidently. Remember, working with electricity can be dangerous, so always take necessary precautions and consult an electrician if needed.
Understanding The Basics Of A 200 Amp Breaker Box
What is a 200 Amp Breaker Box and why do you need it?
A 200 Amp Breaker Box is an essential component in every home’s electrical system, responsible for distributing and controlling the electricity that runs through your household. This electrical panel houses the circuit breakers, which protect your home from electrical overloads and short circuits.
So why do you need a 200 Amp Breaker Box? The answer is simple: it provides you with enough power to meet the electrical demands of your home. As technology advances, more and more appliances and gadgets are being introduced into our lives, resulting in an increased need for electricity. Upgrading to a 200 Amp Breaker Box ensures that your home’s electrical system can handle the growing demand without risking safety or causing frequent power outages.
Importance of upgrading to a 200 Amp Breaker Box
Upgrading to a 200 Amp Breaker Box is not just a luxury, but a necessity for modern households. Here are a few key reasons why this upgrade is important:
| 1. Power Capacity: | A 200 Amp Breaker Box provides a higher power capacity compared to older, lower amp breaker boxes. This means you can run multiple high-demand appliances simultaneously without overloading the electrical system. |
| 2. Safety: | Older breaker boxes may not be equipped to handle the demands of modern electrical appliances and electronics. Overloading an outdated breaker box can lead to electrical shocks, fires, and other hazardous situations. Upgrading to a 200 Amp Breaker Box ensures the safety of your home and family. |
| 3. Future-Proofing: | As technology continues to advance, the need for more electricity is only going to increase. By upgrading to a 200 Amp Breaker Box, you are future-proofing your home, ensuring that it can accommodate any new electrical requirements that may arise in the coming years. |
Assessing the electrical capacity of your home:
- Determining Your Electrical Demand: Start by evaluating your home’s electrical demand. Consider the number and type of appliances you use on a regular basis, as well as any specific electrical requirements for equipment like hot tubs or electric vehicle chargers.
- Consulting an Electrician: It’s always wise to consult a licensed electrician during the assessment process. They can evaluate your current breaker box’s capacity and determine whether an upgrade to a 200 Amp Breaker Box is necessary.
- Performing Load Calculations: Load calculations involve calculating the total electrical load that your home requires. An electrician can help you determine the amount of power you need, and based on that, recommend the right size breaker box.
By following these steps and upgrading to a 200 Amp Breaker Box, you can ensure that your home’s electrical system is up to par with today’s demands. Remember, safety should always be a top priority when dealing with electricity, so it’s crucial to hire a professional electrician for any electrical upgrades or installations.
Selecting The Right 200 Amp Breaker Box For Your Home
Understanding different types of breaker boxes available
When it comes to selecting the right 200 Amp breaker box for your home, it’s important to understand the different types of breaker boxes available in the market. Breaker boxes, also known as distribution boards or electrical panels, play a crucial role in distributing and protecting the electrical circuits of your home. Before making a decision, let’s take a closer look at the different types of breaker boxes you can choose from.
Factors to consider when selecting a breaker box
Choosing the right breaker box for your home requires considering several important factors. To ensure a safe and efficient electrical system, keep the following factors in mind during the selection process.
1. Load Capacity: Determine the electrical load requirements of your home. Consider the number and types of appliances, as well as any future additions or renovations that may increase the load demand. It is essential to choose a breaker box with the appropriate load capacity to avoid overloads and potential safety hazards.
2. Number of Circuits: Assess the number of circuits your home needs to power all the appliances and electrical devices effectively. Different breaker boxes come with a varying number of breaker slots, so be sure to choose one that provides enough room for all your circuits without overloading any single circuit.
3. Safety Features: Safety should be a top priority when selecting a breaker box. Look for features like ground fault circuit interrupters (GFCIs) and arc fault circuit interrupters (AFCIs) that offer enhanced protection against electrical shocks and fire hazards.
4. Brand Reputation: Consider the reputation of the brand when choosing a breaker box. Opt for well-known and trusted manufacturers who have a proven track record of producing high-quality electrical products.
Tips for choosing the right size and capacity
Selecting the right size and capacity for your breaker box is crucial to ensure the smooth operation of your electrical system. Here are some tips to help you make an informed decision:
1. Calculate Load: Perform a load calculation to determine the electrical load requirements of your home. Consider the power consumption of various appliances and devices to get an accurate estimate. It’s always better to choose a breaker box with a slightly higher capacity to allow for any future power requirements.
2. Consult an Electrician: If you’re unsure about the load calculation or the specific requirements of your home, it’s always a good idea to consult a licensed electrician. They can assess your electrical needs and provide expert guidance on selecting the right size and capacity for your breaker box.
3. Consider Expansion: Think about any possible future expansions or additions to your home that may require additional circuits. Choosing a breaker box with extra breaker slots can save you from expensive upgrades down the line.
4. Comply with Electrical Codes: Ensure that the breaker box you choose complies with all relevant electrical codes and regulations in your area. This will help ensure the safety and legality of your electrical system.
By considering these factors and following these tips, you can select the right 200 Amp breaker box for your home, providing a safe and efficient electrical distribution system for your household’s needs. Remember, always prioritize safety and consult professionals when necessary.
Preparing For The Installation Process
Gathering the necessary tools and equipment
Before you begin the installation process of a 200 Amp breaker box, it is crucial to gather all the necessary tools and equipment. Having everything prepared in advance will save you time and ensure a smooth installation process. Here is a list of the tools and equipment you will need:
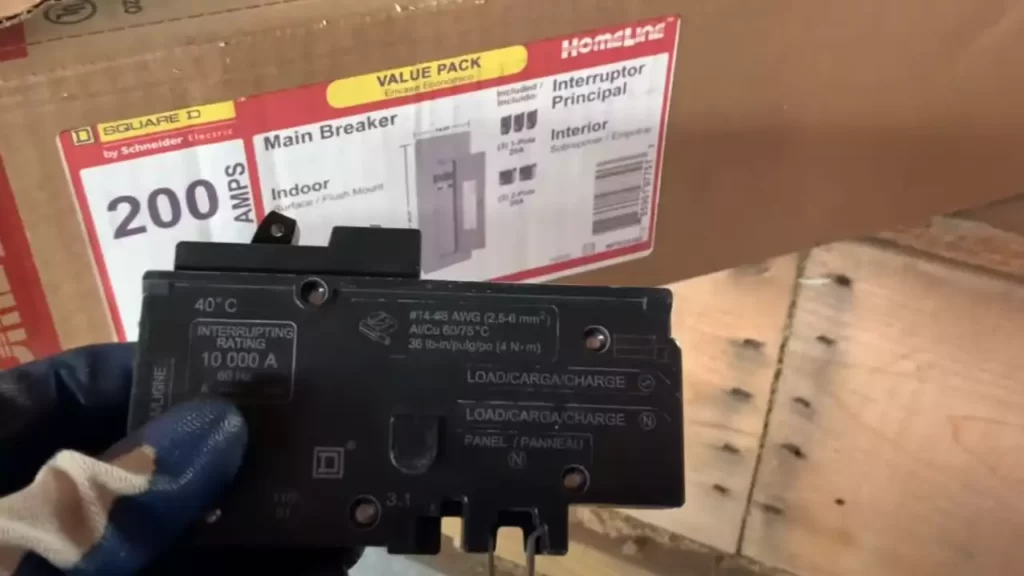
- A 200 Amp breaker box
- Screwdrivers (both flathead and Phillips)
- Wire strippers
- Wire cutters
- Electrical tape
- Wire connectors
- Circuit breakers (compatible with the new breaker box)
- A voltage tester
- A hammer
- Labeling stickers
Make sure to gather all these tools and equipment before you begin the installation, as it can be frustrating to discover you are missing something halfway through the process.
Ensuring safety measures before starting the installation
Taking the necessary safety precautions is of utmost importance when working on electrical installations. Before you start the installation of the new 200 Amp breaker box, make sure to follow these safety measures:
- Wear safety goggles to protect your eyes from any potential hazards.
- Ensure that you are wearing rubber gloves to protect yourself from electric shock.
- Make sure the area is well-ventilated to prevent the accumulation of any harmful gases.
- Keep a fire extinguisher nearby in case of emergencies.
- If you are not confident in your electrical skills, it’s best to hire a professional electrician to ensure the job is done safely and correctly.
By adhering to these safety measures, you can minimize the risk of accidents and ensure a safe installation process.
Turning off the power supply and disconnecting the old breaker box
With safety measures in place, it’s time to proceed to the actual installation process. The first step is to turn off the power supply to avoid any electrical mishaps. Follow these steps carefully:
- Locate the main electrical panel in your home.
- Find the main circuit breaker and switch it to the off position.
- Use a voltage tester to double-check that there is no power running through the panel.
Once you are certain that the power is off, you can proceed to disconnect the old breaker box:
- Carefully remove the panel cover by unscrewing the screws on the front.
- Take note of the existing wiring connections and labels to ease the installation process later.
- Disconnect the wires from each circuit breaker by loosening the terminal screws.
- Remove any additional wires connected to the main lugs.
By following these steps, you can safely turn off the power supply and disconnect the old breaker box, preparing the way for the installation of the new 200 Amp breaker box.
Installing And Wiring The 200 Amp Breaker Box
Securing the new breaker box in the designated location
Before you begin the process of installing your 200 Amp breaker box, it is crucial to secure it properly in the designated location. This ensures the box remains stable and safe. Follow these steps:
- Choose an appropriate location for the breaker box. It should be easily accessible and away from moisture or direct sunlight.
- Attach the breaker box securely to the wall using suitable screws or anchors. Ensure that it is level and flush with the wall.
- Make sure the box is mounted at the right height according to local electrical codes.
- Check that there is enough clearance around the box for easy access and maintenance.
Connecting the main power leads to the breaker box
Once you have secured the breaker box in its designated location, it’s time to connect the main power leads. Follow these steps carefully:
- Turn off the main power supply to ensure your safety.
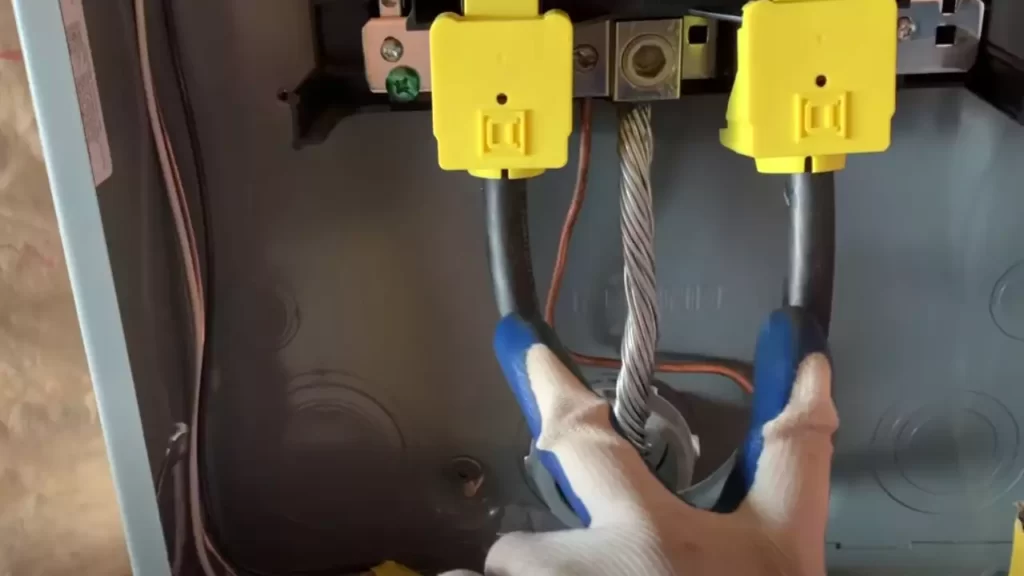
- Strip the insulation from the main power leads using a wire stripper, leaving about half an inch of bare wire exposed.
- Identify the main lugs or main breaker in the box, which is marked as the “line” side.
- Connect the black (hot) wire to the lugs or breaker, making sure it is tightly secured. Repeat this step for the white (neutral) wire and the green or copper (ground) wire.
- Check that all connections are tight and secure by giving them a gentle tug.
Wiring the individual circuits and breakers
With the main power leads successfully connected, you can now proceed to wire the individual circuits and breakers in your 200 Amp breaker box. Here’s how:
- Plan and determine the wiring routes for each circuit ahead of time to ensure proper organization.
- Strip the insulation from the individual circuit wires, leaving about half an inch of bare wire exposed.
- Identify the appropriate slots in the breaker box for each circuit and breaker. Refer to the manufacturer’s instructions or label inside the box for guidance.
- Insert the wires into their respective slots and tighten the screws to secure them in place.
- Label each circuit or breaker to easily identify them in the future.
- Ensure that each wire is properly routed and secured using suitable clamps or cable ties.
Remember, it is crucial to follow local electrical codes and regulations during the installation process. If you are uncertain about any aspect, it is advisable to consult a licensed electrician for assistance. By properly securing the breaker box and connecting the main power leads and individual circuits, you can ensure a safe and efficient electrical setup for your home or business.

Verifying And Testing The Installation
Performing a Visual Inspection of the Wiring and Connections
After the installation of a 200 Amp breaker box, it is crucial to verify and test the wiring and connections to ensure a safe and reliable electrical system. Performing a visual inspection allows you to identify any potential issues that may affect the functioning of the breaker box.
Start by visually examining the wiring connections inside the breaker box. Ensure that all wires are properly secured and tightened. Look for any signs of loose connections, frayed wires, or damaged insulation. Additionally, check the labeling on the wires to ensure they are correctly identified.
Inspect the breaker box itself for any signs of damage or defects. Look for cracks, rust, or any visible signs of wear and tear. If you come across any abnormalities, it is important to have them addressed by a qualified electrician before proceeding further.
If everything appears to be in order, move on to testing the functionality of the breaker box and the operation of the circuit breakers.
Testing the Breaker Box Functionality and Circuit Breaker Operation
Once the visual inspection is complete, it is time to test the functionality of the breaker box and ensure that all circuit breakers are operating correctly. This step helps to identify any potential issues that may arise during normal usage and ensures the safety of the electrical system.
Here’s how you can test the breaker box and its circuit breakers:
- Switch off all the circuit breakers in the breaker box before starting the test.
- Turn on the main breaker and make sure it latches into place securely.
- Gradually switch on each circuit breaker one by one and check that they engage properly.
- Test each circuit by plugging in a device and verifying that power is supplied accordingly.
- Make sure each circuit breaker trips when overloaded or short-circuited.
If at any point during the testing process you encounter any issues such as breakers not latching, failing to trip, or inadequate power supply, it is imperative to consult a professional electrician to rectify the problem.
Conducting a Load Test to Ensure Proper Electrical Capacity
After performing the functionality test, it is essential to conduct a load test to ensure that the breaker box can handle the electrical capacity required for your household or business needs.
Here’s how you can conduct a load test:
- Turn off all circuit breakers in the breaker box.
- Gradually turn on each circuit breaker one by one.
- Measure the current drawn by each circuit using a current meter.
- Add up the currents from all the circuits to calculate the total load.
- Compare the total load to the maximum capacity of the breaker box (200 Amp in this case) to ensure it does not exceed the limit.
If the total load exceeds the capacity of the breaker box, it is crucial to adjust or redistribute the loads to prevent overloading. This may require the assistance of a professional electrician to ensure the electrical system operates safely and efficiently.
By performing a visual inspection, testing the breaker box functionality, and conducting a load test, you can verify the installation of a 200 Amp breaker box and ensure that your electrical system is safe and reliable.
Troubleshooting Common Issues And Errors
Identifying Common Installation Mistakes and Errors
One of the key aspects of installing a 200 Amp breaker box is ensuring that everything is done correctly to avoid any potential issues or errors down the line. However, even with careful installation, mistakes can still happen. In this section, we will discuss some common installation mistakes and errors that you might encounter and how to identify them.
- Poor grounding: one of the most common mistakes during installation is improper grounding. This can lead to various electrical issues and even safety hazards. To identify this issue, you should check the grounding connection for any loose or disconnected wires. Ensure that the ground wire is securely connected to the grounding electrode system.
- Inadequate wire sizing: it is essential to use the correct wire size for the breaker box installation. Using undersized wires can lead to overheating and potential fire hazards. To identify this error, check if the wire gauge matches the amperage rating of the breaker box. Consult a professional electrician if needed.
- Improper cable management: messy cable management not only looks unprofessional but can also lead to problems in the future. Wires that are tangled or tightly compressed can be easily damaged, causing electrical issues. To identify this mistake, ensure that all cables are organized, properly spaced, and secured using suitable cable clamps.
Troubleshooting Poor Wiring Connections and Loose Connections
Poor wiring connections and loose connections are major culprits when it comes to electrical problems. If not addressed properly, they can lead to erratic circuit behavior and potential safety risks. Here’s how to troubleshoot and fix these issues.
- Inspect all wiring connections: visually inspect all connections within the breaker box, making sure they are tight and secure. Look for any signs of arcing, burnt marks, or loose screws. Tighten any loose connections, taking care not to overtighten and damage the wires.
- Use proper wire connectors: if you find any loose or poorly connected wires, use appropriate wire connectors to ensure a secure and reliable connection. Make sure to strip the wire ends correctly and twist them tightly before applying the connector.
- Perform a continuity test: to verify the integrity of the wiring connections, you can use a multimeter to perform a continuity test. This test will help you identify any breaks or faulty connections in the wiring. Replace or repair any damaged wires as necessary.
Dealing with Tripped Breakers and Electrical Issues
Tripped breakers and electrical issues can be frustrating and disruptive. They can occur due to various reasons, such as overloaded circuits or faulty appliances. Here are some steps to troubleshoot and fix these common issues.
- Identify the source of the problem: determine which circuit has tripped by checking the position of the breaker switch. Look for any appliances or devices connected to that circuit that may be causing the overload.
- Check for short circuits: inspect the wiring connected to the tripped circuit for any signs of short circuits, such as exposed wires or damaged insulation. Repair or replace any damaged wiring.
- Unplug or disconnect appliances: if you suspect that an appliance is causing the overload, unplug or disconnect it from the circuit and reset the breaker. If the breaker holds, the appliance may need repair or replacement.
- Distribute the load: in case of frequent breaker tripping, consider redistributing the load by connecting the devices to different circuits. This will help balance the electrical load and prevent overloading.
By identifying common installation mistakes and errors, troubleshooting poor wiring connections and loose connections, and knowing how to deal with tripped breakers and electrical issues, you’ll be better equipped to successfully install a 200 Amp breaker box. Remember to always prioritize safety and consult a professional if you are unsure or encounter more complex problems.
Finalizing The Installation And Ensuring Compliance
Once you have successfully installed your 200 Amp breaker box, there are a few important steps you need to take to finalize the installation and ensure compliance with local electrical codes. These steps include properly labeling the circuit breakers and electrical panel, securing the breaker box cover, and checking for any loose components. Furthermore, understanding local electrical codes and obtaining necessary inspections is crucial for maintaining a safe and compliant electrical system. Let’s dive into each step in detail.
Properly Labeling the Circuit Breakers and Electrical Panel
Properly labeling the circuit breakers and electrical panel is essential for easy identification and maintenance of your electrical system. By clearly identifying and labeling each circuit breaker, you can quickly identify the specific circuit it controls in case of any electrical issues or emergencies. To properly label the circuit breakers and electrical panel:
- Start by creating a comprehensive list of the electrical loads and appliances in your home or building.
- Using a permanent marker or labels, write the name or description of each load or appliance next to the corresponding circuit breaker switch.
- Ensure the labels are clear, legible, and securely attached to the panel cover.
By following these steps, you will be able to easily identify and troubleshoot any electrical issues that may arise.
Securing the Breaker Box Cover and Checking for Any Loose Components
Securing the breaker box cover is crucial to protect the electrical components and ensure the safety of your electrical system. Here’s how you can secure the breaker box cover and check for any loose components:
- Make sure all the circuit breakers are in the “off” position before securing the cover.
- Align the cover with the breaker box and carefully slide it into place.
- Tighten the screws or latches to securely fasten the cover to the breaker box, ensuring a tight fit.
- Gently shake the breaker box to check if there are any loose components inside. If you notice any rattling or loose parts, tighten them using a suitable screwdriver or tool.
Regularly checking and securing the breaker box cover ensures the integrity of your electrical system and reduces the risk of electrical hazards.
Understanding Local Electrical Codes and Obtaining Necessary Inspections
Understanding and adhering to local electrical codes is crucial to ensure the safety and compliance of your electrical installation. Each region may have its specific regulations and requirements that must be followed. Here’s what you need to do:
- Research and familiarize yourself with the local electrical codes and regulations relevant to your area.
- Ensure your electrical installation meets all the necessary requirements and standards.
- Contact the local building or electrical authority to schedule an inspection of your breaker box installation.
- During the inspection, the inspector will assess the installation for compliance with the local electrical codes.
- If any deficiencies or issues are identified, take the necessary steps to rectify them before obtaining final approval.
By following the local electrical codes and obtaining necessary inspections, you can ensure that your breaker box installation is safe, compliant, and meets all the required standards.
Maintaining And Upgrading Your 200 Amp Breaker Box
Maintaining and Upgrading Your 200 Amp Breaker Box
Regular maintenance tips to ensure optimal performance
Regular maintenance of your 200 Amp breaker box is crucial to ensure its optimal performance and prevent any electrical issues. Here are some maintenance tips you can follow:
- Inspect for any signs of damage or wear: Regularly check the breaker box for any visible signs of damage such as rust, corrosion, loose wires, or burning smells. If you notice any of these signs, it’s important to address them promptly.
- Tighten connections: Over time, the connections inside the breaker box may become loose. Use a screwdriver to tighten any loose connections, but remember to turn off the main power supply beforehand.
- Clean the breaker box: Dust and debris can accumulate inside the breaker box, affecting its efficiency. Gently clean the box using a soft brush or compressed air to remove any build-up.
- Ensure proper ventilation: A breaker box requires proper airflow to prevent overheating. Make sure there is sufficient space around the box for ventilation and avoid storing items near it.
- Test the breakers: Regularly test the functionality of the breakers by turning them on and off. This helps identify any faulty breakers that may need replacing.
- Keep a record: Maintain a record of any repairs or maintenance performed on your breaker box, including the date and details of the work done. This can be helpful for future reference.
Upgrading the breaker box to accommodate future electrical needs
As your electrical needs grow over time, you may find that your 200 Amp breaker box is no longer sufficient. It’s essential to upgrade your breaker box to accommodate increased electrical loads. Here are a few considerations:
- Evaluate your current load: Assess your current electrical usage and determine if it’s nearing the capacity of your breaker box. Overloading the system can lead to tripped breakers or even electrical hazards.
- Consult a professional electrician: Upgrading a breaker box requires expertise and knowledge of electrical systems. It’s recommended to consult a professional electrician who can assess your needs and guide you through the upgrading process.
- Choose the right capacity: Based on your assessment, the electrician will recommend the appropriate capacity for your upgraded breaker box. It may be necessary to upgrade to a higher amperage, such as 400 Amps, to meet the increased demand.
- Consider future needs: It’s wise to plan for future electrical needs when upgrading your breaker box. Discuss your long-term goals with the electrician to ensure the new box can accommodate potential future expansions or additions.
- Permits and regulations: Upgrading a breaker box typically requires permits and must adhere to local electrical codes. Your electrician will handle the necessary paperwork and ensure the installation meets all safety standards.
Consulting a professional electrician for maintenance and upgrades
While certain maintenance tasks can be handled by homeowners, it’s essential to hire a professional electrician for regular maintenance and upgrades of your 200 Amp breaker box. Here’s why:
- Expertise and safety: Electricians are trained professionals who possess the knowledge and skills to handle electrical systems safely. They can identify potential hazards and ensure all maintenance and upgrades adhere to safety standards.
- Code compliance: Electrical work must comply with local codes and regulations. Electricians stay up-to-date with these requirements and can ensure that your breaker box meets all necessary standards.
- Prevent further damage: Attempting DIY repairs on your breaker box without proper knowledge or experience can lead to further damage or electrical accidents. Hiring a professional electrician mitigates the risk of causing more harm.
- Long-term cost savings: Regular maintenance and professional upgrades can extend the lifespan of your breaker box, preventing costly repairs or replacements down the line. It’s a wise investment that promotes efficient electrical performance.
By following these maintenance tips, upgrading your breaker box when necessary, and relying on the expertise of a professional electrician, you can ensure the optimal performance and safety of your 200 Amp breaker box for years to come.
Frequently Asked Questions
Can You Install A 200 Amp Panel Yourself?
Yes, you can install a 200 amp panel yourself if you have the necessary skills and knowledge about electrical systems. However, it is recommended to consult a professional electrician for safety and code compliance.
How Much Does It Cost To Install A 200 Amp Breaker Box?
Installing a 200 amp breaker box typically costs between $500 and $1,500. Prices may vary depending on factors such as location and specific requirements.
What Size Breaker Do I Need For A 200 Amp Panel?
For a 200 amp panel, you will need a breaker that can handle that amount of current. It is recommended to use a 200 amp breaker to ensure proper functionality and safety.
How Many Breakers Can I Have In A 200 Amp Box?
A 200 amp box can accommodate multiple breakers, but the specific number depends on the manufacturer’s guidelines. It’s best to consult the manufacturer or a qualified electrician to determine the maximum number of breakers for your specific 200 amp box.
Conclusion
To sum it up, installing a 200 amp breaker box is a crucial step when upgrading your electrical system. Following the proper steps and guidelines ensures safety and efficiency in your home or business. Remember to consult a professional electrician if you encounter any challenges during the installation process.
By taking the time to install a 200 amp breaker box correctly, you’ll have peace of mind knowing that your electrical system is up to code and capable of meeting your power needs.