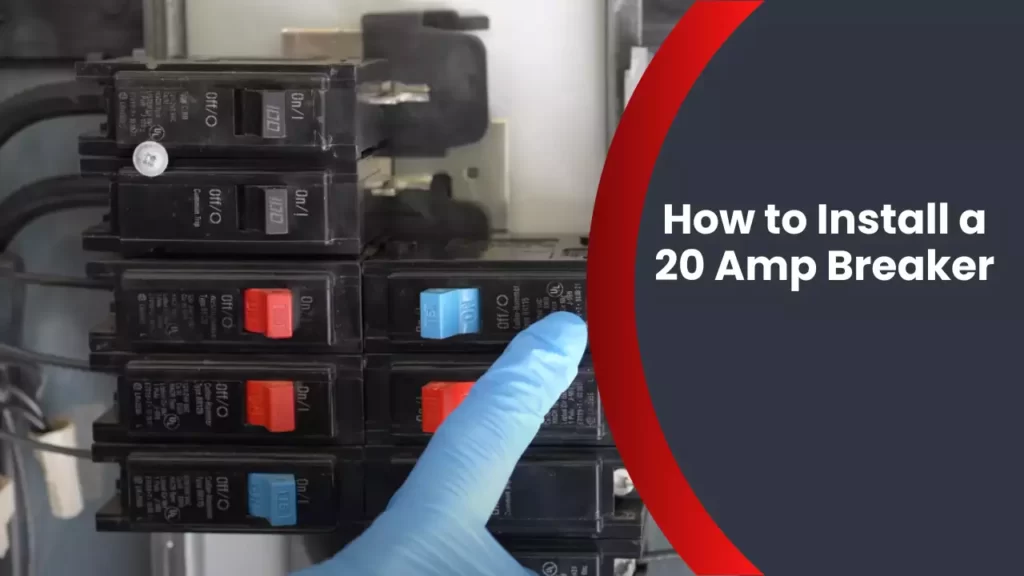
To install a 20 amp breaker, first turn off the main power supply and remove the cover from the breaker box. Then, locate an available slot in the breaker box and insert the 20 amp breaker, ensuring it is securely seated.
An electrical circuit breaker is an essential component of any electrical system, as it protects the system from overloads and short circuits. Installing a 20 amp breaker allows for the safe operation of circuits that require higher amperage. This could include appliances like air conditioning units, large power tools, or electric vehicle chargers.
While the process of installing a breaker can be potentially dangerous and should ideally be handled by a qualified electrician, understanding the basic steps involved can provide valuable knowledge for homeowners. In this guide, we will outline the steps for installing a 20 amp breaker to ensure a safer and more efficient electrical system in your home.
Understanding The Basics Of A 20 Amp Breaker
Installing a 20 Amp breaker is an important step when it comes to electrical installations. Whether you’re adding a new circuit or upgrading an existing one, understanding the basics of a 20 Amp breaker is crucial to ensure the safety and efficiency of your electrical system. In this article, we’ll dive into what a 20 Amp breaker is, how it works, and the different types of breakers available in the market.
What is a 20 Amp Breaker?
A 20 Amp breaker is a type of circuit breaker designed to handle electrical currents up to 20 Amperes. It acts as a safety device that automatically shuts off the power supply when the current exceeds the rated capacity, preventing damage to the circuit or potential electrical hazards such as fires or electrocution.
How does a 20 Amp Breaker work?
A 20 Amp breaker works by utilizing an electromechanical mechanism that senses the amount of current flowing through it. When the current exceeds the maximum rating, the breaker trips, opening the circuit and cutting off the power supply. This protects the circuit and the connected devices from overloading and keeps the electrical system safe.
Different types of breakers and their uses
There are several types of breakers available in the market, each designed for specific applications. Here is a brief overview of some commonly used breaker types and their uses:
| Breaker Type | Uses |
|---|---|
| Standard Breakers | Typically used for residential circuits such as lighting, outlets, and small appliances. |
| Ground Fault Circuit Interrupters (GFCIs) | Designed for areas prone to moisture like bathrooms, kitchens, and outdoor outlets, providing protection against ground faults. |
| Arc Fault Circuit Interrupters (AFCIs) | Used to detect and prevent dangerous electrical arcs in bedrooms, living rooms, and other areas where fires are likely to occur. |
| Tandem Breakers | Allow for two circuit breakers in a single slot, providing a space-saving solution for panelboards with limited space. |
Choosing the right type of breaker for your specific electrical needs is essential to ensure the safety and functionality of your electrical system.
In conclusion, understanding the basics of a 20 Amp breaker is crucial for any electrical installation or upgrade. By knowing what it is, how it works, and the different types available, you can make informed decisions to protect your electrical circuits and devices from potential hazards. Remember to always follow proper installation procedures and consult a professional if you have any doubts or concerns.
Safety Precautions Before Installing A 20 Amp Breaker
Importance of Safety Precautions
Before you dive into the installation process, it’s crucial to understand the importance of safety precautions. Working with electrical equipment can be dangerous if not approached with caution. Taking the necessary steps to protect yourself and your surroundings is not only prudent but also ensures a smooth and incident-free installation of a 20 Amp breaker.
The Danger of Working with Electrical Equipment
Electricity, while being an essential part of our daily lives, can also be hazardous if mishandled. Working with electrical equipment without proper precautions can lead to electrical shocks, fires, and even fatal accidents. It’s essential to recognize the potential dangers and take the necessary steps to minimize any risks.
Protective Gear Required for Installing a Breaker
When it comes to installing a 20 Amp breaker, protective gear is crucial for your safety. Here’s a list of the key protective gear you should wear:
| Protective Gear | Description |
|---|---|
| 1. Safety Glasses | Protect your eyes from sparks or debris. |
| 2. Gloves | Insulated gloves provide a barrier against electrical shocks. |
| 3. Long-Sleeved Clothing | Prevent direct contact with live wires. |
| 4. Non-Conductive Shoes | Avoid grounding and potential electrical shocks. |
| 5. Safety Helmet | Protect your head in case of any accidents. |
By wearing the appropriate protective gear, you’re minimizing the risk of potential injuries and ensuring a safe working environment during the installation process.
Tools And Materials Required For Installing A 20 Amp Breaker
Installing a 20 Amp breaker is a relatively straightforward task that can be done by most DIY enthusiasts. To ensure a successful installation, it is essential to gather the necessary tools and materials beforehand. In this section, we will outline the list of essential tools, the materials required for a successful installation, and where to purchase them.
List of essential tools
Before you begin the installation process, you will need to have the following tools:
- Flathead screwdriver
- Phillips screwdriver
- Wire stripper
- Wire cutter
- Pliers
- Voltage tester
- Needle-nose pliers
- Wire connectors
- Electrical tape
Materials needed for a successful installation
In addition to the tools mentioned above, you will also need the following materials for a successful installation:
- 20 Amp breaker
- Electrical wire
- Wire nuts
- Outlet or switch (if required)
- Circuit breaker panel cover
These materials are crucial for a safe and reliable installation of a 20 Amp breaker in your electrical system.
Where to purchase the necessary tools and materials
You can find all the necessary tools and materials for installing a 20 Amp breaker at your local hardware store or home improvement center. Additionally, you can also purchase them online from reputable retailers such as Amazon or Home Depot.
In conclusion,
Gathering the right tools and materials is crucial for a successful installation of a 20 Amp breaker. By having the essential tools at hand and obtaining the necessary materials, you can complete the installation process efficiently and ensure the safety of your electrical system.
Assessing The Electrical Panel For Installation
Before you start installing a 20 Amp breaker, it’s essential to assess your electrical panel to ensure it can accommodate the additional load. A thorough evaluation of the electrical panel will help you determine if it has enough capacity and if it meets the necessary requirements for a safe installation.
Locating the electrical panel
The first step in assessing your electrical panel is to locate its position within your home. The panel is usually found in a basement, laundry room, garage, or utility closet. Sometimes it can be hidden behind a door or covered by a decorative wall panel. Take your time to find it, ensuring it is easily accessible for any future maintenance or upgrades.
Checking the panel’s capacity
Once you’ve located the panel, it’s time to check its capacity. The maximum amperage it can handle typically is labeled on the main breaker, usually found at the top or bottom of the panel. Pay attention to the number printed on it; this is the total amperage capacity for your panel, and it’s crucial for determining whether you can install a 20 Amp breaker. If the panel’s capacity is already being fully utilized, you may need to consider upgrading the panel to support the additional load.
Understanding the different components of the electrical panel
A basic understanding of the different components within the electrical panel will aid you in assessing its suitability for installing a 20 Amp breaker. Here are the key components:
- Main Breaker: This large switch, usually at the top of the panel, controls power distribution to the entire household.
- Branch Circuit Breakers: These smaller switches control power distribution to different zones or areas of your home.
- Neutral Bar: The neutral bar provides a connection point for all the neutral wires within your electrical panel.
- Grounding Bar: Similarly, the grounding bar provides a connection point for all the grounding wires.
- Bus Bars: These bars distribute power from the main breaker to the branch circuit breakers. There is typically one bus bar for the hot wires and another for neutral wires.
Understanding these components is crucial for identifying whether there is sufficient space and wiring for installing a 20 Amp breaker while adhering to electrical code requirements. It’s vital to verify whether the panel has an available slot for the new breaker and whether the existing wires can handle the additional load.
By carefully assessing your electrical panel’s capacity and understanding its components, you can determine if it’s suitable for installing a 20 Amp breaker. Remember, electrical work should always be done by a qualified professional to ensure safety and compliance with local regulations.
Shutting Off Power To The Electrical Panel
Before starting any electrical work, it is crucial to shut off the power to the electrical panel to ensure your safety. This step is vital as it prevents any electrical shocks or accidents from occurring during the installation process. In this section, we will discuss the importance of shutting off power, locating the main circuit breaker, and steps to safely turn off the power supply.
Importance of shutting off power
Shutting off power to the electrical panel is of utmost importance to ensure a safe working environment. Whether you are installing a 20 amp breaker or any other electrical component, cutting off the power supply reduces the risk of electric shocks and ensures that you can work on the panel without any danger.
Locating the main circuit breaker
First, you need to locate the main circuit breaker in your electrical panel. The main circuit breaker is usually located at the top or bottom of the panel and is labeled with a large number or letter indicating its function. If you are unsure which breaker is the main one, consult the panel’s manual or seek professional assistance to avoid any potential hazards.
Steps to safely turn off the power supply
- Start by switching off all the individual circuit breakers within the panel. This ensures that there is no power flowing through any of the circuits.
- Once all the individual breakers are turned off, locate the main circuit breaker and toggle it to the “off” position.
- To double-check that the power is off, use a non-contact voltage tester. This handy tool can detect electrical currents without direct contact with the wires.
- Test the voltage tester on a known live circuit to ensure it is functioning correctly.
- Now, with the voltage tester, check each circuit in the panel to confirm that there is no live current running.
By following these steps, you can ensure that the power supply to the electrical panel is completely shut off, providing a safe environment for installing the 20 amp breaker or any other electrical component.
Remember, while working on any electrical installation, it is always recommended to consult a professional electrician if you are unsure about any step or lack proper knowledge in this field. Safety should always be the top priority when it comes to working with electricity.
Removing The Panel Cover And Preparing For Installation
When it comes to installing a 20 Amp breaker, one of the first steps you need to take is removing the panel cover and preparing the workspace for a smooth installation process. This crucial step ensures that you have easy access to the electrical panel and can work safely and efficiently. In this section, we will guide you through the proper techniques for removing the panel cover, clearing any obstructions, and setting up your workspace. So, let’s get started!
Removing the Panel Cover Safely
Before you begin, it’s important to remember that safety should always be your top priority when working with electricity. Follow these steps to safely remove the panel cover:
- Turn off the main power supply to the panel by switching off the main circuit breaker. This will ensure that there is no electricity flowing through the panel while you work.
- Put on a pair of insulated gloves to protect yourself from any potential electrical shocks.
- Using a screwdriver or a wrench, carefully unscrew the screws that secure the panel cover in place. Keep the screws in a safe place so that you can easily reattach the cover later.
- Once all the screws are removed, gently pull the panel cover towards you to detach it from the electrical panel. Be cautious not to disturb any of the wires or components inside the panel.
Clearing any Obstructions
Now that you have successfully removed the panel cover, it’s time to check for any obstructions that might hinder the installation process. Follow these steps to ensure a clear workspace:
- Inspect the inside of the panel for any debris or loose wires. If you notice any, use a small brush or a vacuum cleaner with a brush attachment to carefully clean the area.
- Check for any signs of overheating, such as discolored wires or a burning smell. If you detect any issues, it’s important to consult a licensed electrician to address the problem before proceeding with the installation.
- Ensure that there is enough space around the panel for easy maneuverability. Remove any nearby objects or clutter that might impede your ability to work comfortably.
Setting up the Workspace for a Smooth Installation Process
Now that the panel cover is off and the area is clear, it’s time to set up your workspace for a smooth installation process. Follow these steps to ensure a well-organized and efficient workspace:
- Gather all the necessary tools and materials you will need for the installation, such as a 20 Amp breaker, wire strippers, a voltage tester, and electrical tape.
- Create a clean and clutter-free work surface near the electrical panel where you can easily access and organize your tools.
- Ensure that there is adequate lighting in the area to clearly see the wires and connections.
- Keep a fire extinguisher nearby in case of any unexpected electrical accidents.
By taking the time to properly remove the panel cover, clear any obstructions, and prepare your workspace, you are setting yourself up for a successful installation process. Now that you are ready to move forward with the installation, stay tuned for the next section where we will guide you through the process of installing the 20 Amp breaker.
Installing The 20 Amp Breaker
Installing a 20 amp breaker is a straightforward process that can help ensure the safety and efficiency of your electrical system. Whether you’re adding a new circuit or upgrading an existing one, it’s important to follow the correct steps to install the breaker properly. In this guide, we will walk you through the process of installing a 20 amp breaker, from positioning it in the panel to connecting the wires and securing it in place.
Positioning the breaker in the panel
The first step in installing a 20 amp breaker is to position it correctly in the electrical panel. To do this, follow these steps:
- Switch off the main power switch to ensure your safety.
- Open the panel cover by removing the screws that hold it in place.
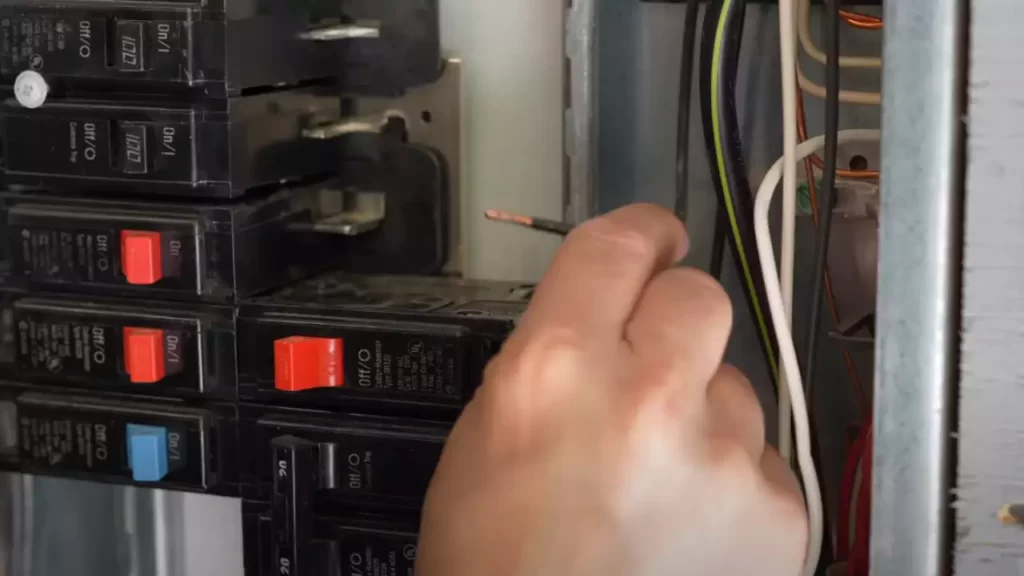
- Find an empty slot in the panel where you want to install the breaker. It’s important to make sure the slot is compatible with a 20 amp breaker and is designated for branch circuit breakers.
- Once you’ve identified the appropriate slot, gently insert the breaker into the panel. Make sure it is securely seated and aligned with the other breakers.
Positioning the breaker correctly is crucial to ensure it functions properly and fits within the electrical panel’s design. Once the breaker is in place, you can proceed to connect the wires.
Connecting the wires to the breaker
Now that the breaker is positioned correctly, you can connect the wires to ensure a proper electrical connection. Follow these steps:
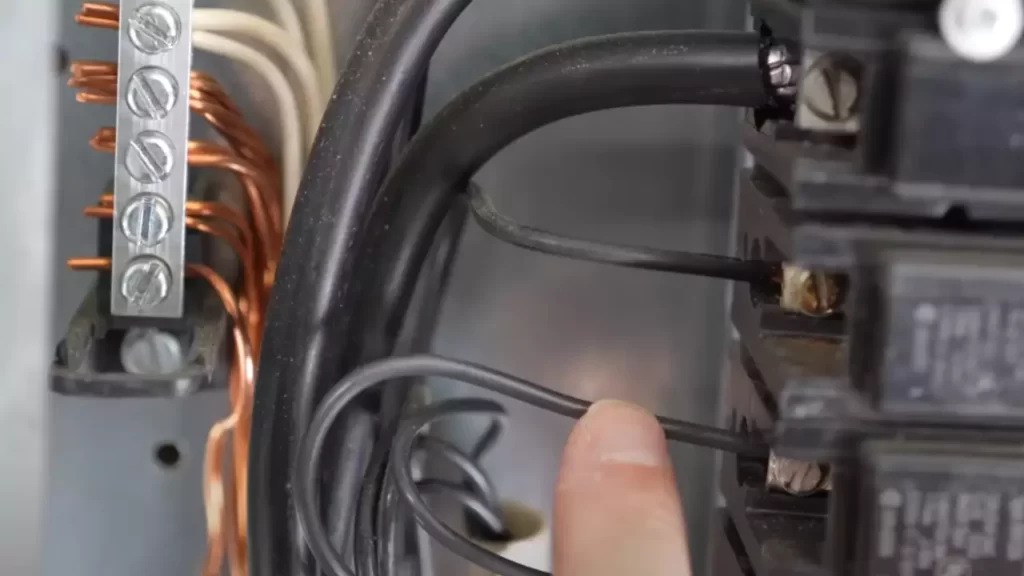
- Identify the circuit wires that will be connected to the breaker. Typically, the wires will be color-coded, with black representing the hot wire, white representing the neutral wire, and green or bare copper representing the ground wire.
- Using a wire stripper, carefully strip about 1/2 inch of the insulation from the ends of the wires.
- Attach the hot wire to the breaker’s terminal by inserting it into the provided slot or under the screw terminal. Tighten the screw securely to ensure a reliable connection.
- Next, connect the neutral wire to the neutral bar in the electrical panel. Insert the stripped end of the wire into an open slot and tighten the screw.
- If your wiring system includes a ground wire, connect it to the ground bar in the same way by inserting it into an open slot and tightening the screw.
Connecting the wires properly is essential for the safe and efficient operation of your electrical circuit. Once the wires are securely connected, you can move on to securing the breaker in place.
Securing the breaker in place
After positioning and connecting the wires to the breaker, the final step is to secure it in place within the electrical panel. Follow these steps:
- Double-check all connections to ensure they are tight and secure.
- Gently push the breaker towards the center of the panel until it snaps into place. You should hear a distinct click when the breaker is fully seated.
- If your electrical panel requires it, use the provided retaining screw or clip to secure the breaker to the panel. This will prevent it from accidentally becoming dislodged.
- Finally, replace the panel cover and securely fasten it with the screws you previously removed.
Securing the breaker ensures its stability and prevents any potential hazards associated with loose connections. Once the breaker is secured, you can turn on the main power switch and test the circuit to ensure everything is functioning correctly.
Testing The Installation And Final Checks
After successfully installing your 20 Amp Breaker, it is crucial to thoroughly test the installation and perform final checks to ensure everything is in proper working order. This step is vital for the safety and functionality of your electrical system. In this section, we will guide you through the essential tasks to complete in order to guarantee the integrity of your installation.
Turning on the power supply
Before proceeding with further checks, it is important to restore the power supply to your electrical panel. Head to the main breaker box and locate the main service panel. Carefully flip the main breaker switch to the “On” position. This will energize the entire panel and make it ready for testing. It is crucial to exercise caution during this step as you will be working with live electricity.
Verifying the breaker’s functionality
Once the power is restored, it is time to verify the functionality of the newly installed 20 Amp Breaker. Start by inspecting the breaker to ensure that it is securely and properly connected to the electrical panel. Check for any loose wires or connections that may pose a safety hazard. If everything is in order, proceed to the following steps.
Next, switch off all the circuits connected to the 20 Amp Breaker. This can be done by flipping the corresponding switches to the “Off” position. By doing so, you create a controlled environment that allows you to test the specific breaker without interference.
After disabling all connected circuits, you can now turn on the switch for the 20 Amp Breaker. Listen carefully for any buzzing or crackling noises. A buzzing sound could indicate a potential issue, such as a loose connection or a faulty breaker. In such cases, it is advisable to seek professional assistance to avoid any safety risks.
If there are no unusual sounds and the breaker remains in the “On” position without tripping, it is a good indication that the installation was successful and the breaker is functioning properly. However, it is important to note that a functioning breaker should not be the only determining factor in the safety of your installation.
Ensuring all connections are secure
Lastly, but equally important, is ensuring that all connections involved in the installation are securely fastened. Loose connections can lead to overheating, arcing, and potential electrical hazards.
Begin by carefully inspecting all connections related to the new breaker. Verify that the wires are tightened securely and the screws are properly fastened. Pay close attention to any signs of frayed or damaged wires, which should be addressed before proceeding.
Use a screwdriver or appropriate tools to tighten any loose connections. Ensure that all screws are snug but be cautious not to overtighten them, as this may damage the panel or the breaker connections.
Lastly, conduct a general visual inspection of other nearby circuits and connections in the electrical panel. This step ensures that the installation of the 20 Amp Breaker did not inadvertently disrupt or loosen any other electrical connections. Take note of any abnormalities, and consult with a qualified electrician if you identify any concerns.
By following these testing and final checks, you can have peace of mind knowing that your newly installed 20 Amp Breaker is functioning safely and efficiently. Remember, prioritizing electrical safety is crucial, and if you encounter any doubts or complexities during the installation or testing process, always seek help from a licensed electrician.
Troubleshooting Common Issues With 20 Amp Breaker Installation
Installing a 20 amp breaker is an essential step in ensuring a safe and efficient electrical system in your home or office. However, like any electrical installation, it can sometimes be prone to issues that may hinder its proper functioning. In this section, we will discuss some common problems that may arise during the installation process and provide you with step-by-step troubleshooting instructions to help you rectify those issues.
Identifying Common Installation Problems
Before we dive into the troubleshooting steps, it’s important to identify the common problems that may occur during the 20 amp breaker installation. By recognizing these issues, you’ll be able to address them more effectively. Some of the common installation problems include:
- Overheating: One common issue that may arise is overheating. This can occur if the circuit is overloaded or if there is a loose connection. Overheating can lead to potential fire hazards and should be addressed immediately.
- Tripping circuit breaker: If your new 20 amp breaker trips frequently, it could be due to a variety of reasons. This can include an overloaded circuit, a short circuit, or a ground fault. Identifying the cause of the frequent tripping is crucial to resolve the issue.
- Inadequate wiring: Another potential problem could be inadequate or improper wiring. This may result in insufficient power supply, which can cause appliances to underperform or malfunction. Ensuring proper wiring is essential to maintain the integrity of your electrical system.
- Incorrect breaker size: Using the wrong size of breaker is a common mistake that can occur during installation. It’s important to ensure that the breaker size corresponds with the electrical load requirements of the circuit. Using an incorrect breaker size can cause frequent tripping and can damage your electrical devices.
Steps to Troubleshoot a Faulty Installation
If you encounter any of the aforementioned problems during your 20 amp breaker installation, here are some steps you can take to troubleshoot and rectify the issues:
- Inspect for loose connections: Start by examining all the connections within the circuit. Ensure that all wires are tightly secured to the breaker terminals and other components. Loose connections can lead to overheating and frequent tripping.
- Check the load: Verify that the circuit is not overloaded. Add up the power requirements of all the devices connected to the circuit and ensure that it does not exceed the breaker’s amp rating. If the load is too high, consider redistributing the devices or upgrading to a higher amp breaker.
- Look for signs of damage: Inspect the wiring and breaker for any signs of damage or wear. Replace any frayed or damaged wires, as well as any breakers that show signs of physical damage. Damaged components can compromise the safety and performance of the breaker.
- Perform a continuity test: To check for short circuits or ground faults, use a continuity tester or multimeter. This will help you identify any abnormal current flow within the circuit. In case of a short circuit or ground fault, locate the source of the problem and repair or replace the affected components.
When to Seek Professional Assistance
While troubleshooting common issues during a 20 amp breaker installation can be relatively straightforward, there are instances where it’s best to seek professional assistance. Consider contacting a licensed electrician under the following circumstances:
- Unsure of the problem: If you are uncertain about the cause of the issue or lack the necessary tools and knowledge to resolve it, it’s best to consult an electrician. They have the expertise to identify and rectify complex electrical problems.
- Safety concerns: If you suspect that the issue poses a safety hazard, such as exposed wires or visible damage, it is crucial to prioritize safety. Contact a professional electrician immediately to assess and remedy the situation.
- Repeated issues: If you consistently encounter problems with your 20 amp breaker installation or if the issues persist even after troubleshooting, it’s advisable to seek professional assistance. A qualified electrician can provide a thorough inspection and offer long-term solutions.
By following these troubleshooting steps and knowing when to seek professional help, you can ensure a successful 20 amp breaker installation and maintain an efficient and safe electrical system in your home or office.
Upgrading To A 20 Amp Breaker
Reasons for Upgrading the Electrical Panel
If you’re experiencing issues with your electrical system, such as flickering lights, tripping breakers, or overloaded circuits, it may be time to consider upgrading your electrical panel. A common reason for upgrading is to meet the increased demand for electricity in modern homes. With the introduction of high-powered appliances, advanced electronics, and home automation systems, older electrical panels may struggle to keep up with the load. Upgrading your electrical panel can provide a safer, more reliable power supply, reducing the risk of electrical hazards and improving the overall efficiency of your electrical system.
Evaluating the Need for a 20 Amp Breaker
Before jumping into the upgrading process, it’s important to determine whether you actually need a 20 amp breaker. A 20 amp circuit breaker allows for the safe flow of up to 2,400 watts of power on a single circuit. This is particularly useful for powering high-demand appliances like air conditioners, refrigerators, or electric water heaters. Assess your current electrical load and consider the potential future needs of your home. If you find that your existing circuits are frequently overloaded or you anticipate installing power-hungry devices in the future, upgrading to a 20 amp breaker may be a wise investment.
Seeking Guidance from an Electrician for the Upgrade Process
While upgrading a breaker panel may seem like a straightforward task, it should only be done by a licensed electrician. This is crucial to ensure that the upgrade is performed safely and in compliance with local electrical codes. Hiring a professional electrician will not only save you time and effort but also give you peace of mind, knowing that the job is done correctly. A licensed electrician will assess your current electrical system, provide recommendations based on your specific needs, and handle the entire upgrade process, making sure your electrical panel can accommodate the 20 amp breaker and meet all safety requirements.
Frequently Asked Questions
What Happens If You Put A 20 Amp Breaker On 14 Gauge Wire?
Using a 20 amp breaker on 14 gauge wire can cause overheating and potentially start a fire. The wire may not be able to handle the higher current and could become damaged. It’s important to match the breaker size with the wire gauge to ensure safety.
What Wire Do I Need For A 20 Amp Circuit Breaker?
For a 20 amp circuit breaker, you’ll need to use a 12-gauge wire. This wire size is capable of handling the electrical load of a 20 amp circuit.
How To Change A 15 Amp Breaker To 20 Amp?
To change a 15 amp breaker to a 20 amp, follow these steps: 1. Turn off the power to the breaker in the main electrical panel. 2. Remove the wires from the 15 amp breaker. 3. Install the 20 amp breaker in its place.
4. Connect the wires to the new breaker securely. 5. Finally, turn the power back on and test the breaker to ensure it’s working properly.
Should You Put A 20 Amp Outlet On A 20 Amp Breaker?
Yes, it is important to use a 20 amp outlet on a 20 amp breaker to ensure proper electrical safety and prevent overload. This matching combination is designed to handle the maximum current without causing any damage or hazards.
Conclusion
To recap, installing a 20 Amp breaker requires careful attention to safety guidelines and a step-by-step approach. By following the process outlined in this blog post, you can ensure a successful installation and a reliable electrical circuit. Remember to consult a professional if you have any doubts or concerns.
With the right tools and knowledge, you’ll be able to handle this task with confidence.