To install 6X9 speakers in a door, first, remove the door panel, disconnect the existing speaker, and mount the new speaker using screws or brackets.
Tools Needed For Installation
Installing 6X9 speakers in your car’s doors can significantly enhance your audio experience on the road. However, to ensure a successful installation, you will need a few essential tools. Having the right tools at your disposal will make the process easier and more efficient. Below are the tools you will need to get the job done:
Screwdriver
A screwdriver is crucial for removing panels and securing the speakers into place. Opt for a screwdriver with a magnetic tip to prevent losing any screws during the installation process.
Drill
A drill will be necessary for creating the necessary holes in your car door to accommodate the 6X9 speakers. Make sure to use the appropriate drill bit size for the speakers and carefully drill the holes to avoid damaging the door.
Wire cutters
Wire cutters will come in handy when it comes to cutting and stripping the existing wires in your car’s audio system. Ensure you have a reliable pair of wire cutters that can cleanly cut through various gauges of wire.
Crimping tool
A crimping tool is essential for connecting and crimping the wires securely. This tool allows for a professional and secure connection between the wires and the speakers, ensuring optimal sound quality.
Socket wrench
A socket wrench is necessary for removing and reinstalling the screws and bolts holding the door panels in place. This tool will enable you to access the speakers and make the necessary adjustments during the installation process.
Panel removal tool
A panel removal tool is specifically designed to pry off the various panels in your car without damaging them. This tool will be invaluable when removing the door panels to gain access to the speaker locations.
Having these tools at hand will ensure a smooth and hassle-free installation process for your 6X9 speakers. Make sure to gather all the necessary tools before starting your installation to avoid any interruptions or delays.

Gathering Materials
Before you can begin the installation process for your 6×9 speakers in your car’s door, you will need to gather a few essential materials. Ensuring that you have all the necessary items beforehand will make the installation process smoother and more streamlined. Here are the materials you will need:
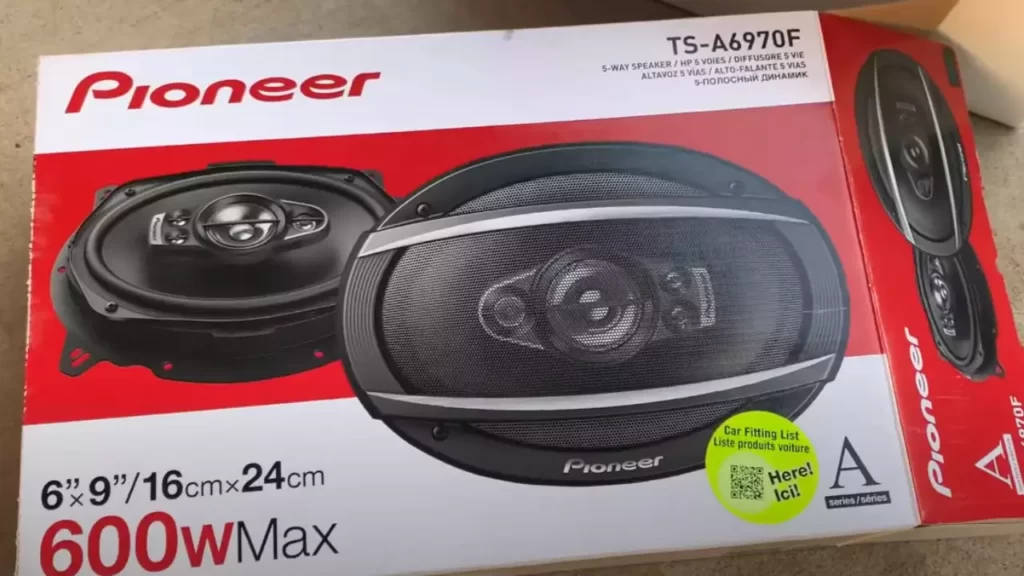
Choosing the right 6×9 speakers
One of the most important aspects of installing 6×9 speakers in your car’s door is choosing the right speakers that suit your needs. There are a variety of options available in the market, so it’s crucial to consider a few factors before making a selection. Here are some key points to keep in mind:
- Power handling: Check the power handling specifications of the speakers to ensure compatibility with your car’s audio system. This information can usually be found on the speaker’s packaging or product description.
- Sound quality: Consider the overall sound quality of the speakers. Look for features like balanced frequency response, clear highs, and strong bass capability. Reading customer reviews and ratings can provide valuable insights.
- Speaker sensitivity: Choose speakers with a higher sensitivity rating, as they will produce better sound quality even with lower power inputs. Higher sensitivity allows for louder and clearer audio, especially in noisy car environments.
- Speaker impedance: Ensure that the speaker impedance matches your car’s audio system requirements. Improper impedance matching can lead to distorted sound or amplifier damage.
Speaker harness adapter
Having a speaker harness adapter is essential for a hassle-free installation process. This adapter allows you to connect your new 6×9 speakers to the existing wiring of your car without cutting or splicing any wires. To find the right speaker harness adapter for your specific car model, consult your car’s manual or do a quick online search. This handy device will save you time and effort during the installation.
Speaker mounting brackets
Speaker mounting brackets are another crucial component when installing 6×9 speakers in your car’s door. These brackets provide the necessary support and alignment for a secure fit. They ensure that the speakers are properly mounted and reduce the risk of vibrations or rattling noises. Make sure to choose compatible mounting brackets that are specifically designed for your car’s make and model. You can usually find the appropriate brackets at an automotive parts store or online retailer.
Gathering the right materials is the first step to successfully installing 6×9 speakers in your car’s door. Choosing the right speakers, along with the speaker harness adapter and mounting brackets, will ensure a smooth and effective installation process. With these components in hand, you’ll be on your way to enjoying an enhanced audio experience in your car!
Preparing The Door
When it comes to upgrading the sound system in your car, installing 6X9 speakers in your doors can make a significant difference. Not only do these speakers provide better sound quality, but they also enhance your overall audio experience while on the road. To successfully install 6X9 speakers in your car doors, there are a few steps you need to follow. One crucial step is preparing the door before you can start the installation process. In this section, we will guide you through the necessary steps to prepare your car door for installing 6X9 speakers.
Removing the door panel
Before you can access the speaker opening, you need to remove the door panel. To do this, follow the steps below:
- Start by locating and removing any screws or bolts holding the door panel in place. These are typically found around the edge of the panel, behind small covers or handles.
- Once the fasteners are removed, use a trim removal tool or a flathead screwdriver to gently pry the panel away from the door. Start at the bottom and work your way around, applying even pressure to avoid damaging the panel.
- Once the panel is free, carefully lift it upward to detach it from the door frame. Be cautious of any electrical connections that may still be connected.
Disconnecting electrical connections
After removing the door panel, you may need to disconnect electrical connections before proceeding:
- Identify any electrical connections attached to the door panel, such as power windows, door locks, and speakers.
- Using a small, flathead screwdriver, gently pry the connectors away from their sockets to detach them. Take note of how each connection is positioned for reassembly later.
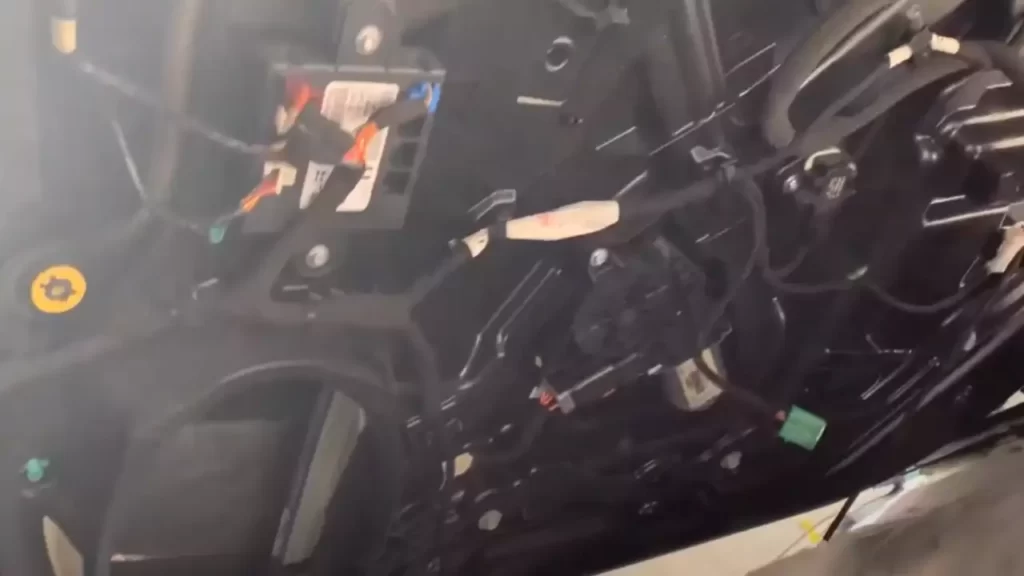
Locating the speaker opening
Once the door panel is removed, you need to locate the speaker opening to ensure a proper fit for your 6X9 speakers:
- Inspect the inside of the door for a circular or oval-shaped opening where the factory speaker was installed. This opening should match the size of your 6X9 speakers.
- If an existing speaker is still in place, remove it by unscrewing any securing screws or bolts. Take note of the position of the wires connected to the speaker for reference during installation.
By following these steps, you have successfully prepared your car door for the installation of 6X9 speakers. Now you can move on to the next step and begin connecting and mounting your new speakers to enjoy an enhanced audio experience during your drives.
Removing The Factory Speakers
Unscrewing the speaker cover
Removing the factory speakers from your car’s doors is the first step towards upgrading your audio system with new 6×9 speakers. To start, locate the speaker covers, which are typically located on the interior side of the doors. These covers are usually held in place by a few screws that need to be removed.
Using a screwdriver or a power drill with the appropriate bit, carefully unscrew each screw holding the speaker cover in place. Make sure to keep track of the screws, as you will need them later when installing the new speakers. Once all the screws are removed, pull the speaker cover away gently from the door panel, being cautious not to damage any surrounding components.
Disconnecting the speaker wiring
After removing the speaker cover, you will come across the speaker wiring connected to the factory speakers. It is essential to disconnect the wiring before proceeding with the removal process. Begin by locating the connector that attaches the wiring to the speaker.
Gently pull the connector away from the speaker, wiggling it if necessary to loosen it. Pay attention to any clips or locks that may be securing the wiring to the speaker. These clips or locks need to be released before the connector can be fully disconnected.
Removing the speaker from the mounting bracket
Once the speaker wiring is disconnected, you can proceed with removing the factory speaker from the mounting bracket. Often, the speaker is secured to the bracket with screws or clips.
If there are screws, use a screwdriver to unscrew them and set them aside with the other screws you removed earlier. If the speaker is attached with clips, gently push the clips inwards or sideways to release the speaker from the bracket. Be cautious not to exert too much force or damage the bracket.
Once the speaker is detached from the mounting bracket, carefully pull it out from the door cavity. If necessary, wiggle it slightly to loosen it from any remaining adhesive or fasteners.
By successfully following these steps, you have now removed the factory speakers from your car doors, preparing them for the installation of your new 6×9 speakers. With the old speakers out of the way, you are one step closer to enjoying an enhanced audio experience in your vehicle!
Preparing The New Speakers
Installing 6X9 speakers in your car door can be an exciting project that can bring a significant improvement in your audio experience. Before diving into the installation process, it is important to properly prepare the new speakers. This involves attaching the speaker harness adapter, mounting the new speakers on the brackets, and connecting the speaker wires. Let’s take a step-by-step look at how to prepare your new speakers.
Attaching the Speaker Harness Adapter
Firstly, you’ll want to ensure that your new speakers are compatible with your car’s wiring system. This is where the speaker harness adapter comes into play. The adapter acts as a bridge between your car’s factory wiring and the new speakers, allowing for a seamless connection. To attach the harness adapter:
- Identify the positive (+) and negative (-) wires on the harness adapter. These wires are color-coded for easy identification.
- Match the positive and negative wires on the harness adapter with the corresponding terminals on the back of the new speakers. The positive wire is typically indicated by a “+” symbol, while the negative wire may be marked with a “-” symbol or a color coding scheme.
- Securely connect the wires by twisting the ends together and using electrical tape or wire connectors to ensure a solid connection.
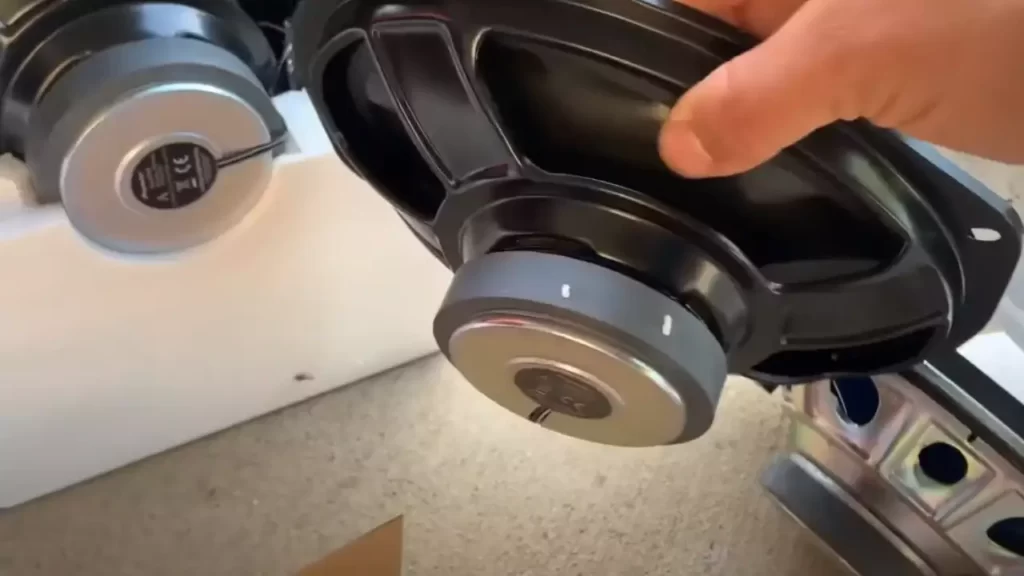
Mounting new speakers on the brackets
Now that the speaker harness adapter is in place, it’s time to mount the new speakers onto the brackets. The brackets serve as a support system, keeping the speakers securely in place. Here’s how to mount the new speakers:
- Align the screw holes on the mounting brackets with the corresponding holes on the speakers.
- Secure the speakers onto the brackets using the provided screws. Make sure the speakers are firmly attached and do not wobble.
It’s important to note that some car models may require additional modifications or brackets for a proper fit. Be sure to consult your car’s manual or seek professional advice if needed.
Connecting the Speaker Wires
With the speakers securely mounted, the final step is to connect the speaker wires. This step ensures that the audio signal from your car’s stereo system reaches the speakers accurately. Here’s how to connect the speaker wires:
- Strip the ends of the speaker wires to expose the bare metal.
- Identify the positive (+) and negative (-) terminals on the new speakers.
- Connect the positive (+) wire from the car’s wiring system to the positive (+) terminal on the speaker. Similarly, connect the negative (-) wire to the negative (-) terminal.
- Secure the connections by twisting the ends of the wires together and using electrical tape or wire connectors.
It’s crucial to ensure that each wire is correctly connected to its respective terminal to avoid any audio imbalances or speaker damage.
Once you have completed these steps, you are now ready to enjoy the enhanced audio experience provided by your newly installed 6X9 speakers. The preparation process ensures that your speakers are properly connected and securely mounted, leading to optimal performance. So gear up and immerse yourself in the ultimate sound quality during your next car ride!
Installing The New Speakers
Placing the new speakers in the door panel
Now that you have removed the old speakers, it’s time to install the new 6X9 speakers in your car’s door panel. Follow these steps to ensure a proper and secure installation:
- Start by examining the door panel and locating the speaker opening. This is where the new speakers will be placed. Make sure the opening is clean and free from any debris that might affect the sound quality.
- Take the new 6X9 speakers and align them with the speaker opening. Make sure the speakers are facing the correct direction, with the tweeters pointing towards the interior of the car.
- Gently push the speakers into the opening, ensuring a snug fit. Use your hands to apply equal pressure on all sides of the speakers to avoid any gaps.
- Once the speakers are in place, check if they are centered properly within the speaker opening. Adjust them if necessary to ensure a symmetrical appearance.
Securing the speakers with screws
Securing the new speakers in the door panel is crucial to prevent any vibration or movement that might affect the sound quality. Follow these steps to securely fasten your 6X9 speakers:
- Locate the screw holes on the speakers and align them with the corresponding holes on the door panel. Ensure that the screw holes are properly lined up to avoid any damage during installation.
- Once aligned, take the screws provided with the speakers and insert them into the screw holes. Use a screwdriver or a suitable tool to tighten the screws until they are firmly in place. Be careful not to overtighten them, as it may cause damage to the speakers or the door panel.
- After securing one screw, move on to the next one until all the screws are tightened. Double-check to make sure each screw is snug and properly fastened.
Reconnecting electrical connections
With the new speakers securely installed, it’s time to reconnect the electrical connections to ensure they function correctly. Follow these steps to reconnect the electrical connections:
- Identify the electrical connectors attached to the old speakers. They are usually located at the back of the speaker unit or on the door panel near the speaker opening.
- Disconnect the electrical connectors by gently pulling them apart. Be careful not to damage the connectors or the wiring.
- Take the electrical connectors of the new speakers and plug them into the corresponding connectors. Ensure a firm connection by pushing them together until you hear a click or feel them securely in place.
- After reconnecting the electrical connections, carefully tuck any excess wiring behind the speakers or secure it using wire clips. This will prevent the wires from interfering with the doors or any moving parts.
By following these steps, you can successfully install your new 6X9 speakers in the door panel of your car. Enjoy enhanced audio quality and immerse yourself in your favorite music while driving.
Testing The Speakers
Turning on the audio system
Once you have successfully installed your brand new 6X9 speakers in the door, it’s time to test them out and enjoy the enhanced sound quality. The first step in testing the speakers is turning on your audio system. Follow these simple steps:
- Locate the power button on your audio system, usually marked with the power symbol.
- Press the power button to turn on the audio system. You should hear a sound indicating that it is powered on.
- Allow a few seconds for the audio system to initialize and prepare for use.
- Once the system is powered on, you can proceed to adjust the sound settings.
Adjusting the sound settings
After turning on the audio system, it’s important to fine-tune the sound settings to get the best audio experience from your newly installed 6X9 speakers. Follow these steps to adjust the sound settings:
- Locate the control panel or settings menu on your audio system. This may vary depending on the make and model of your system.
- Access the sound settings by selecting the appropriate menu option.
- Use the volume control or knob to adjust the overall volume of the audio system. Start at a moderate level and gradually increase or decrease it to your preference.
- If your audio system has a graphic equalizer, adjust the sliders to enhance specific frequencies or create a custom sound profile. Experiment with different settings to find the right balance.
- Some audio systems also have preset sound modes or audio enhancements. Explore these options and choose the one that suits your taste.
Checking the speakers for proper functioning
Now that you have turned on your audio system and adjusted the sound settings, it’s time to check if the 6X9 speakers are working correctly. Follow these steps to ensure proper functioning:
- Select a track or audio source that is known to have a good range of frequencies, such as a favorite song or a test audio file.
- Play the selected audio source through all the speakers, including the newly installed 6X9 speakers in the door.
- Listen carefully for any distortions, crackling sounds, or imbalances in the audio output. Pay attention to each speaker individually to ensure they are all producing sound.
- If you notice any issues, such as one speaker not producing any sound or distorted audio, try adjusting the wiring connections or checking the speaker polarity to troubleshoot the problem. Refer to the user manual of your audio system for specific troubleshooting instructions.
- Once you are satisfied with the audio quality and all the speakers are performing as expected, you can sit back, relax, and enjoy your favorite music with the enhanced sound experience provided by your newly installed 6X9 speakers.
Reassembling The Door
Placing the Door Panel Back
Once you have successfully installed your 6×9 speakers in the car door, it’s time to reassemble the door. This process involves placing the door panel back in its original position. Carefully follow the steps below to ensure a proper fit and functionality.
- Begin by lining up the door panel with the corresponding holes on the door frame. Ensure that the wiring harness is properly positioned and not tangled.
- Gently press the panel against the door, ensuring that all clips align with their respective counterparts on the door.
- Once you have aligned the clips, firmly push the panel into place. You should hear a satisfying click as each clip engages.
Reattaching all the Screws and Clips
With the door panel securely in place, it’s time to reattach all the screws and clips. This step is crucial for ensuring the stability and longevity of your newly installed speakers. Follow these easy steps to complete the process:
- Refer to your notes or photographs taken during the disassembly process to locate the screw holes on the panel.
- Using an appropriate screwdriver, carefully insert each screw back into its respective hole. Ensure they are tightened snugly but not excessively.
- Next, reattach any clips or retainers that may have been removed. Pay close attention to their specific placement and orientation to avoid any misalignment or damage.
Testing the Door Panel for Proper Fit
Now that you have reassembled the door and reattached all the necessary components, it’s time to ensure that everything fits properly. Follow these final steps to test the door panel:
- Gently push and pull the door panel to check for any loose or rattling components. If you notice any instability, double-check the screws and clips for proper tightness.
- Open and close the door several times, paying attention to any unusual sounds or resistance. If everything feels smooth and functions correctly, then you have successfully reassembled the door.
- Take a moment to admire your work and enjoy the enhanced audio experience that your new 6×9 speakers will provide.
Final Thoughts And Tips
Properly securing all connections, insulating the speakers for sound quality, and taking necessary precautions during installation are crucial steps when installing 6X9 speakers in your door. To ensure a successful installation, here are some final thoughts and tips to keep in mind:
Properly securing all connections
When installing 6X9 speakers in your car door, it is essential to secure all connections properly. Loose connections can not only cause sound distortion but also damage your speakers. To ensure a secure connection, follow these steps:
- Identify the speaker wires and their corresponding terminals.
- Strip the insulation from the speaker wires using a wire stripping tool.
- Twist the exposed wires together and insert them into the appropriate terminals.
- Tighten the terminals to secure the connection, ensuring no loose wires or exposed metal.
Insulating the speakers for sound quality
Insulating your speakers is essential for enhancing sound quality and preventing vibrations and rattling noises. Here’s how you can insulate your 6X9 speakers:
- Apply a layer of sound deadening material, such as foam or rubber, to the metal door panel surrounding the speaker mounting area. This helps reduce vibrations and enhances sound quality.
- Use foam baffles or speaker enclosures to isolate the backside of the speakers from the door panel. This helps in improving bass response and prevents sound distortion.
- Ensure a snug fit for the speakers in the mounting hole to minimize rattling and vibrations.
Taking necessary precautions during installation
During the installation process, it is important to take necessary precautions to avoid any potential issues. Follow these tips to ensure a smooth and successful installation:
- Disconnect the car battery before starting any electrical work to prevent short circuits or electrical damage.
- Handle the speakers with care and avoid touching the cone or other delicate parts to prevent damage.
- Double-check all wiring connections to ensure they are properly aligned and secured.
- Test the speakers before reassembling the door to ensure they are functioning correctly.
By following these final thoughts and tips, you can install 6X9 speakers in your door with confidence, and enjoy a superior sound experience in your car.
Frequently Asked Questions
How Do You Install Car Speakers In A Door?
To install car speakers in a door, follow these steps: 1. Gather necessary tools: screwdriver, wire stripper, and wire connectors. 2. Remove the door panel carefully, starting with screws and clips. 3. Disconnect the existing speaker and attach the new one with wire connectors.
4. Secure the new speaker into place and reattach the door panel. 5. Test the speakers to ensure they are working properly.
Is Installing Door Speakers Hard?
Installing door speakers is not difficult. With the right tools and instructions, it can be done easily.
Do You Need An Amp For 6X9 Speakers?
Yes, you need an amp for 6×9 speakers. An amplifier enhances the power and clarity of your speakers, delivering better sound quality and volume. Adding an amp ensures optimal performance and maximum enjoyment from your 6×9 speakers.
Do You Have To Break In Door Speakers?
No, you do not need to break in door speakers.
Conclusion
To sum up, installing 6X9 speakers in your car door is a relatively simple process that can significantly enhance your audio experience on the road. By following the steps outlined in this guide, you can ensure a professional and secure installation.
Remember to gather the necessary tools, prepare the door panel, and connect the speakers correctly. Enjoy your new and improved sound system as you hit the road with crystal-clear audio.