To install a 60 amp breaker, turn off the power source and disconnect the wires from the old breaker, then connect the wires to the new 60 amp breaker and restore power. Welcome to our guide on installing a 60 amp breaker!
If you’re looking to upgrade your electrical system or add new circuits to your home, installing a 60 amp breaker is a necessary step. This breaker allows for greater electrical capacity, providing ample power for various appliances and devices. We will walk you through the steps required to install a 60 amp breaker, ensuring a safe and efficient process.
With a few precautions and the right instructions, you can easily install a 60 amp breaker and enjoy the benefits of enhanced electrical capacity. Let’s get started!
Understanding The Importance Of A 60 Amp Breaker
The role of a 60 Amp breaker in electrical systems
When it comes to electrical systems, ensuring safety is paramount. A 60 Amp breaker plays a crucial role in maintaining the integrity and protection of these systems. Acting as a switch, this breaker is designed to safeguard your electrical circuits and appliances from overload or short circuits. It serves as a protective barrier that disconnects the power supply in case of an electrical fault, preventing potential damage to your electrical equipment or even fire hazards.
Key considerations before installing a 60 Amp breaker
Before delving into the installation process of a 60 Amp breaker, there are a few important considerations to take into account. These factors will ensure that your breaker functions optimally and that your electrical system remains safe and efficient.
- Electrical Load: Before installing a 60 Amp breaker, it’s crucial to assess the electrical load it will be subjected to. This load refers to the total amount of current that will flow through the breaker to power the connected circuits and appliances. An overloaded breaker can lead to overheating, tripping, or even damage to your electrical system. Therefore, it’s vital to evaluate your electrical load and confirm that a 60 Amp breaker is appropriate for the intended use.
- Wire Size: The wire size that connects to the breaker should be suitable for handling a 60 Amp current. Insufficient wire gauge can cause resistance and potentially result in overheating or fire hazards. It is essential to ensure that the wire size aligns with the amp rating of the breaker for safe and efficient functionality.
- Compatibility: Compatibility between the breaker and the electrical panel is crucial. Not all breaker brands or models are universally compatible with every electrical panel. Before proceeding with the installation, double-check the compatibility of the 60 Amp breaker with your specific panel. This will ensure a proper fit and eliminate any potential risks.
- Permits and Codes: It’s important to adhere to electrical safety codes and regulations while installing a 60 Amp breaker. Before beginning the installation process, ensure you have the necessary permits in place and familiarize yourself with local electrical codes. Following these guidelines will help prevent safety hazards and ensure your installation adheres to legal requirements.
By considering these crucial aspects beforehand, you can confidently proceed with the installation of a 60 Amp breaker. This will guarantee a safer and more efficient electrical system, protecting your appliances and providing peace of mind.

Tools And Materials Needed
When it comes to installing a 60 Amp breaker, having the right tools and materials is essential for a successful installation. In this section, we will discuss the necessary tools and materials you will need to complete the job efficiently. Let’s dive in.
Essential Tools for Installing a 60 Amp Breaker
When working with electrical components, it is crucial to have the right tools to ensure a safe and smooth installation process. Here are the essential tools you will need:
- Screwdriver Set: A reliable set of screwdrivers is necessary for loosening and tightening screws during the installation process. Make sure to have both flathead and Phillips screwdrivers in different sizes to accommodate various screw types.
- Wire Strippers: Wire strippers are essential for removing the insulation from the wires, allowing you to connect them properly. Get a pair of wire strippers that can handle the wire gauge used for the 60 Amp breaker.
- Needle-Nose Pliers: These pliers have a long, narrow jaw ideal for gripping small objects and bending wires. They come in handy when manipulating wires around tight spaces within the breaker panel.
- Wire Connectors: Wire connectors, also known as wire nuts, are essential for joining wires together securely. Opt for wire connectors that are compatible with the wire gauge used for the 60 Amp breaker.
- Voltage Tester: A voltage tester is a crucial tool for confirming that the power to the breaker panel is off before beginning the installation. This tool helps prevent electric shocks and ensures your safety during the process.
Required Materials for a Successful Installation
In addition to the right tools, you will also need specific materials to complete the installation of a 60 Amp breaker. Here are the materials you should have on hand:
- 60 Amp Breaker: The main component of the installation, the 60 Amp breaker is responsible for protecting the circuit and handling the specified current load. Ensure that you have a breaker that matches the specifications required for your electrical system.
- Electrical Wire: High-quality electrical wire is necessary for connecting the breaker to the electrical panel and the circuit itself. The wire gauge you choose should be appropriate for a 60 Amp circuit and meet the safety standards in your area.
- Breaker Panel: A breaker panel is the central component that houses all the circuit breakers in your electrical system. Ensure that your breaker panel is compatible with a 60 Amp breaker and has enough space to accommodate it.
- Electrical Tape: Electrical tape is used to secure and insulate the wire connections, preventing any accidental contact with live wires. Choose electrical tape that is rated for the appropriate voltage and is durable.
- Labeling Tags: Labeling tags are useful for marking the wires and breakers in the panel, making future maintenance and troubleshooting easier. Ensure that you have enough labeling tags to identify the circuits connected to the 60 Amp breaker.
With the essential tools and materials listed above, you are now equipped to begin the installation of a 60 Amp breaker. Remember to prioritize safety, double-check all connections, and follow the manufacturer’s instructions for a smooth and successful installation.
Step 1: Ensuring Safety First
Before proceeding with any electrical installation, it is crucial to prioritize safety. Installing a 60 Amp breaker requires knowledge and caution to prevent any accidents or damage to your electrical system. In this step, we will outline the importance of turning off the main power supply and the safety precautions you should follow before starting the installation.
Importance of turning off the main power supply
Turning off the main power supply before working on any electrical circuits is essential to prevent electric shocks and other hazards. By shutting off the main power, you ensure that no electricity is flowing through the wires you will be working on. This step is crucial as it minimizes the risk of injury and protects your equipment and the electrical system from damage.
Safety precautions to follow before starting the installation
Prior to installing a 60 Amp breaker, it is crucial to take the necessary safety precautions. These precautionary measures will ensure your well-being and the safe completion of the installation. Here are some important steps to follow:
- Wear protective gear: Always wear appropriate protective gear, such as safety glasses, gloves, and non-conductive shoes, to protect yourself from any potential electrical hazards.
- Identify and mark the circuit breaker box: Locate the circuit breaker box in your property and clearly mark it for easy identification. This will allow you to quickly and safely shut off the power during emergencies.
- Verify the voltage: Before proceeding, ensure that the 60 Amp breaker you have is compatible with the voltage requirements of your electrical system. Mismatched voltage can lead to equipment damage and safety hazards.
- Obtain the necessary permits: In some jurisdictions, installing a 60 Amp breaker may require a permit from the local authorities. Check with your local building department to ensure compliance with any regulations or requirements.
- Plan the installation: Before starting the installation, it is important to plan the process. Identify the location where you will install the breaker, ensuring adequate space and appropriate mounting options.
- Turn off all connected devices: Prior to shutting off the main power supply, turn off and unplug all connected devices. This will prevent any damage to your appliances or equipment.
- Locate and shut off the main power switch: Locate the main power switch or circuit breaker in your electrical panel. Flip the switch to the “Off” position to cut off the power supply to the entire electrical system.
- Double-check power absence: After turning off the main power switch, use a voltage tester or multimeter to confirm that there is no electrical activity in the circuits you will be working on. Safety should always be a top priority.
- Secure a safe working area: Clear the area around the electrical panel and ensure a clean, well-lit, and uncluttered workspace. Remove any flammable materials or objects that could pose a safety risk during the installation.
- Work with a partner: It is always a good idea to have someone nearby while working on electrical installations. In case of emergencies, having a partner can provide immediate assistance or call for help.
By following these safety precautions and ensuring that the main power supply is turned off, you establish a safe environment for installing a 60 Amp breaker. Safety should always be your priority to prevent accidents and protect yourself and your electrical system.
Step 2: Assessing Electrical Panel Compatibility
In order to install a 60 Amp breaker, it’s important to ensure that your electrical panel is compatible. This step is crucial to ensure the safety and functionality of your electrical system. Here are two key aspects to consider when assessing the compatibility of your electrical panel:
Checking if the electrical panel supports a 60 Amp breaker
The first step in assessing compatibility is to determine if your electrical panel is capable of supporting a 60 Amp breaker. Not all panels are designed to handle this level of electrical load, so it’s important to check the specifications of your panel or consult with a qualified electrician.
Here are a few key points to consider:
- Refer to the manufacturer’s documentation: The manufacturer’s documentation or label on your electrical panel should specify the maximum capacity of the panel. Look for information regarding the maximum ampacity or total amperage that the panel can handle.
- Inspect the panel’s wiring and bus bars: Visual inspection of the panel can provide clues about its capacity. If the wiring and bus bars appear undersized or inadequate for a 60 Amp breaker, it may be necessary to upgrade the panel.
Determining the available space and configuration in the panel
Once you’ve determined that your electrical panel can support a 60 Amp breaker, the next step is to assess the available space and configuration within the panel. This ensures that there is enough room to install the breaker and that it can be properly wired.
Consider the following factors:
- Physical space: Measure the available physical space in the panel to determine if it can accommodate the size of the 60 Amp breaker. This includes both vertical and horizontal space.
- Clearance requirements: Take into account any clearance requirements specified by the manufacturer for the proper installation and operation of the breaker.
- Wiring configuration: Determine the configuration of the existing wiring in the panel. Assess if there are enough available circuit slots and if the existing circuits can be rearranged to accommodate the 60 Amp breaker. In some cases, it may be necessary to install a sub-panel to accommodate additional circuits.
Assessing the compatibility of your electrical panel is an essential step in the installation process. By checking if the panel supports a 60 Amp breaker and evaluating the available space and configuration, you can ensure a safe and successful installation. If you’re unsure about any aspect of this assessment, it’s always best to consult with a qualified electrician to ensure the compatibility and safety of your electrical system.
Step 3: Selecting The Right Breaker
Understanding Different Types of 60 Amp Breakers
When it comes to selecting the right breaker for your electrical system, it is important to understand the different types of breakers available. A 60 amp breaker is commonly used for larger appliances and electrical circuits that require a higher amount of power. These breakers can handle up to 60 amps of current flow, making them suitable for heavy-duty applications.
There are two main types of 60 amp breakers: single-pole and double-pole. A single-pole breaker consists of one circuit that can handle up to 60 amps of current flow. It is usually used for 120-volt circuits, such as lighting and small appliances. On the other hand, a double-pole breaker is designed to handle 240-volt circuits, such as electric water heaters and air conditioning units. It consists of two circuits, each capable of carrying up to 60 amps of current flow.
Choosing the Appropriate Breaker for Your Specific Electrical System
When selecting a 60 amp breaker for your electrical system, it is crucial to choose the appropriate one that matches your specific needs. Taking into consideration the voltage requirement of your appliances and the wiring in your electrical panel is essential to ensure safety and efficiency.
Here are a few factors to consider when choosing the right breaker:
- Amperage Rating: Ensure that the breaker has a 60 amp rating to match the power requirements of your appliances and circuits. Using a higher or lower amp breaker can lead to electrical hazards and cause damage to your electrical system.
- Voltage Compatibility: Determine the voltage of the circuits you are connecting the breaker to. If you have 120-volt circuits, a single-pole breaker would be suitable. However, for 240-volt circuits, a double-pole breaker is necessary.
- Breaker Type: Consider the type of breaker that best suits your specific needs. For example, if you are installing a breaker for lighting circuits, a single-pole breaker is appropriate. For appliances that require 240 volts, a double-pole breaker is necessary.
- Compatibility with Electrical Panel: Check the compatibility of the breaker with your electrical panel. Make sure it is compatible with the brand and model of your panel for a proper fit and safe operation.
Remember, selecting the right breaker is crucial for the safe and efficient operation of your electrical system. If you are unsure about which breaker to choose or how to install it, it is best to consult a licensed electrician who can guide you through the process.
Step 4: Wiring Preparation
Gathering the necessary wiring tools and supplies
Before you begin the installation process of a 60 Amp breaker, it is important to gather all the necessary wiring tools and supplies. Having everything prepared beforehand will streamline the process and ensure a smooth installation.
Here is a handy list of tools and supplies you will need:
| Tools | Supplies |
|---|---|
|
|
Make sure you have all these tools and supplies readily available before moving on to the next step.
Understanding the wiring requirements for a 60 Amp breaker
Before diving into the wiring process, it is crucial to understand the specific wiring requirements for a 60 Amp breaker. Adhering to these requirements ensures the safety and efficiency of the electrical system.
The wiring requirements for a 60 Amp breaker may vary depending on factors such as the intended use, building codes, and the specific electrical panel you are working with. Always consult the manufacturer’s guidelines and local regulations to ensure compliance.
Here are some general considerations when it comes to wiring a 60 Amp breaker:
- Wire size: The wire size you need will depend on the length of the wire run, the voltage of the circuit, and the type of wire insulation. Using the wrong wire size can lead to overheating and potential hazards.
- Grounding: Proper grounding is essential for safety. A 60 Amp breaker will require a grounding wire according to the applicable codes. Ensure the grounding wire is correctly connected and securely attached.
- Circuit capacity: Take into account the electrical load requirements of the circuit and the appliances or equipment you plan to connect to the 60 Amp breaker. Make sure the breaker can handle the predicted load without exceeding its capacity. Overloading a breaker can cause damage and increase the risk of fire.
By understanding and adhering to these wiring requirements, you can establish a safe and reliable electrical system.
Step 5: Disconnecting Power And Removing The Existing Breaker
Safely disconnecting power from the electrical panel
Before you start removing the old breaker, it’s crucial to ensure your safety by disconnecting the power from the electrical panel. Not doing so can lead to dangerous electrical shocks or damage to the breaker itself. Here’s how you can safely disconnect power:
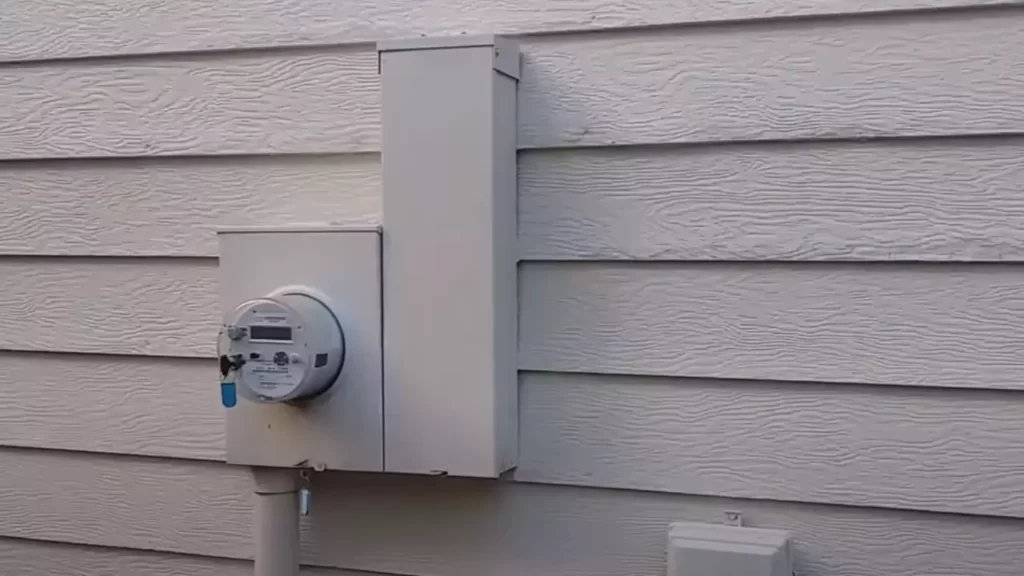
- Locate the main power switch: Find the main service panel in your house, commonly known as the electrical panel or breaker box. It usually resides in the garage, basement, or utility room. Once you locate it, look for the main power switch – a large breaker controlling the entire electrical supply to your home.
- Switch off the main power: It’s essential to switch off the main power switch before handling any electrical components. To turn it off, firmly push the switch handle to the “off” position until it clicks into place. You may hear a distinct sound indicating that the power has been successfully shut off.
- Verify power disconnection: To confirm that the power has been disconnected, test a few nearby outlets or switches using a voltage tester. If the tester doesn’t detect any voltage, it means that the power has been successfully turned off, and you can proceed with the next step.
Removing the old breaker to make space for the new one
With the power safely disconnected, you can now focus on removing the old breaker to make room for the new 60 amp breaker. Here are the steps to follow:
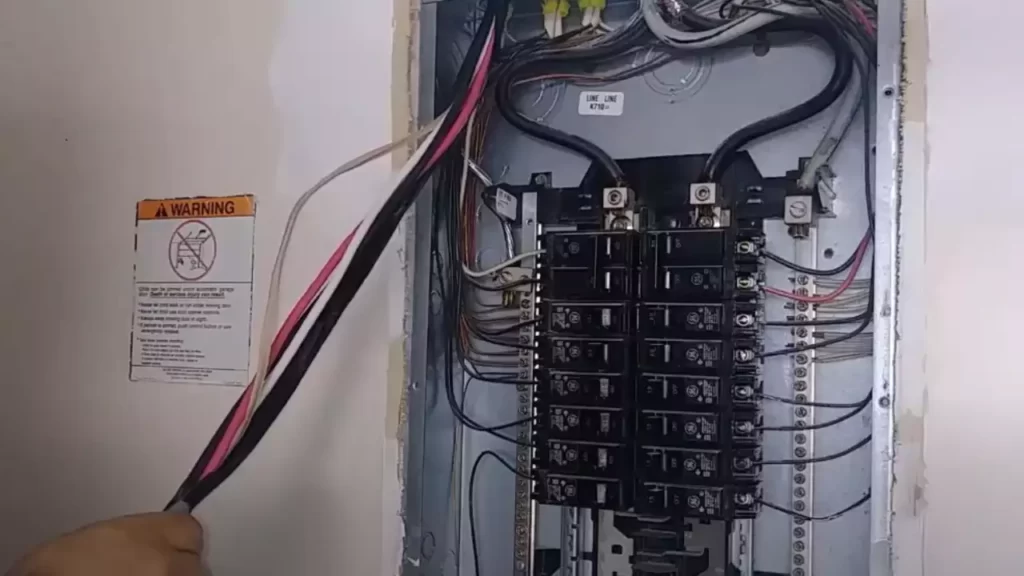
- Open the electrical panel: Carefully remove the cover from the electrical panel. It is usually secured in place with screws or clips. Set aside the cover in a safe location where it won’t be damaged.
- Locate the old breaker: Once the panel is exposed, it’s time to locate the existing breaker you want to replace. Typically, breakers are arranged in rows, each representing a designated circuit. Refer to your breaker panel’s labeling or consult an electrician if you’re unsure about which breaker to remove.
- Disconnect the wiring: Using caution, disconnect any wiring attached to the old breaker. Gently remove the wire screws or clamps, making sure not to damage the wires or neighboring breakers.
- Remove the old breaker: After disconnecting the wiring, you can now remove the old breaker. Firmly grasp the breaker and gently pull it out of its slot. Safely set it aside or dispose of it according to local electrical disposal guidelines.
You’ve successfully completed step 5 by disconnecting power from the electrical panel and removing the existing breaker. Now, you’re one step closer to installing your new 60 amp breaker and enhancing the electrical capacity of your panel. Make sure to proceed with the next steps carefully and consult a professional if you’re unsure about any aspect of the installation process.
Step 6: Installing The 60 Amp Breaker
Once you have prepared the panel and stripped the wires, it is time to install the 60 amp breaker. This step is crucial to ensure the safe and efficient distribution of electricity throughout your electrical system. Follow these instructions to properly position the new breaker in the panel and connect the wiring.
Properly positioning the new breaker in the panel
Positioning the 60 amp breaker in the panel is essential for its effective functioning. Here’s how you can do it:
- Identify an available slot in the breaker panel where the 60 amp breaker can be installed. Consult the manufacturer’s instructions or local electrical codes to determine the appropriate slot.
- Make sure the breaker is in the “off” position before installing it into the panel. This ensures your safety during the installation process.
- Align the breaker with the chosen slot in the panel. The breaker should fit snugly and line up with the other breakers in the panel.
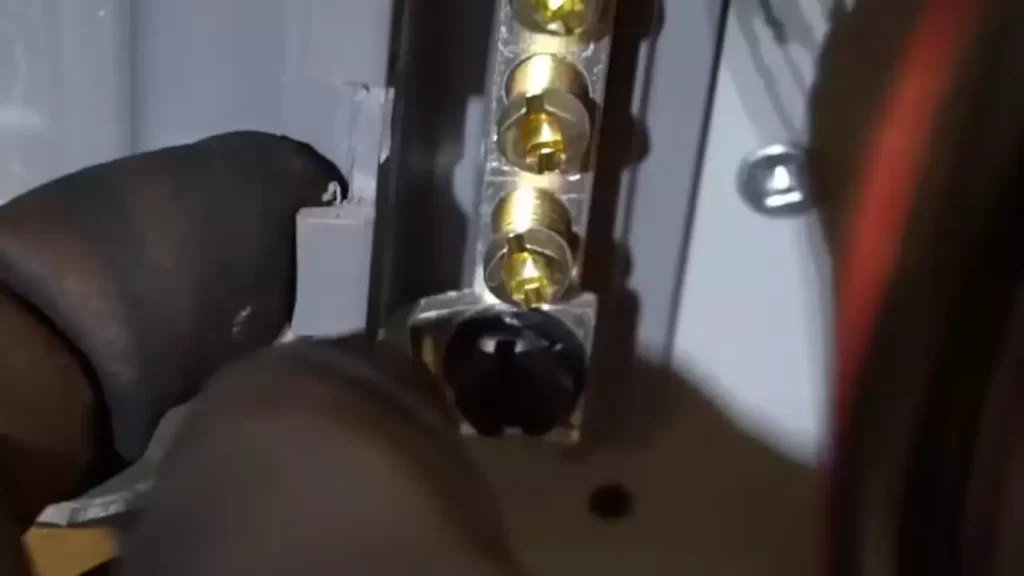
- Press the breaker firmly into place until it snaps securely onto the panel’s bus bar. This ensures a proper electrical connection.
- Double-check that the breaker is securely installed and aligned correctly. Any loose or misaligned breakers can lead to electrical hazards or malfunctioning circuits.
Connecting the wiring to the breaker terminals
Once the breaker is properly positioned, you can proceed with connecting the wiring. This step ensures the proper flow of electricity through the circuit. Follow these guidelines:
- Locate the terminals on the 60 amp breaker. Typically, breakers have two terminals: one for the hot wire and one for the neutral wire.
- Strip the insulation from the ends of the hot and neutral wires, exposing about 1/2 inch of wire. Ensure that the wires are of the appropriate gauge to handle the amperage of the circuit.
- Insert the stripped ends of the wires into their respective terminals. The hot wire should be connected to the terminal designated for the hot wire, while the neutral wire should be connected to the terminal designated for the neutral wire.
- Tighten the terminal screws firmly with a screwdriver to ensure a secure connection. Avoid over-tightening, as this can damage the wires or the breaker.
- Inspect the connections to ensure they are tight and properly aligned. Loose or poorly connected wires can result in overheating and potential electrical hazards.
By following these instructions, you can safely and effectively install your 60 amp breaker. Remember to adhere to all electrical safety precautions, consult the manufacturer’s instructions, and consider seeking the assistance of a licensed electrician if you are uncertain about any part of the installation process.
Step 7: Testing And Finishing Up
Once you have successfully installed the 60 Amp breaker, it is crucial to conduct a comprehensive test to ensure its proper functioning. This step will help identify any potential issues and allow you to address them before they become major problems.
Conducting a comprehensive test to ensure proper functioning
The following steps will guide you through the process of testing the 60 Amp breaker to ensure it is working correctly:
- Turn off all appliances: Before you start the testing process, it is important to turn off all appliances in your home that are connected to the breaker. This will help prevent any electrical mishaps during the testing.
- Verify the breaker position: Make sure the breaker is in the “off” position before proceeding with the testing. This step is crucial for your safety.
- Reset the breaker: Switch the breaker to the “on” position and ensure it locks into place. This step will provide power to the circuit.
- Check for proper voltage: Use a multimeter to measure the voltage across the breaker terminals. It should accurately display the designated 60 Amps.
- Test the circuit: Turn on the appliances connected to the circuit one by one and observe their performance. If any appliances fail to operate or show signs of malfunctioning, it indicates an issue that needs to be addressed.
- Monitor for overheating: During the testing process, keep an eye out for any signs of overheating. Touch the breaker and surrounding wires to check for excessive heat. If you notice any, it could be a sign of an underlying problem that requires further attention.
By following these steps and conducting a thorough test, you can ensure the proper functioning of your newly installed 60 Amp breaker.
Final steps for completing the installation of a 60 Amp breaker
After the successful testing of the 60 Amp breaker, it is time to complete the installation process. Follow these final steps to ensure a proper and secure installation:
- Ensure tight connections: Double-check that all connections, including the breaker terminals and wires, are securely tightened. Loose connections can lead to electrical issues and pose a safety risk.
- Cover the breaker panel: Place the cover back onto the breaker panel and secure it using the appropriate screws. This step helps protect the breaker and prevents accidental contact with the live components inside.
- Label the breaker: Use a labeling tool to mark the breaker with its corresponding circuit or appliance. This labeling will assist you in identifying the breaker in the future, saving time and effort.
- Adhere to local regulations: Familiarize yourself with local electrical codes and regulations to ensure compliance. It is essential to follow these guidelines to guarantee a safe and legally compliant installation.
Completing these final steps will ensure that the installation of your 60 Amp breaker is fully finished and ready for use. Remember to always prioritize safety and consult a professional if you encounter any difficulties during the process.
Troubleshooting Common Installation Issues
Installing a 60 Amp Breaker might seem like a straightforward task, but sometimes unexpected issues can arise. Understanding these common installation problems and knowing how to troubleshoot them can save you time, money, and frustration. In this section, we will discuss a few typical issues that you may encounter during the installation and provide step-by-step troubleshooting solutions.
Common problems that may arise during the installation
When installing a 60 Amp Breaker, you may come across several common issues that can hamper the installation process. Recognizing these problems early on will help ensure a smooth installation and prevent any unnecessary setbacks. Here are some common problems to watch out for:
- Incorrect breaker size: One of the most prevalent issues occurs when a breaker of the wrong size is used. This can lead to serious consequences, such as overheating or electrical hazards. Double-check that you have the correct 60 Amp Breaker designed for your specific electrical application.
- Incompatible panels: Ensuring compatibility between the breaker and your electrical panel is crucial for a successful installation. If your panel is not designed to accommodate a 60 Amp Breaker, you may need to upgrade the panel or consult with a professional electrician to find a suitable solution.
- Loose or faulty connections: Loose connections can cause intermittent power issues or even damage the breaker and other electrical components. Carefully inspect all connections to ensure they are tight and secure. Additionally, faulty connections or damaged wires can impede the breaker’s functionality, so any visible signs of wear or damage should be addressed before proceeding.
- Inadequate wiring: In some cases, the existing wiring may not be adequate for a 60 Amp Breaker. If the current wiring is not capable of handling the increased load, it can lead to circuit overloads, tripped breakers, and potential electrical hazards. It’s crucial to assess the condition and capacity of your wiring and, if necessary, upgrade it to meet the requirements of the 60 Amp Breaker.
Troubleshooting steps to resolve these issues
When faced with any of the problems mentioned above, following the right troubleshooting steps can help resolve them promptly. Here is a step-by-step guide to addressing these common installation issues:
1. Check the breaker size:
Ensure that you have the correct 60 Amp Breaker size for your specific electrical application. Consult the manufacturer’s instructions or refer to the electrical panel’s labeling to confirm compatibility. If you have mistakenly used the wrong size breaker, replace it with the appropriate 60 Amp Breaker.
2. Verify panel compatibility:
If you suspect compatibility issues between the breaker and your electrical panel, review the panel’s specifications or consult an electrician. They can assess the panel’s capacity and determine if any modifications or upgrades are necessary to accommodate the 60 Amp Breaker safely.
3. Secure connections:
Inspect all connections for tightness and security. Ensure that all wire connections are properly tightened to avoid loose or faulty connections. If you notice any signs of wear or damage, replace the affected components before proceeding with the installation.
4. Assess wiring capacity:
Assess the adequacy of your existing wiring to handle the increased load of a 60 Amp Breaker. If the wiring is insufficient or outdated, consult with a qualified electrician to determine whether a wiring upgrade is required. Upgrading the wiring will help prevent overloads, tripped breakers, and potential safety hazards.
By recognizing common problems and following these troubleshooting steps, you can overcome any installation issues that may arise when installing a 60 Amp Breaker. Remember, safety should always be the utmost priority, so never hesitate to seek professional assistance if needed.
Frequently Asked Questions
Can I Add A 60 Amp Breaker To My Panel?
Yes, you can add a 60 amp breaker to your panel. However, it is crucial to consult an electrician to ensure that your panel can handle the additional load and to avoid any potential safety hazards.
What Size Wire Do I Need For A 60 Amp Breaker?
For a 60 amp breaker, you will need a wire size of at least 6 AWG (American Wire Gauge).
Can I Put A 60 Amp Breaker In A 200 Amp Panel?
Yes, you can put a 60 amp breaker in a 200 amp panel, as long as the panel is rated to accommodate it. However, it’s important to consult with a licensed electrician to ensure that the panel can safely handle the load and to check local electrical codes.
What Is A 60 Amp Double-Pole Breaker Used For?
A 60 amp double-pole breaker is used to protect high-demand electrical circuits, such as for heavy appliances like dryers or electric ranges. It ensures safety by cutting off power if the current exceeds 60 amps, preventing overheating or potential electrical fires.
Conclusion
To conclude, installing a 60 amp breaker requires careful attention to detail and adherence to safety guidelines. By following the step-by-step instructions outlined in this blog post, you can successfully install a 60 amp breaker and ensure the efficient functioning of your electrical system.
Remember to consult a professional if you encounter any difficulties or uncertainties during the process. Stay safe and enjoy the benefits of a properly installed 60 amp breaker.