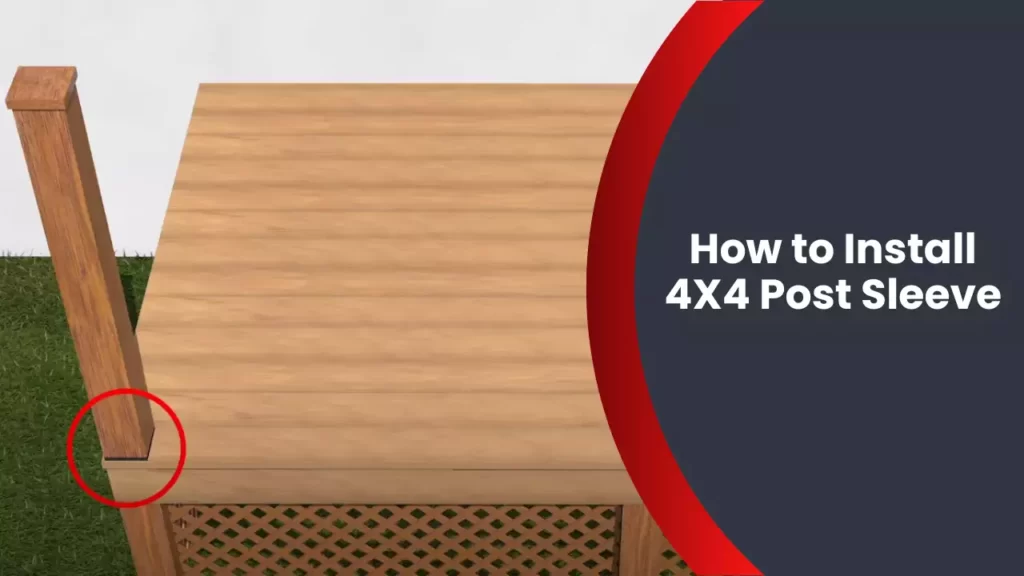
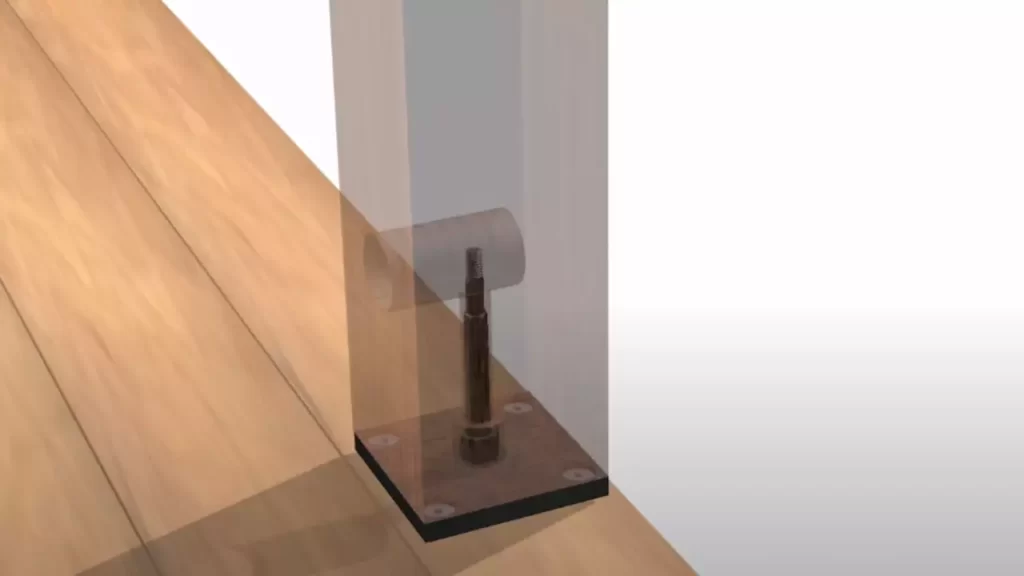
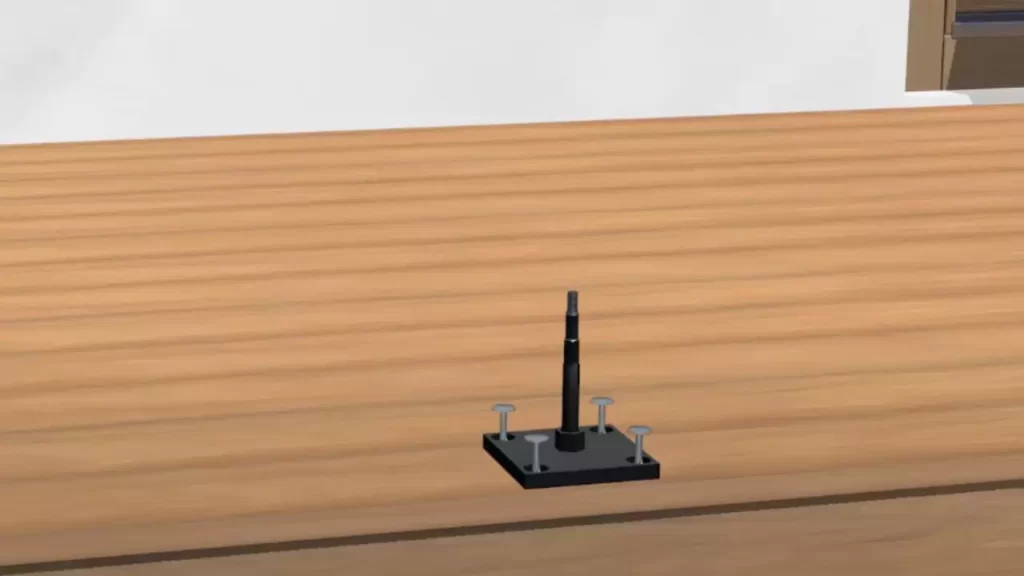
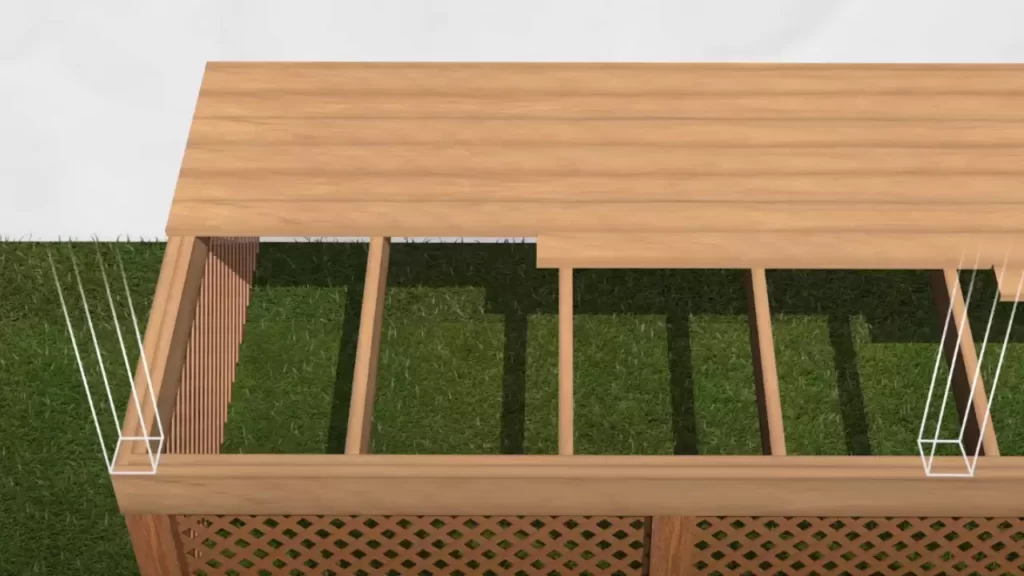
To install a 4X4 post sleeve, start by measuring and cutting the sleeve to the desired length. Then, slip the sleeve over the post and secure it in place using screws or adhesive.
Benefits Of Using 4X4 Post Sleeve For Installation
If you’re considering installing a 4X4 post, using a post sleeve is a smart choice. Not only does it offer added protection and durability, but it also enhances the overall appearance of your structure. Let’s dive deeper into the benefits of using a 4X4 post sleeve for installation.
Protection: Shielding the post from weather elements
One of the significant advantages of using a 4X4 post sleeve is the protection it provides. By acting as a shield, the post sleeve safeguards the underlying post from various weather elements. Whether it’s intense sunlight, heavy rain, or even snow, the post sleeve acts as a barrier, preventing direct contact and potential damage to the post.
Furthermore, the post sleeve is designed to resist warping, cracking, or splitting, ensuring long-lasting protection for your structure. This added layer of defense not only prolongs the lifespan of your post but also reduces the need for frequent maintenance and repairs.
Durability: Extending the lifespan of the post
When it comes to durability, a 4X4 post sleeve is hard to beat. Constructed from high-quality materials, such as vinyl or composite, the sleeve is built to withstand the test of time. This durable composition makes the post sleeve resistant to rot, decay, insects, and other common issues that often plague wooden posts.
In addition, the 4X4 post sleeve is designed to be easy to install and fits seamlessly over your existing post. Its strong and sturdy construction ensures that it won’t warp or weaken over time, providing exceptional durability and extending the lifespan of your post.
Aesthetics: Enhancing the overall appearance of the structure
Aside from protection and durability, a 4X4 post sleeve also offers aesthetic benefits. This versatile accessory comes in various finishes, colors, and styles, allowing you to find the perfect match that complements your structure. Whether you prefer a traditional, modern, or rustic look, there is a post sleeve option that suits your taste.
By adding a post sleeve, you can easily transform the appearance of your structure, giving it a polished and cohesive look. The sleek and smooth surface of the post sleeve provides a clean and attractive finish, enhancing the overall aesthetics of your space.
In conclusion, investing in a 4X4 post sleeve for installation not only offers essential protection and durability but also elevates the aesthetics of your structure. With its ability to shield the post from weather elements, extend its lifespan, and enhance the overall appearance, using a post sleeve is a wise choice for any project.

Tools And Materials Needed For Installing 4X4 Post Sleeve
Installing a 4X4 post sleeve is a great way to add strength and stability to your outdoor structures. To successfully complete this installation, you will need a set of essential tools and materials. This section will guide you through the tools and materials required for the installation process.
Measuring Tape
A measuring tape is an indispensable tool for accurately measuring the height and length of your post sleeve. Make sure to write down the measurements for future reference and to ensure a precise installation.
Level
A level is essential for ensuring that your post sleeve is perfectly vertical. This tool will help you achieve a professional-looking installation by ensuring that your structure stands straight. Use the level to adjust the position of the post sleeve during the installation process.
Post Hole Digger
A post hole digger is a must-have tool for digging precise holes in the ground to accommodate the post sleeve. This tool enables you to create sturdy foundations for the post sleeve, ensuring stability and durability.
Concrete Mix
Concrete mix is crucial for securing the post sleeve in place. The concrete provides a solid foundation and prevents the post sleeve from shifting or becoming loose over time. Choose a high-quality concrete mix that is suitable for outdoor use.
Tamping Tool
A tamping tool is used to compact the soil around the post sleeve after the concrete has been poured. This helps to eliminate any voids or air pockets, ensuring a stable and secure installation. Use the tamping tool to firmly pack the soil around the base of the post sleeve.
4X4 Post Sleeve
A 4X4 post sleeve is the main component of your installation. Ensure that you purchase a post sleeve that is made of durable and long-lasting material, such as PVC or composite. The post sleeve will provide structural support and add an attractive finish to your outdoor project.
By having the necessary tools and materials, you will be prepared to install your 4X4 post sleeve successfully. This ensures that your outdoor structures will be stable, secure, and aesthetically pleasing for years to come.

Step-By-Step Guide For Installing 4X4 Post Sleeve
Installing a 4X4 post sleeve is a crucial step in ensuring the stability and longevity of your outdoor structure. Whether you are building a deck, fence, or any other structure that requires sturdy support, following a step-by-step guide can make the installation process easier and more efficient. In this guide, we will break down the installation process into simple and easy-to-follow steps, ensuring that your post sleeve is installed correctly.
Measure and mark the desired height of the post sleeve
Before beginning the installation process, it is important to determine the desired height of your post sleeve. Use a measuring tape to measure and mark the desired height on the post where the sleeve will be installed. This will ensure that your post sleeve is properly aligned with the overall structure and looks aesthetically pleasing.
Dig the post hole according to the sleeve dimensions
Next, it’s time to dig the post hole that will accommodate the 4X4 post sleeve. Use a shovel or a post hole digger to dig a hole with dimensions that match the size of the post sleeve. Ensure that the hole is deep enough to provide sufficient stability for the post and sleeve. A general rule of thumb is to dig a hole that is approximately one-third of the total length of the 4X4 post sleeve.
Place the post sleeve in the hole and check for levelness
Once the hole is dug, carefully place the post sleeve into the hole. Ensure that the sleeve is centered and straight. Use a level to check for levelness on all sides of the post sleeve. Adjust the position of the sleeve if necessary to ensure it is perfectly level.
Pour concrete mix around the post sleeve
After the post sleeve is properly positioned and leveled, it’s time to pour the concrete mix around it. Prepare the concrete mix according to the manufacturer’s instructions. Slowly pour the concrete mix into the hole, ensuring that it fills the space evenly around the post sleeve. Use a shovel or a trowel to consolidate the concrete and remove any air pockets.
Use a tamping tool to compact the concrete
Once the concrete is poured, use a tamping tool to compact it further and remove any remaining air bubbles. This step ensures that the concrete is fully settled and provides maximum stability for the post sleeve. Work the tamping tool around the circumference of the post sleeve, applying even pressure to ensure proper compaction.
Allow the concrete to dry and cure completely
After compacting the concrete, it is important to allow it to dry and cure completely before proceeding. Follow the manufacturer’s instructions for the recommended drying and curing time. This step is crucial for the concrete to achieve its maximum strength and ensure the stability of the post sleeve.
Insert the 4X4 post into the installed sleeve
Once the concrete has dried and cured, you are now ready to insert the 4X4 post into the installed sleeve. Ensure that the post is properly aligned and snugly fits into the sleeve. You may apply some pressure or use a rubber mallet to secure the post in place. Double-check the levelness of the post before proceeding with your construction project.

Additional Tips For Installing 4X4 Post Sleeve
When it comes to installing a 4X4 post sleeve, there are a few additional tips that can help ensure a sturdy and durable installation. These tips will not only help you achieve a professional-looking result but also ensure the safety and longevity of your project. In this section, we will cover these essential tips and highlight the importance of each step.
Ensure the post sleeve is securely set in the ground before proceeding with the installation
Before you start installing a 4X4 post sleeve, it is crucial to ensure that the post sleeve is securely set in the ground. A stable foundation is the key to having a strong and durable structure. There are several methods to achieve this:
- Dig a hole deep enough to accommodate the post sleeve, ensuring it goes below the frost line if applicable in your area.
- Place a layer of gravel at the bottom of the hole to promote drainage and prevent water accumulation at the base of the post sleeve.
- Pour concrete into the hole, ensuring it reaches the desired level to provide a stable base for the post sleeve.
- Double-check the vertical alignment of the post sleeve using a level before the concrete sets.
Double-check the levelness of the post sleeve before pouring the concrete
Once the post sleeve is securely set in the ground, it is essential to double-check its levelness before pouring the concrete. A post that is not level can lead to structural issues and compromise the overall stability of the installation. To ensure a level post sleeve:
- Place a level on different sides of the post sleeve and adjust its position until it is perfectly level horizontally and vertically.
- Make any necessary adjustments by adding or removing soil or gravel from the hole to achieve a level post sleeve.
- Recheck the levelness multiple times from different angles to ensure accuracy.
Follow manufacturer guidelines for mixing and pouring the concrete
Mixing and pouring the concrete properly is crucial for a strong and durable installation. It is vital to follow the manufacturer’s guidelines for mixing ratios, water-to-concrete ratios, and pouring techniques. This will ensure that the concrete cures properly and provides the necessary support for the post sleeve. Some key points to consider:
- Use a reliable concrete mix and follow the instructions provided by the manufacturer.
- Avoid adding excess water to the mix, as it can weaken the concrete.
- Pour the concrete evenly around the post sleeve, ensuring it completely fills the hole and forms a solid base.
Allow ample time for the concrete to dry and cure before applying any weight or pressure to the post
After pouring the concrete, it is essential to allow ample time for it to dry and cure before applying any weight or pressure to the post. Rushing this process can lead to unstable and weak installations. Here are some guidelines:
- Follow the manufacturer’s instructions for the recommended drying and curing time.
- Avoid placing any weight or pressure on the post sleeve until the concrete has fully cured.
- Protect the post sleeve from disturbances during the drying and curing process to ensure its stability.
By following these additional tips, you can ensure a secure and durable installation of your 4X4 post sleeve. Taking the time to properly set the post sleeve, checking for levelness, following manufacturer guidelines for concrete pouring, and allowing sufficient drying and curing time will result in a sturdy and long-lasting structure.

Maintenance And Care For 4X4 Post Sleeve
Regularly inspect the post sleeve for any damage or wear
Regular inspection of your 4×4 post sleeve is crucial to maintain its integrity and ensure its longevity. Look for any signs of damage or wear, such as cracks, splinters, or loose fittings. It’s important to catch any issues early on to prevent further damage and maintain the overall safety of your post. Be sure to inspect all sides of the sleeve, including the bottom, as damage can occur from various sources, such as weather conditions, accidental impacts, or natural wear and tear.
Clean the sleeve periodically to remove dirt and debris
Dirt, debris, and other substances can accumulate on your 4×4 post sleeve over time, tarnishing its appearance and potentially causing damage. To keep your sleeve looking clean and well-maintained, it is recommended to clean it periodically. Start by removing any loose dirt or debris using a soft-bristle brush or a clean cloth. For tougher stains or grime, consider using a mild detergent mixed with water and gently scrubbing the affected areas. Rinse thoroughly with clean water and allow the sleeve to dry completely before applying any additional maintenance steps.
Protect the sleeve from excessive moisture to prevent rot
Moisture is one of the biggest enemies of a 4×4 post sleeve, as it can lead to rot, decay, and structural damage over time. To protect your post from excessive moisture, ensure proper drainage around the installation area and avoid situations where water may accumulate or pool. Additionally, consider using a waterproofing membrane or a protective sleeve over the 4×4 post sleeve to provide an extra layer of defense against moisture. Regularly inspect the sleeve for any signs of moisture intrusion and address them promptly to prevent further damage.
Consider applying a protective sealant or paint to enhance longevity
In addition to regular maintenance, applying a protective sealant or paint coating to your 4×4 post sleeve can significantly enhance its longevity. A protective sealant acts as a barrier, shielding the sleeve from environmental elements, such as UV rays, moisture, and insects. It also helps to prevent fading, cracking, and peeling, ensuring that your post sleeve remains in good condition for years to come. Before applying any sealant or paint, make sure to clean the sleeve thoroughly and follow the manufacturer’s instructions for best results. Regularly reapply the sealant or paint as needed to maintain its protective properties.
Frequently Asked Questions
How Do You Attach A 4X4 Post To A Deck Surface?
To attach a 4×4 post to a deck, follow these steps: 1. Position the post in the desired location on the deck surface. 2. Drill pilot holes through the post and into the deck surface. 3. Insert screws into the pilot holes, securing the post to the deck.
4. Use a level to ensure the post is straight and adjust if necessary. 5. Tighten the screws to secure the post firmly in place.
How Does A Post Sleeve Work?
A post sleeve works by providing a protective covering for an object. It safeguards the post from damage caused by weather, insects, or wear and tear. The sleeve is durable, easy to install, and extends the lifespan of the post.
It is an effective solution for maintaining the post’s structural integrity.
Should Deck Railing Posts Be Inside Or Outside?
Deck railing posts should be installed on the outside of the deck. This provides better stability and support for the railing system. By placing the posts on the outside, you can maximize the usable space on your deck while ensuring safety.
How Far Should Deck Railing Posts Be Apart?
Deck railing posts should be spaced no further than 6 feet apart. This allows for adequate support and stability, ensuring the safety of the deck.
Conclusion
To sum up, installing a 4X4 post sleeve is a simple and efficient way to enhance the durability and aesthetics of your outdoor space. By following the step-by-step guide we have provided, you can effortlessly complete this project and enjoy the benefits it brings.
Remember to choose the right materials and take necessary safety precautions. So, what are you waiting for? Start transforming your outdoor area today!
