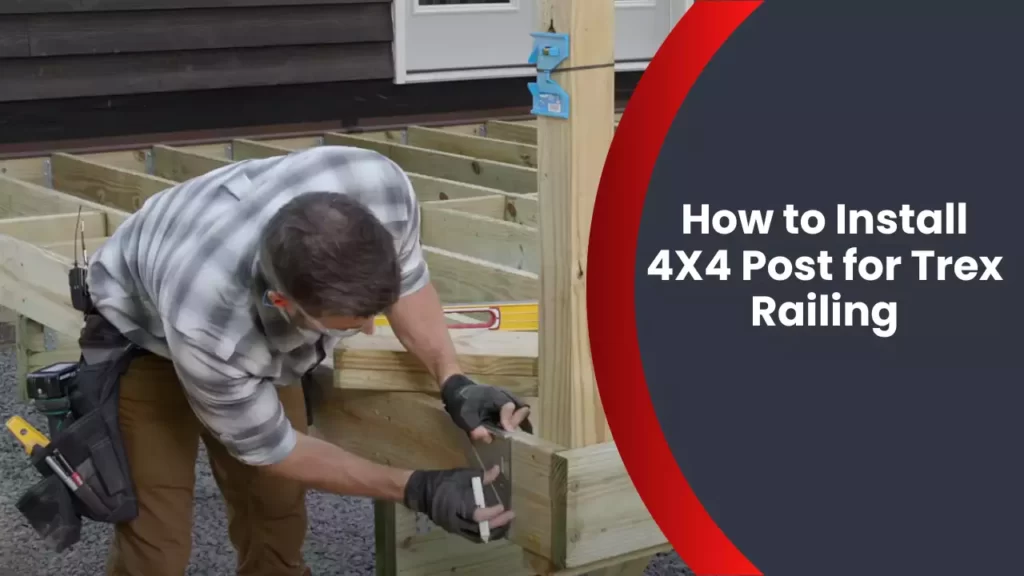
To install a 4×4 post for Trex railing, first determine the desired location and dig a hole that is deep and wide enough to accommodate the post. Then, place the post in the hole, ensuring it is level and plumb, and backfill with concrete, allowing it to set before attaching the railing.
Installing a 4×4 post for Trex railing is a crucial step in ensuring the stability and durability of your deck railing. Proper installation involves carefully positioning the post, securing it using concrete, and ensuring it is level and plumb. In this guide, we will explore the step-by-step process of installing a 4×4 post for Trex railing, providing you with the necessary instructions to complete the task successfully.
By following these guidelines, you can ensure a sturdy and secure railing structure that enhances the safety and aesthetics of your outdoor space.
Choosing The Right Materials For Your Trex Railing Post
When it comes to installing a sturdy and reliable Trex railing system, choosing the right materials for your 4×4 post is crucial. From considering durability and strength to matching dimensions with your Trex railing system, every aspect plays a significant role in ensuring a secure and long-lasting installation. In this guide, we’ll walk you through the essential factors to consider when selecting the materials for your Trex railing post.
Consider the Durability and Strength of the 4X4 Post Material
The durability and strength of the 4×4 post material are paramount to the overall stability and longevity of your Trex railing system. For outdoor installations, it’s essential to select a material that can withstand harsh weather conditions such as rain, snow, and UV exposure without deteriorating or warping over time.
When deciding on the material, it’s important to go for options that offer the highest resistance to moisture and decay. Pressure-treated wood, for example, is a popular choice due to its ability to resist rot, insects, and other environmental factors. However, if you prefer a more low-maintenance option, you may consider composite or metal materials that offer enhanced durability with minimal upkeep.
Selecting the Appropriate 4X4 Post Length for Your Railing
Choosing the correct length for your 4×4 post is crucial for the overall stability and aesthetics of your Trex railing system. An improperly sized post can result in wobbly railings and compromise the overall integrity of the installation.
Before purchasing the 4×4 post, carefully measure the height of your railing and ensure that the post provides sufficient length to extend from the bottom of the railing to the ground. Additionally, consider the depth of the post you’ll need to secure it firmly into the ground or mounting surface. Remember, it’s better to go for a slightly longer post that can be trimmed down to size, rather than one that falls short of the required dimensions.
Ensuring the 4X4 Post Dimensions Match Your Trex Railing System
Another critical factor to consider when choosing materials for your Trex railing post is ensuring that the dimensions of the 4×4 post match seamlessly with your chosen Trex railing system. This ensures a clean and professional appearance while also providing proper support for your railing.
Before making a purchase, review the specifications provided by the manufacturer for your Trex railing system. Pay close attention to the required dimensions, such as the post sleeve size, the recommended post spacing, and any other specific guidelines provided. Matching these dimensions precisely will ensure that your Trex railing system functions optimally and provides the desired aesthetic appeal.
By choosing the right materials for your Trex railing post, considering factors such as durability, strength, length, and dimensions, you can achieve a secure, visually pleasing, and long-lasting installation. Take the time to research and select the materials that best suit your needs and preferences, and you’ll be rewarded with a Trex railing system that enhances both the safety and beauty of your outdoor space.
Preparing The Installation Area For Your Trex Railing 4X4 Post
Before you can begin installing your Trex Railing 4X4 Post, it is essential to properly prepare the installation area. In this section, we will outline the necessary steps to ensure a solid foundation for your post and minimize any potential issues. From clearing the area to marking the post locations and checking for underground utilities, these crucial steps will help you achieve a safe and successful installation.
Clearing the Area and Marking the Post Locations
Begin by clearing the area where you plan to install your Trex Railing 4X4 Post. Remove any obstacles, debris, or vegetation that may hinder the installation process. This will give you a clean and level surface to work with.
Once the area is clear, mark the locations where the posts will be installed. Measure and mark the spots where each post will be placed, ensuring proper spacing as recommended by Trex guidelines. Use a tape measure or other suitable tool to ensure accurate measurements and make sure the markings are clearly visible.
Checking for Any Underground Utilities
Before you begin digging, it is crucial to check for any underground utilities that may be present in the installation area. Contact your local utility companies or utilize a professional utility locator service to accurately identify the location of underground lines for gas, water, electricity, or other utilities. This step is essential for your safety and to prevent any damage to existing infrastructure.
Preparing the Soil for Solid Post Foundation
Once you have cleared the area and marked the post locations, it’s time to prepare the soil to ensure a solid post foundation. Start by digging holes at each marked location, making sure they are of the appropriate depth and diameter for your Trex Railing 4X4 Posts.
Remove the excavated soil and set it aside for later use. You may need to add or remove soil to achieve the proper depth for your post holes. Use a leveler to ensure the holes are deep enough and are leveled with each other.
When the holes are ready, it’s recommended to add gravel at the bottom for drainage. This will help prevent water accumulation around the post base, reducing the risk of rot or instability. Fill the remainder of the hole with soil, compacting it firmly as you go to create a sturdy foundation for your posts.
By taking these necessary steps to clear the area, mark the post locations, check for underground utilities, and prepare the soil, you are ensuring a secure and reliable foundation for your Trex Railing 4X4 Post installation. Following these guidelines will help you achieve a successful and long-lasting railing system.
Installing The 4X4 Post For Your Trex Railing
When it comes to installing a 4X4 post for your Trex railing, it’s important to follow the right steps to ensure a sturdy and secure installation. In this guide, we will walk you through the process of digging the post holes, setting the post in the hole, and securing it with concrete or gravel.
Digging the Post Holes to the Appropriate Depth
The first step in installing your 4X4 post is to dig the post holes to the appropriate depth. This is crucial for the stability of your railing system. To determine the correct depth, refer to the manufacturer’s specifications or building codes in your area.
Once you have determined the proper depth, use a post hole digger or an auger to dig the holes. Make sure the diameter of the hole is wide enough to accommodate the 4X4 post and have sufficient space for concrete or gravel around it.
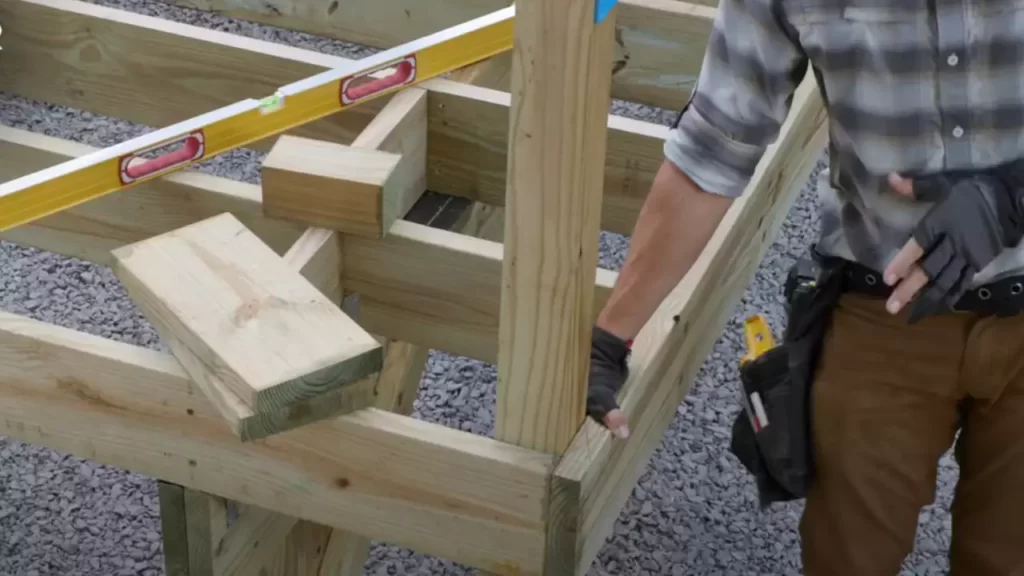
Setting the Post in the Hole and Ensuring Vertical Alignment
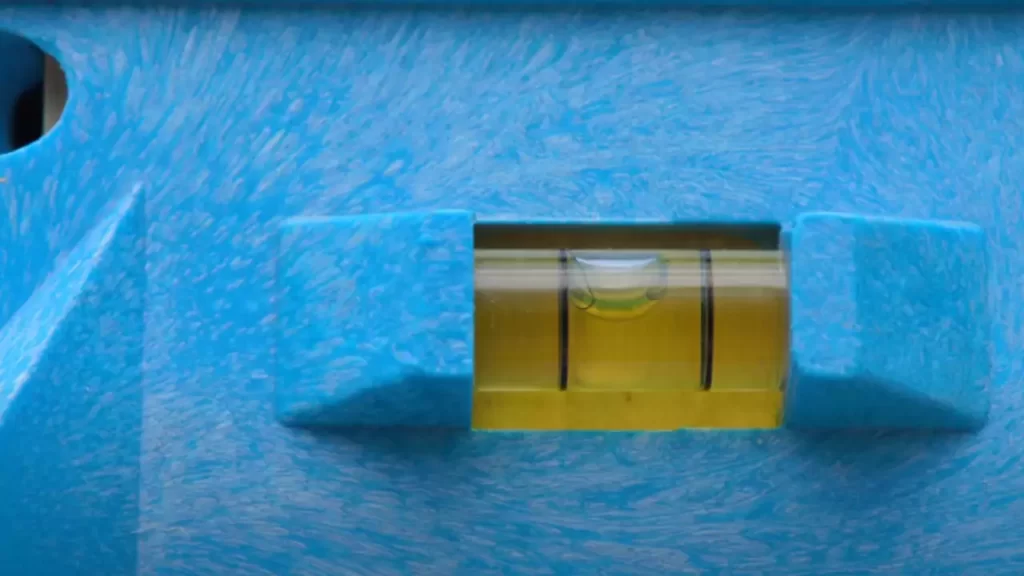
After you have dug the post holes, it’s time to set the 4X4 post in the hole. Start by placing the post in the hole and checking for proper vertical alignment. Use a level to ensure that the post is perfectly upright. Adjust the position of the post if necessary.
Once the post is aligned, you can begin filling the hole with concrete or gravel. This will provide stability and support to the post. If using concrete, mix it according to the manufacturer’s instructions and fill the hole around the post. Make sure the concrete completely fills the hole and rises slightly above the ground level for added strength.
Securing the Post with Concrete or Gravel
Securing the post with concrete or gravel is the final step in the installation process. This will ensure that the post remains in place and can withstand the weight and pressure of the railing system.
If you are using concrete, allow it to dry completely before proceeding. This usually takes about 24 to 48 hours. Once the concrete is dry, remove any excess material around the post and level it with the ground.
If you prefer to use gravel, pour it into the hole around the post until it reaches ground level. Make sure the gravel is tightly packed and provides sufficient support to the post.
In conclusion, properly installing the 4X4 post for your Trex railing is essential for the safety and stability of your railing system. By following these steps and using the appropriate materials, you can ensure a secure and long-lasting installation.

Securing The Trex Railing To The 4X4 Post
Securing the Trex Railing to the 4X4 Post is an important step in ensuring a sturdy and long-lasting railing system for your outdoor space. By properly attaching the railing components to the 4X4 post, you can create a safe and visually appealing railing that complements your Trex decking. In this section, we will guide you through the process of securing the Trex railing to the 4X4 post, covering the key steps: attaching the bottom rail to the 4X4 post, installing the balusters or spindles, and attaching the top rail to complete the Trex railing system.
Attaching the Bottom Rail to the 4X4 Post
Before you begin, make sure that your 4X4 posts are securely in place and level. Then, proceed with attaching the bottom rail to the 4X4 post.
- Position the bottom rail on the 4X4 post so that the baluster holes align with the post.
- Using stainless-steel screws or the provided railing hardware, secure the bottom rail to the post. Make sure to follow the manufacturer’s instructions for the specific Trex railing system you are installing.
- Double-check that the bottom rail is level and properly aligned before moving on to the next step.
Installing the Balusters or Spindles
Once the bottom rail is securely attached to the 4X4 post, it’s time to install the balusters or spindles, depending on your preferred railing design.
- Start by inserting each baluster or spindle into the designated holes in the bottom rail.
- Make sure each baluster is securely in place before proceeding to the next one.
- Check that the spacing between each baluster is consistent to ensure both safety and visual appeal.
Attaching the Top Rail to Complete the Trex Railing System
Now that the bottom rail and balusters are installed, it’s time to attach the top rail to complete your Trex railing system.
- Position the top rail over the balusters, ensuring that the rail aligns with both the bottom rail and the 4X4 post.
- Use the provided hardware or screws to secure the top rail to the post, following the manufacturer’s instructions.
- Ensure that the top rail is level and securely fastened before finishing off the installation.
By following these steps, you can successfully secure your Trex railing to the 4X4 post, creating a sleek and secure railing system for your outdoor space. Remember to always refer to the manufacturer’s instructions for specific guidance on your Trex railing system, as the installation process may vary slightly depending on the product you choose.
Adding Finishing Touches To Your Trex Railing And 4X4 Post
Concealing the Mounting Hardware for a Seamless Look
When it comes to installing a 4X4 post for your Trex railing, it’s essential to pay attention to the finishing touches. Concealing the mounting hardware is one crucial step that helps achieve a seamless and polished appearance. By hiding the hardware, you can create an elegant and cohesive look that enhances the overall aesthetic.
To achieve this seamless appearance, start by using post mounts or flanges specifically designed for Trex railing systems. These mounts are concealed within the post, offering a clean and professional finish. Additionally, they provide structural support and stability to your railing, ensuring it stays secure for years to come.
By choosing the right mounting hardware and concealing it effectively, you can achieve a sleek finish that highlights the beauty of your Trex railing without any distracting elements.
Applying Protective Coating to the 4X4 Post
Protecting your 4X4 post is crucial for its longevity and durability. Applying a protective coating not only helps preserve the appearance but also shields the post from environmental elements that could potentially damage it over time. By following these steps, you can ensure your post remains in excellent condition for years to come:
- Start by cleaning the 4X4 post thoroughly to remove any dirt, dust, or other debris.
- Once clean, allow the post to dry completely before applying any protective coating.
- Choose a high-quality protective coating specifically designed for outdoor use and compatible with the material of your post.
- Apply the protective coating evenly, following the manufacturer’s instructions.
- Allow the coating to dry completely before proceeding with the installation of your Trex railing.
By taking the time to apply a protective coating to your 4X4 post, you are investing in its longevity and ensuring it continues to withstand the test of time and the elements.
Regular Maintenance and Inspection for Longevity
To ensure the longevity and safety of your Trex railing and 4X4 post, regular maintenance and inspection are essential. By following these simple steps, you can keep your railing in top-notch condition:
- Regularly inspect the post for any signs of damage, such as cracks, warping, or splintering.
- Check the mounting hardware and connections to ensure they are secure and tight.
- Remove any dirt, debris, or mildew using a soft brush or cloth.
- Inspect the protective coating and reapply as necessary to maintain its effectiveness.
- Finally, give your Trex railing a quick visual inspection to ensure all components are in good condition and functioning properly.
By performing these simple maintenance tasks regularly, you can identify and address any issues promptly, prolonging the lifespan of your Trex railing and 4X4 post.
Frequently Asked Questions
How Do You Install 4X4 Deck Rail Posts?
To install 4×4 deck rail posts, follow these steps: 1. Position the post at the desired location 2. Use a level to ensure it is plumb 3. Attach the post to the deck using appropriate brackets or hardware 4. Secure the post using screws or nails 5.
Repeat the process for the remaining posts.
How Do You Attach A Trex Post?
To attach a Trex post, follow these steps: 1. Position the post where desired. 2. Drill pilot holes into the post and deck. 3. Insert galvanized lag screws or carriage bolts through the holes. 4. Tighten the screws/bolts using a wrench or socket set.
5. Confirm the post is securely attached.
How Do You Secure A 4X4 Post To A Deck?
To secure a 4×4 post to a deck, follow these steps: 1. Position the post in the desired location on the deck. 2. Level the post and mark the location for drilling. 3. Drill pilot holes through the post and into the deck.
4. Attach the post to the deck using lag screws or structural screws. 5. Make sure the post is securely fastened before continuing with deck construction.
How Do You Install Trex Railing Post Sleeves?
To install Trex railing post sleeves, follow these steps: 1. Measure and cut the post sleeve to the desired height. 2. Slide the post sleeve over the post and secure with brackets or screws. 3. Attach the railing connectors to the sleeve and insert the railings.
4. Ensure the sleeve is leveled and tighten all connections. 5. Finish by adding post caps for a polished look.
Conclusion
Installing 4×4 posts for Trex railing is a crucial step towards creating a sturdy and beautiful outdoor living space. By following the correct installation process, you can ensure the safety and durability of your railing. Remember to choose the right materials, measure accurately, and secure the posts properly.
With the detailed instructions provided in this blog post, you’ll be well-equipped to complete the installation successfully. Enjoy your newly installed Trex railing and make the most of your outdoor area.