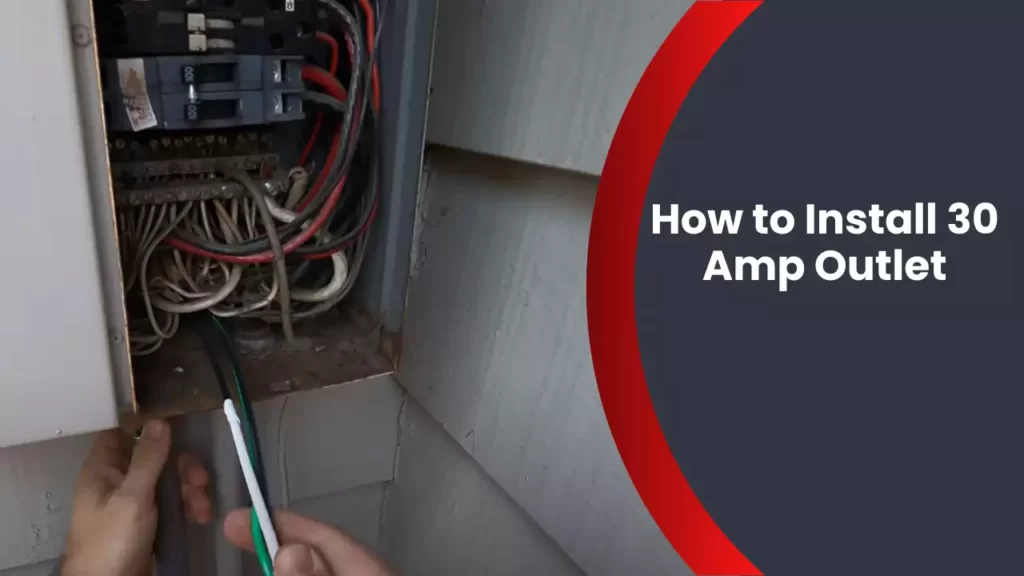
To install a 30 Amp outlet, you need to purchase a 30 Amp receptacle and a double-pole circuit breaker, install the breaker in the electrical panel, run the appropriate wiring, and connect the wires to the receptacle. Before starting the installation, always prioritize safety and ensure the power is turned off at the breaker.
Introducing a 30 Amp outlet to your electrical system can expand your available power options and accommodate larger appliances or devices that require a higher amperage. Whether you’re setting up a workshop, adding an RV hookup, or upgrading your home’s electrical capabilities, installing a 30 Amp outlet allows for greater versatility in the use of electrical appliances.
This guide will walk you through the steps required to safely and correctly install a 30 Amp outlet. By following the guidelines and using proper equipment, you can successfully complete this electrical installation. Remember, if you’re uncomfortable with any step of the process, it’s best to consult a professional electrician.
Understanding The Basics Of Electrical Outlets
Electrical outlets are an essential part of any home or building, providing the necessary power supply for various appliances and devices. Understanding the basics of electrical outlets is important, especially when it comes to installing a 30 amp outlet. In this section, we will explore the different types of electrical outlets and why a 30 amp outlet is required for specific appliances.
Different Types of Electrical Outlets
There are several types of electrical outlets, each designed to accommodate different voltages and amperages. Knowing the type of outlet you need is crucial for ensuring proper electrical supply to your appliances. Below are some commonly used types of electrical outlets:
| Type | Amperage | Voltage | Usage |
|---|---|---|---|
| Standard 15 Amp Outlet | 15 amps | 120 volts | Most household appliances |
| 20 Amp Outlet | 20 amps | 120 volts | High-demand appliances like refrigerators |
| 30 Amp Outlet | 30 amps | 240 volts | Large appliances such as electric dryers and ranges |
As you can see, a 30 amp outlet provides a higher amperage and voltage supply compared to standard 15 or 20 amp outlets. This makes it suitable for powering larger appliances that require more electricity to operate efficiently.
Why a 30 Amp Outlet is Required for Specific Appliances
Specific appliances, such as electric dryers and ranges, require a 30 amp outlet to function properly. These appliances draw a significant amount of power and need a stronger electrical supply to meet their energy demands. A 30 amp outlet provides the necessary capacity to handle the load these appliances generate, ensuring optimal performance and preventing electrical hazards.
Installing a 30 amp outlet requires careful consideration and adherence to electrical codes and safety guidelines. It is recommended to hire a qualified electrician to handle the installation process to guarantee proper wiring and connection that complies with the necessary standards.
Now that you have a better understanding of the basics of electrical outlets and the importance of a 30 amp outlet for specific appliances, you can make an informed decision when it comes to installing the right outlet for your needs.
Assessing The Electrical Needs Of Your Appliances
When it comes to installing a 30 amp outlet, it is crucial to assess the electrical needs of your appliances. This step is essential to determine if your current electrical setup can handle the demand of a 30 amp outlet and to identify the ideal location for it. By understanding the electrical requirements of your appliances and considering factors like their power consumption and usage, you can ensure a safe and efficient installation process. Let’s dive deeper into the key aspects you need to consider.
Determine the Electrical Requirements of Your Appliances
The first step in assessing your electrical needs is to determine the specific electrical requirements of your appliances. Each appliance typically has a rating, expressed in volts, amps, or watts, which indicates the amount of electrical power it requires to operate effectively.
To find this information, refer to the manufacturer’s documentation, labels, or the appliance’s data plate. Look for details like voltage, amperage, and wattage. Additionally, consider the nature of the appliance and how often it is used. Appliances that draw a significant amount of power, such as electric dryers or ovens, may require a 30 amp outlet to operate optimally.
Identifying the Ideal Location for the Outlet
After determining the electrical requirements of your appliances, the next step is to identify the ideal location for the 30 amp outlet. This location should be conveniently accessible and close to where you will be using the high-powered appliances.
Consider the proximity to the main electrical panel so that the wiring can be easily connected. The outlet should also be positioned to minimize the length of electrical wiring needed, as longer wiring can result in voltage drop and reduced efficiency.
Furthermore, take into account any local electrical codes or regulations that may dictate the positioning of the 30 amp outlet. These regulations ensure safety and compliance with local standards.
To make the installation process smoother, it’s recommended to consult an electrician who can provide expert guidance on the ideal location based on your specific setup and needs.
Assessing the electrical needs of your appliances and identifying the ideal location for the 30 amp outlet are crucial steps in ensuring a successful installation. By considering factors such as the electrical requirements of your appliances and the location for the outlet, you can create a safe and efficient electrical setup in your home. So, take the time to gather the necessary information, consult professionals if needed, and enjoy the benefits of a properly installed 30 amp outlet!
Tools Required For The Installation Process
When it comes to installing a 30 Amp outlet, having the right tools is essential. The correct tools not only make the installation process easier but also ensure safety and efficiency. In this section, we will discuss the tools you will need for a successful installation. Let’s dive in!
Screwdriver
A screwdriver is an indispensable tool for any electrical installation. It helps you tighten or loosen screws and connect wires securely. For installing a 30 Amp outlet, you will need a flat-head or Phillips screwdriver, depending on the type of screws used in the outlet and junction box.
Wire Strippers
Wire strippers are necessary for removing the insulation from electrical wires. They allow you to expose the conductive copper wire without damaging it. For a 30 Amp outlet installation, you will need wire strippers capable of handling the wire gauge specified for the project, usually around 10 AWG.
Voltage Tester
Before working on any electrical installation, it is crucial to ensure that the power is turned off. A voltage tester helps you determine if there is any electrical current running through the wires. This tool provides an added layer of safety, preventing accidental shocks or electrocution. Make sure to have a voltage tester on hand before starting the installation process.
Now that we have discussed the essential tools, let’s move on to the installation process itself. Keep in mind that safety should always be the top priority when working with electricity. If you are unsure or uncomfortable with any part of the installation, it is best to consult a professional electrician.

Materials Required For The Installation Process
When it comes to installing a 30 Amp outlet, you’ll need a few essential materials to ensure a safe and efficient installation process. These materials not only provide the necessary components for the job, but they also contribute to the reliability and longevity of your electrical setup. Let’s take a look at the key materials required for the installation:
30 Amp Outlet
The 30 Amp outlet is the primary component you’ll need for this installation. This outlet is specifically designed to handle heavy electrical loads of up to 30 Amps. It is different from standard and lower amp outlets, as it has larger prongs and a distinct configuration to accommodate the higher electrical current. Ensure you purchase an outlet that is compatible with your specific electrical requirements.
Electrical Wire
Electrical wire is an essential material for the installation process, as it serves as the conduit for the electrical current. It is important to choose the appropriate wire gauge to handle the 30 Amp load. For this installation, a 10-gauge wire is typically recommended to ensure it can safely carry the current without overheating. Remember, using a wire with a lower gauge may result in increased electrical resistance and potential hazards. Always consult a professional if you are unsure about the wire gauge required for your installation.
Wire Connectors
Wire connectors play a critical role in joining the various wires together securely. These connectors ensure proper electrical connectivity and help prevent any loose connections or exposed wires. When installing a 30 Amp outlet, it is crucial to choose wire connectors that are suitable for the wire gauge being used, as well as the specific application. You can opt for wire nuts, crimp connectors, or other types of connectors depending on your preference and the wiring setup.
In conclusion, installing a 30 Amp outlet requires a few essential materials, including the outlet itself, electrical wire of the appropriate gauge, and wire connectors. By using the correct materials and adhering to appropriate installation practices, you can ensure a safe and reliable electrical setup. Remember, if you are unsure about any aspect of the installation process, it is always best to consult a qualified electrician.
Step-By-Step Guide On Safety Precautions
When it comes to installing a 30 Amp outlet, safety should always be the top priority. Following the proper safety precautions is crucial to prevent accidents, injuries, and electrical hazards. In this step-by-step guide, we will walk you through the necessary safety measures to take before starting the installation process. Let’s get started!
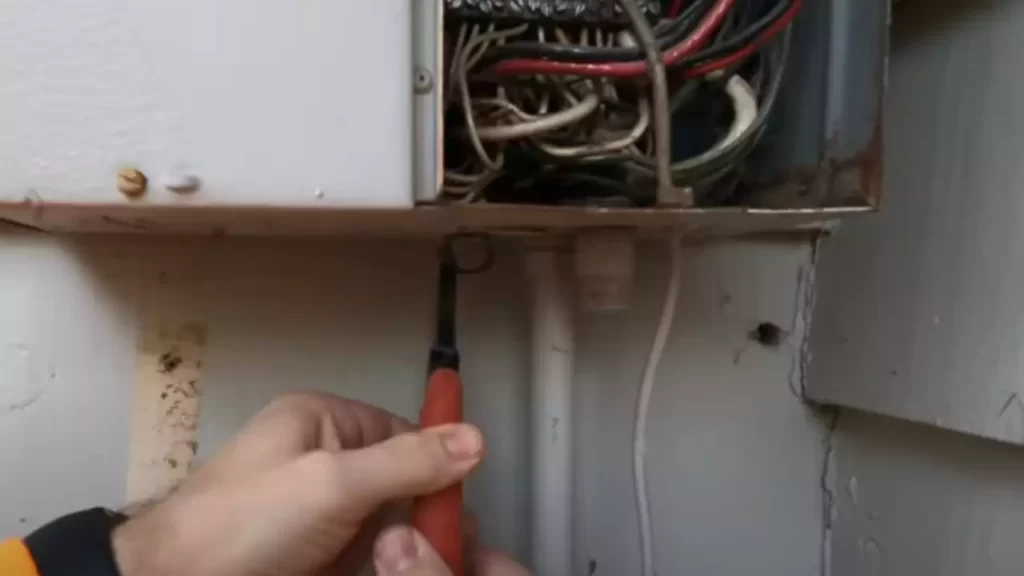
Shut Off the Power
The first and most important step in ensuring your safety during the installation is to shut off the power. It is crucial to cut off the electrical supply to the outlet to avoid any potential danger.
To shut off the power:
- Locate your main electrical panel in your home.
- Open the panel cover using a screwdriver or a provided key.
- Locate the circuit breaker that supplies power to the area where you’ll be installing the 30 Amp outlet.
- Switch off the corresponding breaker by flipping it to the “Off” position.
Use Proper Protective Gear
Before starting any electrical work, it is vital to protect yourself by wearing the right gear. Here are some essential safety equipment to use:
- Insulated gloves: Protect your hands from electrical shocks.
- Safety goggles: Shield your eyes from any potential sparks or debris.
- Protective clothing: Wear clothing made of non-conductive materials.
- Rubber-soled shoes: Prevent electrical grounding and provide better traction.
Test for Electrical Current
Prior to beginning the installation, it’s important to test for electrical current. This step ensures that the power is completely off and further minimizes the risk of electric shock.
To test for electrical current:
- Use a voltage tester or multimeter to check if there is any live electricity flowing through the wires.
- Place the tester leads on the exposed wires and check for any voltage readings.
- If the tester confirms an electrical current, double-check that you have turned off the correct circuit breaker.
- Only proceed with the installation once you have confirmed that there is no electrical current present.
By following these safety precautions – shutting off the power, wearing proper protective gear, and testing for electrical current – you can significantly reduce the risk of accidents or electric shocks during the installation of your 30 Amp outlet. Remember, safety should always come first when working with electricity!
Different Types Of Wiring Configurations
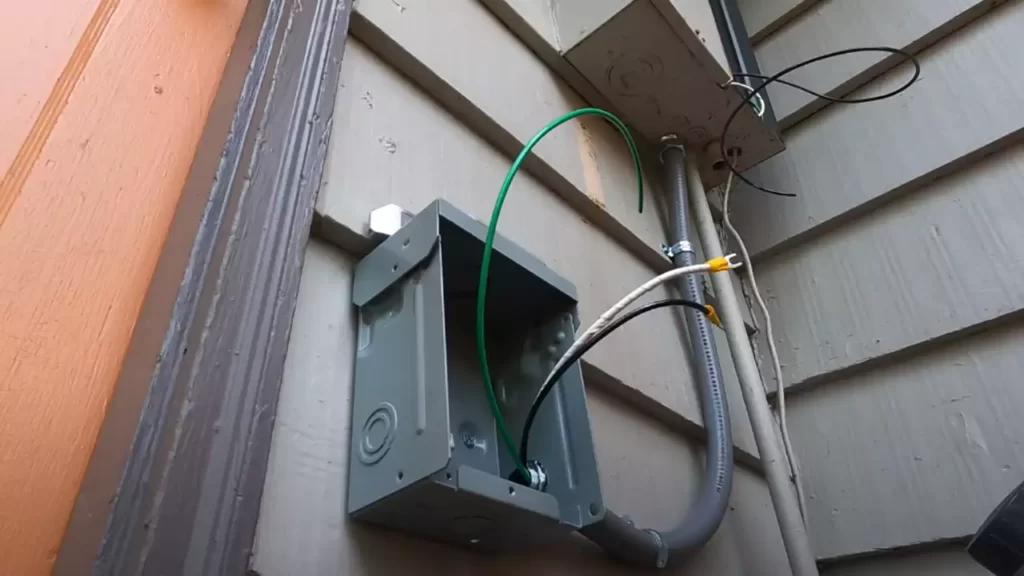
3-Wire Connection
A 3-wire connection is a common method used to install a 30 amp outlet. In this configuration, you’ll have three wires – one black (hot), one white (neutral), and one green or bare copper wire (ground). The black wire carries the power from the circuit breaker to the outlet, while the white wire acts as the return path for the current, and the green or bare copper wire provides a safe path for any electrical faults.
Before proceeding with the installation, make sure to turn off the power to the circuit at the main electrical panel and verify that no voltage is present by using a non-contact voltage tester. This simple safety step can help prevent electric shock or damage to the equipment.
Once you’ve confirmed the power is off, you can start the installation process. Begin by locating a suitable area on the wall where you want to mount the 30 amp outlet. Ensure it is easily accessible and at a convenient height. Remember, safety is paramount, so ensure the outlet is not near any flammable materials or potential sources of water.
4-Wire Connection
A 4-wire connection is another option for installing a 30 amp outlet and is commonly used in newer homes. This configuration includes four wires – two hot wires (usually black and red), one white neutral wire, and one green or bare copper wire for grounding purposes.
Similar to the 3-wire connection, turning off the power and using a non-contact voltage tester is crucial. Once you’ve taken the necessary safety precautions, you can proceed with the installation.
When connecting the wires to the outlet, it’s important to follow the manufacturer’s instructions and adhere to the specific color coding indicated. Usually, the black and red wires are attached to the hot terminals, the white wire connects to the neutral terminal, and the green or bare copper wire attaches to the grounding terminal.
By utilizing a 4-wire connection, you’ll have the advantage of separating the ground and neutral wires, which provides an extra layer of safety. This separation is especially important for specific appliances that require a dedicated ground, such as electric dryers or ranges.
In conclusion, understanding the different types of wiring configurations for a 30 amp outlet is essential before starting the installation process. Whether you choose a 3-wire or 4-wire connection, always prioritize safety and follow the proper guidelines to ensure a secure and properly functioning electrical outlet.
Connecting Wiring To The Outlet
Connecting the wiring to the outlet is a crucial step when installing a 30 Amp outlet. This process ensures that the electrical current flows safely and efficiently through the wiring and into the outlet terminals. In this section, we will guide you through each step of this process, from stripping the wires to attaching them to the outlet terminals. By following these instructions, you will be able to successfully complete the wiring connection and have your 30 Amp outlet ready for use.
Strip the Wires
The first step in connecting the wiring to the outlet is to strip the wires. This involves removing the protective insulation from the ends of the wires to expose the conductive copper. To strip the wires, follow these steps:
1. Use wire strippers to carefully remove approximately 3/4 of an inch of insulation from the ends of the wires. Use caution to avoid cutting into the copper strands.
2. Once the insulation is removed, you should have a clean, exposed section of copper wire at the end.
Attach Wires to the Outlet Terminals
With the wires stripped, it’s time to attach them to the outlet terminals. Each wire will be connected to a specific terminal on the outlet. Follow these instructions to ensure a proper connection:
1. Locate the terminal screws on the outlet. These screws are typically color-coded, with brass screws for the hot wires (black or red), silver screws for the neutral wire (white or gray), and a green screw for the ground wire (bare copper or green).
2. Insert the end of the hot wire into the brass screw terminal and tighten the screw securely. Repeat this step for each hot wire.
3. Insert the end of the neutral wire into the silver screw terminal and tighten the screw securely. Repeat this step for each neutral wire.
4. Insert the end of the ground wire into the green screw terminal and tighten the screw securely.
5. Once all the wires are attached to the terminals, double-check that each connection is secure and tight. This will ensure a proper electrical connection.
Keep in mind that the specific wiring instructions may vary based on the type of outlet you are installing and the electrical code in your area. It is always recommended to consult a professional electrician or reference the manufacturer’s instructions for your specific outlet and wiring requirements.
By following these steps and ensuring a secure wiring connection, you can confidently proceed with the installation of your 30 Amp outlet.
Step-By-Step Guide On Testing The Outlet
Now that you have successfully installed your 30 Amp outlet, it’s time to test it to ensure it is functioning properly. This step-by-step guide will walk you through the process of testing the outlet and verifying its proper connection. Remember, safety is always a top priority when working with electrical installations, so make sure to take the necessary precautions.
Use a Voltage Tester
Before you start testing the outlet, it’s important to use a voltage tester to ensure there is no electrical current flowing through it. This will help prevent any potential accidents or hazards. Here’s how to do it:
- Turn off the power to the outlet by switching off the circuit breaker or removing the fuse that controls it.
- Insert the voltage tester into each slot of the outlet. The tester should indicate whether there is any voltage present in the outlet.
- If the voltage tester shows no voltage, proceed to the next step. However, if you do detect voltage, stop immediately and consult a professional electrician to investigate the issue further.
Verify Proper Connection
Once you have confirmed that there is no electrical current present, it’s time to verify the proper connection of your 30 Amp outlet. Follow these steps:
- Visually inspect the outlet for any loose connections or obvious signs of damage.
- Ensure that all the wires are securely tightened and properly connected to the corresponding terminals of the outlet.
- Using a screwdriver or an appropriate tool, gently tug on the wires to make sure they are tightly held in place.
- If everything looks secure and in place, you can proceed to the final step.
Congratulations! You have successfully installed your 30 Amp outlet and tested its functionality. By following this step-by-step guide on testing the outlet, you can ensure that your electrical installation meets the necessary safety standards and functions as intended. However, always remember that if you encounter any issues or uncertainties during the process, it is best to seek assistance from a qualified electrician.
Identifying And Fixing Wiring Problems
Identifying and fixing wiring problems is crucial when it comes to installing a 30 amp outlet in your home. Proper wiring is essential for safety and to ensure that your outlet can handle the electrical load it’s designed for.
Overheating
One of the common wiring issues you may encounter is overheating. Overheating occurs when the electrical wires are not properly connected or when there is excessive electrical resistance in the circuit. This can lead to dangerous situations, including fire hazards and damage to your electrical equipment.
To identify and fix overheating problems, you should:
- Inspect the wires for any signs of damage, such as frayed insulation or exposed wires.
- Check for loose connections at the outlet, junction box, or circuit breaker.
- Ensure that the wires are of the appropriate gauge for the amp rating of the outlet.
- Make sure the electrical load does not exceed the capacity of the outlet.
- Consider installing a GFCI (Ground Fault Circuit Interrupter) outlet, which can help prevent overheating due to electrical faults.
By addressing overheating issues promptly and taking necessary precautions, you can ensure the safety and functionality of your 30 amp outlet.
Short Circuits
Another wiring problem that may arise is a short circuit. A short circuit occurs when the flow of current takes an unintended path, bypassing the normal electrical circuit. This can result in tripped circuit breakers, sparks, and even electrical fires.
To identify and fix short circuit problems, follow these steps:
- Inspect the wiring for any exposed or damaged insulation, which can cause wires to come into contact with each other.
- Check for loose connections or wire nuts that have come undone, causing wires to touch.
- Use a multimeter to test for continuity between hot and neutral or hot and ground wires.
- Consider installing AFCI (Arc Fault Circuit Interrupter) protection, which can detect and prevent short circuits caused by arcing.
By promptly addressing short circuit problems and implementing preventive measures, you can minimize the risk of electrical hazards and ensure the smooth operation of your 30 amp outlet.
Dealing With Outlet Malfunctions
Dealing with Outlet Malfunctions
Tripping Circuit Breakers
One of the common issues you might encounter when dealing with a 30 amp outlet installation is tripping circuit breakers. A circuit breaker is designed to protect your electrical system from overloading, which can cause damage or even fire hazards. If you find that your circuit breaker keeps tripping when you connect or use your 30 amp outlet, it’s essential to address the issue promptly.
To identify the cause of the circuit breaker tripping, follow these steps:
- First, make sure that your outlet is rated for 30 amps. A lower-rated outlet can overload the circuit and trip the breaker.
- Check if you are using any other high-power devices on the same circuit. The combined load may be exceeding the circuit’s capacity.
- Inspect the wiring for any signs of damage or loose connections. Faulty or damaged wiring can cause short circuits, leading to breaker tripping.
If you are unable to pinpoint the exact cause of the circuit breaker trips, it is advisable to consult a qualified electrician. They will have the necessary expertise to diagnose and resolve the issue safely.
Faulty Connections
Another issue that can arise during a 30 amp outlet installation is faulty connections. Poor or loose connections can lead to electrical hazards, including electrical shock and fires. Therefore, it is crucial to ensure that all connections are secure and properly installed.
Here are some key steps to check and address faulty connections in your 30 amp outlet:
- Ensure that the wires are securely attached to the outlet’s terminals. If any wires are loose, tighten them using the appropriate tools.
- Inspect the wires for any signs of damage, such as fraying or exposed copper. If you notice any damaged wires, replace them immediately.
- Use a voltage tester to validate that the connections are electrically sound. This step will help confirm if power is flowing correctly through the outlet.
Remember, if you are not confident in your electrical skills, it’s always best to consult a qualified electrician to address any faulty connections with your 30 amp outlet accurately.
Frequently Asked Questions
How Do I Add A 30 Amp Rv Outlet To My House?
To add a 30 amp RV outlet to your house, follow these steps: 1. Identify a suitable location near your electrical panel. 2. Install a double-pole 30 amp circuit breaker in the electrical panel. 3. Run a 10-gauge, 3-wire cable from the panel to the chosen location.
4. Install a weatherproof RV outlet box and connect the wires to it. 5. Test the outlet to ensure it is properly functioning. Seek an electrician’s help if needed.
How Is A 30 Amp Rv Plug Wired?
A 30 amp RV plug is wired with three prongs: one for the ground, one for the neutral, and one for the hot wire. The hot wire carries the electrical current, while the neutral wire returns the current to its source.
The ground wire provides safety in case of a short circuit.
How To Wire A 30 Amp Service?
To wire a 30 amp service, follow these steps: 1. Turn off the power supply. 2. Install a 30 amp double-pole breaker in your main electrical panel. 3. Connect the black and red wires from the breaker to the hot bus bars, and the white wire to the neutral bus bar.
4. Connect the green or bare copper wire to the grounding bus bar. 5. Finally, connect the wiring to your 30 amp service outlet. Remember to use appropriate wire sizes and follow electrical codes for safety.
Can You Replace A 50 Amp Outlet With A 30 Amp Outlet?
No, a 50 amp outlet cannot be replaced with a 30 amp outlet because they have different power capacities. It is essential to use the appropriate outlet for the electrical requirements to ensure safety and prevent circuit overloads.
Conclusion
Installing a 30 Amp outlet is a straightforward process that can provide you with a reliable power source for heavy-duty electrical appliances. By carefully following the steps outlined in this guide, you can ensure a safe and efficient installation. Remember to always prioritize safety and consult a professional electrician if needed.
Enjoy the convenience and power that a 30 Amp outlet brings to your home!