To install a 3 prong outlet, first, turn off the power supply to the circuit. Then, remove the existing outlet and disconnect the wires.
Finally, connect the new outlet, ensuring the black wire is connected to brass screws, the white wire to silver screws, and the green or bare wire to the green screw. Make sure all connections are secure and cover the outlet with a wall plate.
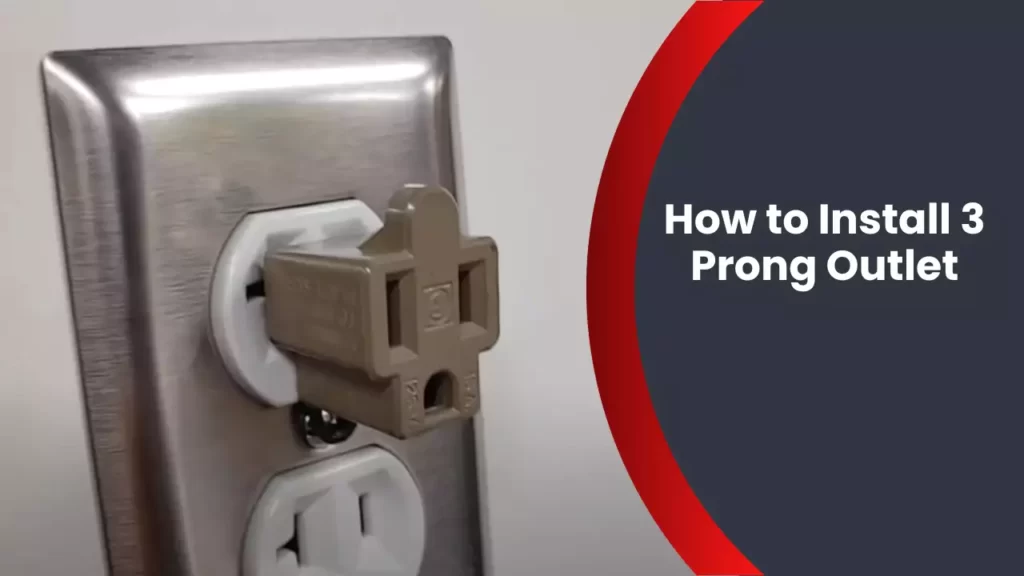
Introducing a new electrical outlet in your home can provide convenience and functionality for your devices. Whether you’re replacing a broken outlet or upgrading from a 2 prong to a 3 prong outlet, the installation process is relatively straightforward. However, it’s important to follow safety precautions and ensure proper wiring to avoid any electrical hazards. We will guide you through the step-by-step process of installing a 3 prong outlet, allowing you to complete the task with confidence and ease. So let’s get started!
Understanding The Different Types Of Outlets
When it comes to electrical outlets, understanding the different types is crucial for a safe and functional electrical system. Two of the most common types of outlets are the three-prong outlets and the two-prong outlets. In this article, we will dive deeper into these outlets, exploring their advantages, limitations, and the importance of grounding in electrical systems.
Three-prong outlets and their advantages
Three-prong outlets, also known as grounded outlets, are the most commonly used outlets in modern homes and buildings. They are easily recognizable due to their three slots, with two vertical slots and one larger grounding slot. These outlets offer several advantages over their two-prong counterparts.
Advantages of three-prong outlets include:
- Improved safety: The grounding slot in three-prong outlets provides a dedicated path for electrical currents to safely dissipate, reducing the risk of electrical shocks.
- Ability to handle higher loads: Three-prong outlets can handle larger electrical loads, making them suitable for appliances and devices that consume more power.
- Compatibility with modern equipment: Many modern appliances and electronic devices come with three-prong plugs, requiring a grounded outlet for proper operation and safety.
Two-prong outlets and their limitations
Two-prong outlets, also known as ungrounded outlets, were commonly used in older homes and buildings before the implementation of grounded electrical systems. These outlets have only two slots, which can pose certain limitations.
Limitations of two-prong outlets include:
- Reduced safety: Without a grounding slot, two-prong outlets provide less protection against electrical shocks, especially in the presence of faulty or malfunctioning equipment.
- Compatibility issues: Many modern appliances and electronic devices come with three-prong plugs, which cannot be directly plugged into two-prong outlets without using adapters. However, it’s important to note that using adapters does not provide the same level of safety as a properly grounded outlet.
- Limited capacity: Two-prong outlets are generally not designed to handle larger electrical loads, limiting their use to low-power devices and lighting fixtures.
The importance of grounding in electrical systems
Grounding is a critical aspect of electrical systems that ensures safety and minimizes the risk of electrical hazards. Essentially, grounding provides a path for electrical currents to flow safely into the ground, preventing the build-up of excess voltage and reducing the likelihood of electrical shocks.
Proper grounding is vital for numerous reasons:
- Electrical fault protection: Grounding helps in detecting and redirecting the flow of electrical currents during faults or accidents, preventing damage to equipment and minimizing the risk of electrical fires.
- Static discharge: Grounding helps in dissipating static electricity, which can accumulate in certain equipment, reducing the risk of damage or data loss.
- Protection against power surges: Grounding provides a pathway for excess electrical energy during power surges, protecting sensitive electronic devices from damage.
In conclusion, understanding the different types of outlets is essential for maintaining a safe and functional electrical system. Three-prong outlets offer improved safety and compatibility with modern equipment, while two-prong outlets come with limitations and reduced safety. Additionally, grounding plays a crucial role in electrical systems, ensuring protection against electrical hazards and extending the lifespan of equipment and devices.
Essential Tools For The Installation
To install a 3 prong outlet, you’ll need a few essential tools to get the job done efficiently and safely. These tools will help you in every step of the installation process, ensuring that you have everything you need at your fingertips. So, let’s take a look at the must-have tools for installing a 3 prong outlet.
Screwdrivers, Pliers, and Wire Cutters
The first set of tools you’ll need for installing a 3 prong outlet are screwdrivers, pliers, and wire cutters. These tools are essential for removing the old outlet, connecting the wires to the new outlet, and securing it in place. Here’s a breakdown of how each tool plays a role in the installation process:
– Screwdrivers: You’ll need a screwdriver to loosen and remove the screws that hold the old outlet in place. Make sure you have both a flat-head and a Phillips-head screwdriver on hand, as different outlets may require different types of screws.
– Pliers: Pliers provide a strong grip, making it easier to disconnect the old outlet from the wires and tighten the screws on the new outlet. They come in handy when you need extra leverage or want to hold small components firmly.
– Wire Cutters: Wire cutters are used to trim the wires to the appropriate length and strip the insulation off the ends. They ensure that the wires are ready for connection to the new outlet and help prevent any short circuits or improper connections.
Voltage Tester and Wire Strippers
Another set of tools you’ll need for a successful 3 prong outlet installation is a voltage tester and wire strippers. These tools are crucial for ensuring the electrical safety of your installation and maintaining proper connections. Let’s take a closer look at each tool:
– Voltage Tester: Before starting the installation, it’s essential to use a voltage tester to check if the power is off. This prevents any accidents or electric shocks. Make sure to follow safety precautions and confirm that there is no live current running through the wires before proceeding.
– Wire Strippers: Wire strippers are designed to remove the insulation from the ends of the wires without damaging the conductors. This step is crucial as it allows for a clean and secure connection between the wires and the new outlet. Make sure to choose a wire stripper that matches the gauge of the wires being used.
Outlet Tester and Electrical Tape
Lastly, an outlet tester and electrical tape are indispensable tools to ensure a successful installation and proper functioning of the new 3 prong outlet. Here’s how these tools aid in the process:
– Outlet Tester: An outlet tester is used to verify that the wiring has been done correctly. It allows you to check if the outlet is wired correctly, if there are any miswired connections, or if there are any electrical faults. With an outlet tester, you can identify and fix any issues before using the outlet.
– Electrical Tape: Electrical tape is used to insulate the exposed wires and secure the connections. It adds an extra layer of protection against accidental contact and helps prevent unwanted electrical hazards. Remember to wrap the exposed wires tightly with electrical tape to ensure a secure and reliable connection.
By having these essential tools at your disposal, you’ll be well-equipped to install a 3 prong outlet with ease. Remember to always prioritize safety and follow proper electrical procedures throughout the installation process.

Required Materials For The Installation
Before you start installing a three-prong outlet, it’s essential to ensure you have all the necessary materials at hand. This will save you time and make the process smoother. Here are the key materials you will need:
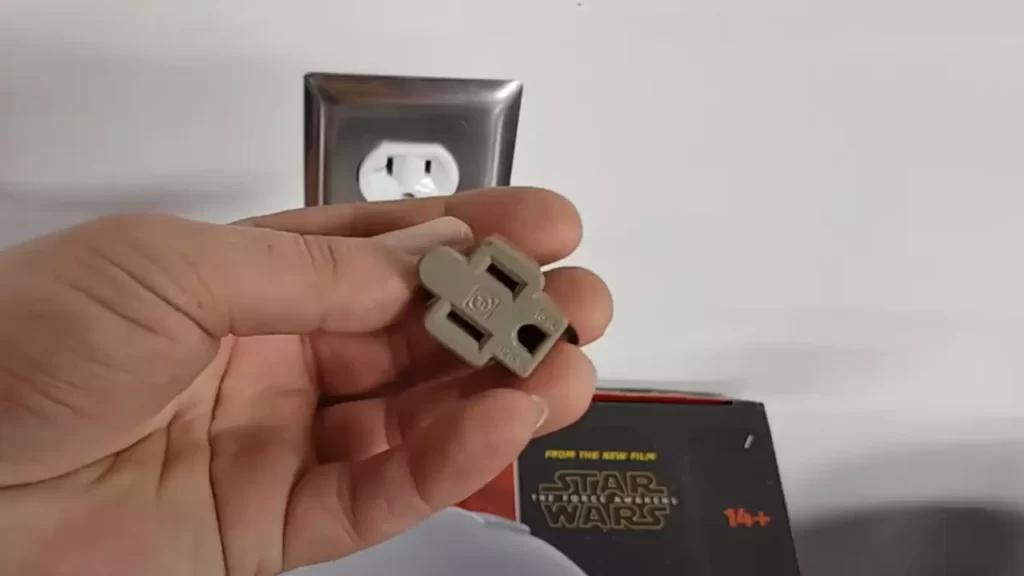
Three-prong outlets and faceplates
The first and most crucial material you will need is the three-prong outlets themselves. These outlets are designed to provide a reliable and safe connection for your electrical devices. Additionally, you will also need faceplates, which are the coverings for the outlets that add a finishing touch to the installation. Faceplates come in various designs and finishes, allowing you to choose one that matches your style and complements your home decor.
Electrical wire and wire connectors
Electrical wire is essential for connecting the three-prong outlets to the power source. You will need a suitable gauge wire that meets the electrical code requirements for your area. It’s crucial to choose the correct size and type of wire to ensure a safe and reliable connection. Alongside the wire, you will also need wire connectors. These connectors help secure the electrical connections and prevent accidental disconnections, ensuring the safety of your electrical system.
Grounding screws and electrical boxes
In order to properly ground the three-prong outlets, grounding screws are necessary. These screws provide a connection between the outlet and the grounding wire, which is essential for safety and proper functioning. Additionally, electrical boxes are required to house the outlets and protect the wiring connections. Electrical boxes come in different sizes and types, so it’s important to choose one that suits your needs and meets the electrical code requirements.
Cable staples and wire nuts
When installing a three-prong outlet, it’s crucial to secure the electrical wiring properly. Cable staples are used to secure the electrical wire to the wall or ceiling, preventing it from sagging or getting damaged. Wire nuts, on the other hand, are essential for connecting multiple wires together, ensuring a secure and reliable connection. Using the right cable staples and wire nuts will help maintain the integrity of the electrical system and prevent any issues down the line.
By having all these necessary materials ready, you are well-prepared to tackle the installation of a three-prong outlet. Make sure to double-check your supplies before starting the process to avoid any unnecessary delays or trips to the hardware store. Once you have everything you need, you’ll be ready to proceed with confidence.
Safety Precautions To Follow
When installing a 3 prong outlet, it’s essential to prioritize safety to prevent any electrical accidents. Here are some important safety precautions you should follow:
1. Turning off Electricity and Using Voltage Tester
Before you begin any electrical work, make sure to turn off the electricity to the area you’re working in. This can be done by switching off the breaker connected to that particular circuit. It’s crucial not to take any chances and assume the power is off, as it could lead to a dangerous situation.
To confirm that the power is indeed off, always use a voltage tester. This small handheld device is designed to detect the presence of live electrical current. By using a voltage tester, you can verify that the circuit is de-energized before proceeding further. Remember, safety always comes first.
2. Protecting Yourself with Safety Gloves and Goggles
Electrical work involves handling wires, which can pose a risk of injury. To minimize the chances of getting an electric shock or sustaining an injury, it’s vital to wear safety gloves and goggles throughout the installation process. Safety gloves provide insulation and protect your hands from any potential electrical contact, while goggles shield your eyes from sparks or debris.
Always ensure that your safety gloves are in good condition, free of any cuts or tears, and appropriately rated for electrical work. And don’t forget to wear your goggles, even if the job seems simple. Remember, accidents can happen unexpectedly, so it’s essential to take all necessary precautions.
3. Working in a Well-Ventilated Area
When installing a 3 prong outlet, it’s important to work in a well-ventilated area. Proper ventilation helps to dissipate any odors or potentially harmful fumes that may arise during the installation process. This is especially important if you’re working with chemicals, such as adhesives or solvents, which can emit harmful vapors.
Ensure that windows or doors are open to allow fresh air circulation, or consider using a fan or extractor to improve ventilation. By working in a well-ventilated area, you can reduce the risk of exposure to hazardous substances and promote a safer working environment.
It’s crucial to follow these safety precautions to ensure your well-being and avoid any potential electrical hazards during the installation of a 3 prong outlet. Remember, when it comes to electrical work, safety should always be your top priority.
Assessing The Existing Wiring
Identifying the wiring system in your home
Before installing a 3 prong outlet, it’s important to assess the existing wiring in your home to ensure you have the appropriate system in place.
In most homes, you will find one of two common wiring systems: the Knob and Tube system or the Romex system.
The Knob and Tube system is an older wiring method that uses ceramic knobs and tubes to hold and protect the wires. It was commonly used in homes built before the 1950s.
The Romex system, on the other hand, is a more modern wiring method that uses non-metallic sheathed cables. It is commonly found in homes built after the 1950s.
Identifying the wiring system in your home is crucial because it determines the type of 3 prong outlet you will need for installation. The Knob and Tube system requires a different type of outlet compared to the Romex system.
Checking the condition of the existing outlet
Once you have determined the wiring system in your home, the next step is to assess the condition of the existing outlet.
Inspect the outlet for any visible damage, such as cracks or burn marks. These signs indicate potential wiring issues and can pose a safety hazard.
Additionally, ensure the outlet is securely mounted to the wall and that there are no loose connections.
If you notice any damage or loose connections, it’s best to consult a licensed electrician to address the issue before proceeding with the installation of the 3 prong outlet.
Ensuring proper electrical grounding
Proper electrical grounding is essential for the safe operation of your electrical devices. It helps prevent electrical shocks and protects your appliances from power surges.
To ensure proper electrical grounding, check if the existing outlet has a ground wire. The ground wire is typically green or bare copper and is connected to the grounding screw on the outlet.
If your existing outlet does not have a ground wire, you may need to consult an electrician to determine if your wiring system can be updated to include grounding.
Remember, installing a 3 prong outlet without proper grounding can be dangerous and may not comply with electrical codes.
Assessing the existing wiring, checking the condition of the existing outlet, and ensuring proper electrical grounding are crucial steps in installing a 3 prong outlet in your home. By following these steps and consulting a professional if needed, you can ensure a safe and reliable electrical setup.
Shutting Off Power To The Outlet
Before proceeding with any electrical work, it is crucial to ensure your safety by shutting off the power supply to the outlet you plan to install. This step is essential to prevent any accidental electric shocks or short circuits.
Identifying the correct circuit breaker
The first step in shutting off the power supply is to identify the correct circuit breaker that controls the outlet you are working on. This can be done by following these simple steps:
- Locate your main electrical panel, which is usually installed in the basement, garage, or utility room.
- Open the panel door and look for circuit breakers. These are typically rectangular switches with labels indicating different areas or appliances of your home.
- Carefully examine the labels and identify the one that corresponds to the outlet you are working on. If the labels are not clear or missing, you can use a process of elimination by turning off each circuit breaker one at a time and testing the outlet with a voltage tester to see if it’s still receiving power.
Switching off the power supply
Once you have identified the correct circuit breaker, you can proceed to switch off the power supply to the outlet by following these steps:
- Stand in a safe and comfortable position, ensuring that you have a clear view of the circuit breaker.
- Using moderate force, flip the identified circuit breaker switch to the “off” position. You will hear a click sound indicating that the power supply to the outlet has been successfully shut off. It is important to note that some circuit breakers may have a middle “trip” position between “on” and “off”. Make sure the switch is fully in the “off” position.
- As an extra precautionary measure, verify that the power to the outlet is indeed off by testing it with a voltage tester. This handheld device will indicate the presence of electrical current, ensuring that it is safe to proceed with your installation.
By following these steps, you can safely shut off the power supply to the outlet you plan to install. Remember to always prioritize your safety and take necessary precautions while working with electricity.
Removing The Old Outlet
Before you can install a new 3 prong outlet, you’ll need to remove the old one. This process involves unscrewing the faceplate and cover screws, disconnecting the wires from the outlet terminals, and finally removing the old outlet from the electrical box. Let’s break down each step in detail:
Unscrewing the faceplate and cover screws
The first step in removing the old outlet is to unscrew the faceplate and cover screws. These screws secure the faceplate and cover to the outlet and electrical box, ensuring a secure connection. To do this:
- Locate the screws holding the faceplate and cover in place.
- Using a screwdriver, turn each screw counterclockwise to loosen and remove them.
- Set the faceplate and cover aside for reassembly later.
Disconnecting the wires from the outlet terminals
With the faceplate and cover removed, you can now disconnect the wires from the outlet terminals. It’s essential to handle this step with caution to avoid any accidents. Follow these steps:
- Identify the different wires connected to the outlet terminals. Typically, you’ll find a black (hot), white (neutral), and green or bare copper (ground) wire.
- Using pliers or a screwdriver, carefully loosen the terminal screws holding the wires in place.
- Gently pull the wires out of the outlet terminals and let them hang free.
- Ensure that the wires are not touching each other or any metal parts to prevent short circuits.
Removing the old outlet from the electrical box
Now that the wires are disconnected, it’s time to remove the old outlet from the electrical box. This step requires extra care to avoid damaging the box or wires. Follow these instructions:
- Inspect the outlet and identify any additional screws securing it to the electrical box.
- Using a screwdriver, carefully unscrew these screws and set them aside.
- Gently pull the old outlet out of the electrical box, making sure not to tug on the wires.
- Check that all wires are free of the old outlet and properly contained within the electrical box.
Once you’ve removed the old outlet, you’re ready to move on to the next step in the installation process: preparing the new outlet.
Wiring The New Outlet
Once you’ve gathered all the necessary tools and materials and prepared the electrical box, it’s time to wire the new outlet. This step-by-step guide will walk you through the process, ensuring a secure and functioning connection.
Stripping the protective coating from the electric wires
Before connecting the wires to the outlet terminals, you need to strip the protective coating from the ends of the electrical wires. This allows for a clean and proper connection. Follow these steps to strip the wires:
- Gather a wire stripper tool suitable for the gauge of your wires. Choose a slot on the wire stripper that matches the gauge of the wire.
- Hold the wire stripper tool near the end of the wire, with the blade facing the insulation.
- Apply slight pressure on the wire and pull the stripper tool towards the end, scoring the insulation.
- Rotate the wire stripper tool around the wire to complete the cut.
- Grab the end of the insulation with your fingers and gently twist and pull it off the wire.
- Repeat this process for each wire you need to strip.
Attaching the wires to the outlet terminals
Now that the wires are stripped, it’s time to connect them to the outlet terminals. Follow these steps to ensure a secure connection:
- Identify the hot wire, usually black or red, and connect it to the brass or gold screw terminal on the outlet. Loosen the screw terminal, insert the wire into the slot, and tighten the screw to secure the wire.
- Identify the neutral wire, usually white, and connect it to the silver screw terminal on the outlet using the same method as the hot wire.
- Identify the ground wire, usually green or bare copper, and connect it to the green screw terminal on the outlet using the same method as the previous wires.
Using wire connectors for secure connections
To ensure each wire is securely connected to the outlet terminals, it’s recommended to use wire connectors. Wire connectors provide a strong and reliable connection that can withstand the demands of electrical currents. Follow these steps to use wire connectors:
- Strip a small amount of insulation from the end of each wire, if necessary.
- Twist the exposed copper strands of each wire together.
- Place a wire connector over the twisted wires, ensuring all the copper strands are inside the connector.
- Twist the wire connector clockwise until it is tightly secured to the wires.
- Gently tug on each wire to ensure a secure connection.
Congratulations! You have successfully wired the new outlet. Proceed to secure the outlet to the electrical box and test the connection before using.
Grounding The Outlet
Proper grounding of an electrical outlet is essential for the safety and functionality of your electrical system. Grounding ensures that any excess electrical charge is directed safely into the ground, preventing potential electrical shocks or fires. In this section, we will guide you through the process of grounding a 3-prong outlet to ensure a safe and reliable electrical connection.
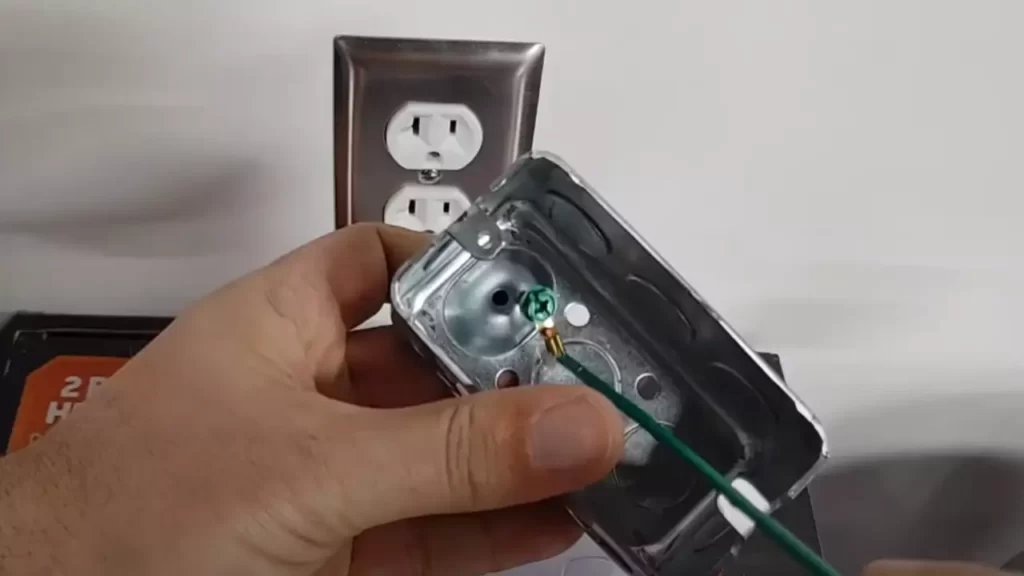
Installing a grounding screw in the electrical box
The first step in grounding your 3-prong outlet is to install a grounding screw in the electrical box. This screw will serve as the connection point for the ground wire. To install the grounding screw, follow these steps:
- Turn off the power to the electrical circuit by switching off the corresponding circuit breaker in your electrical panel.
- Open the electrical box by removing the cover plate.
- Locate the provided hole in the electrical box designated for the grounding screw.
- Insert the grounding screw into the hole and tighten it securely using a screwdriver or an appropriate tool.
- Make sure the grounding screw is flush with the surface of the electrical box.
Connecting the ground wire to the grounding screw
Once you have installed the grounding screw, it’s time to connect the ground wire to it. The ground wire is typically a bare copper wire that is attached to the electrical outlet and runs back to the electrical panel. Follow these steps to connect the ground wire:
- Locate the ground wire coming from the electrical outlet. It is usually green or bare copper.
- Strip approximately 1/2 inch of insulation from the end of the ground wire.
- Wrap the exposed end of the ground wire around the grounding screw in a clockwise direction.
- Tighten the grounding screw to secure the connection. Ensure that the ground wire is securely fastened and cannot easily be pulled out.
Ensuring proper grounding with a voltage tester
To verify that the outlet is properly grounded, it’s important to use a voltage tester. Here’s how you can ensure proper grounding:
- Turn on the power to the electrical circuit by switching on the corresponding circuit breaker in your electrical panel.
- Insert the voltage tester into the outlet and follow the manufacturer’s instructions to test for the presence of voltage.
- If the voltage tester indicates that the outlet is properly grounded, you can proceed with using the outlet.
- If the voltage tester shows no voltage or indicates an open ground, turn off the power and double-check the connections made in the previous steps.
Proper grounding is crucial for the safe operation of your electrical devices and protects you from potential electrical hazards. By following these steps and ensuring a solid grounding connection, you can have peace of mind knowing that your electrical system is secure and reliable.
Testing For Proper Wiring
Using an Outlet Tester to Detect any Wiring Issues
Once you have successfully installed a 3 prong outlet, the next step is to test it for proper wiring. This crucial step ensures that your outlet is functioning correctly and is safe to use. For this task, you will need an outlet tester.
An outlet tester is a small, handheld device that you can easily purchase at your local hardware store. It features a plug that you insert into your newly installed 3 prong outlet. The tester has a series of indicator lights that will provide you with valuable information about the wiring in your outlet.
To use the outlet tester, simply plug it into your outlet and observe the indicator lights. The lights will indicate various issues that may be present, such as reversed hot and neutral wires, open grounds, or open neutrals. Each light corresponds to a specific wiring problem that needs to be addressed.
Checking for Correct Polarity and Grounding
One of the most important aspects of proper wiring is correct polarity and grounding. Polarity refers to the correct connection of hot and neutral wires, while grounding provides protection in case of electrical faults. To ensure that your newly installed 3 prong outlet is properly wired, you need to check for correct polarity and grounding.
To check for correct polarity, use a multimeter. Set the multimeter to the AC voltage setting and insert the probes into the outlet. The reading should show a voltage between 110 and 120 volts. If the reading is significantly higher or lower, there may be a wiring issue that needs to be addressed.
Checking for grounding is also essential. Start by turning off the power to the outlet at the circuit breaker. Use a continuity tester and touch one probe to the grounding wire and the other to a known ground, such as a metal water pipe. If the tester beeps or the light illuminates, the outlet is grounded properly. If not, you will need to ensure that the grounding wire is properly connected.
By following these steps to test for proper wiring, you can ensure that your newly installed 3 prong outlet is safe and functioning correctly. Remember to always exercise caution when working with electricity and to consult a professional if you are unsure about any aspect of the installation process.
Securing The Outlet In Place
Once you have successfully connected the wires to the 3 prong outlet, it is important to secure it properly in place to ensure safety and functionality. Here are the steps to follow:
Placing the outlet back into the electrical box
Begin by carefully inserting the 3 prong outlet back into the electrical box. Ensure that the outlet is positioned correctly, with the grounding screw facing up and the two vertical slots facing downwards. Make sure that the wires are neatly tucked inside the box, without any excess wire protruding.
Screwing in the outlet’s faceplate and cover screws
Next, place the faceplate over the outlet and align it with the screw holes on the outlet and electrical box. Insert the screws provided with the outlet into the screw holes and tighten them using a screwdriver. Be gentle while tightening the screws to avoid damaging the outlet or the electrical box. Ensure that the faceplate fits snugly against the wall surface.
Verifying the outlet is securely attached
Once the faceplate is securely attached, gently pull on the faceplate to check if the outlet is firmly attached to the electrical box. It should not move or wiggle. If there is any looseness, carefully remove the faceplate and re-tighten the screws, making sure they are secure. This step is crucial to prevent any electrical hazards and ensure a safe installation.
By following these steps, you can securely attach the 3 prong outlet in place. Double-check everything to ensure its proper installation. Securing the outlet not only guarantees safety but also helps to maintain the longevity and functionality of the electrical system in your home.
Turning On The Power Supply
Switching on the circuit breaker for the outlet
After successfully installing a new 3 prong outlet, the next crucial step is to turn on the power supply. This is a crucial step that ensures the outlet is ready to use and can provide electricity to the connected devices.
Switching on the circuit breaker is a necessary precaution that helps prevent electrical mishaps. It is important to follow these steps to ensure a safe and successful operation:
- Locate the circuit breaker box in your home or building. This box contains multiple switches or breakers that control different areas or circuits.
- Look for the breaker that corresponds to the newly installed outlet. Most circuit breakers are labeled to indicate which outlets and circuits they control.
- Flip the switch of the corresponding breaker to the ON position. This allows the electricity to flow to the outlet, supplying power.
- Listen for any audible clicks or sounds, indicating that the breaker has been successfully switched on.
Remember, it is crucial to ensure that the breaker is switched on to the correct position to avoid any electrical complications. If you are unsure about which breaker corresponds to the outlet, it is advisable to consult a professional electrician.
Checking if the outlet is receiving power
Once you have switched on the circuit breaker, it is important to verify whether the newly installed 3 prong outlet is receiving power. This step will help confirm that the installation was successful and that the outlet is ready for use. Follow these simple steps to check the power supply:
- Ensure that all connected devices are unplugged from the outlet.
- Use a voltage tester or a multimeter to check if the outlet is receiving power. Insert one prong of the tester into the smaller slot of the outlet and the other prong into the larger slot.
- Observe the indicator on the tester. If it lights up or displays a reading, it means the outlet is receiving power. If there is no response, it indicates a potential issue.
- If the tester indicates that the outlet is not receiving power, double-check the circuit breaker to ensure it is in the ON position. Additionally, make sure there are no tripped GFCI outlets in the vicinity.
- If the problem persists, it may be necessary to troubleshoot or call a professional electrician for assistance.
Remember, safety should always be the top priority when working with electricity. If you are not confident in your ability to handle electrical tasks, it is best to seek professional assistance to avoid any risks or hazards.
Testing The Outlet
Once you have successfully installed your three-prong outlet, it’s important to test its functionality before fully relying on it for your electronic devices. This step will ensure that the outlet is properly wired and provides a safe and reliable power source. Here are two key methods to verify that your three-prong outlet is operating correctly:
Plugging in a device to verify functionality
One way to test your newly installed three-prong outlet is by plugging in a device to verify its functionality. It’s important to choose a device that you know is in proper working condition, such as a lamp or a phone charger. By doing so, you can conduct a simple but effective test.
To start, simply plug in the selected device into the outlet. Make sure it is securely connected and there are no loose connections. Once the device is plugged in, turn it on or check if it starts charging. If the device powers up or charges as expected, this indicates that the outlet is functioning correctly and providing the necessary power.
However, if the device fails to turn on or charge, it may suggest that there is an issue with the outlet’s wiring or connections. In this case, it is advisable to seek professional assistance or investigate further to identify and rectify the problem.
Ensuring the three-prong outlet is operating correctly
In addition to plugging in a device, you can further ensure that the three-prong outlet is operating correctly by performing a visual inspection. This inspection allows you to identify any visible signs of damage or irregularities that may affect the outlet’s performance or safety.
During the visual inspection, check for any loose or exposed wires, fraying insulation, or burn marks around the outlet. These could indicate wiring issues or potential fire hazards. Additionally, ensure that the ground prong is securely attached and intact.
If you notice any abnormalities during the visual inspection, it is crucial to address them promptly. This can involve seeking professional help or replacing the outlet if necessary. An outlet in proper working condition is essential for both the safe operation of your electronic devices and your peace of mind.
By following these testing methods, you can ensure that your newly installed three-prong outlet is functioning correctly and safely. Testing the outlet provides assurance that your electronic devices will have a reliable and secure power source. Remember, if you encounter any issues or doubts, consulting a professional electrician is always a wise decision.
Addressing Possible Issues Or Errors
Addressing Possible Issues or Errors
Troubleshooting common installation problems
Installing a 3 prong outlet can be a relatively straightforward task, but occasionally you might encounter some issues or errors along the way. It’s important to troubleshoot these problems to ensure a safe and efficient installation. Here are some common installation problems you might come across and tips on how to resolve them.
If you’re experiencing issues with the outlet not providing power or functioning properly, there are a few potential causes.
- Faulty wiring connections: One of the most common installation problems is faulty wiring connections. Double-check that all the wires are securely connected to their respective terminals. If there are any loose or damaged wires, replace them as necessary.
- Incorrect wiring: Another problem could arise from incorrect wiring. Ensure that you have followed the correct wiring diagram for your 3 prong outlet. Incorrectly wired outlets can cause electrical shocks or damage to appliances plugged into the outlet. Refer to the manufacturer’s instructions or seek professional advice if you are unsure of the correct wiring.
- Tripped circuit breaker: It’s possible that the circuit breaker protecting the outlet has tripped. Check your circuit breaker panel and look for any switches in the “off” position. If you find one, flip it back on. However, if the circuit repeatedly trips, it could indicate an underlying electrical problem that requires professional assistance.
- Insufficient grounding: A 3 prong outlet needs proper grounding for it to function correctly. If there isn’t sufficient grounding, you may experience issues with the outlet. Consult a professional electrician who can assess the grounding system and make any necessary adjustments or installations.
Seeking professional assistance if needed
If you encounter any of the above installation problems or if you feel unsure about completing the installation on your own, it is always best to seek professional assistance. Electricians have the knowledge and experience to troubleshoot and resolve complex electrical issues. They can ensure that the installation is done correctly and up to code, providing you with peace of mind and a safely functioning outlet.
Remember, safety should always be the top priority. If you have any doubts or concerns about the installation process, consulting a professional is highly recommended.
Understanding Electrical Codes And Regulations
Familiarizing yourself with local codes and regulations
Understanding electrical codes and regulations is an essential step when installing a 3 prong outlet. Each country, state, and even city may have specific electrical codes that must be followed to ensure safety and compliance. Familiarizing yourself with these codes can help you avoid potential hazards and ensure that your installation is up to standard.
When working with electricity, it’s crucial not only to follow the basic principles of electrical safety but also to understand the specific requirements set forth in your area. This means researching and familiarizing yourself with the local electrical codes and regulations that pertain to your project.
Electrical codes typically cover a wide range of safety measures, such as outlet placement, wire thickness, grounding requirements, and circuit load limits. By being aware of these regulations, you can proceed with confidence and avoid any potential violations or unsafe installations.
Ensuring compliance for a safe installation
Once you have familiarized yourself with the local electrical codes and regulations, it’s time to ensure compliance for a safe installation. Adhering to these codes not only helps you avoid fines and legal issues but, more importantly, it minimizes the risk of electrical accidents, fires, and other safety hazards.
Here are some important factors to consider when ensuring compliance:
- Proper outlet selection: Selecting the right type of 3 prong outlet that meets the local standards is critical. There are different types of outlets available, and it’s essential to choose the appropriate one for your specific needs.
- Correct wiring techniques: Following the correct wiring techniques is vital to ensure safety and compliance. This includes proper grounding, accurate wire connections, and adherence to the specified wire thickness and insulation requirements.
- Outlet location: Understanding the regulations regarding outlet placement is crucial. Codes often dictate the minimum distance between outlets, their height from the floor, and whether they need to be located near sources of water, such as sinks or bathtubs.
- Circuit load limits: Each electrical circuit has a load limit that should not be exceeded to prevent overheating and potential electrical hazards. Understanding these load limits and distributing the load properly among circuits is necessary to ensure compliance.
- Inspections and certifications: In some jurisdictions, electrical installations require inspections and certifications by qualified professionals. Engaging with certified electricians or government agencies can ensure that your installation is compliant and safe.
By following the local codes and regulations and ensuring compliance throughout the installation process, you can be confident that your 3 prong outlet is safe and up to standard. Remember, electrical safety should never be underestimated, and adherence to codes is essential for the well-being of yourself, your property, and anyone who will be using the outlet.
Frequently Asked Questions
Is It Legal To Put A 3-Prong Outlet Without Ground?
No, it is not legal to install a 3-prong outlet without a ground. The ground wire is an important safety feature that protects against electrical shocks and prevents damage to appliances. It is recommended to hire a licensed electrician to ensure proper installation.
Which Way Should A 3-Prong Outlet Be Installed?
The three-prong outlet should be installed with the grounding prong facing downward.
How Do I Upgrade My Outlet To 3-Prong?
To upgrade your outlet to a 3-prong, follow these steps: 1. Turn off the power to the outlet from the circuit breaker. 2. Remove the old outlet cover and unscrew the outlet from the box. 3. Attach the ground wire to the green screw on the new outlet.
4. Connect the black and white wires to the appropriate screws. 5. Screw in the new outlet and replace the cover.
Can I Change My 2 Prong Outlet To 3-Prong?
Yes, you can change your 2 prong outlet to a 3-prong one. It requires upgrading the wiring and adding a ground wire to ensure safety. Consulting a licensed electrician is recommended for proper installation. Avoid DIY attempts to prevent electrical hazards or code violations.
Conclusion
To conclude, installing a 3-prong outlet is a simple process that can be easily accomplished with the right tools and techniques. By following the step-by-step instructions provided in this blog post, you can ensure the safe and efficient installation of a 3-prong outlet in your home.
Always remember to turn off the power supply before starting the installation and to double-check your work to ensure everything is connected properly. With a little bit of effort and attention to detail, you can upgrade your electrical outlets to accommodate modern appliances and electronics.
So go ahead and take the necessary steps to enhance the functionality and safety of your home electrical system.