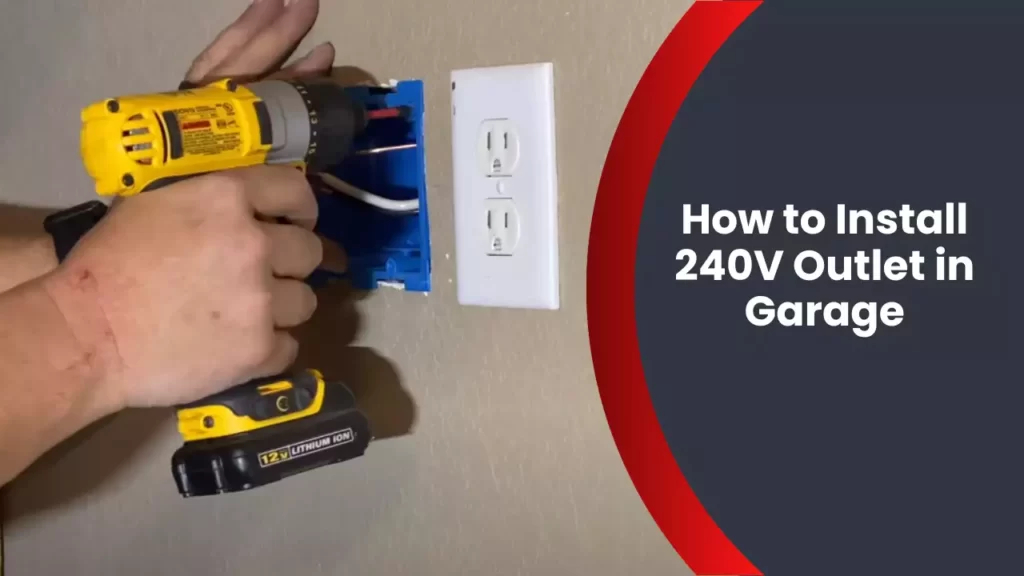
To install a 240V outlet in your garage, call a licensed electrician for professional assistance. It is essential to hire an expert to ensure a safe and proper installation.
Having a licensed electrician handle the installation will ensure that the wiring is correct and up to code, reducing the risk of electrical hazards in your garage. This is particularly important as a 240V outlet requires specific expertise and knowledge.
By hiring a professional, you can have peace of mind knowing that your garage is equipped with a reliable and efficient power source for your electrical needs.
Assessing Electrical Needs And Safety Requirements
Before you embark on installing a 240V outlet in your garage, it’s crucial to assess your electrical needs and ensure you meet all the required safety requirements. This step is essential to determine the power requirements for your appliances and tools, as well as to understand safety codes and regulations that must be followed. By doing so, you can ensure the safe and efficient operation of your electrical system.
Determining power requirements for appliances and tools
One of the first things you need to consider when installing a 240V outlet in your garage is the power requirements of the appliances and tools you plan to use. Different tools and appliances have different power needs, and it’s important to ensure that your electrical system can handle the load. To determine the power requirements, you can follow these steps:
- Identify the appliances and tools: Make a list of all the appliances and tools that you plan to use in your garage. This may include power tools, air compressors, electric vehicle chargers, or other heavy-duty equipment.
- Check the power ratings: Look for the power ratings of each appliance or tool. Usually, this information can be found on a label or the manufacturer’s documentation. Power ratings are usually measured in watts (W) or amps (A).
- Calculate the total power consumption: Add up the power ratings of all the appliances and tools to determine the total power consumption. This will help you understand if your electrical system can handle the load.
- Consider future needs: It’s also important to account for any future appliances or tools that you may want to add in the future. This will ensure that your electrical system can accommodate potential upgrades without the need for further modifications.
Understanding safety codes and regulations
When it comes to electrical installations, safety should always be a top priority. To ensure the safety of your electrical system, you need to understand the safety codes and regulations that apply to your area. These codes and regulations are put in place to protect you and your property from electrical hazards. Here are some key considerations:
- Research local codes: Start by researching the local codes and regulations that are enforced by your city or municipality. These codes may specify the types of electrical connections, grounding requirements, and other safety measures that must be followed.
- Hire a licensed electrician: In some cases, it may be necessary to hire a licensed electrician to ensure compliance with the safety codes and regulations. A qualified electrician will have the knowledge and expertise to perform the installation safely.
- Obtain necessary permits: Depending on the jurisdiction, you may need to obtain permits before installing a new electrical outlet. Permits ensure that the installation is inspected and approved by local authorities, further ensuring compliance with safety codes and regulations.
- Install safety devices: Consider installing additional safety devices, such as ground fault circuit interrupters (GFCIs) or surge protectors, to provide added protection against electrical hazards.
By understanding the power requirements of your appliances and tools and adhering to the necessary safety codes and regulations, you can ensure a safe and reliable electrical installation in your garage. Remember, it is always recommended to consult with a licensed electrician for professional advice and assistance.
Gathering Tools And Materials
Gathering Tools and Materials
When it comes to installing a 240V outlet in your garage, gathering the necessary tools and materials beforehand is essential. Proper preparation ensures a smooth and successful installation process. In this section, we will outline the essential tools and materials you will need for this project.
List of Essential Tools for Installation
- Screwdriver: A Phillips head screwdriver will be required to open electrical panels and secure wires.
- Pliers: Needle-nose pliers are necessary for bending wires and attaching them to the outlet.
- Wire Strippers: These tools allow you to strip the insulation from the wires to connect them properly.
- Electrical Tape: Using electrical tape ensures secure connections and prevents accidental short circuits.
- Drill: If you don’t have an existing hole for the cable, a drill will be needed to create one.
- Hole Saw: This tool is necessary for cutting a hole in the wall or the ceiling to accommodate the outlet box.
- Measuring Tape: You will need a measuring tape to determine the correct placement and size of the hole.
- Wire Connectors: Wire connectors are essential for joining the wires together safely and securely.
- Voltage Tester: You’ll need a voltage tester to ensure the power is off before working on any electrical connections.
- Electrical Fish Tape: If you need to route the cable through tight spaces, an electrical fish tape will be required.
Outline of Necessary Materials for the Project
- 240V Outlet: Purchase a 240V outlet, specifically designed to handle the higher voltage required for heavy-duty appliances.
- Electrical Cable: It’s essential to select the appropriate electrical cable rated for 240V installations. The cable should be sized for the power demand of the appliances you intend to use.
- Outlet Box: An outlet box is required to house the outlet and protect the electrical connections.
- Cable Connector: Ensure you have a cable connector to secure the electrical cable to the outlet box.
- Wire Nuts: Wire nuts are necessary for joining wires together safely within the outlet box.
- Wall Plate: A wall plate provides a finished look and covers the outlet box once the installation is complete.
- Mounting Screws: These screws are needed to secure the outlet box to the wall or the ceiling.
- Label Maker or Electrical Tape: Use a label maker or electrical tape to identify the newly installed 240V outlet.
By gathering all the tools and materials listed above, you’ll be well-prepared to take on the installation of a 240V outlet in your garage. Remember, it’s important to double-check that you have all the necessary items for the project before getting started to avoid any unnecessary delays or interruptions.
Turning Off Power And Disconnecting Existing Wiring
Safely shutting off electricity to the garage
Before starting any electrical work in your garage, it is crucial to turn off the power supply. Safety should always be your top priority when working with electricity. Here is a step-by-step guide on how to safely shut off the power to your garage:
- Locate the main circuit breaker: In most homes, the main circuit breaker will be in the electrical panel. It is usually a large switch or a set of switches labeled as “main,” “main breaker,” or “main disconnect.”
- Turn off the main circuit breaker: Once you locate the main circuit breaker, flip the switch to the “off” position. This will cut off power to the entire house, including the garage.
- Verify that the power is off: To ensure your safety, use a non-contact voltage tester to verify that there is no electricity running through the wires in the garage. Simply hold the tester close to the wires and if it does not light up or make any noise, it means the power is off.
Disconnecting any existing wiring
Now that you have safely shut off the power to the garage, it’s time to disconnect any existing wiring. This step is crucial before installing a new 240V outlet. Follow these steps to disconnect the existing wiring:
- Identify the wires you need to disconnect: Take a close look at the existing wiring in the garage and identify the wires that are connected to the outlet or any other electrical components that you need to remove.
- Prepare your tools: Before proceeding further, make sure you have the necessary tools on hand, such as wire cutters, wire strippers, and a voltage tester.
- Disconnect the wires: Turn off the power to any additional circuits connected to the outlet you are working on. Then, use wire cutters to carefully remove any electrical tape or wire nuts connecting the wires. Be cautious while handling the live wires, and if you’re unsure, consult a professional electrician for assistance.
Remember, proper diligence and precaution must be exercised when performing electrical work in your garage. Always consult local electrical codes and regulations, and if you are uncertain or uncomfortable with any part of the process, it is best to seek the help of a licensed electrician.
Running New Electrical Wiring
Planning the route for the new wiring
Before you start running new electrical wiring in your garage, it’s important to plan the route to ensure safety and efficiency. This involves determining the most direct path from the circuit breaker to the location of the 240V outlet. Consider the layout of your garage, existing wiring, and any potential obstacles that may hinder the installation process. Take measurements and create a detailed plan to guide you throughout the installation process.
Securing the wiring in a safe and organized manner
Properly securing the wiring is crucial to prevent accidents and make future maintenance easier. Here’s how you can do it:
- Start by choosing the appropriate type of cable for the job. In most cases, a 10-gauge, 3-wire cable will suffice for a 240V outlet installation. Ensure the cable is rated for outdoor use if it will be exposed to the elements.
- Use cable clamps or staples to secure the wiring along the planned route. These devices will keep the cable in place and prevent it from moving or hanging loosely.
- Maintain proper spacing between the fasteners to avoid damaging the cable. Refer to the manufacturer’s guidelines for the recommended spacing.
- If the wiring needs to cross any joists or beams, consider using protective conduit or running the cable through bored holes to reduce the risk of damage.
- Finally, ensure that the wiring is neatly organized, free of tangles or twists, and clearly labeled for easy identification.
Connecting the wiring to the circuit breaker
Connecting the new wiring to the circuit breaker requires careful attention to ensure safety and proper functioning. Here’s a step-by-step guide on how to do it:
- Turn off the main power to the garage by flipping the corresponding switch in the main electrical panel.
- Locate an available 240V circuit breaker in the panel and switch it off. Make sure to check the manufacturer’s instructions for any specific requirements or limitations.
- Strip the insulation from the end of the new wiring, exposing the copper wires inside.
- Insert the wires into the appropriate terminals on the circuit breaker. Typically, the black wire connects to the terminal marked “hot,” the white wire connects to the neutral terminal, and the green or bare copper wire connects to the ground terminal.
- Tighten the terminal screws securely to ensure a proper electrical connection.
- Double-check all connections to ensure they are correct and tight.
- With the main power still switched off, turn on the new 240V circuit breaker and restore power to the garage.
- Test the outlet with a voltage tester to verify that it is receiving power.
- Once confirmed, securely fasten the outlet in the desired location and cover it with a weatherproof faceplate.
Following these steps will help you run new electrical wiring in your garage, ensuring a safe and functional 240V outlet installation. Remember, if you’re not confident in your abilities, it’s always best to consult a licensed electrician to ensure the job is done correctly.
Mounting The 240V Outlet Box
Choosing the appropriate location for the outlet
Before you start installing a 240V outlet in your garage, it’s essential to choose the right location. Here’s what you need to consider:
- Accessibility: Ensure that the location you select is easily accessible. It should be convenient to reach and not hinder any future plans for garage layout changes.
- Distance: Take into account the distance between the new 240V outlet and your breaker panel. The outlet should be within a reasonable distance to avoid voltage drop issues.
- Wall stud: Locate a wall stud near the chosen area to provide stability when mounting the outlet box.
Installing the outlet box securely
Now that you’ve chosen the appropriate location for the 240V outlet in your garage, it’s time to install the outlet box securely. Follow these steps to ensure a safe and reliable installation:
- Gather the necessary materials: Before beginning the installation, make sure you have all the required tools and materials. These may include an outlet box, appropriate electrical wiring, wire connectors, screws, a screwdriver, and a wire stripper.
- Turn off the power: Prior to working on any electrical installation, always turn off the power to the area you’ll be working in. Locate the correct breaker in your breaker panel and switch it off.
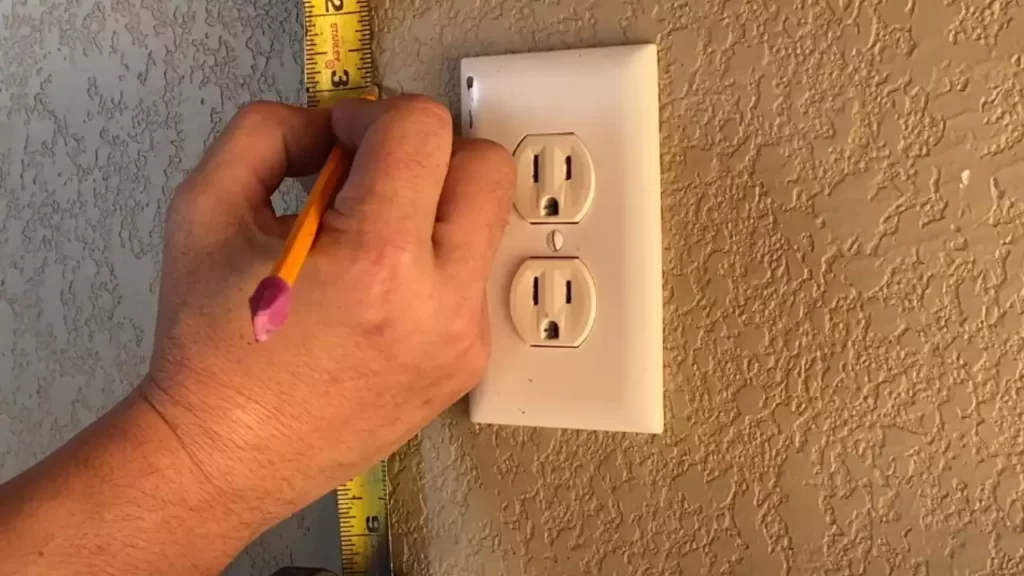
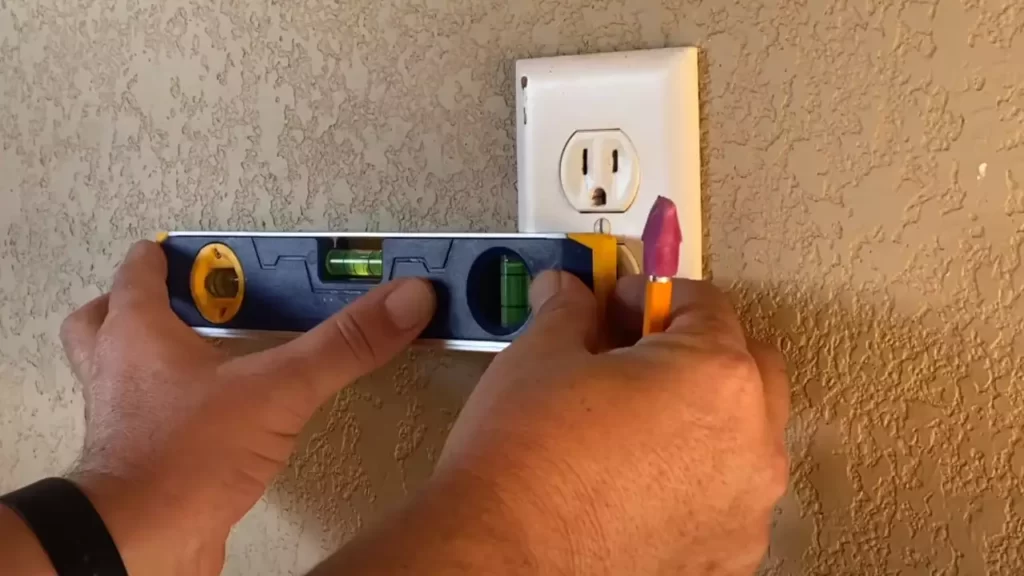
- Measure and mark: Measure and mark the desired height for the outlet box on the wall. Use a level to ensure accuracy. Then, mark the placement of the screw holes on the stud.
- Drill pilot holes: Using an appropriate drill bit, carefully drill pilot holes at the marked screw hole locations on the wall stud. These pilot holes will make it easier to secure the outlet box.
- Mount the outlet box: Align the screw holes of the outlet box with the pilot holes on the wall stud. Insert screws through the holes and tighten them securely using a screwdriver. Ensure that the box is level and securely mounted on the wall.
- Connect the wiring: Carefully strip the ends of the electrical wires and connect them to the appropriate terminals in the outlet box. Follow the manufacturer’s instructions to ensure proper wiring connections.
- Secure the wires: To avoid any strain on the wiring, use wire connectors to secure the wires inside the outlet box. This will prevent accidental disconnection and ensure a safe and secure installation.
- Double-check the connections: Before turning the power back on, double-check all the connections in the outlet box to ensure they are tight and secure. Inspect for any loose wires or improper connections that may pose a safety hazard.
- Restore power: Once you have confirmed that everything is properly connected, switch the breaker back on to restore power to the newly installed 240V outlet in your garage.
Remember, if you are not confident or familiar with electrical installations, it is always recommended to consult a licensed electrician for assistance. Safety should always be a top priority when working with electricity.
Wiring The 240V Outlet
After gathering all the necessary tools and materials, it’s time to start the wiring process. This step is crucial to ensure the safe and efficient functioning of your 240V outlet in the garage. In this section, we will guide you through the process step by step.
Connecting the wiring to the outlet
Before connecting the wires, make sure the power is turned off at the breaker panel to avoid any electrical hazards. Double-check the power is off by using a non-contact voltage tester. Once confirmed, proceed with the following steps:
- Strip the wires: Carefully strip off about 3/4 inch of insulation from the ends of the wires using wire strippers. Make sure not to cut into the wire itself.
- Connect the wires to the outlet terminals: The 240V outlet will have four terminals – two hot terminals (gold or brass screws), one neutral terminal (silver screw), and one grounding terminal (green screw). Refer to the manufacturer’s instructions for the exact configuration.
- Attach the hot wires: Attach the hot wires to the hot terminals using the appropriate screwdriver. Typically, the black wire connects to one hot terminal, while the red wire connects to the other hot terminal.
- Connect the neutral wire: Connect the white wire, which is the neutral wire, to the neutral terminal on the outlet. Ensure it is secure but not over-tightened.
- Ground the outlet: Attach the bare copper or green wire, which is the grounding wire, to the grounding terminal on the outlet. This step is crucial for safety and to protect against electrical shocks.
- Secure the outlet: Carefully push the wired outlet into the electrical box and use the mounting screws provided to secure it in place. Make sure the wires are not pinched or damaged in the process.
Ensuring proper grounding and insulation
In addition to connecting the wiring properly, you need to ensure proper grounding and insulation to minimize the risk of electrical shocks and fire hazards. Consider the following measures:
- Proper grounding: Make sure the grounding wire is securely attached to the grounding terminal. It should be tightly connected and not loose.
- Insulation check: Inspect the wires to ensure no bare wires are exposed. If you find any exposed wires, cover them with electrical tape or replace the damaged portion of the wire.
- Protective cover: Consider using a protective cover for the outlet to prevent any accidental contact with the live terminals.
By following these steps and adhering to safety guidelines, you can successfully wire your 240V outlet in the garage. Remember, if you are not confident in doing the electrical work yourself, it is always advisable to seek professional help to ensure the job is done correctly and safely.
Testing And Finalizing The Installation
Once the wiring and installation of the 240V outlet in your garage are complete, the next step in the process is testing and finalizing the installation. Testing the outlet for functionality, securing the outlet box and wiring, and restoring power to the garage are crucial steps to ensure the safety and effectiveness of your new electrical outlet. Let’s explore each of these steps in detail.
Testing the Outlet for Functionality
Before moving forward, it is necessary to test the outlet to ensure it is functioning correctly. This step involves conducting a series of simple tests to verify the outlet’s functionality. Here’s how you can do it:
- Switch off the circuit breaker that powers the garage.
- Using a voltage tester, check if the power is completely off at the outlet location.
- Once confirmed, gently insert the tester into the outlet slots to ensure there is no electricity flowing.
- If the voltage tester does not detect any electrical current, your outlet is ready to be secured and finalized.
- If the voltage tester indicates the presence of electrical current, it is essential to troubleshoot the issue before proceeding further. Consult a professional electrician for assistance.
Securing the Outlet Box and Wiring
After testing the outlet, it is time to secure the outlet box and wiring to ensure long-term reliability. Follow these steps to properly secure the outlet box and wiring:
- Ensure the outlet box is securely attached to the wall or surface in the garage.
- Check that the box is flush with the wall and properly aligned.
- Secure the wiring within the outlet box, making sure it is neatly arranged and free from any kinks or twists.
- Use appropriate screws or fasteners to firmly attach the outlet box to the wall or surface.
- Double-check that all connections are tight and secure, without any exposed wires.
Restoring Power to the Garage
Once the outlet box and wiring are securely in place, you can proceed with restoring power to the garage. Follow these steps to ensure a smooth and safe power restoration:
- Switch on the circuit breaker that powers the garage.
- Give the system a few moments to initialize and stabilize.
- After confirming that power has been restored to the garage, use your voltage tester to check the functionality of the newly installed outlet.
- Plug in a device or appliance to the outlet and verify if it is receiving power and functioning properly.
- Keep monitoring the outlet in the following days to ensure consistent functionality and report any issues to a professional electrician for further inspection.
By following these steps, you can confidently test and finalize the installation of your new 240V outlet in the garage. Always prioritize safety and consult a professional if you encounter any difficulties or uncertainties during the process.
Consulting With A Licensed Electrician
If you are considering installing a 240V outlet in your garage, it is important to consult with a licensed electrician. While tackling small electrical projects around your home can be tempting, dealing with high-voltage systems is not something to take lightly. Consulting with a professional ensures that your installation is done correctly and safely, avoiding any potential hazards that can arise from improper electrical work.
Knowing when to seek professional help
It’s crucial to understand when it’s time to call in a licensed electrician for assistance. While installing a 240V outlet may seem like a straightforward task, there are several factors that can make it more complex than it appears. Here are some situations in which you should definitely seek professional help:
- Upgrading your electrical panel: If you currently have an older electrical panel, it may not have the capacity to handle the additional power required for a 240V outlet. A licensed electrician will assess your panel’s capacity and make any necessary upgrades to ensure safe installation.
- Complex wiring: Wiring a 240V outlet involves working with multiple wires and connections. If you don’t have experience with electrical wiring, it’s best to leave it to the professionals. They have the knowledge and skills to handle the intricacies of the job safely.
- Permit requirements: In some areas, installing a new electrical outlet requires a permit. A licensed electrician will know the local regulations and ensure that your installation meets all requirements.
- Safety concerns: Safety should always be the top priority when dealing with electricity. If you have any concerns about the safety of your installation or the wiring in your garage, it’s best to consult with a professional.
By recognizing when it’s time to seek professional help, you can avoid the potential dangers and pitfalls of attempting a 240V outlet installation on your own. Your safety and the safety of your home should always come first.
Understanding Outlet Usage And Limitations
When it comes to powering heavy-duty appliances and tools in your garage, a 240V outlet is a must-have. This high-voltage outlet provides the necessary power to run equipment such as welders, air compressors, and electric vehicle chargers. However, before diving into the installation process, it is essential to familiarize yourself with the capabilities and limitations of the outlet.
Familiarizing yourself with the capabilities of the outlet
Before installing a 240V outlet in your garage, it is crucial to understand the capabilities it offers. Unlike the standard 120V outlets found throughout your home, a 240V outlet delivers double the voltage, providing more horsepower to power demanding equipment. This higher voltage allows for faster charging times, increased tool performance, and enhanced electrical efficiency.
Additionally, it is important to note that a 240V outlet typically comes in two configurations: a 3-prong outlet and a 4-prong outlet. The 3-prong outlet, also known as a NEMA 6-50 outlet, features three straight blades and is commonly used for welders and some power tools. On the other hand, the 4-prong outlet, known as a NEMA 14-50 outlet, includes an additional grounding pin and is often used for electric vehicle chargers and larger appliances like ranges and dryers.
Considering the limitations of the outlet
While a 240V outlet offers increased power, it is essential to recognize its limitations as well. One crucial limitation to be aware of is the maximum amperage rating of the outlet. This rating represents the amount of electrical current the outlet can handle without overheating or becoming a safety hazard. It is crucial to select an outlet with an amperage rating that is compatible with the equipment you plan to use.
A common mistake is assuming that upgrading to a 240V outlet automatically means you can power any appliance or tool without considering its specific electrical requirements. Before making any installations, carefully review the manufacturer’s guidelines and specifications for each device. This will ensure compatibility and prevent potential damage or accidents.
Furthermore, it is worth noting that while a 240V outlet can provide considerable power, it may not be suitable for every application. Some appliances or tools, such as smaller power tools or simple household electronics, may not require the additional voltage and may operate perfectly using the standard 120V outlets already available in your garage. Understanding which devices truly benefit from a 240V outlet will help you make informed decisions during the installation process.
By familiarizing yourself with the capabilities and limitations of a 240V outlet, you can ensure that you are making an informed decision and setting up your garage for optimal performance. Once you have a thorough understanding, you can proceed confidently with the installation process, knowing that you have chosen the right equipment and considered all necessary precautions.
Safety Precautions And Best Practices
Following Safety Guidelines During Installation and Usage
Installing a 240V outlet in your garage can provide you with the power you need to run heavy-duty tools and equipment. However, it is essential to prioritize safety throughout the installation process and when using the outlet in your day-to-day activities. Taking precautions and following best practices will not only protect you and your property but also ensure the longevity of your electrical system.
When it comes to electrical work, safety should always be the top priority. Here are some crucial safety guidelines and best practices to keep in mind:
1. Obtaining the Necessary Permits and Inspections
Before starting any electrical work, check with your local building department to determine if you need permits for the installation of a 240V outlet in your garage. Permits ensure that the project complies with electrical codes and regulations, and that it undergoes the necessary inspections for safety.
2. Turning Off the Power
Before you begin the installation process, make sure to turn off the power to the area where you will be working. This can be done by switching off the corresponding breaker in your electrical panel. Always double-check that the power is off using a voltage tester to avoid any accidental electrical shocks.
3. Proper Wiring and Grounding
Correct wiring and grounding are crucial for the safe and efficient operation of your 240V outlet. Ensure that you use the appropriate gauge wire for the circuit, following the manufacturer’s recommendations. It is also essential to properly ground the outlet to protect against electrical faults and minimize the risk of electrical fires.
4. Secure and Protect the Wiring
Once the wiring is complete, it is important to secure and protect it to prevent any damage or accidental disconnection. Use conduit or cable trays to keep the wires organized and away from any potential hazards. Make sure that the wiring is properly supported and avoid running it across high-traffic areas or near heat sources.
5. Regular Inspection and Maintenance
To ensure the ongoing safety and performance of your 240V outlet, regular inspection and maintenance are necessary. Check for any signs of wear or damage, such as frayed wires or loose connections. Clean the outlet regularly and replace any faulty components promptly. It is also recommended to have a licensed electrician inspect your electrical system periodically to identify and address any potential issues.
By following these safety guidelines and best practices, you can confidently install and use a 240V outlet in your garage, maximizing its functionality while minimizing the risk of electrical hazards. Remember, if you are unsure or uncomfortable with any aspect of the installation, it is always advisable to seek the assistance of a qualified professional electrician.
Adapting Existing Appliances And Tools For 240V Use
Adapting Existing Appliances and Tools for 240V Use
If you’re considering installing a 240V outlet in your garage, one important aspect to address is adapting existing appliances and tools to make the most of the increased voltage. With a 240V outlet, you can power heavy-duty tools and appliances that require more electrical power, providing a significant boost to your garage’s functionality.
Evaluating Compatibility and Necessary Modifications
Before connecting your existing appliances and tools to a 240V outlet, it’s crucial to evaluate their compatibility and make necessary modifications. Not all appliances and tools are designed to run on 240V power, so it’s essential to check their specifications and verify if they can handle the increased voltage.
Here’s what you need to consider:
- Check the appliance or tool specifications: Consult the user manual, labels, or the manufacturer’s website to determine if the appliance or tool is compatible with 240V power. Look for phrases such as “dual voltage,” “compatible with 240V,” or similar indications.
- Convert from 120V to 240V: If your appliance or tool isn’t compatible with 240V, you may need to make modifications to adapt it. This typically involves replacing or rewiring internal components to handle the higher voltage. It’s recommended to hire a professional electrician for this task to ensure safety and compliance with electrical codes.
- Consider the power draw: Keep in mind that even if an appliance or tool is compatible with 240V, it may draw more power than your existing electrical system can handle. Evaluate your electrical panel’s capacity and check if modifications are necessary to accommodate the increased power demand.
Ensuring Proper Wiring and Grounding
When adapting appliances and tools for 240V use, it’s vital to ensure proper wiring and grounding to guarantee safe and reliable operation.
Here are a few key considerations:
- Upgrade wiring if necessary: If your existing wiring is not rated for 240V or does not provide enough capacity, you’ll need to upgrade it. Consult with an electrician to determine the appropriate wire gauge and make any necessary changes to your electrical system.
- Ground fault circuit interrupter (GFCI): Install a GFCI breaker or outlet to protect against electrical shocks. This is especially important in a garage where water or moist conditions may be present.
- Ensure proper grounding: The National Electrical Code requires grounding for 240V circuits. A grounding conductor must be installed and connected to a proper grounding electrode to ensure electrical safety.
- Label electrical outlets: Once you’ve adapted an appliance or tool for 240V use, it’s crucial to label the corresponding outlet or breaker. This helps prevent accidental connections of incompatible devices and promotes safety in your garage.
By thoroughly evaluating compatibility, making necessary modifications, and ensuring proper wiring and grounding, you can adapt existing appliances and tools for 240V use in your garage. This allows you to take full advantage of the increased power capacity and expand the range of tasks you can accomplish in your workspace.
Troubleshooting Potential Issues
During the installation of a 240V outlet in your garage, it is not uncommon to encounter a few hiccups along the way. This troubleshooting section aims to address some of the common problems that may arise during the process and provide solutions to help you overcome them.
Identifying Common Problems and Their Solutions
1. Frequent tripping of circuit breaker
One of the most common issues when installing a 240V outlet is the frequent tripping of the circuit breaker. This can be caused by a few different problems:
- Overloaded circuit: If you have several appliances running on the same circuit, it can overload the system and cause the breaker to trip. To solve this, you can redistribute the loads by connecting some of the appliances to a different circuit.
- Faulty wiring: Another possible cause is faulty or damaged wiring. Inspect the wiring connections and ensure they are securely tightened. If there are any signs of frayed wires or loose connections, they should be repaired or replaced by a qualified electrician.
- Incompatible circuit breaker: If your circuit breaker is not designed to handle the specific load, it may trip frequently. Consult an electrician to ensure that the circuit breaker is suitable for the 240V outlet.
2. No power to the outlet
If you find that there is no power coming to the 240V outlet, consider the following solutions:
- Ensure proper wiring connections: Check that all the wires are correctly connected to their respective terminals. Make sure all wire nuts are securely tightened.
- Test the outlet: Use a voltage tester to verify if there is power at the outlet. If there is no power, it may indicate a wiring issue or a problem with the breaker. Contact an electrician for further troubleshooting.
3. Inadequate grounding
Grounding is essential for the safe operation of a 240V outlet. If you suspect inadequate grounding, follow these steps:
- Check the grounding wire: Ensure that the grounding wire is securely connected to the outlet and to the designated grounding point. If it is loose or damaged, it should be replaced.
- Test the grounding: Use a multimeter to test the grounding of the outlet. If it shows a high resistance or no connection at all, consult an electrician to rectify the grounding issue.
By troubleshooting these potential issues, you can ensure that your 240V outlet installation in the garage is successful. However, always remember that working with electricity can be dangerous, and it’s best to consult a professional electrician for complex problems or if you feel unsure about any step of the installation process.
Regular Maintenance And Inspection
Maintaining the outlet and ensuring ongoing safety and functionality
Regular maintenance and inspection of your 240V outlet in the garage is crucial to ensure its ongoing safety and functionality. By following a few simple steps, you can ensure that your outlet remains in good working condition and provide a safe environment for all your electrical needs. Here are some important tips to help you maintain and inspect your 240V outlet:
1. Conduct regular visual inspections
Regular visual inspections are essential to identify any visible signs of damage or wear on your 240V outlet. Start by examining the outlet for any cracks, discoloration, or loose connections. Any signs of damage should be addressed promptly as they can lead to a compromised electrical system and potential safety hazards.
2. Check for proper grounding
Ensuring that your 240V outlet is properly grounded is crucial for both safety and optimal functionality. To check the grounding, you can use a multimeter or consult a professional electrician. If the grounding is not adequate, it can pose a risk of electrical shock and damage to your appliances. Proper grounding is a key element in maintaining a safe electrical system.
3. Clean the outlet regularly
Over time, dirt, dust, and other debris can accumulate in and around your 240V outlet. This buildup can hinder the connection between the outlet and the plug, resulting in poor electrical flow and increased resistance. To clean the outlet, turn off the power supply, and use a soft brush or cloth to remove any debris. Avoid using water or liquid cleaners, as they can cause electrical damage.
4. Test the outlet periodically
Regularly testing the functionality of your 240V outlet is important to detect any potential issues. You can use a voltage tester to check if the outlet is providing the correct amount of power. If you notice any irregularities or fluctuations, it may indicate a problem with the wiring or the outlet itself. In such cases, it is best to consult a professional electrician for further assessment and repairs.
Conclusion
Maintaining and inspecting your 240V outlet in the garage is a crucial part of ensuring ongoing safety and functionality. By conducting regular visual inspections, checking for proper grounding, cleaning the outlet regularly, and testing its functionality, you can minimize the risk of electrical hazards and help prolong the lifespan of the outlet. Remember to always prioritize safety and consult with a professional electrician if you are unsure about any aspect of maintaining or repairing your 240V outlet.
Frequently Asked Questions
Can I Install A 240V Outlet In My Garage Without Professional Help?
Yes, you can install a 240V outlet in your garage without professional help, but it requires some knowledge of electrical work and adherence to safety precautions. It’s recommended to consult an electrician if you’re unsure about the process.
What Are The Basic Steps To Install A 240V Outlet In A Garage?
To install a 240V outlet in your garage, you’ll need to turn off the power, run a new cable from the electrical panel to the desired location, install a double-pole circuit breaker, mount the outlet, and connect the wires according to the manufacturer’s instructions.
What Tools And Materials Are Required For Installing A 240V Outlet In A Garage?
To install a 240V outlet in your garage, you’ll need tools such as a screwdriver, wire stripper, wire cutter, electrical tape, fish tape, and a voltage tester. Additionally, you’ll need materials including electrical wire, outlet box, wire nuts, and wire staples.
Are There Any Safety Precautions I Should Follow While Installing A 240V Outlet In My Garage?
Yes, it’s crucial to take proper safety precautions when installing a 240V outlet in your garage. Ensure the power is turned off, wear safety goggles and gloves, and follow local electrical codes. If you’re unsure or uncomfortable working with electricity, it’s best to hire a licensed electrician.
Conclusion
To conclude, installing a 240V outlet in your garage can greatly enhance its functionality and accommodate high-powered appliances or tools. By following the step-by-step guide provided in this blog post, you can safely and efficiently install the outlet on your own.
Remember to consult a professional electrician or adhere to local building codes for additional guidance. With this new addition, your garage will become a versatile space that caters to all your power needs. Upgrade your garage today and enjoy the convenience it brings.