To install a 240V outlet for an electric car, hire a professional electrician for the installation process. This ensures safe and accurate installation of the outlet according to the local electrical codes and regulations.
In addition, a licensed electrician can help determine the best location for the outlet and ensure the necessary electrical capacity is available to power the electric vehicle. Installing a 240V outlet for an electric car is an essential step for convenient charging at home.
Planning The Installation Process
Before you dive headfirst into installing a 240V outlet for your electric car, it’s crucial to take the time to plan out the process. This will help ensure a smooth installation and minimize any potential setbacks. In this section, we will delve into the various steps involved in planning your installation, including understanding the requirements and benefits of a 240V outlet, assessing your electrical capacity and capabilities, and gathering the necessary materials and tools.
Understanding the Requirements and Benefits of a 240V Outlet
Having a clear understanding of the requirements and benefits of a 240V outlet is essential before starting the installation process. Let’s take a closer look:
- Requirements: A 240V outlet, also known as a Level 2 charging station, is the preferred choice for electric car charging due to its ability to deliver faster charging speeds compared to a standard 120V outlet. This outlet requires a dedicated circuit and must be installed by a licensed electrician to ensure compliance with local electrical codes.
- Benefits: Installing a 240V outlet offers several advantages. First and foremost, it significantly reduces the charging time for your electric vehicle. With a Level 2 charging station, you can replenish your car’s battery up to eight times faster compared to a regular outlet. Additionally, a dedicated circuit for your electric vehicle prevents circuit overload and reduces the risk of electrical hazards.
Assessing Your Electrical Capacity and Capabilities
Assessing your electrical capacity and capabilities is a crucial step before proceeding with the installation. It ensures that your electrical system can support the additional load and that you have the necessary skills to complete the installation process. Here’s what you need to consider:
- Electrical Capacity: Check your electrical panel to determine its capacity. You must have enough available amperage to accommodate the new circuit for the 240V outlet. If your panel is already near its capacity, you may need to upgrade it to avoid overloading the system.
- Electrical Skills: While the installation process may seem straightforward, it’s important to recognize your level of electrical knowledge and expertise. If you’re not comfortable working with electrical wiring or lack the necessary skills, it’s best to hire a professional electrician to handle the installation.
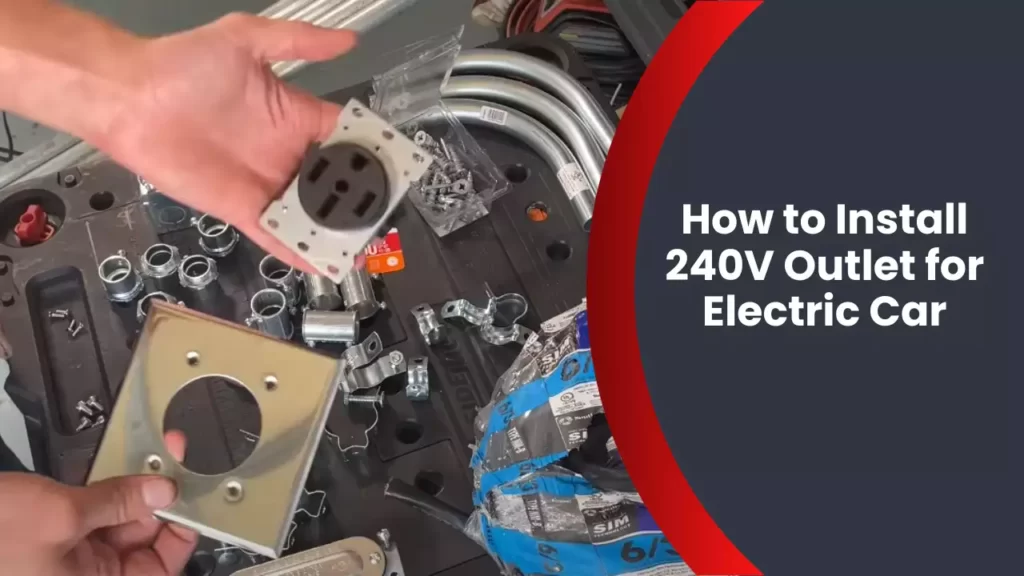
Gathering the Necessary Materials and Tools
To ensure a successful installation, you’ll need to gather the necessary materials and tools beforehand. Here’s a list of what you’ll typically need:
| Materials | Tools |
|---|---|
|
|
Having these materials and tools ready in advance will save you time and ensure a more efficient installation process.
Now that you have a better understanding of the planning process, including comprehending the requirements and benefits of a 240V outlet, assessing your electrical capacity and capabilities, and gathering the necessary materials and tools, you’re one step closer to installing a Level 2 charging station for your electric car.
Preparing For Installation
Before you can install a 240V outlet for your electric car, proper preparation is key. This involves conducting a site evaluation, deciding on the optimal location for the outlet, and obtaining any necessary permits and permissions. By following these steps, you’ll ensure a smooth and hassle-free installation process.
Conducting a Site Evaluation for the New Outlet
One of the first steps in preparing for the installation of a 240V outlet is to conduct a site evaluation. This evaluation will help you assess the feasibility of installing the outlet at your chosen location and determine if any additional work is required. During the evaluation, consider the following factors:
- The distance between your electrical panel and the proposed outlet location. It’s important to determine if your electrical system can handle the additional load.
- The availability of sufficient space near the electrical panel for installing a new circuit breaker.
- Any potential obstacles such as walls, floors, or other structural elements that may require additional work for routing the wiring.
- The accessibility of the proposed location for running the wiring and installing the outlet.
Deciding on the Optimal Location for the Outlet
Once you’ve conducted the site evaluation, you can proceed to choose the optimal location for your 240V outlet. When deciding on the location, keep the following considerations in mind:
- The proximity to your electric car’s parking spot. Ideally, the outlet should be within a reasonable distance for convenient charging.
- The accessibility of the outlet. Ensure that it is easily reachable and not obstructed by any objects or furniture.
- The availability of proper ventilation and clearance around the outlet to prevent overheating.
Consider consulting with an electrician to help you determine the most suitable location for your specific needs and preferences.
Obtaining Any Necessary Permits and Permissions
Before proceeding with the installation, it’s crucial to obtain any necessary permits and permissions. This may involve contacting your local building department or electrical authority to ensure compliance with regulations. By obtaining the proper permits, you can ensure the safety and legality of the installation.
Additionally, if you live in a rented property, it’s essential to seek permission from your landlord or property owner before making any modifications. Keep in mind that some homeowner’s associations or rental agreements may have specific rules or restrictions regarding electrical installations.
By conducting a site evaluation, deciding on the optimal location, and obtaining the necessary permits and permissions, you can efficiently prepare for the installation of a 240V outlet for your electric car.
Installing The 240V Outlet
Installing a 240V outlet for your electric car is an essential step in ensuring that you can charge your vehicle safely and efficiently. In this blog post, we will guide you through the process of installing a 240V outlet in your home. This will allow you to enjoy faster charging times and maximize the convenience of owning an electric car.
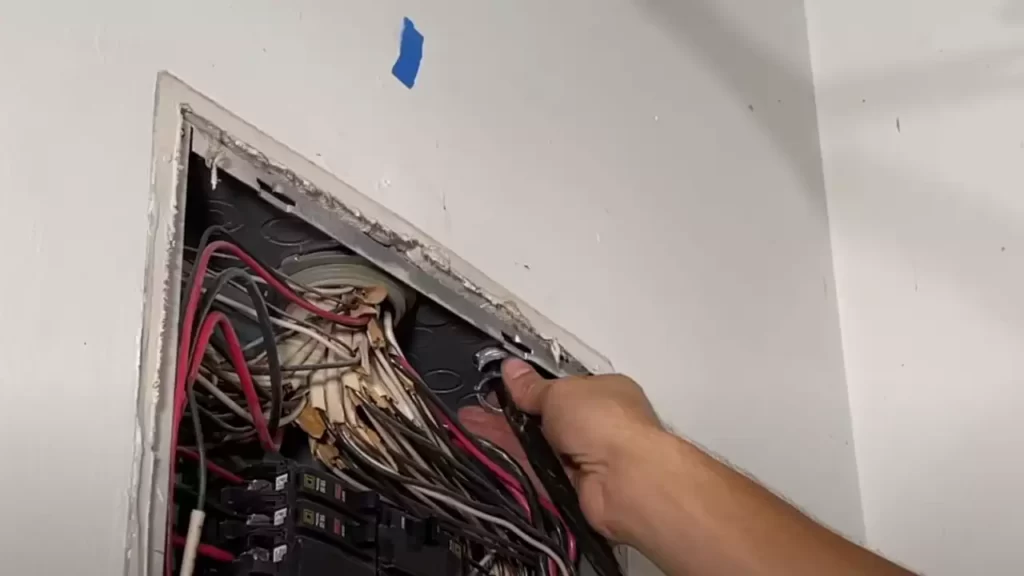
Shutting off the power and ensuring safety
Before you begin any electrical work, it is crucial to prioritize safety. Shutting off the power to the area where you will be installing the 240V outlet is the first step. This will prevent any electrical accidents or injuries during the installation process. Follow these steps to shut off the power:
- Locate your main electrical panel.
- Open the panel door using a screwdriver or another appropriate tool.
- Identify the circuit breaker that controls the area where you will be working.
- Switch off the circuit breaker by flipping it to the “off” position. You should hear a click sound, indicating that the power is off.
- Use a voltage tester to double-check that the power is indeed off. The voltage tester will indicate whether there is any electrical current present in the circuit.
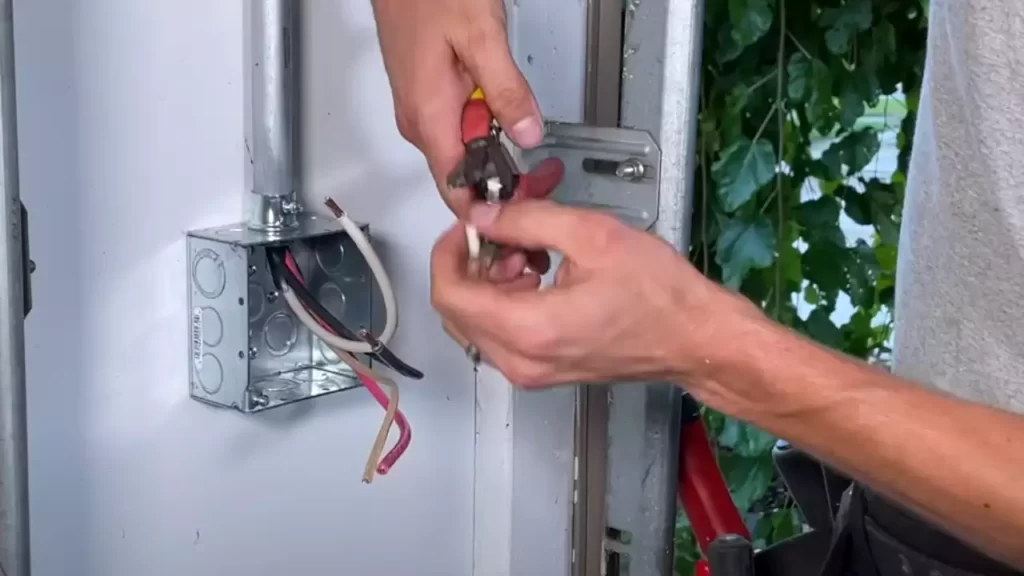
Running the necessary wiring
Once you have ensured safety by shutting off the power, it is time to run the necessary wiring for your 240V outlet. Here’s how you can do it:
- Plan the route for the wiring. Make sure it follows a clear and safe path.
- Measure and cut the appropriate length of electrical wire for the installation.
- Use wire strippers to remove approximately 1 inch of insulation from the ends of the wires.
- Connect the wires to the circuit breaker in the electrical panel. Follow the manufacturer’s instructions for proper installation.
- Route the wires through walls, ceilings, or conduits, ensuring they are secure and protected.
- Connect the wires to the 240V outlet box in the location where you want to install the outlet. Again, refer to the manufacturer’s instructions for proper installation.
Mounting the outlet box and installing the outlet
With the wiring in place, it is time to mount the outlet box and install the outlet itself. Here is the step-by-step process:
- Choose a suitable location for the outlet box. It should be easily accessible and away from any potential hazards.
- Secure the outlet box to the wall or surface, using appropriate screws or anchors.
- Feed the wires into the outlet box through the designated openings.
- Attach the wires to the appropriate terminals on the outlet, following the manufacturer’s instructions and ensuring a secure connection.
- Screw the outlet onto the outlet box, making sure it is firmly attached.
- Use a voltage tester to confirm that the outlet is properly wired and there is no electrical current leakage.
Now that you have successfully installed the 240V outlet, you can proceed to connect your electric car charging equipment and enjoy faster and more convenient charging at home. Remember to seek professional assistance if you are unsure about any step in the installation process or if you have any concerns regarding electrical work.
Testing And Finalizing The Installation
Once you have completed the installation of the 240V outlet for your electric car, it is crucial to conduct a thorough inspection of the wiring to ensure everything is correctly installed and no potential issues exist. In this section, we will discuss the steps involved in conducting a thorough inspection, verifying proper grounding and functionality, as well as connecting the new outlet to the electrical panel.
Conducting a thorough inspection of the wiring
To ensure the safety and proper functioning of your 240V outlet, it is essential to conduct a comprehensive inspection of the wiring. Follow these steps to perform a thorough inspection:
- Visually inspect the wiring for any signs of damage, such as frayed or exposed wires. If you notice any issues, immediately take the necessary steps to repair or replace the damaged wiring.
- Check that all connections are secure and tight, ensuring there are no loose or dangling wires. Use a voltage tester to confirm that power is not present before touching any wires.
- Ensure that the wiring is properly protected by conduit or other suitable covering, especially in areas where it may be exposed to potential damage.
- Verify that the wiring is installed according to the manufacturer’s specifications and meets local electrical codes and regulations. This is crucial for both safety and compliance.
- Lastly, ensure that the wiring is adequately labeled to clearly identify its purpose, whether it is for the electric car charging station or any other electrical usage.
Verifying proper grounding and functionality
Proper grounding is a critical aspect of electrical installations to prevent electrical shocks and protect against electrical faults. Follow these steps to verify proper grounding and functionality:
- Check the grounding wire connections to ensure they are securely attached and properly connected to the grounding system of the electrical panel.
- Use a continuity tester to confirm that the grounding wire is continuous and free from any breaks or interruptions.
- Test the functionality of the outlet by plugging in a device or a voltage tester to ensure it receives power.
- If the outlet functions correctly, proceed to the next step. If not, double-check the wiring connections and consult a professional if needed.
Connecting the new outlet to the electrical panel
Now that you have conducted a thorough inspection and verified proper grounding and functionality, it is time to connect the new outlet to the electrical panel. Follow these steps to ensure a proper connection:
- Identify a suitable circuit breaker in the electrical panel and switch it off to cut power to the corresponding circuit.
- Remove the panel cover, exposing the circuit breaker connections.
- Connect the hot wire to the circuit breaker and tighten the connection securely.
- Connect the neutral wire to the neutral bar in the electrical panel.
- Attach the grounding wire to the grounding bar or bus, ensuring a firm and secure connection.
- Double-check all the connections to ensure they are tight and secure.
- Replace the panel cover and switch the circuit breaker back on.
Once you have completed these steps, your 240V outlet installation for your electric car should be complete, and you can now enjoy the convenience of fast and efficient charging.
Frequently Asked Questions
How Much Does It Cost To Install A 240V Outlet For An Ev?
The cost to install a 240V outlet for an EV varies, but it typically ranges from $300 to $900. Factors like location, electrical panel capacity, and the distance from the panel to the installation point can affect the total cost.
It’s best to consult with a licensed electrician for an accurate estimate.
Can You Plug An Ev Into A 240V Outlet?
Yes, you can plug an electric vehicle (EV) into a 240V outlet. It’s a common and convenient option for charging EVs at home or certain public charging stations.
How Much Does It Cost To Install 240-Volt Outlet For Tesla?
The cost to install a 240-volt outlet for a Tesla depends on various factors, such as the location and existing electrical setup. Generally, prices range from $300 to $900, including labor and materials. Contact a licensed electrician for a precise estimate tailored to your specific circumstances.
Can You Charge A Car From 240V Outlet?
Yes, you can charge a car from a 240V outlet.
Conclusion
Installing a 240V outlet for an electric car is a smart choice for convenience and efficiency. By following the steps outlined in this guide, you can successfully complete the installation process and enjoy the benefits of faster charging times. Remember to consult a professional electrician for any complex electrical work.
With this new outlet, you’ll be ready to hit the road in no time, knowing that your electric car will always be charged and ready to go. Start enjoying the convenience and environmental benefits today!