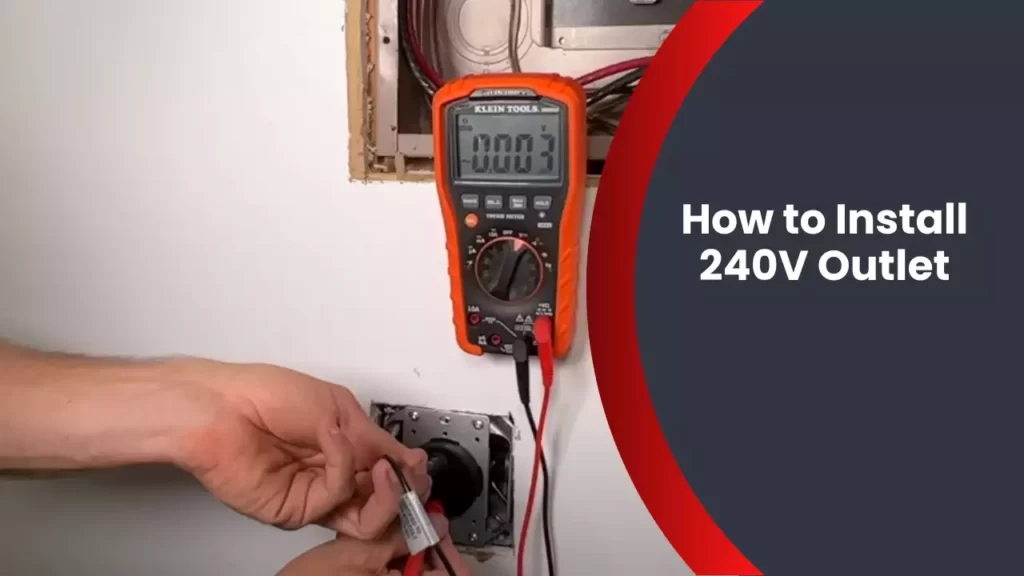
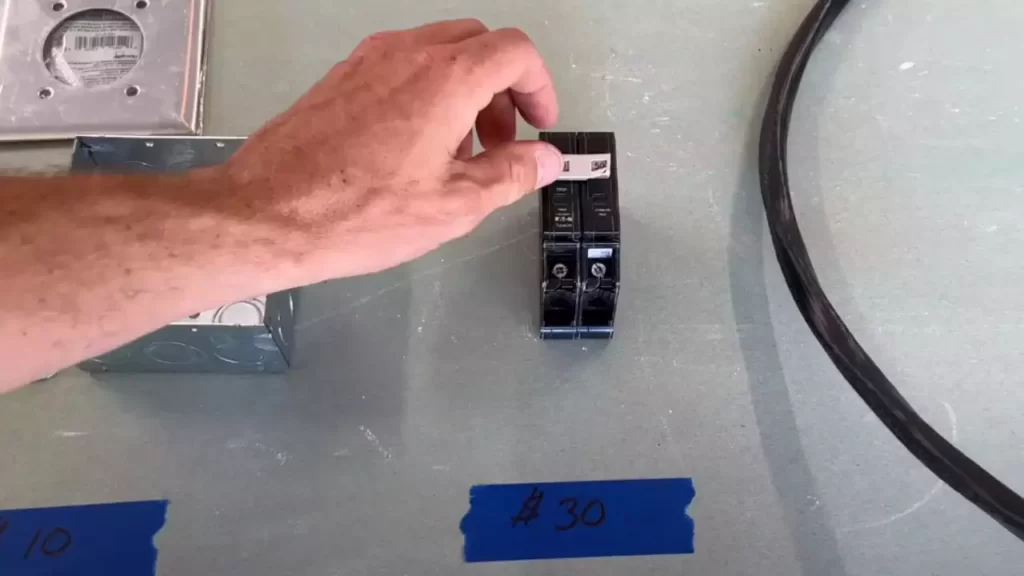
To install a 240V outlet, shut off power to the circuit, remove the existing outlet, install a new double-pole circuit breaker, pull new cables, and connect them to the outlet. Welcome to our guide on how to install a 240V outlet.
Installing a 240V outlet allows you to power high-voltage appliances, such as electric dryers and ranges. This step-by-step tutorial will walk you through the process of safely and accurately installing a 240V outlet in your home. By following these instructions, you will be able to confidently complete this electrical installation task with ease.
So, let’s get started on upgrading your electrical system to accommodate your power needs.
The Basics Of 240V Outlets
Understanding the Purpose of 240V Outlets
Before delving into the installation process, it is crucial to understand the purpose of 240V outlets. These outlets are commonly used for high-powered appliances that require a significant amount of electrical energy to operate efficiently. Unlike standard 120V outlets, which are suitable for most household appliances, 240V outlets provide double the voltage, enabling devices such as electric stoves, dryers, and air conditioners to function optimally.
Key Considerations Before Installing a 240V Outlet
Prior to embarking on the installation process, several key considerations must be taken into account. These factors can greatly impact the success and safety of the project. Here are some important things to bear in mind:
- Electrical Load: Determine the electrical load requirement of the appliance that will utilize the 240V outlet. This is typically indicated on the appliance’s specifications or user manual.
- Location: Choose an appropriate location for the outlet, ensuring it is easily accessible and away from moisture sources.
- Circuit Panel: Check if your circuit panel has sufficient capacity to accommodate the new circuit required for the 240V outlet.
- Permits and Regulations: Research local building codes and regulations to ensure compliance. If necessary, obtain the relevant permits before proceeding.
Safety Precautions to Keep in Mind
Enhancing electrical safety should be a top priority when working with high-voltage electricity. Follow these safety precautions to minimize any potential risks:
- Power Off: Ensure all power to the electrical panel is turned off before starting the installation process.
- Test Equipment: Utilize a voltage tester to confirm that the power is indeed turned off before commencing any work.
- Insulation: Wear appropriate personal protective equipment such as gloves and safety goggles to protect yourself from electrical shock.
- Proper Wiring: Ensure that all electrical connections are secure, properly insulated, and in accordance with wiring codes and standards.
- Professional Assistance: If you are unfamiliar with electrical work or unsure about any step of the installation process, it is recommended to seek professional assistance.
By understanding the purpose, considering key factors, and adhering to safety precautions, installing a 240V outlet can be a manageable task, providing you with the required electrical power for your high-powered appliances.
Evaluating Your Electrical Needs
Before embarking on the installation of a 240V outlet, it is crucial to evaluate your electrical needs. This step is essential to ensure that you have the appropriate electrical infrastructure to accommodate the outlet and the appliances or equipment that will be connected to it. Taking the time to assess your requirements beforehand will save you from running into electrical capacity issues or purchasing equipment that cannot be powered by a standard 120V outlet.
Determining the Appliances or Equipment that Require a 240V Outlet
Prior to installing a 240V outlet, you need to identify the appliances or equipment in your home that require this voltage level. While most household devices operate on 120V, certain high-powered devices such as electric ovens, dryers, welders, air conditioners, and power tools necessitate a 240V power supply. Make a list of all the equipment you own or plan to acquire that fall into this category.
- Electric Oven
- Dryer
- Welder
- Air Conditioner
- Power Tools
Assessing Your Electrical Panel’s Capacity
The next step involves evaluating your electrical panel’s capacity to handle the additional load from a 240V outlet. Your electrical panel is responsible for distributing electricity throughout your home, and it has a specific amperage rating that determines how much power it can handle.
To determine the available capacity, locate your electrical panel and examine the main breaker. The number on this breaker corresponds to the maximum amperage your panel can support. If your panel already operates near its limit or is outdated, you might need to upgrade it before installing a 240V outlet.
Consulting with a Professional Electrician
When it comes to electrical installations, it is always recommended to consult with a professional electrician. An experienced electrician can assess your electrical needs accurately, evaluate your electrical panel’s capacity, and guide you through the installation process in compliance with local regulations and safety standards.
Contacting a professional electrician ensures that your electrical requirements are met efficiently and safely. They can determine if your electrical system requires any upgrades or modifications to accommodate the new 240V outlet and provide you with a reliable installation solution.
In conclusion, evaluating your electrical needs is a crucial step before installing a 240V outlet. By determining the appliances or equipment that require this voltage level, assessing your electrical panel’s capacity, and consulting with a professional electrician, you can ensure a well-informed and successful installation that meets your power demands.
Selecting The Right Location For Your 240V Outlet
When it comes to installing a 240V outlet, choosing the right location is crucial. The placement of your outlet can greatly impact its functionality and convenience. This section will discuss the key considerations for selecting the optimal location for your 240V outlet.
Proximity to Electrical Panel and Appliance/Equipment
The first aspect to consider is the proximity of the outlet to both your electrical panel and the appliance or equipment you plan to connect to it. A shorter distance between these components will minimize the amount of wiring needed, reducing potential voltage drop and increasing overall efficiency.
Ensure that the outlet is placed within a reasonable distance from your electrical panel. If the outlet is too far away, it may require excessive wiring, leading to increased costs and potential power loss. Similarly, consider the location of your appliance or equipment. Placing the outlet nearby will provide convenient access, minimizing any obstructions or inconveniences.
Accessibility for Installation and Future Maintenance
In addition to proximity, accessibility is another important factor when selecting the location for your 240V outlet. Accessibility refers to the ease of installation and future maintenance for your outlet.
Choose a location that allows for straightforward installation, with accessible wiring routes and sufficient space for the outlet and accompanying components. This will not only simplify the installation process but also increase future maintenance convenience.
Consider the accessibility of the area in terms of potential obstructions. Ensure there are no obstacles such as furniture, fixtures, or appliances that would hinder easy access to the outlet. By selecting a location that allows for unobstructed access, you can save time and effort in both the installation and future upkeep of your 240V outlet.
Compliance with Local Electrical Codes
Lastly, it is essential to comply with local electrical codes when selecting the location for your 240V outlet. Local regulations vary, and it is crucial to adhere to these codes to ensure safety and avoid any potential legal issues.
Before installing the outlet, familiarize yourself with the electrical codes specific to your area. These codes often dictate requirements such as outlet height, clearances, and the use of appropriate wiring and equipment. By adhering to these regulations, you can guarantee the safe and reliable operation of your 240V outlet.
| Consideration | Explanation |
|---|---|
| Proximity to Electrical Panel and Appliance/Equipment | Minimize wiring distance, reducing voltage drop and maximizing efficiency. |
| Accessibility for Installation and Future Maintenance | Ensure easy access, simplifying installation and future upkeep. |
| Compliance with Local Electrical Codes | Follow local regulations to ensure safety and legal compliance. |
By considering these factors and adhering to local electrical codes, you can select the ideal location for your 240V outlet. This will enable efficient and reliable power supply to your appliance or equipment, enhancing your overall electrical setup.
Gathering The Necessary Tools And Materials
Before you begin the installation process of a 240V outlet, it’s crucial to gather all the essential tools and materials required for the job. Having the right equipment not only ensures a smooth and efficient installation, but it also promotes safety throughout the process.
Essential Tools for the Installation Process
Here are the tools you will need:
- Wire strippers: These will come in handy for removing the insulation from the electrical wires.
- Screwdriver set: Different screwdriver sizes will be required to secure electrical components effectively.
- Electrical tape: This will be used to insulate exposed wires and provide additional protection.
- Wire cutters: These will be used to cut and trim the electrical wires to the appropriate lengths.
- Drill with a hole saw attachment: You’ll need this to create the opening for the electrical box.
- Wire nuts: These will be used to secure the connections between wires.
- Electrical tester: This tool is crucial for checking if the electrical supply is turned off.
Required Electrical Materials and Components
Make sure you have the following electrical materials and components:
- 240V outlet: This is the main component that will allow you to safely connect your high-power electrical devices.
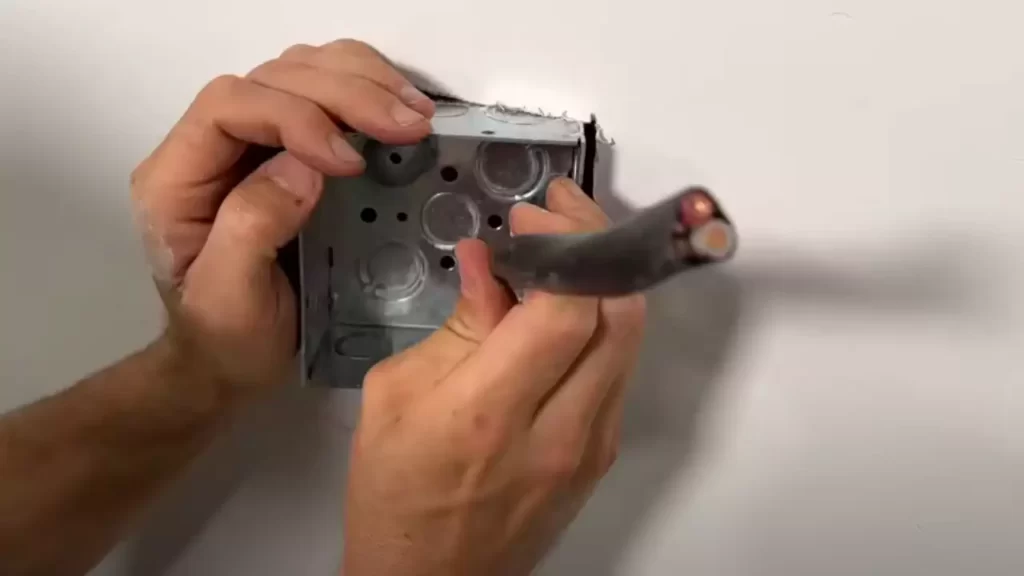
- Electrical box: Choose a box that is compatible with your chosen outlet and can be safely mounted.
- Electrical wires: It’s essential to have the appropriate gauge and color-coded wires for your specific installation.
- Cable connectors: These connectors will be required to secure the wires to the electrical box.
- Mounting screws: Ensure you have the right screws for securing the electrical box to the wall.
- Wire staples: These will help secure the electrical wires to the studs or framing.
Optional Accessories for Enhanced Efficiency and Safety
In addition to the essential tools and materials, you can consider the following optional accessories to make your installation process more efficient and safe:
- Cable organizer: This will help keep your electrical wires neatly organized, reducing the risk of entanglement or damage.
- GFCI outlet: Installing a ground fault circuit interrupter outlet adds an extra layer of safety by immediately cutting off power if a ground fault is detected.
- Conduit: Using a conduit will provide additional protection for your electrical wires, especially in areas where there is a risk of physical damage or exposure.
- Wire labels: Labeling your wires can help you identify them easily during installation and future maintenance.
- Wire connectors: These connectors allow for quick and secure connections between wires without the need for manual twisting.
By ensuring you have all the necessary tools and materials, as well as considering optional accessories for enhanced efficiency and safety, you’ll be well-prepared to install a 240V outlet successfully.
Step-By-Step Installation Guide For A 240V Outlet
Step-by-Step Installation Guide for a 240V Outlet
Installing a 240V outlet can be a useful addition to your home or workspace, allowing you to power heavy-duty appliances such as electric dryers, ovens, or even charging stations for electric vehicles. While the electrical work involved may seem intimidating, with the right knowledge and safety precautions, you can confidently tackle this project. In this step-by-step installation guide, we will walk you through the process of installing a 240V outlet, ensuring safe and efficient power supply for your needs.
Powering Off and Disconnecting Electrical Circuits
Before starting any electrical work, your safety should be the top priority. It is essential to power off and disconnect the electrical circuits to be able to work safely without any risk of electric shock or short circuits. Follow these steps to power off and disconnect electrical circuits:
- Identify the correct circuit: Start by identifying the circuit that supplies power to the outlet you are planning to replace or install.
- Shut off the power: Locate the main breaker panel or sub-panel and switch off the breaker connected to the circuit. Make sure to test the circuit with a voltage tester to confirm it is no longer energized.
- Tag the circuit: To avoid confusion, tag the circuit breaker with a label indicating it is being worked on to prevent anyone from accidentally turning it back on.
Removing the Existing Outlet (if applicable)
If you are replacing an existing outlet with a 240V outlet, you will need to remove it first. Follow these steps to remove the existing outlet:
- Double-check the power: Ensure the circuit is powered off and use a voltage tester to verify that there is no electricity flowing through the wires.
- Remove the faceplate and outlet screws: Unscrew the faceplate and outlet screws using a screwdriver. Carefully pull the outlet away from the electrical box while being mindful of the connected wires.
- Disconnect the wires: Loosen the terminal screws on the outlet and disconnect the wires connected to it. Pay close attention to the wire colors and make a note of the connections for future reference.
- Remove the outlet: Once the wires are disconnected, you can remove the old outlet from the electrical box.
Wiring and Connecting the New 240V Outlet
Now that you have prepared the circuit and removed the existing outlet (if applicable), it is time to wire and connect the new 240V outlet. Follow these steps to ensure a proper installation:
- Prepare the wires: Strip the insulation from the ends of the wires, making sure to expose enough copper to securely connect them.
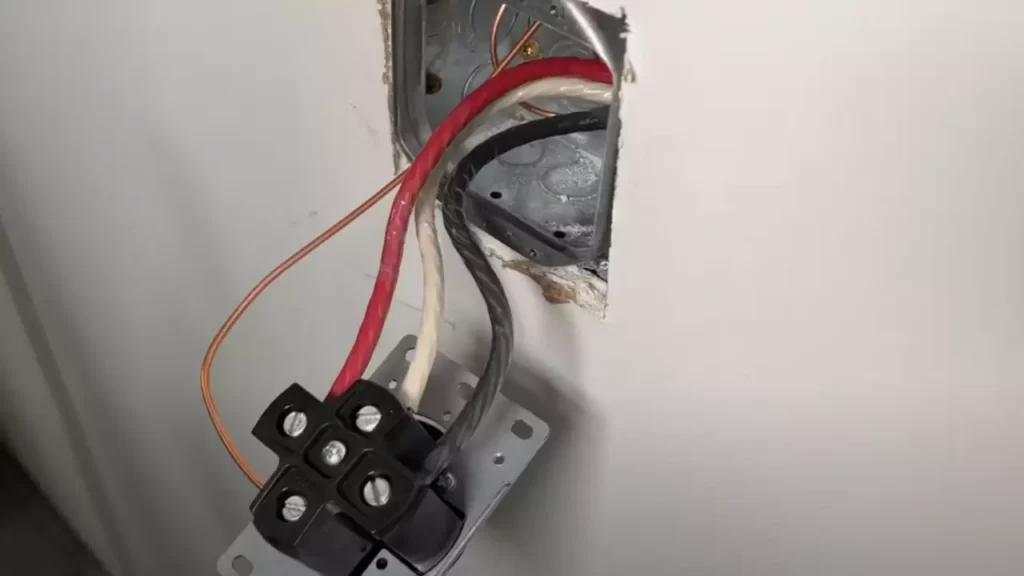
- Connect the wires: Attach the hot wires (usually black and red) to the brass terminal screws on the new outlet and tighten them securely. Connect the neutral wire (usually white) to the silver terminal screw. If a grounding wire is present, connect it to the green grounding screw.
- Tighten the terminal screws: Make sure all terminal screws are tightened properly to establish a secure and reliable electrical connection.
- Attach the outlet to the electrical box: Carefully tuck the wires inside the electrical box and align the new outlet with the screw holes. Use the provided screws to secure the outlet in place.
Grounding and Finalizing the Installation Process
Grounding is a crucial step in any electrical installation to ensure safety and prevent electrical hazards. Follow these steps to properly ground and finalize the installation of your 240V outlet:
- Attach the grounding wire: If your outlet requires grounding, attach the grounding wire to the green grounding screw on the outlet.
- Secure the outlet: Double-check that all terminal screws are tightened, and the outlet is securely fastened to the electrical box.
- Restore power: Return to the breaker panel and switch the circuit breaker back on. Test the newly installed 240V outlet with a voltage tester to confirm that it is working correctly.
- Install a faceplate: If not already attached, install a faceplate over the outlet and screw it in place for a finished look.
Congratulations! You have successfully completed the installation of a 240V outlet. Now you can safely power your heavy-duty appliances or charging stations with ease. Remember to always prioritize safety and consult a professional electrician if you have any doubts or concerns.
Testing And Troubleshooting The 240V Outlet
Once you have successfully installed a 240V outlet in your home, it’s crucial to test and troubleshoot the outlet to ensure it’s working safely and efficiently. This step is essential to avoid any electrical hazards or potential issues that may arise later on. In this section, we will discuss how to conduct a voltage test, verify proper wiring and connections, and address common issues along with potential solutions.
Conducting a Voltage Test
Before you start using the 240V outlet, it is essential to conduct a voltage test. This test will verify if the outlet is providing the correct voltage and ensures it is safe to use. You will need a digital multimeter to perform this test.
- Start by setting your multimeter to the AC voltage setting.
- Insert one probe into the hot slot of the outlet and the other probe into the neutral slot.
- Check the multimeter reading. If it shows the desired voltage, typically around 240V, it means the outlet is functioning correctly.
- If you get a reading significantly lower or higher than the expected voltage, there might be an issue with the wiring or connection that needs to be addressed.
Verifying Proper Wiring and Connections
Verifying the proper wiring and connections of the 240V outlet is crucial to ensure its safety and effectiveness. Follow these steps to check the wiring and connections:
- Switch off the power supply to the outlet by turning off the circuit breaker or disconnecting the power source.
- Remove the outlet cover plate and inspect the wiring connections.
- Make sure all the wires are securely connected and tightly screwed into place.
- Check for any loose or damaged wires that may cause issues.
Addressing Common Issues and Potential Solutions
When troubleshooting a 240V outlet, you may come across common issues that can easily be resolved. Here are some potential solutions for these issues:
| Issue | Potential Solution |
|---|---|
| No Power | Check if the circuit breaker has tripped and reset it if necessary. If the problem persists, seek professional help. |
| Low Voltage | Inspect the wiring connections for loose or damaged wires. If necessary, replace the faulty wires. |
| Hot Outlet | Ensure the outlet is not overloaded. Disconnect any extra appliances or devices connected to it. If the problem continues, consult an electrician. |
Always remember to prioritize your safety when troubleshooting electrical issues. If you are unsure about any aspect of the testing or troubleshooting process, it’s best to seek professional assistance to avoid any potential hazards.
Post-Installation Best Practices
Once you have successfully installed your 240V outlet, it is crucial to follow certain best practices to ensure its optimal performance and safety. In this section, we will discuss key considerations after the installation process, including proper labeling and documentation, regular inspection and maintenance, and the importance of seeking professional assistance for complex electrical tasks.
Proper Labeling and Documentation for Future Reference
Properly labeling and documenting your newly installed 240V outlet is essential for future reference and ease of use. This will help you and anyone else who may need to access the outlet to identify its purpose, voltage, and any specific safety precautions to take. Here are some recommendations:
- Label the outlet: Use clear and visible labels to indicate the voltage level and the specific appliance or equipment it is intended for. For example, if the outlet is designated for an electric vehicle charger, clearly label it as such.
- Create a documentation: Keep a record of the installation process, including any modifications or additional considerations taken. This documentation will prove valuable in cases of future troubleshooting or upgrades.
- Include safety instructions: Ensure your labeling includes any necessary safety instructions, such as warnings about high voltage or specific precautions while using the outlet. This will help prevent accidents and ensure everyone’s safety.
Regular Inspection and Maintenance of the 240V Outlet
The regular inspection and maintenance of your newly installed 240V outlet are paramount to its functionality and safety. By routinely checking and maintaining the outlet, you can identify and address any potential issues before they escalate. Here are some practices to follow:
- Visual inspection: Regularly inspect the outlet for any signs of physical damage, loose connections, or overheating. Look for any frayed wires, burnt marks, or unusual smells that may indicate a problem.
- Cleanliness: Keep the area around the outlet clean and free from dust or debris. Accumulated dirt can lead to poor connectivity and increase the risk of electrical problems.
- Tighten connections: Over time, connections may become loose, compromising the outlet’s performance. Use the appropriate tools to securely tighten any loose connections, ensuring a stable electrical flow.
- Conduct a periodic test: Consider conducting a periodic test of the outlet using a voltage tester to verify its functionality. This will help detect any irregularities or deficiencies that may require attention.
Seeking Professional Assistance for Complex Electrical Tasks
While installing a 240V outlet may seem like a straightforward task, certain situations demand the expertise of a professional electrician. Complex electrical tasks, such as panel upgrades or rewiring, require advanced knowledge and specialized tools. Here’s why seeking professional assistance is crucial:
- Electrical expertise: A professional electrician possesses the knowledge and experience to handle complex electrical tasks safely and efficiently. Their expertise ensures proper installation, minimizing the risk of hazards and electrical malfunctions.
- Legal compliance: In some regions, specific electrical tasks must be carried out by a licensed professional to comply with local regulations. Hiring a professional ensures your installation adheres to these regulations, avoiding any potential legal issues.
- Peace of mind: By entrusting complex electrical tasks to a professional, you can have peace of mind knowing that the job will be done correctly and to the highest standard. This reduces the risk of future problems and ensures the longevity of your 240V outlet.
By following these post-installation best practices, you can ensure the optimal use, longevity, and safety of your 240V outlet. Proper labeling and documentation, regular inspection and maintenance, and seeking professional assistance when needed all contribute to a reliable and efficient electrical system.
Frequently Asked Questions
How Much Does It Cost To Install A 240V Outlet?
The cost to install a 240V outlet can vary depending on factors like location and complexity. On average, homeowners can expect to spend around $200 to $600 for the installation. It’s best to consult with a licensed electrician for an accurate quote based on your specific needs.
Can You Convert A 120V Outlet To 240V?
Yes, you can convert a 120V outlet to 240V by rewiring it and replacing the circuit breaker. It’s important to consult an electrician to ensure proper safety measures are followed.
How Many Wires Do I Need For A 240V Outlet?
For a 240V outlet, you typically need three wires. These include two hot wires, each carrying 120 volts, and one neutral wire. These wires provide the necessary power and ensure proper functioning of electrical devices.
Does A 240V Outlet Need Its Own Breaker?
Yes, a 240V outlet needs its own breaker. This is because the breaker helps protect against overloads and short circuits that could cause damage or fires. Having a dedicated breaker for the outlet ensures that it has the necessary power supply and prevents other circuits from being affected.
Conclusion
To summarize, installing a 240V outlet may seem daunting at first, but with the right tools and knowledge, it can be a manageable task. By following the step-by-step instructions outlined in this blog post, you can ensure a safe and efficient installation process.
Remember to always prioritize safety and consult a professional if you are unsure. With this new outlet, you’ll have the power you need to run high-voltage appliances and equipment effortlessly. Happy installing!