To install a 230V outlet, start by turning off the power, then remove the cover plate and the old outlet. Connect the new wires to the appropriate terminals, and secure the outlet to the electrical box.
Finally, test the outlet with a voltage tester to ensure it is properly installed. Now, let’s dive into the detailed steps on how to install a 230V outlet. Installing a 230V outlet can seem like a daunting task, but with the right preparation and knowledge, you can do it yourself.
Whether you’re adding a new outlet or replacing an old one, this guide will walk you through the process step by step. By the end, you’ll be able to safely and effectively install a 230V outlet in your home or office. So, let’s get started and make sure you have all the necessary tools and materials for the job.
Understanding The Basics Of A 230V Outlet
Understanding the Basics of a 230V Outlet
When it comes to electrical outlets, most people are familiar with the standard 120V outlets found in homes and offices. However, there are situations where a higher voltage outlet is required, such as for heavy machinery, large appliances, or power-hungry equipment. In such cases, a 230V outlet is the solution.
What is a 230V Outlet and its Purpose?
A 230V outlet, also known as a 220V or 240V outlet, is designed to handle higher voltage requirements. Unlike the standard 120V outlets, which deliver a lower voltage, a 230V outlet provides double the voltage, allowing for more power to be supplied.
The purpose of a 230V outlet is to meet the demands of equipment that requires a higher voltage to operate. This could include electric stoves, dryers, air conditioners, power tools, and various industrial machinery. By supplying the necessary voltage, a 230V outlet ensures that these devices function efficiently and reliably.
Different Types of Electrical Outlets and their Voltages
There are several types of electrical outlets available, each with different voltage ratings. Understanding these types can help you determine which outlet is appropriate for your specific needs.
Here are some of the common electrical outlets and their corresponding voltages:
Outlet Type Voltage Level
———————————–
120V Standard voltage for household outlets
220V Common for high-powered appliances like electric stoves and dryers
240V Common for large building systems, industrial machinery, and HVAC units
250V Used for specific equipment requiring slightly higher voltage, such as commercial refrigerators
480V Industrial-grade voltage for heavy machinery and manufacturing equipment
Why You Might Need a 230V Outlet in Your Home or Workspace
In some cases, the electrical demands of certain appliances or equipment exceed what a standard 120V outlet can provide. This is where a 230V outlet becomes necessary. Here are some situations where you might need a 230V outlet in your home or workspace:
1. Operating high-powered appliances: Electric stoves, ovens, and dryers often require a 230V outlet to deliver the necessary power for efficient operation.
2. Using heavy-duty power tools: Power tools such as table saws, welders, and air compressors often require a higher voltage to handle their high power consumption.
3. Running energy-intensive equipment: In commercial or industrial settings, machinery like HVAC systems, manufacturing equipment, and industrial compressors rely on the higher voltage provided by a 230V outlet to meet their energy requirements.
By installing a 230V outlet, you can ensure that your electrical devices and equipment receive the power they need to operate optimally. Whether it’s for residential or commercial purposes, understanding the basics of a 230V outlet is crucial when it comes to meeting high-voltage demands.
Safety Precautions And Tools For Installing A 230V Outlet
When it comes to installing a 230V outlet, safety should always be your top priority. Working with electricity can be dangerous if proper precautions aren’t taken, so it’s important to know the necessary safety equipment and tools as well as the proper dress code and precautions to follow. In this section, we’ll discuss the importance of turning off the power supply before starting any work, the necessary safety equipment and tools you’ll need, and the proper dress code and precautions to ensure your safety.
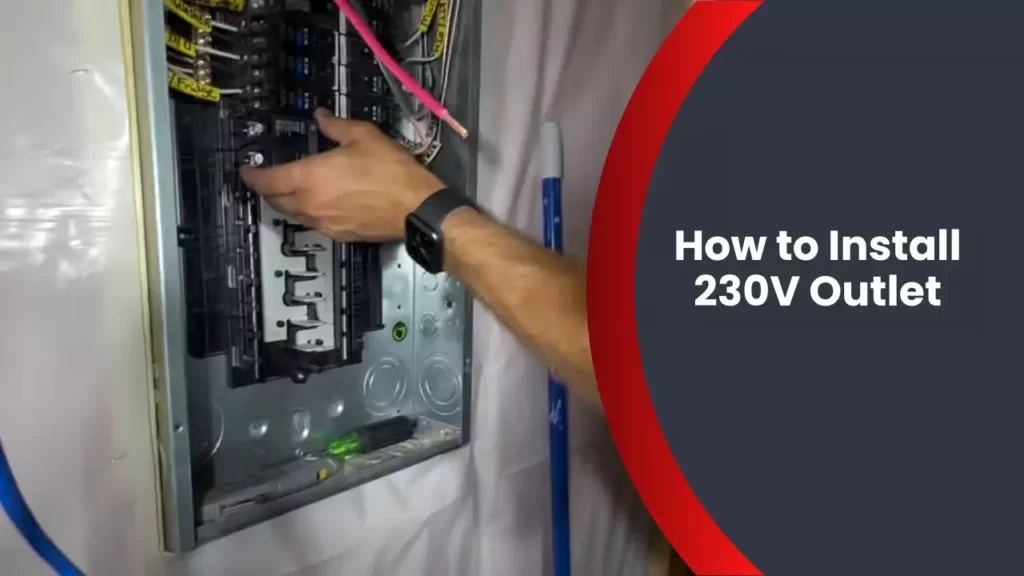
Importance of turning off the power supply
Turning off the power supply is a crucial step before you start working on installing a 230V outlet. This ensures that you won’t get electrocuted or experience any other electrical hazards while working. To turn off the power supply, you’ll need to locate the main electrical panel in your house and flip the corresponding circuit breaker to the “off” position for the area you’ll be working in. This will cut off the electricity for that specific area, allowing you to work safely without any live wires.
Necessary safety equipment and tools
In addition to turning off the power supply, it’s important to have the necessary safety equipment and tools on hand. This includes:
- Insulated gloves
- Safety goggles
- Insulated screwdrivers
- Non-contact voltage tester
- Wire strippers
- Electrical tape
- Wire nuts
These tools will help protect you from electrical shocks and ensure that the installation process goes smoothly.
Proper dress code and precautions while working with electricity
When working with electricity, it’s important to dress appropriately and take additional precautions to minimize any potential risks. Follow these guidelines:
- Wear clothing made of non-conductive materials, such as cotton.
- Avoid wearing jewelry or accessories that could come in contact with live wires.
- Make sure your workspace is well-lit to avoid any accidents.
- Avoid using wet or damp tools as they can increase the risk of electrical shock.
- Keep a fire extinguisher nearby in case of emergencies.
By following these proper dress code and precautions, you will greatly reduce the chances of accidents or injuries while working on your 230V outlet installation.
Step-By-Step Guide To Installing A 230V Outlet
If you’re looking to install a 230V outlet, you’ve come to the right place. With the right tools and a little expertise, you’ll be able to complete this project in no time. In this step-by-step guide, we’ll walk you through the process of assessing the electrical load requirements, planning the location of the outlet, gathering the necessary materials, shutting off the power supply to the area, removing the existing outlet or installing a new one, wiring the 230V outlet, securing and testing the outlet, and patching up the wall or surface if needed. So, let’s get started!
Assessing the electrical load requirements
Before installing a 230V outlet, it’s crucial to assess the electrical load requirements to ensure the outlet can safely handle the power demands of the devices you plan to connect. The electrical load is measured in amps, and it’s essential to check the circuit breaker to determine the maximum load it can handle. If the load requirements exceed the capacity, you may need to upgrade the circuit breaker or install an additional circuit. This step is crucial in preventing electrical hazards and ensuring a smooth installation process.
Planning the location of the outlet
Now that you have assessed the electrical load requirements, it’s time to plan the location of the 230V outlet. Consider the proximity to the devices that require this voltage, ensuring they’re within a reasonable distance. Take into account the accessibility, convenience, and safety of the location. It’s best to install the outlet away from damp areas or anything that could potentially cause electrical issues. Additionally, check local building codes and regulations to ensure compliance and safety.
Gathering the necessary materials
Before you start the installation process, gather all the necessary materials. This will help you complete the project smoothly without any interruptions. Here’s a list of materials you’ll likely need:
| Materials |
|---|
| 230V outlet |
| Wire strippers |
| Electrical tape |
| Wire nuts |
| Screwdriver |
| Drill |
| Wire connectors |
| Circuit tester |
| Hammer |
Shutting off the power supply to the area
Safety is paramount when working with electricity. Before proceeding with the installation, shut off the power supply to the area where you’ll be installing the outlet. Locate the circuit breaker panel and switch off the relevant breaker to ensure no electricity is flowing. Use a circuit tester to double-check that the power is indeed off before moving forward with the installation process.
Removing the existing outlet or installing a new one
Next, you need to determine whether you’ll be removing an existing outlet or installing a new one. If you’re replacing an old outlet with a 230V outlet, turn off the power supply, remove the cover plate, and use a screwdriver to disconnect the wires. If you’re installing a brand new outlet, you’ll need to cut a hole in the wall or surface using a drill and then attach the outlet box securely. Remember to consult the manufacturer’s instructions for specific details on installation and connections.
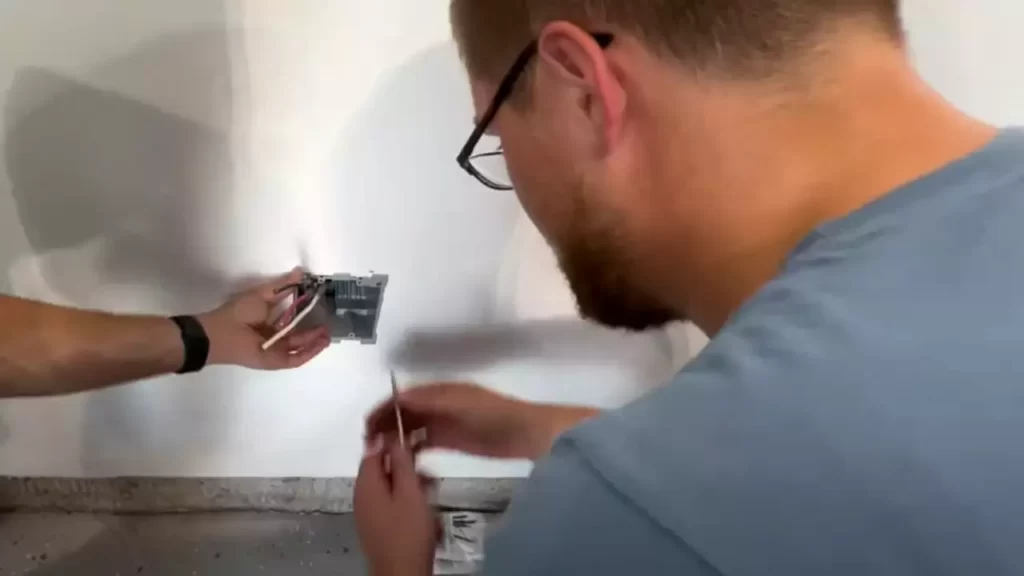
Wiring the 230V outlet
Now comes the crucial step of wiring the 230V outlet. Carefully strip the wires to expose the copper and connect them correctly to the outlet terminals. Use wire nuts to secure the connections, ensuring there are no loose or exposed wires. Consult an electrician or the manufacturer’s instructions if you’re unsure about the wiring process. Take your time and verify that all connections are secure and tight before proceeding to the next step.
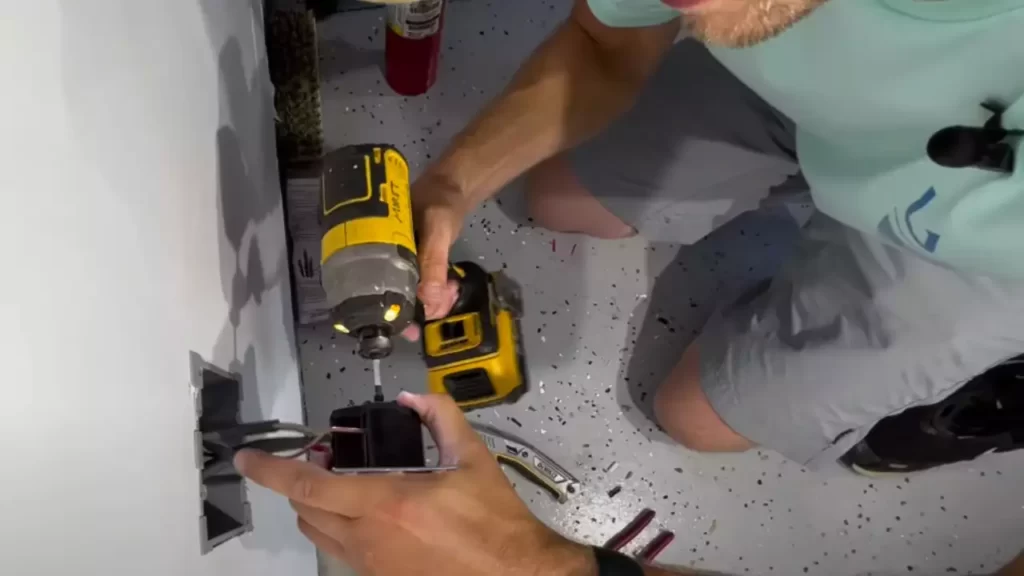
Securing and testing the outlet
With the wiring complete, it’s time to secure the 230V outlet. Attach the outlet securely to the outlet box using screws, making sure it’s level and flush with the wall or surface. Once secured, it’s important to test the outlet before putting it to use. Use a circuit tester to verify that the outlet is functioning correctly. Plug in a device that requires 230V to ensure it powers up successfully. If all tests pass, you’re one step closer to completing the installation process.
Patching up the wall or surface if needed
After successfully installing and testing the 230V outlet, it’s time to clean up and patch up the wall or surface if needed. Fill any holes or gaps using plaster or spackle and allow it to dry. Once dry, sand it down to create a smooth surface. Finally, paint or apply the appropriate finish to match the surrounding area. This step will give your installation a professional and finished look.
Congratulations! You’ve successfully completed the steps to install a 230V outlet. While this process may seem daunting at first, following this step-by-step guide ensures a safe and efficient installation. Remember, if you’re ever unsure about any step or encounter any difficulties, it’s best to consult a qualified electrician to avoid any potential risks or hazards.+
Troubleshooting And Common Issues With 230V Outlet Installations
Installing a 230V outlet can greatly enhance the functionality and versatility of your electrical system. However, it’s not uncommon to encounter some issues during the installation process. In this section, we will discuss some troubleshooting tips for identifying and solving wiring problems, dealing with breaker tripping issues, testing the outlet for proper functionality, and seeking professional help for more complex issues.
Identifying and solving wiring problems
If you’ve recently installed a 230V outlet and are experiencing issues, there’s a possibility that there may be wiring problems at play. These problems can range from loose connections to incorrect wire sizing. To identify and solve these issues, follow these steps:
- Step 1: Turn off the power to the outlet by switching off the corresponding breaker in your electrical panel.
- Step 2: Inspect the wiring connections at the outlet. Look for any loose or disconnected wires. Ensure all connections are secure and properly tightened.
- Step 3: Check the wire sizes. Make sure the wires are appropriately sized for the outlet’s electrical load. Undersized wires can cause overheating and other electrical problems.
- Step 4: If you suspect any wiring issues, consider consulting a qualified electrician to assess and resolve the problem. They have the expertise to handle complex electrical systems.
Dealing with breaker tripping issues
When you attempt to use a 230V outlet and notice that the breaker keeps tripping, it can be frustrating. Here are some steps you can take to address this issue:
- Step 1: Determine the cause of the tripping. It could be due to a short circuit, overloaded circuit, or a faulty appliance.
- Step 2: Unplug all appliances from the outlet and reset the breaker.
- Step 3: Plug in the appliances one by one, ensuring they are in good working condition. If the breaker trips when a specific appliance is plugged in, that appliance may have a fault.
- Step 4: If the breaker continues to trip even with all appliances unplugged, there may be an issue with the circuit wiring. In such cases, it’s essential to consult a professional electrician to avoid any risks.
Testing the outlet for proper functionality
Once you’ve installed a 230V outlet and addressed any wiring or breaker issues, it’s crucial to test the outlet to ensure proper functionality. Follow these steps to test your outlet:
- Step 1: Turn off the power to the outlet by switching off the corresponding breaker in your electrical panel.
- Step 2: Use a voltage tester to confirm that there is no electrical current present.
- Step 3: Plug in a compatible appliance or tool into the outlet.
- Step 4: Turn on the power to the outlet by flipping the breaker switch.
- Step 5: Check if the appliance or tool is receiving power and functioning correctly.
Seeking professional help for more complex issues
In some cases, troubleshooting and resolving issues with a 230V outlet installation may require professional expertise. If you encounter any of the following situations, it’s recommended to seek assistance from a qualified electrician:
- If you are unsure about identifying or solving wiring problems.
- If your breaker continues to trip even after following the troubleshooting steps.
- If you face difficulties in testing the outlet or determining its functionality.
- If you notice any signs of electrical hazards or abnormal behavior after the installation.
A professional electrician can help diagnose complex issues and ensure the safe and efficient operation of your 230V outlet.

Upgrading An Existing Outlet To A 230V Outlet
If you’re working with high-voltage equipment or appliances that require a 230V outlet, you may need to upgrade your existing outlet. This process involves evaluating if upgrading is necessary, adapting the wiring for a higher voltage, and replacing the outlet with a proper 230V outlet. Let’s dive into each step to ensure a safe and successful upgrade.
Evaluating if Upgrading is Necessary
Before jumping into the upgrade process, it’s important to evaluate if upgrading your existing outlet is necessary. Not all equipment and appliances require a 230V outlet, so you want to make sure that it’s the right move for your specific needs. Here are a few factors to consider:
- The voltage requirements of your equipment or appliance – Check the manufacturer’s specifications or consult a professional to determine if a 230V outlet is necessary.
- The electrical load of your circuit – Make sure that your electrical system can handle the increased load that comes with a higher voltage. Upgrading to a 230V outlet may require additional circuit modifications.
Adapting the Wiring for a Higher Voltage
Once you’ve confirmed that upgrading to a 230V outlet is necessary, the next step is to adapt the wiring to accommodate the higher voltage. This process requires careful attention and expertise to ensure the safety of your electrical system. Here are the essential steps:
- Turn off the power – Before working on any electrical components, always turn off the power at the circuit breaker to avoid any risk of electric shock.
- Identify the circuit wiring – Locate the wiring for the outlet you intend to upgrade. This includes identifying the hot, neutral, and ground wires.
- Replace the wiring – Depending on the existing wiring configuration, you may need to replace it with appropriate wiring capable of handling the higher voltage. This task is best left to a qualified electrician.
- Connect the new wiring – Connect the new wiring to the outlet, ensuring each wire is securely fastened and properly insulated.
Replacing the Outlet with a Proper 230V Outlet
Now that the wiring is adapted for a higher voltage, it’s time to replace the old outlet with a proper 230V outlet. Here’s how to go about it:
- Remove the old outlet – Carefully remove the old outlet from the wall or junction box, ensuring the wires are disconnected.
- Prepare the junction box – Inspect the junction box to ensure it is in good condition and can accommodate the 230V outlet.
- Install the new outlet – Fit the new 230V outlet into the junction box, making sure it is securely mounted. Connect the wires to their respective terminals, following the manufacturer’s instructions.
- Double-check the connections – Before restoring power, double-check all connections to ensure they are tight and properly secured. Loose connections can lead to electrical hazards.
- Restore power and test – Once you’re confident in your connections, restore power at the circuit breaker and test the new 230V outlet to ensure it’s functioning correctly.
Upgrading an existing outlet to a 230V outlet requires careful evaluation, wiring modifications, and the installation of a proper outlet. If you’re unsure about any step, it’s always best to consult a qualified electrician who can provide expert guidance and ensure your safety throughout the process.
Tips For Safety And Maintenance Of 230V Outlets
When it comes to ensuring the safety and proper functioning of your 230V outlets, regular maintenance is key. By following these simple tips, you can help prevent accidents and extend the lifespan of your electrical outlets. Here are some important pointers to keep in mind:
Regularly checking for loose connections and signs of wear
One of the most crucial aspects of maintaining a safe electrical system is routinely inspecting your 230V outlets for any loose connections or signs of wear. Over time, the wiring inside the outlet can become loose or frayed, potentially leading to electrical hazards or even fires. By regularly examining your outlets, you can identify and address these issues before they escalate.
To properly conduct an inspection, make sure to:
- Turn off the power supply before touching any electrical components.
- Carefully remove the outlet cover using a screwdriver.
- Inspect the wiring connections for any signs of looseness or corrosion.
- Look out for burn marks, melting, or other signs of damage on the outlet and surrounding areas.
- If you notice any issues, it is essential to seek professional help for repairs or upgrades rather than attempting to fix them yourself, as improper handling can be dangerous.
Keeping the area around the outlet clear of debris
In addition to inspecting the outlet itself, it is important to maintain a clean and clutter-free environment around the outlet. Debris or objects near the outlet can pose a fire hazard or interfere with the proper functioning of the outlet. By keeping the area clear, you reduce the risk of accidental electrical shocks or damage.
To ensure safety, please adhere to the following precautions:
- Regularly clean and dust the immediate vicinity of the outlet to prevent the accumulation of flammable materials.
- Ensure that there are no loose or exposed wires in the area that could come into contact with the outlet.
- Keep any combustible materials or liquids away from the outlet.
- Consider installing outlet covers or protectors to prevent accidental contact.
Knowing when to seek professional help for repairs or upgrades
While regular maintenance can help prevent many issues with your 230V outlets, there may come a time when professional assistance is necessary. It is crucial to recognize when certain problems exceed your expertise and requires the attention of a qualified electrician.
Here are a few instances when you should enlist professional help:
- If you experience frequent power surges or outages.
- If you notice persistent burning smells or electrical sparks.
- If the outlet is hot to the touch or emits unusual sounds.
- If you need to upgrade the outlet to accommodate higher power requirements or additional appliances.
Remember, your safety should always be the top priority when dealing with electrical systems. By following these tips and knowing when to ask for help, you can ensure that your 230V outlets remain functional and safe for years to come.
Frequently Asked Questions
Is 230 Volts Same As 220?
Yes, 230 volts is almost the same as 220 volts. The difference is very minor and doesn’t have a significant impact on electrical devices. Both voltages are commonly used in residential and commercial applications.
How To Install 220V Outlet?
To install a 220V outlet, follow these steps: 1. Turn off power at the breaker panel. 2. Choose a suitable location for the outlet. 3. Install a double-pole circuit breaker in the panel. 4. Run a 10-gauge cable from the panel to the outlet location.
5. Connect the wires to the outlet, ensuring correct polarity.
How Do You Get 230 Volts?
To get 230 volts, you can connect your electrical device to a power source with a voltage of 230 volts. This can be done by using a suitable power outlet or by using a voltage converter if your device requires a different voltage.
Make sure to follow safety guidelines when working with electricity.
What Is A 230V Electrical Outlet?
A 230V electrical outlet is a standard power outlet found in many countries. It supplies 230 volts of electrical energy, allowing various devices to be plugged in and powered. These outlets are commonly used for household appliances, electronics, and other electrical devices.
Conclusion
To conclude, installing a 230V outlet is a straightforward process that can greatly enhance your electrical capabilities. By following the steps outlined in this guide, you can ensure a safe and efficient installation. Remember to always prioritize safety and consult a professional electrician if you are uncertain about any aspect of the process.
Enjoy the convenience and potential of your newly installed 230V outlet!