To install a 220V breaker, first turn off the power supply. Then, carefully remove the panel cover and attach the breaker to the panel by aligning it with the slots provided.
Make sure to tighten the screws properly. Lastly, connect the wires to the breaker and tighten the connection.
Preparing For The Installation
Preparing for the Installation
Installing a 220V breaker may seem like a daunting task, but with the right tools, equipment, and safety precautions in place, it can be a relatively straightforward process. Before diving in, it’s important to prepare properly to ensure the installation goes smoothly. In this section, we’ll discuss the necessary tools and equipment you’ll need and outline some essential safety precautions to keep in mind throughout the process.
Necessary Tools and Equipment
Having the right tools and equipment is key to a successful installation. Here is a list of items you’ll need:
- Wire strippers
- Screwdrivers (flathead and Phillips)
- Wire cutters
- Voltage tester
- Wire nuts
- Electrical tape
- Drill
- Hammer
- Wire connectors
- Wire clamps
It’s important to have all these tools on hand before starting the installation. This will save you time and frustration later on, as you’ll have everything you need right at your fingertips.
Safety Precautions
Ensuring safety during the installation process is of utmost importance. Here are some essential safety precautions to follow when installing a 220V breaker:
-
- Turn off the power: Before beginning any work, shut off the power to the area where you’ll be installing the breaker. This can be done by flipping the switch on the main circuit breaker.
- Wear protective gear: Always wear safety goggles and gloves to protect yourself from any potential hazards.
- Test for voltage: Use a voltage tester to ensure there is no electricity flowing through the wires you’ll be working with. This will reduce the risk of electrical shock.
- Follow electrical code guidelines: Adhere to local electrical codes when installing the breaker. This ensures the installation is done correctly and safely.
- Label the breaker: Clearly label the newly installed breaker so that it can be easily identified in the future. This will help with troubleshooting and maintenance.
By following these necessary safety precautions, you can minimize the risk of accidents and ensure a safe installation process.
Now that you have an understanding of the tools, equipment, and safety precautions involved, you’re ready to move on to the actual installation of the 220V breaker. In the next section, we’ll guide you through the steps of wiring and connecting the breaker, helping you complete the installation with confidence.
Step-By-Step Guide To Installing A 220V Breaker
Installing a 220V breaker can be a challenging task, but by following a step-by-step guide, you can ensure a smooth and safe installation process. In this guide, we will walk you through the key steps involved in installing a 220V breaker. From turning off the power supply to properly connecting the wires, we’ve got you covered. Let’s get started!
Turning off the power supply
The first step in installing a 220V breaker is to turn off the power supply to ensure your safety during the installation process. Locate the main electrical panel in your home and switch off the main breaker or main disconnect switch. This will cut off the power supply to the entire panel, including the area where you will be installing the new breaker.
Removing the electrical panel cover
With the power supply turned off, carefully remove the cover of the electrical panel. Use caution and ensure you are wearing appropriate safety gear, such as gloves and safety glasses.
Identifying the location for the 220V breaker
Now it’s time to identify the location where the 220V breaker will be installed. Take a moment to familiarize yourself with the layout of the panel and find an open slot where the new breaker can be added. Look for a slot that is suitable for the size of the breaker you will be installing.
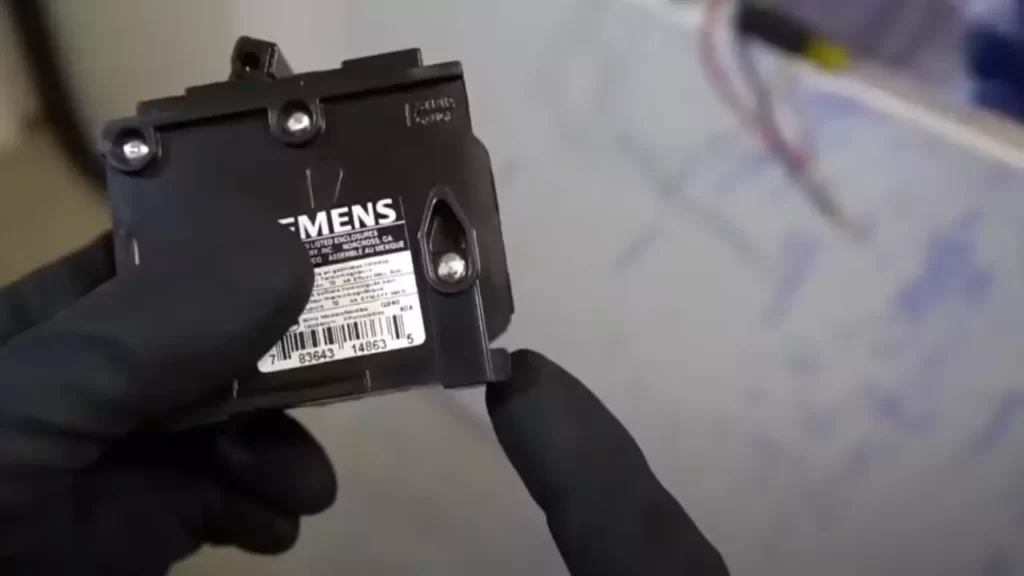
Choosing the appropriate breaker size
Choosing the appropriate breaker size is crucial for the safe and efficient operation of your electrical system. Refer to the manufacturer’s instructions or consult a professional electrician to determine the correct size breaker for your specific needs. The size of the breaker will depend on the electrical load and the specific appliance or equipment it will be powering.
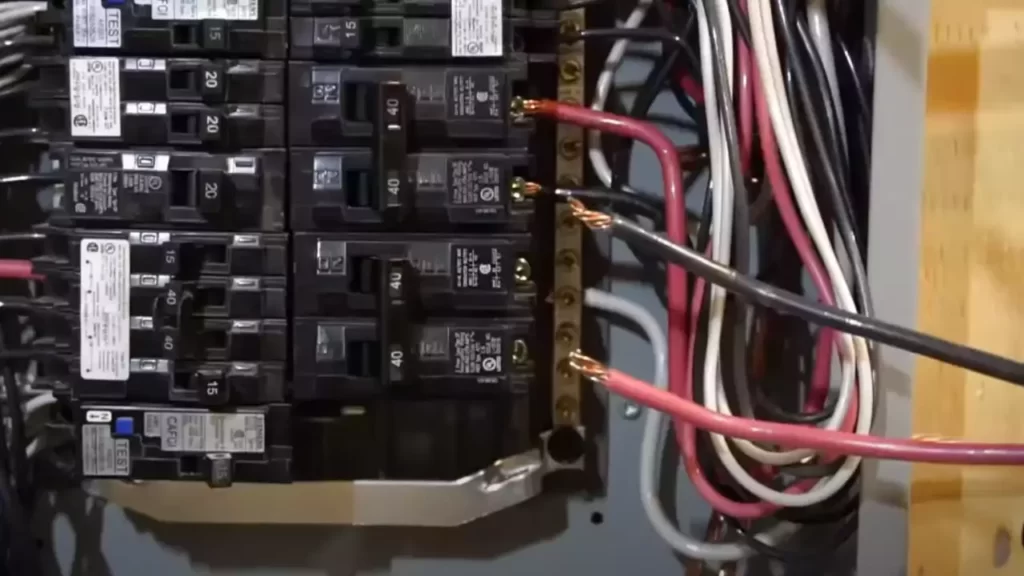
Installing the 220V breaker
With the location and size determined, it’s time to install the 220V breaker. Gently insert the breaker into the open slot, making sure it is securely in place. Use caution and ensure that all connections are tight and secure to prevent any electrical hazards.
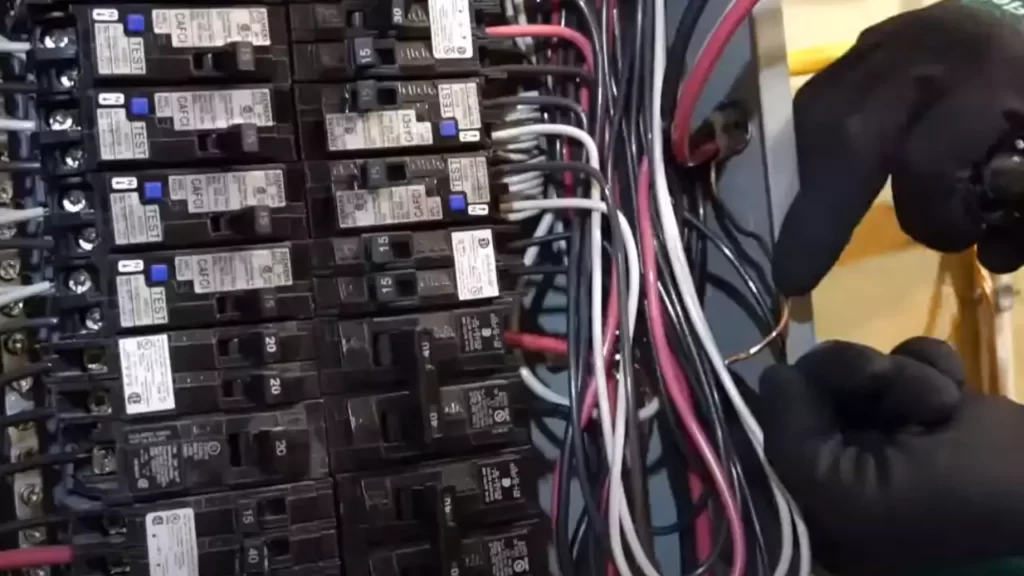
Properly connecting the wires
Next, it’s important to properly connect the wires to the breaker. This step requires precision and attention to detail. Follow the manufacturer’s instructions to attach the wires to the appropriate terminals on the breaker. Double-check all connections to ensure they are tight and secure.
Testing the breaker
Once the wires are connected, it’s time to test the breaker to ensure it is working properly. Switch on the power supply and test the appliance or equipment that the breaker will be powering. Check for any signs of malfunction or overheating. If everything appears to be in working order, congratulations! You have successfully installed a 220V breaker.
Installing a 220V breaker may seem daunting, but by following this step-by-step guide, you can confidently tackle the task. Remember to prioritize safety, refer to the manufacturer’s instructions, and consult a professional electrician if needed. With proper installation and care, your new breaker will provide reliable power for your electrical needs.
Troubleshooting And Tips For Successful Installation
Installing a 220V breaker may seem like a daunting task, but with the right knowledge and preparation, you can successfully complete the installation. However, it’s important to be aware of common issues that may arise during the process. In this section, we will discuss troubleshooting tips to help you overcome any challenges you may encounter and ensure a smooth installation process. Additionally, we will provide essential tips to ensure code compliance for a safe and efficient installation.
Common issues and how to troubleshoot them
During the installation of a 220V breaker, you may come across a few common issues. By familiarizing yourself with these problems and their troubleshooting techniques, you can tackle them confidently:
- No power to the breaker: If your breaker is not receiving power, first check your electrical panel’s main breaker to ensure it is turned on. If the main breaker is on, inspect the wiring connections to the breaker itself. Oftentimes, loose connections are the culprit. Make sure all wires are securely fastened and tightened.
- Tripped breaker: If your breaker keeps tripping, it indicates that there is an overload or short circuit. Start by unplugging all devices connected to the circuit and then reset the breaker by turning it completely off and then back on. If it trips again immediately, you may have a wiring issue or a faulty breaker. In this case, it’s best to consult a licensed electrician to ensure a safe resolution.
- Inadequate amperage: It’s crucial to match the amperage rating of the breaker with the circuit’s requirements. If the breaker keeps tripping under normal usage, it could be a sign that the amperage is insufficient. Consider upgrading to a higher amperage breaker if needed.
- Incorrect wiring connections: Double-check that all wiring connections are correct and secure. An incorrect connection can cause various issues, including tripped breakers or devices not receiving power. You can refer to the manufacturer’s instructions or consult an electrician if you are unsure about the proper wiring configuration.
Tips for a smooth installation process
To ensure a smooth installation process of your 220V breaker, follow these essential tips:
- Plan your installation: Begin by carefully planning your installation, considering factors such as the breaker’s location, wiring path, and access to the electrical panel. A well-thought-out plan will save you time and potential issues down the line.
- Gather the necessary tools: Before starting the installation, make sure you have all the required tools and equipment on hand. This includes wire cutters, wire strippers, pliers, a voltage tester, and appropriate safety gear.
- Turn off the power: Prior to any electrical work, always turn off the power at the main electrical panel. This ensures your safety and prevents damage to the breaker or other electrical components.
- Follow manufacturer’s instructions: Carefully read and follow the manufacturer’s instructions for your specific 220V breaker. Each model may have slight variations in installation steps or requirements. Adhering to the instructions will help you avoid mistakes and ensure a correct installation.
- Seek professional help if needed: If you are unsure about any step of the installation process or encounter difficulties troubleshooting an issue, it’s wise to consult a licensed electrician. They possess the expertise and experience to guide you through the installation or address any complications that may arise.
Ensuring code compliance
Adhering to electrical codes and regulations is crucial for a safe and compliant installation. Below are some key considerations to ensure code compliance:
| Code Compliance Tips |
|---|
| Use appropriate wiring: Select wiring that is rated for the amperage of your 220V circuit. Copper wiring is commonly used and is more conducive to high-voltage applications compared to aluminum wiring. |
| Proper grounding: Ensure that your 220V breaker and circuit are properly grounded. This protects against electrical shock and provides a safe pathway for excess electrical current. |
| Follow distance guidelines: Be mindful of distance guidelines when routing the wiring for your breaker. Keep the wires separated from other electrical circuits and avoid running them near water pipes or flammable materials. |
| Obtain necessary permits: Check with your local building department to determine if a permit is required for your 220V breaker installation. Obtaining the necessary permits ensures compliance with local regulations and may require an inspection of the completed installation. |
By troubleshooting common issues, following installation tips, and ensuring code compliance, you can successfully install a 220V breaker and have peace of mind knowing that your electrical system is safe and efficient.
Troubleshooting Common Issues
During the installation of a 220V breaker, it’s essential to familiarize yourself with some of the common issues that may arise. By troubleshooting these problems, you can ensure a smooth and safe installation process. Here are three common issues to be aware of:
Breaker tripping frequently
If you find that your breaker is tripping frequently after installing a 220V breaker, there could be several reasons behind it. Here are a few possible causes and their solutions:
- Faulty wiring: Inspect the wiring connections to ensure they are properly tightened and secure. Loose connections can lead to excess heat and cause the breaker to trip. If you notice any loose connections, carefully tighten them with the appropriate tools.
- Overloaded circuit: If too many appliances or devices are connected to the circuit, it can overload the breaker. Consider redistributing the load across multiple circuits or upgrading to a higher amp breaker to accommodate the additional power demand.
- Defective breaker: In some cases, the breaker itself may be faulty. If you suspect this is the issue, it’s recommended to consult a licensed electrician who can inspect and replace the breaker if necessary.
Electrical sparking or heating
Seeing electrical sparking or experiencing excessive heating around the breaker is an alarming issue that needs immediate attention. Here’s what you can do:
- Inspect for loose or damaged wiring: Turn off the power supply and carefully examine the wiring connections. Look for any loose connections, exposed wires, or signs of damage. If you find any, rectify the issue by tightening the connections or replacing the damaged wiring.
- Check for circuit overload: Excessive load on the circuit can cause sparking or heating. Ensure that the total power consumption of the connected devices does not exceed the breaker’s capacity. If needed, redistribute the load or upgrade to a higher-rated breaker.
- Seek professional assistance: If the sparking or heating continues even after checking and resolving the above issues, it’s highly recommended to consult a qualified electrician. They have the expertise to identify and address potential electrical hazards.
Inadequate power supply
One of the most common issues encountered during the installation of a 220V breaker is an inadequate power supply. Here’s how you can troubleshoot this problem:
- Verify the power source: Check if the power source can provide the required voltage and amperage. Ensure that the circuit breaker panel is correctly wired and the power source connections are secure.
- Assess the power demands: Evaluate the power demands of the appliances or devices connected to the breaker. If the power demand exceeds the capacity of the power supply, consider upgrading the power source to meet the requirements.
- Consult an electrician: If you’re unsure about the power supply’s adequacy or face difficulties troubleshooting the issue, it’s best to consult a professional electrician. They can assess your electrical system and advise you on the necessary steps to rectify any power supply deficiencies.
By addressing these common issues and troubleshooting them effectively, you can ensure the successful installation and proper functioning of your 220V breaker.
Tips For A Smooth Installation
When it comes to installing a 220V breaker, following a few tips can make the process smoother and ensure a successful installation. Whether you are a seasoned electrician or a DIY enthusiast, paying attention to labeling circuits, using wire nuts for secure connections, and double-checking all connections are crucial steps in the installation process. Read on to learn more about these tips.
Labeling Circuits for Easy Identification
Properly labeling circuits is essential for easy identification and future troubleshooting. Before starting the installation, take the time to create clear and concise labels for each circuit. This will not only save you time and effort during the installation, but it will also prevent confusion in the future. You can use a labeling machine or make your labels using masking tape and a permanent marker.
| Label | Circuit |
|---|---|
| Kitchen Appliances | Refrigerator, dishwasher, microwave |
| Home Office | Computer, printer, desk lamp |
| Living Room | TV, gaming console, sound system |
Using Wire Nuts for Secure Connections
Ensuring secure connections is vital for the safety and efficiency of your electrical system. When connecting wires, always use wire nuts. These small plastic caps not only protect the exposed wires but also ensure a reliable and long-lasting connection. To use wire nuts correctly, strip the wire tips, twist them together tightly, and then twist the wire nut clockwise until it is tight and secure. Don’t forget to tug gently on the wires to ensure they are properly connected before moving on to the next step.
Double-Checking All Connections
Making mistakes during the installation process can lead to safety hazards and electrical issues. Therefore, it is essential to double-check all connections before finalizing the installation. Take the time to inspect each connection point, ensuring that all wires are securely connected and properly tightened. Additionally, make sure there are no loose or exposed wires that could cause a short circuit or electrical shock. Taking this extra step will give you peace of mind and ensure a smooth and trouble-free installation.
By following these tips, you can successfully install a 220V breaker and enjoy a safe electrical system. Remember to label circuits for easy identification, use wire nuts to ensure secure connections, and double-check all connections before finalizing the installation. These small yet crucial steps will not only make the installation process smoother but also contribute to a safer and more efficient electrical setup in your home or workspace.
Code Compliance And Safety Considerations
Electricity is a powerful and essential resource in our daily lives, but it’s crucial to prioritize safety when working with electrical systems. Installing a 220V breaker requires careful attention to local electrical codes to ensure compliance and guarantee the safety of your home. In this section, we’ll discuss three critical areas you need to consider: understanding local electrical codes, grounding requirements, and using the proper wire gauge. By adhering to these guidelines, you can install your 220V breaker safely and confidently.
Understanding Local Electrical Codes
When installing a 220V breaker, it’s vital to familiarize yourself with the local electrical codes specific to your area. These codes are put in place to ensure safe installation practices, prevent hazards, and preserve the integrity of your electrical system. Some important points to keep in mind when it comes to code compliance include:
1. Obtain permits: Before starting any electrical installation, make sure to obtain the necessary permits from your local building department. This step is crucial as it allows the authorities to ensure that the work is done according to the codes, reducing the risk of electrical hazards.
2. Follow clearance requirements: Local electrical codes outline specific clearance requirements around electrical panels and equipment. These requirements ensure easy access to the breakers and prevent potential fire hazards. It’s important to adhere to these clearance specifications to maintain a safe working environment.
3. Use approved materials and methods: Local codes often specify the types of materials and methods that should be used when installing electrical systems. It’s essential to follow these guidelines to ensure longevity, reliability, and safety of the electrical wiring and components.
Grounding Requirements
Grounding is a critical aspect of electrical systems and is essential for the protection of people and property. When installing a 220V breaker, be mindful of the following grounding requirements:
1. Install a grounding electrode: A grounding electrode, typically a rod driven into the ground, is used to establish a safe path for electrical current to dissipate in case of a fault. Ensure that a properly sized grounding electrode is installed and connected to the grounding system as per local codes.
2. Bond metal components: Metal components of the electrical system, such as the breaker box, should be bonded together to create an effective grounding path. This bonding helps prevent electrical shocks and reduces the risk of electrical fires.
3. Use proper grounding conductors: Install grounding conductors of the correct type and gauge, following the local codes. These conductors provide a low-impedance path for electrical faults, directing the current away from the electrical system and ensuring the safety of occupants.
Using Proper Wire Gauge
Selecting the right wire gauge is crucial for the safe and efficient operation of your 220V breaker. Here are some key points to consider:
1. Calculate voltage drop: To ensure optimal performance, calculate the voltage drop over the length of the wire. This calculation helps determine the appropriate wire gauge, considering the distance between the breaker and the load. A lower voltage drop ensures that the load receives the required voltage for proper operation.
2. Consider amperage requirements: Determine the amperage requirements of the devices or appliances connected to the breaker. This information will help you select the appropriate wire gauge that can handle the current without overheating, preventing potential fire hazards.
3. Consult local codes: Local electrical codes typically provide guidelines on the minimum wire gauge requirements based on the amperage and type of circuit. Always consult these codes to ensure compliance and safety.
Remember, the installation of a 220V breaker should be performed by a licensed electrician if you’re uncertain about any aspect of the process. Adhering to local electrical codes, meeting grounding requirements, and using the proper wire gauge are essential to ensure the safety and longevity of your electrical system. By following these guidelines, you can have peace of mind knowing that your 220V breaker installation is done safely and in compliance with the applicable codes.
Final Thoughts And Additional Resources
Summary of the Installation Process
Installing a 220V breaker can seem daunting, but with the right guidance and a bit of confidence, you can successfully complete the task. Here’s a summary of the installation process:
- Ensure your safety by switching off the power at the main electrical panel.
- Identify the appropriate breaker slot to allocate for the 220V breaker.
- Remove the panel cover by unscrewing the necessary screws.
- Inspect the wiring of the 220V circuit and evaluate if any rewiring is needed.
- Attach the new 220V breaker to the panel by sliding it into the chosen slot and securing it in place.
- Connect the wires to the breaker, following the manufacturer’s instructions and adhering to safety regulations.
- Double-check all connections to ensure they are securely fastened.
- Once everything is in place, it’s time to restore power by flipping the main electrical panel switch back on.
- Test the newly installed 220V breaker and associated circuit to ensure it is functioning properly.
Links to Additional Resources for Further Guidance and Support
While this summary provides a general overview of the installation process, it’s always helpful to have more detailed information and resources at your disposal. Here are some additional resources to assist you:
- Electrical Installation Guide – A comprehensive guide that covers various electrical installations, including installing a 220V breaker.
- Video Tutorial: 220V Breaker Installation – Watch a step-by-step video tutorial for a visual guide on how to install a 220V breaker.
- 220V Breaker Troubleshooting Tips – Troubleshoot common issues that may arise during or after the installation process.
These resources will provide you with the necessary information and insights to ensure a successful and safe installation of the 220V breaker. Remember to always prioritize your safety and consult a professional if you encounter any challenges or uncertainties.
Frequently Asked Questions
Does It Matter Which Wire Goes Where On A 220 Breaker?
The position of the wires does matter when installing a 220 breaker to ensure proper functionality. Incorrect wiring can cause electrical issues or damage the breaker. Always consult the manufacturer’s instructions or hire a professional electrician for safe installation.
Can I Install 220V Myself?
No, it is not recommended to install 220V yourself. It should be done by a licensed electrician for your safety and to comply with electrical codes and regulations.
Can You Run Two 220V Outlets On One Breaker?
Yes, you can run two 220V outlets on one breaker. However, it is crucial to consider the electrical load and amperage requirements to avoid overloading the breaker. Consulting a licensed electrician is recommended to ensure safety and proper installation.
What Kind Of Breaker Do I Need For A 220 Outlet?
For a 220 outlet, you’ll need a double-pole breaker. It provides the required electrical power for appliances that run on 220 volts. Ensure you consult an electrician to determine the appropriate breaker size based on your specific needs and local electrical codes.
Conclusion
Installing a 220V breaker may seem intimidating at first, but with the right steps and guidelines, it can be done smoothly. By following this step-by-step guide, you can ensure a safe and efficient installation process. Remember to always prioritize safety and consult a professional electrician if needed.
With this knowledge, you can confidently tackle your 220V breaker installation and enjoy the convenience and power it brings to your electrical system.