To install a 2-way switch, first, turn off the power, remove the old switch, connect the wires to the new switch, and attach it to the electrical box. Installing a 2-way switch allows you to control a single electrical device, such as a light, from two different locations.
This can be useful in large rooms or staircases where you need to turn the light on or off from multiple places. In this guide, we will provide you with the necessary steps to install a 2-way switch safely and efficiently.
By following these instructions, you will be able to complete the installation process without any complications. Remember to always exercise caution and turn off the power before working with electrical components.
Understanding The Basics Of A 2 Way Switch
HTML Content:
In this article, we will dive into the world of electrical switches and specifically focus on the 2 way switch. Whether you are a homeowner or a DIY enthusiast, understanding the basics of a 2 way switch is essential for anyone looking to install or replace their light switches. Knowing how these switches work will empower you to carry out the installation process with confidence. So, let’s explore the definition and functionality of a 2 way switch, as well as how it differentiates from a single pole switch.
Definition and Functionality of a 2 Way Switch
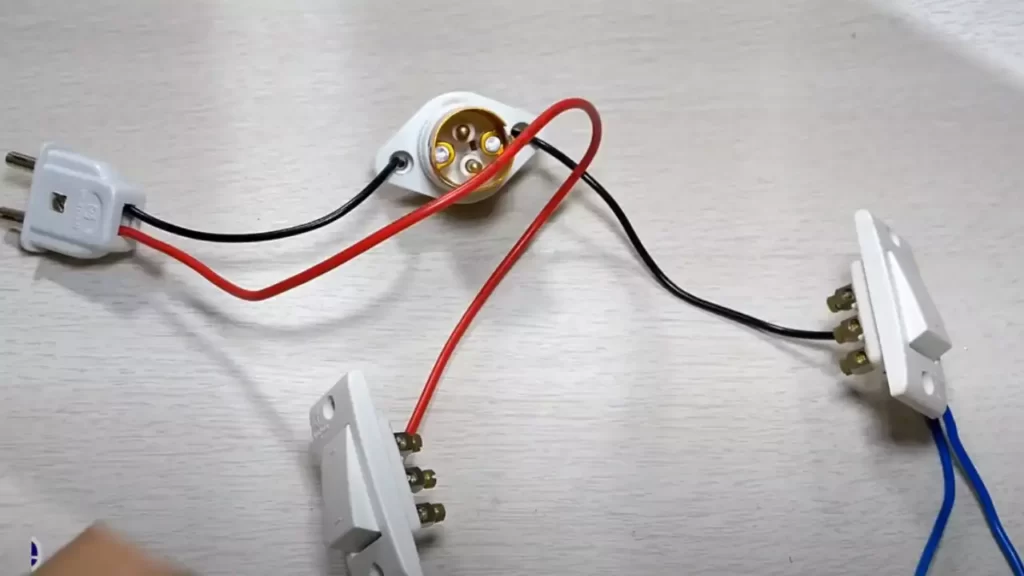
A 2 way switch, also commonly known as a two-way switch or a three-way switch (in some regions), is a type of electrical switch that allows control of a light fixture or a set of light fixtures from two locations. In simpler terms, it is a switch that enables you to control the same light or lights from multiple points in a room.
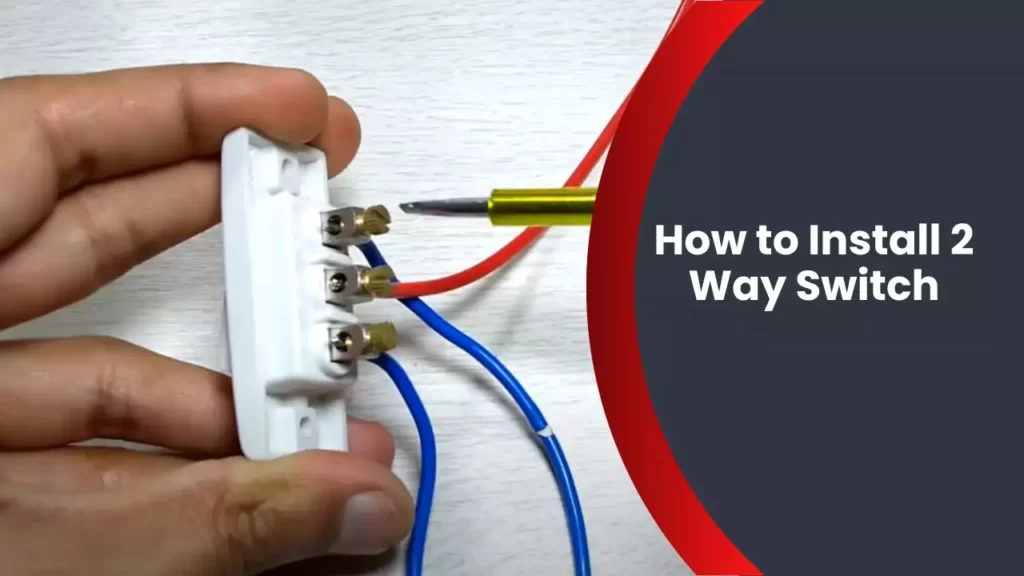
A 2 way switch has three terminals: a common terminal (COM) and two traveler terminals (L1 and L2). The common terminal is connected to the power source or the hot wire, while the traveler terminals are used to connect the switch to the light fixture(s). When the switch is turned on from one location, the electrical current flows through one traveler terminal to the common terminal, and then to the light fixture(s). When the switch is turned off, the current is interrupted, and the lights go off.
Differentiating Between a Single Pole and a 2 Way Switch
Now, let’s clear up any confusion between a single pole switch and a 2 way switch. A single pole switch is the most common type of switch found in households. It is used to control the power supply to a light fixture or an electrical outlet from a single location. In contrast, a 2 way switch allows you to control the same light or lights from two different locations. It expands your control options and offers convenience, especially when you have multiple entrances to a room or want to control a light from both ends of a corridor.
While a single pole switch has two terminals (hot and switch leg), a 2 way switch features three terminals (common and two travelers). This distinction is crucial when it comes to understanding the wiring process during installation.
By familiarizing yourself with the basic functionality of a 2 way switch and how it differs from a single pole switch, you’ll be well-equipped to install or replace these switches in your home. In our next section, we’ll delve into the wiring process and provide step-by-step instructions on installing a 2 way switch.
So, let’s dive right in and get started with understanding how to install a 2 way switch!
Materials Needed For Installing A 2 Way Switch
Installing a 2-way switch is a relatively simple task that can enhance the functionality and convenience of your lighting system. Before you get started, it’s important to gather all the necessary materials to ensure a smooth installation process. This section will provide you with a comprehensive list of tools and components you’ll need for the job.
List of Required Tools
To install a 2-way switch, you’ll need the following tools:
- Screwdriver – Ensure you have a screwdriver that is suitable for the screws used in your electrical switch. Having both a flathead and a Phillips head screwdriver is recommended to accommodate different types of screws.
- Wire cutters – These will be handy for trimming excess wire during the installation process.
- Wire strippers – This tool will allow you to strip the insulation from the ends of the wires cleanly, providing a reliable connection.
- Voltage tester – It’s crucial to have a voltage tester to ensure that the power is turned off before working on the switch. This will eliminate the risk of electrical shocks.
- Safety gloves – It’s always recommended to wear safety gloves to protect your hands during electrical work.
Choosing the Right 2 Way Switch
When it comes to selecting a 2-way switch, there are a few considerations to keep in mind. The quality of the switch is crucial to ensure its longevity and proper functionality. It’s best to choose a switch with a reputable brand that meets safety and quality standards.
Additionally, consider the features of the switch. Some switches offer enhanced features such as dimming capabilities or compatibility with smart home systems. Depending on your specific needs and preferences, choose a switch that caters to these requirements.
Furthermore, ensure that the switch is compatible with the electrical wiring in your home. Refer to the manufacturer’s instructions or consult a professional electrician for guidance if needed.
By choosing the right 2-way switch, you can ensure a reliable and efficient lighting system that meets your needs.
Step-By-Step Guide To Installing A 2 Way Switch
If you’re looking to update your home’s lighting system, installing a 2-way switch can provide you with added convenience and control. Whether you want to turn your lights on or off from multiple locations, a 2-way switch allows you to do just that. In this step-by-step guide, we will walk you through the process of installing a 2-way switch, ensuring that you have the necessary knowledge and confidence to complete the task safely and efficiently.
Shutting Off the Power
The first step in any electrical installation is to ensure your safety by shutting off the power to the area where you will be working. Locate your home’s electrical panel and identify the circuit breaker corresponding to the area you will be working on. Flip the switch to the “Off” position to cut off the power supply. Use a voltage tester to verify that there is no active electrical current flowing through the circuit before proceeding further.
Removing the Old Switch
Next, remove the existing switch from the wall. Start by unscrewing the faceplate and gently pulling it away from the wall. Use a screwdriver to remove the screws securing the switch to the electrical box. Carefully pull the switch out, exposing the wires connected to it. Take a moment to examine the wiring configuration and make a note of the current setup to assist you in the installation of the new switch.
Installing the New Switch
Now that the old switch has been removed, it’s time to install the new 2-way switch. Begin by placing the switch into the electrical box, aligning it with the screw holes. Insert and tighten the screws to secure the switch in place. Ensure that the switch is level and flush with the wall. Replace the faceplate and screw it back onto the switch.
Connecting the Wires
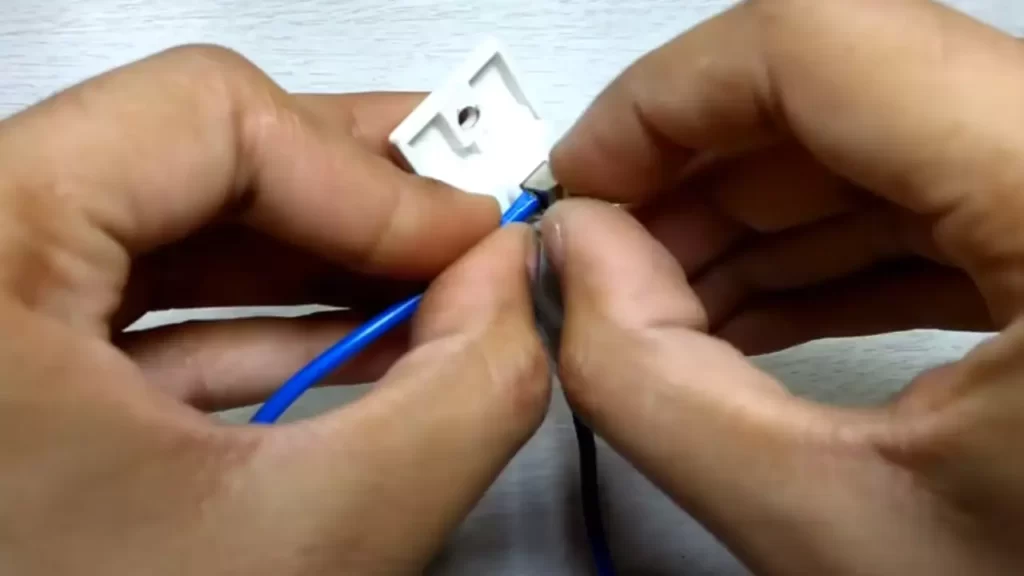
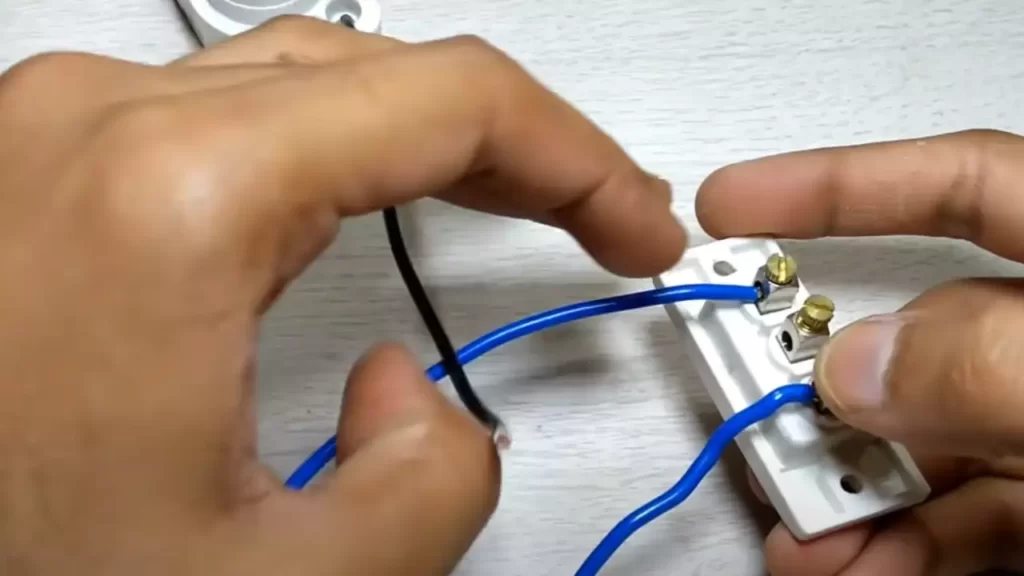
The next step is to connect the wires to the new switch. Identify the common wire, typically colored black, and connect it to the common terminal on the switch. Connect one of the two remaining wires, known as travelers, to one of the remaining terminals on the switch. Repeat this process with the other traveler wire on the remaining terminal. Use wire nuts to secure the connections, ensuring they are tight and well-insulated.
Testing the Switch
Before restoring power to the circuit, it’s essential to test the switch to ensure it operates correctly. Turn the circuit breaker back on, and with caution, test the switch at both locations. Verify that the lights turn on and off as expected, and that the switch provides the desired control and functionality.
In conclusion, by following this step-by-step guide, you can confidently install a 2-way switch in your home. Remember, safety should always be your top priority. If you’re uncomfortable working with electrical systems, it’s best to consult a professional. With the right tools and a little technical know-how, you’ll have your new 2-way switch up and running in no time, providing you with convenient control over your lighting.
Troubleshooting Common Issues
After successfully installing a 2 way switch, you may encounter a few common issues that need troubleshooting. In this section, we will discuss how to identify and fix wiring errors, deal with dim or flickering lights, and adjust switch settings. By following these simple steps, you can ensure that your 2 way switch functions smoothly.
Identifying and Fixing Wiring Errors
If your two-way switch is not working properly, the first thing you should do is check for any wiring errors. Incorrectly connected wires can lead to a malfunctioning switch. Here are a few steps to help you identify and fix potential wiring errors:
- Turn off the power to the switch from the main electrical panel.
- Inspect the wiring connections at the switch box.
- Make sure all the wires are securely connected to their intended terminals.
- Verify that the live wire (typically black) is connected to the common terminal.
- Check that the traveler wires (usually red or yellow) are connected correctly.
- If you find any loose or disconnected wires, tighten or reconnect them as needed.
- Once you have made any necessary adjustments, turn the power back on and test the switch to see if the wiring errors have been resolved.
Dealing with Dim or Flickering Lights
Dim or flickering lights connected to a two-way switch can be a frustrating issue. However, with a few simple steps, you can troubleshoot and fix this problem:
- Check the bulbs to ensure they are securely screwed into the light sockets. Loose bulbs can cause dim or flickering lights.
- If the bulbs are securely in place, check if they are the correct wattage for the fixtures they are installed in. Using bulbs with a higher or lower wattage than recommended can result in dim or flickering lights.
- Inspect the wiring connections at the switch and the light fixtures. Loose or faulty connections may cause voltage drops, leading to dim or flickering lights.
- If you find any loose connections, tighten them properly.
- If the issue persists, it might be worth considering replacing the light fixtures or contacting a licensed electrician for further assistance.
Adjusting Switch Settings
In some cases, the issue with your two-way switch may not be related to wiring errors or the light fixtures themselves. Adjusting the switch settings can help resolve certain problems. Here’s what you can do:
- Check the position of the switch. Make sure both switches are in the desired position for the lights to turn on or off.
- Verify that the switches are aligned correctly. If they are not in the same direction, it can lead to improper functionality.
- If the switches appear to be misaligned, toggle them to the desired position and test the lights.
- In some cases, the switch itself may need adjustment or replacement. If you have tried all the steps above and the issue persists, consider seeking professional help.
By following the troubleshooting steps outlined above, you can quickly identify and resolve common issues that may arise after installing a two-way switch. Remember, safety should always be your top priority when working with electricity. If you are unsure about any aspect of troubleshooting electrical issues, it’s best to consult a professional electrician.
Safety Precautions
When it comes to electrical work, safety should always be the top priority. Whether you are an experienced electrician or a DIY enthusiast, following safety precautions is essential to prevent accidents and ensure a successful installation. This section will discuss the importance of turning off the power, handling electrical wires safely, and using protective gear.
Importance of Turning Off the Power
Before beginning any electrical work, it is crucial to turn off the power supply to the area where you will be working. This simple step can significantly reduce the risk of electrical shocks or electrocution. To effectively turn off the power:
- Locate the main electrical panel in your home or building.
- Open the panel’s cover using a screwdriver or the designated tool.
- Identify the circuit breaker or fuse that controls the power to the area you will be working in.
- Switch the circuit breaker to the “off” position or remove the fuse.
- Use a voltage tester to ensure that the power is indeed off before proceeding.
Handling Electrical Wires Safely
When working with electrical wires, it is essential to handle them with care to avoid injury or damage. Follow these guidelines to handle electrical wires safely:
- Always assume that wires are live until proven otherwise, even if you have turned off the power.
- Use a wire stripper or wire cutter to remove the insulation from the ends of the wires.
- Avoid touching bare wires with your bare hands. Wear insulated gloves if necessary.
- Never use damaged or frayed wires. Replace them with new ones.
- Securely fasten wires using electrical tape, wire nuts, or other appropriate connectors.
Using Protective Gear
Protective gear is vital when working with electricity. It provides an extra layer of protection against potential hazards. Here are some protective gear items you should consider:
- Insulated gloves: These gloves protect your hands from shocks and burns.
- Safety goggles: These goggles shield your eyes from sparks, debris, and other flying objects.
- Ear protection: Use earplugs or earmuffs to minimize the risk of hearing damage from loud electrical equipment.
- Clothing: Wear clothes made of non-conductive materials, such as cotton, to minimize the risk of accidental electrical contact.
By adhering to these safety precautions, you can ensure a safe and successful installation of a 2-way switch. Remember, it’s always better to be safe than sorry when working with electricity.
Additional Tips And Considerations
Installing a 2-way switch can be a practical and straightforward process once you have a basic understanding of electrical wiring. However, there are a few additional tips and considerations to keep in mind to ensure a successful installation. From proper switch placement to upgrading to a smart 2-way switch, and seeking professional help if needed, let’s explore these aspects in detail.
Proper Switch Placement
When it comes to installing a 2-way switch, the placement plays a crucial role in maximizing convenience and ease of use. Here are a few tips to consider:
- Accessible and Convenient: Choose a location for your switch that is easily accessible and convenient for everyday use. Avoid placing it behind furniture or in hard-to-reach corners.
- Consistency: Maintain consistency in switch placement throughout your home to avoid confusion. Placing switches at the same heights and in the same direction will ensure a seamless user experience.
- Lighting Conditions: Consider the lighting conditions around the switch location. Ensure there is sufficient lighting to easily locate and operate the switch, especially in dark or dimly lit areas.
- Avoid Moisture and Heat: Keep switches away from areas that may be exposed to moisture or excessive heat, such as bathrooms, kitchens, and attics.
- Secure Mounting: Ensure the switch is securely mounted to prevent any wobbling or accidental dislodging. Use appropriate screws or brackets to reinforce the stability of the switch.
Upgrading to a Smart 2-way Switch
In this technologically advanced era, upgrading your conventional 2-way switch to a smart switch can enhance the functionality of your home lighting system. Here’s how to go about it:
- Smart Home Compatibility: Determine whether your home’s electrical system is compatible with smart switches. Check if you have a neutral wire available, which is a requirement for most smart switch installations.
- Research and Choose: Research different smart switches available on the market and choose one that suits your specific needs. Look for features like voice control compatibility, scheduling options, and remote accessibility via smartphone apps.
- Follow Manufacturer’s Instructions: Carefully follow the manufacturer’s instructions provided with your chosen smart switch for installation. Each brand may have slight variations, so it is essential to adhere to the specific guidelines.
- Network Connectivity: Ensure that you have a stable Wi-Fi network connection in the area where you plan to install the smart switch. This will enable seamless communication between the switch and the associated smart home automation system.
- Test and Troubleshoot: Once installed, thoroughly test the smart switch to ensure proper functionality. Troubleshoot any potential issues by referring to the user manual or contacting customer support for assistance.
Seeking Professional Help if Needed
If you lack experience or confidence in electrical wiring, it is important to seek professional help. Electrical systems can be complex and potentially dangerous if not handled properly. Here are a few reasons to consider professional assistance:
- Complex Wiring: If the wiring in your home is intricate or unclear, it is best to hire a licensed electrician who can accurately identify the wiring and ensure a safe installation.
- Legal and Safety Compliance: Certified electricians are well-versed in local codes and safety regulations. They can ensure your switch installation is compliant, eliminating any potential hazards or legal issues.
- Time and Convenience: Hiring a professional allows you to free up valuable time and avoid the hassle of navigating through the installation process. Electricians have the knowledge and expertise to complete the task efficiently.
- Peace of Mind: By entrusting the installation to a professional, you can have peace of mind knowing that the job is done correctly and safely.
In conclusion, proper switch placement, upgrading to a smart 2-way switch, and seeking professional help if needed are all important considerations when installing a 2-way switch. By keeping these tips in mind, you can successfully and safely complete the installation, improving the functionality and convenience of your home lighting system.
Frequently Asked Questions
How Do You Wire A 2 Way Switch?
To wire a 2-way switch, first turn off the power. Connect the live wire to the common terminal and the switched live wire to the L1 terminal. Connect the neutral wires together. Finally, connect the earth wires to the earth terminal.
Double-check the connections and turn the power back on. It’s important to hire a licensed electrician if you’re unsure or unfamiliar with electrical work.
What Happens If You Wire A 2 Way Switch Wrong?
If you wire a 2-way switch incorrectly, it may cause the switch to not work properly or cause a short circuit, resulting in electrical issues or damage. It is important to carefully check the wiring and consult an electrician if you are unsure.
Can You Wire A 2 Way Switch With 2 Wires?
Yes, you can wire a 2-way switch with 2 wires. One wire connects to the live source, while the other connects to the light or load. The switch allows you to control the flow of electricity between these wires, enabling you to turn the light on or off from different locations.
How Do You Convert A One Way Switch To A Two Way?
To convert a one-way switch to a two-way switch, you need to replace it with a two-way switch. First, turn off the power supply. Then, remove the existing one-way switch and disconnect the wires. Connect the wires to the corresponding terminals on the new two-way switch.
Finally, secure the switch back to the wall and turn on the power supply.
Conclusion
To conclude, installing a 2-way switch is a simple yet essential task for anyone looking to enhance their home’s lighting system. By following the step-by-step instructions provided in this guide, you can easily replace your old switch with a more convenient and efficient one.
Remember to always prioritize safety and consult a professional if you encounter any difficulties. Enjoy the benefits of controlling your lights from multiple locations with ease and convenience.