To install a new outlet box, turn off the power, remove the existing box, attach the new box, connect the electrical wires, and secure the box to the wall. In this guide, we will walk you through the step-by-step process of installing a new outlet box in your home or office.
Whether you need to add an outlet for a new appliance or you’re looking to upgrade your electrical system, installing a new outlet box can be a simple and straightforward task. By following the instructions provided, you will be able to safely and effectively install a new outlet box, ensuring reliable and convenient access to power wherever you need it.
So let’s get started and learn how to install a new outlet box in a few easy steps.
Preparing For Installation
Installing a new outlet box is a relatively simple task that can be done by most homeowners with the right tools and a little know-how. Before you get started, it’s essential to take the necessary steps to prepare for the installation process. This includes gathering the necessary tools and materials, turning off the power to the electrical circuit, determining the location for the new outlet box, and assessing the wiring requirements for the project. In this section, we will guide you through each of these steps to ensure a successful installation.
Gather Necessary Tools and Materials
Before you begin installing a new outlet box, it’s crucial to gather all the necessary tools and materials. Having everything ready before you start will save you time and prevent unnecessary trips to the hardware store. Here is a list of items you’ll need for this project:
| Tools | Materials |
|---|---|
|
|
Turn off Power to the Electrical Circuit
Before you begin working with electrical wiring, it’s essential to turn off the power to the circuit you’ll be working on. This will ensure your safety and prevent any electrical accidents. Follow these steps to turn off the power:
- Locate the main electrical panel in your home.
- Identify the circuit breaker that controls the circuit you’ll be working on.
- Flip the switch to the “off” position to cut off power to the circuit.
- Test the circuit with an electrical tester to ensure power is properly disconnected.
Determine the Location for the New Outlet Box
Choosing the right location for your new outlet box is crucial for its functionality and convenience. Consider the following factors when determining the placement:
- Accessibility: Ensure the outlet is easily accessible and not obstructed by furniture or other objects.
- Proximity to electrical source: The new outlet box should be located near an existing electrical source or junction box.
- Wall studs: Ideally, the box should be anchored to a solid wall stud for secure installation.
- Height: Consider the optimal height for your outlet based on your needs and preferences.
Assess the Wiring Requirements for the Project
Before proceeding with the installation, it’s essential to assess the wiring requirements of your project. This ensures that your new outlet box will be compatible with your existing electrical system. Consider the following aspects:
- Voltage needs: Determine if the circuit requires standard 120-volt wiring or a higher voltage for specific appliances.
- Amperage requirements: Make sure the electrical cable and outlet are rated to handle the amperage of the circuit.
- Grounding: Check if grounding wires are present and properly connected.
- Wire size: Verify that the wire size matches the requirements for the circuit.
By taking the time to gather the necessary tools and materials, turning off the power, determining the location, and assessing the wiring requirements, you’ll be well-prepared for a successful outlet box installation. In the next section, we will guide you through the step-by-step process of installing the new outlet box.
Removing The Old Outlet Box
Before installing a new outlet box, you need to first remove the old one. This process involves disconnecting the power from the existing outlet, removing the outlet cover plate and screws, unscrewing and disconnecting the wires from the old outlet, and finally removing the old outlet box from the wall. Let’s break down each step in detail.
Disconnect power from the existing outlet
To ensure your safety, it is crucial to disconnect the power from the existing outlet before proceeding. Here’s how you can do it:
- Locate the circuit breaker box in your home.
- Identify the circuit breaker that controls the power to the outlet you are working on.
- Switch off the circuit breaker by flipping it to the “off” position.
- Confirm that the power to the outlet is completely shut off by attempting to turn on a device connected to it.
Note: If you are unsure which circuit breaker controls the outlet, it is recommended to turn off the main power switch to the entire house for added safety.
Remove the outlet cover plate and screws
Once the power is turned off, you can proceed to remove the outlet cover plate and screws:
- Using a flat-head screwdriver, carefully unscrew and remove the cover plate from the outlet.
- Set aside the cover plate and screws in a safe place for later use.
Unscrew and disconnect the wires from the old outlet
Now, it’s time to unscrew and disconnect the wires from the old outlet:
- Using a screwdriver, loosen the screws that secure the wires to the old outlet.
- Once the screws are loosened, gently pull the wires out of their corresponding terminals.
- Take note of the wire connections to ensure proper reconnection later.
Remove the old outlet box from the wall
With the wires disconnected, you can proceed to remove the old outlet box from the wall:
- Inspect the outlet box for any screws or nails that may be securing it to the wall.
- Using a screwdriver or hammer, remove any screws or nails that are keeping the box in place.
- Gently pull the outlet box away from the wall, taking care not to damage the surrounding area.
With the old outlet box successfully removed, you are now ready to install the new outlet box. Stay tuned for our next blog post where we will guide you through the installation process step by step!
Installing The New Outlet Box
When it comes to installing a new outlet box, it is important to follow a step-by-step process to ensure that everything is done correctly and safely. In this section, we will guide you through each step, from choosing the appropriate type of outlet box to securing it in place and connecting the wires. Let’s get started!
Choose the Appropriate Type of Outlet Box
The first step in installing a new outlet box is to choose the right type of box for your specific needs. Outlet boxes come in various sizes and configurations, including metal and plastic options. So, consider the electrical requirements and the location of the box in order to select the appropriate one. This will ensure that the box can safely accommodate the wires and provide the necessary protection.
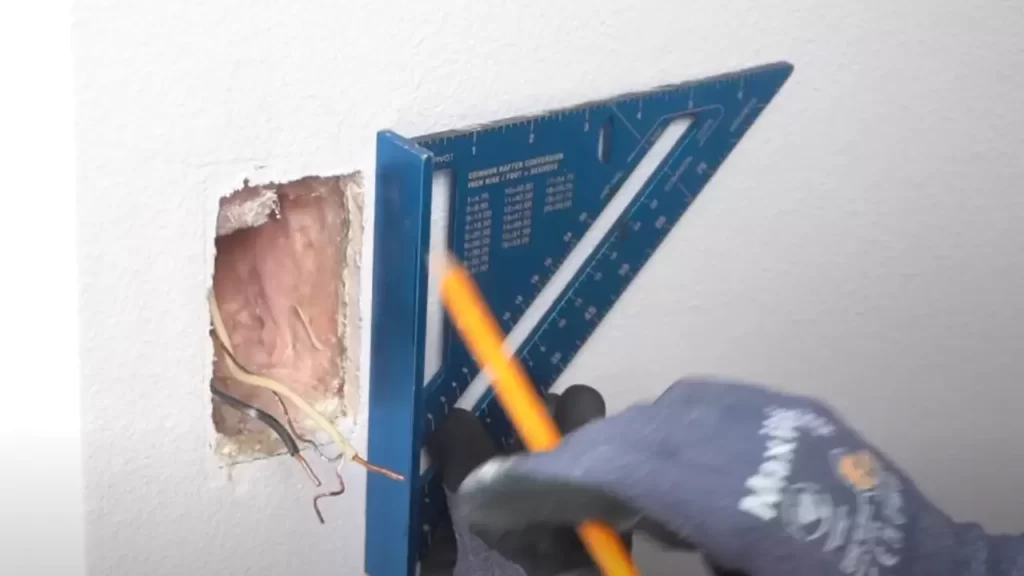
Mark the Location for the New Box on the Wall
Once you have determined the type of outlet box you need, it’s time to mark the location on the wall where the new box will be installed. Use a pencil to make the markings, ensuring that they are accurate and align with the electrical code requirements. Take into account the height and accessibility of the box to make it convenient for future use.
Cut an Opening in the Wall for the New Box
With the location marked, proceed to cut an opening in the wall for the new box. This can be done using a drywall saw or a utility knife, depending on the material of your wall. Take caution while cutting to avoid any damage to the surrounding area. Make sure the hole is the correct size to fit the outlet box snugly.
Secure the New Box in Place
Once the opening is made, secure the new outlet box in place. Ensure that it is positioned properly and level with the wall. Attach it securely using screws or other appropriate fasteners. This will prevent any movement or potential hazards in the future.
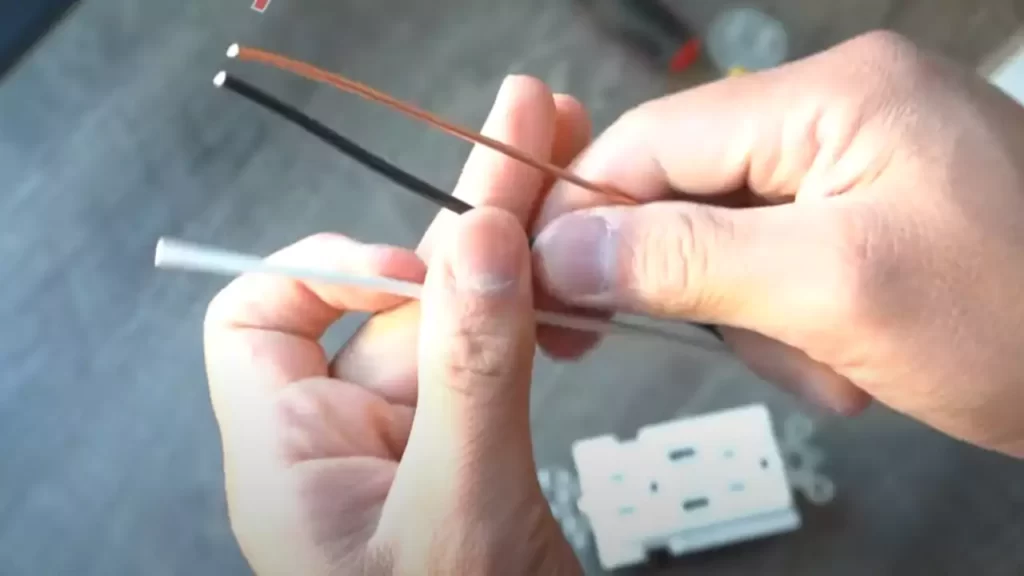
Connect the Wires in the New Box
Now you’re ready to connect the wires in the new box. Start by stripping the insulation from the ends of the wires. Use wire connectors to join the wires together, matching the colors and ensuring a secure connection. Follow proper electrical safety guidelines and make sure all connections are tight.
Install a Cable Clamp and Thread the Wires Through the Box
To protect the wires and provide strain relief, install a cable clamp in the knockouts of the outlet box. This will prevent any damage to the wires and ensure a neat and organized installation. Thread the wires through the box, making sure they are properly aligned and not pinched or twisted.
Replace the Outlet Cover Plate and Screws
Lastly, replace the outlet cover plate and screws to complete the installation. Make sure the cover plate is aligned correctly and securely fastened. This will provide a clean and finished look to the outlet box.
Congratulations! You have successfully installed a new outlet box. Following these steps will help you ensure a safe and proper installation. Remember to always follow the electrical code and consult a professional if you are unsure about any part of the process.
Testing And Finalizing The Installation
Once you have successfully installed a new outlet box, it is important to test and finalize the installation to ensure it is safe and functioning properly. This step-by-step guide will walk you through the necessary actions to take for testing and finalizing the installation of a new outlet box.
Turn the power back on
Before proceeding with any testing, ensure that you have turned the power back on. Locate the circuit breaker associated with the outlet and switch it back to the ON position. This will provide electricity to the outlet and allow you to conduct the necessary tests.
Use a multimeter to test the outlet for electricity
Using a multimeter is a crucial step to verify if the outlet has electricity flowing through it. Set your multimeter to the AC voltage setting and carefully insert one probe into the hot slot of the outlet and the other probe into the neutral slot. The multimeter should display a reading between 110-120 volts, indicating that electricity is successfully flowing through the outlet.
Conduct a visual inspection to ensure proper installation
After testing for electricity, perform a visual inspection of the outlet box to ensure it has been installed correctly. Check for any loose wires, exposed connections, or any signs of damage or improper installation. If any issues are found, make the necessary adjustments to ensure a safe and secure installation.
Secure any loose wires and tidy up the work area
If you come across any loose wires during the visual inspection, it is crucial to secure them properly. Use wire nuts or electrical tape to securely fasten any loose wires. Additionally, take the time to tidy up the work area by removing any excess materials, debris, or tools to create a safe and organized space.
Test the new outlet with a device to ensure functionality
After completing the visual inspection and securing any loose wires, it’s time to test the functionality of the new outlet. Plug in a device, such as a lamp or phone charger, into the outlet to ensure it is working properly. If the device powers on, it is a clear indication that the new outlet has been successfully installed and is ready for use.
In conclusion, testing and finalizing the installation of a new outlet box is an essential step to ensure safety and functionality. By following these guidelines and conducting thorough tests, you can have confidence in the proper installation of your new outlet box.

Maintaining Safety And Compliance
When installing a new outlet box, it is crucial to prioritize safety and compliance with local building codes and regulations. By following these guidelines, you can ensure that the installation is done correctly and safely. In this section, we will discuss three important aspects of maintaining safety and compliance: following local building codes and regulations, using appropriate safety equipment, and verifying proper grounding of the outlets.
Follow local building codes and regulations
Before beginning the installation process, it is essential to research and familiarize yourself with the local building codes and regulations. These codes are put in place to ensure the safety and efficiency of electrical installations within a specific area. Failure to comply with these regulations not only poses a risk to your safety but may also result in legal consequences.
To ensure compliance, consider the following:
- Acquire a copy of the local building codes and familiarize yourself with the specific requirements.
- Understand the permitted locations for outlet box installations.
- Follow any specific guidelines regarding the size and type of outlet box required.
- Adhere to the necessary spacing requirements for outlets in relation to other objects (e.g., walls or countertops).
- Ensure that you are aware of any additional regulations that may apply to your specific installation situation.
Use appropriate safety equipment throughout the installation process
When working with electricity, it is crucial to prioritize your safety. Using appropriate safety equipment throughout the installation process helps minimize the risk of accidents and electric shock. The following safety equipment should be utilized:
- Insulated Gloves: Protect your hands from electrical shock by wearing insulated gloves.
- Safety Goggles: Shield your eyes from flying debris or particles during drilling or wiring.
- Dust Mask: Avoid inhaling dust or particles generated during the installation.
- Electrical Tester: Use an electrical tester to ensure that power is fully disconnected before starting any work.
Verify the outlets are properly grounded
Proper grounding plays a vital role in electrical safety. To verify that the outlets are properly grounded:
- Use a circuit tester to check the grounding of the existing outlets (if applicable).
- Ensure that the new outlet box is grounded by connecting the ground wire to the box and grounding the outlet itself.
- Test the newly installed outlets to confirm proper grounding capability.
By guaranteeing proper grounding, you significantly reduce the risk of electrical hazards, such as electric shock or electrical fires.
Remember that safety should always be the top priority throughout the installation process. Following local building codes and regulations, using appropriate safety equipment, and verifying proper grounding are crucial steps towards ensuring a safe and compliant electrical installation.
Additional Tips And Considerations
When it comes to electrical installations, it’s important to be aware of the additional tips and considerations that can ensure a successful and safe outcome. Understanding the different types of outlet boxes available, considering the benefits of installing a GFCI outlet, hiring a licensed electrician for complex installations, using wire connectors for secure and reliable connections, and consulting an electrician for challenging wiring scenarios are all crucial aspects to keep in mind.
Understanding the different types of outlet boxes available
In order to install a new outlet box, it’s essential to understand the different types that are available. Outlet boxes come in various materials, such as plastic and metal, and can be shallow or deep depending on the desired installation. Plastic outlet boxes are lightweight and easy to work with, while metal outlet boxes provide increased durability. It’s essential to choose the right type of outlet box for your specific electrical needs.
Considering the benefits of installing a GFCI outlet
Installing a Ground Fault Circuit Interrupter (GFCI) outlet offers several benefits. GFCI outlets are designed to protect against electrical shock by monitoring the electrical current flowing through the circuit. If it detects an imbalance, the GFCI outlet will immediately shut off the power, reducing the risk of electrocution. GFCI outlets are especially important in areas near water sources, such as kitchens, bathrooms, and outdoor spaces.
Hiring a licensed electrician for complex installations
While installing a new outlet box may seem like a simple task, complex installations require the expertise of a licensed electrician. Licensed electricians have the necessary knowledge and experience to handle intricate electrical wiring, ensuring that the installation is done safely and up to code. It’s crucial to enlist the services of a professional when dealing with complex electrical installations to avoid potential risks and ensure the longevity of the electrical system.
Using wire connectors for secure and reliable connections
When installing a new outlet box, using wire connectors is essential for creating secure and reliable connections. Wire connectors ensure that the electrical wires are properly joined and insulated, preventing any loose connections or exposed wires. It’s crucial to choose the appropriate wire connectors for the specific wires being used and to follow the manufacturer’s instructions for proper installation.
Consulting an electrician for challenging wiring scenarios
In certain wiring scenarios, such as older homes or complex electrical setups, it’s always recommended to consult an electrician. These challenging scenarios may involve outdated wiring systems, confusing circuitry, or the need for additional circuit breakers. An electrician can assess the situation, provide the most effective solution, and ensure the electrical installation is safe and compliant with local regulations.
Frequently Asked Questions
Do You Need An Electrician To Install An Outlet Box?
Yes, it is recommended to hire an electrician to install an outlet box for safety reasons and to ensure proper installation.
Can I Install An Electrical Outlet Myself?
Yes, you can install an electrical outlet yourself. However, it is important to follow safety precautions and guidelines set by your local electrical code. If you are unsure or uncomfortable with electrical work, it is best to hire a professional electrician to ensure proper installation and avoid any potential hazards.
How Do You Install An Electrical Box In An Existing Wall?
To install an electrical box in an existing wall, first, turn off the power. Locate the desired spot on the wall and draw an outline of the box. Cut the opening using a drywall saw. Fish electrical wires through the opening and secure the box with screws.
Finally, connect the wires to the box and cover it with a faceplate.
How Do You Replace A Receptacle Box?
To replace a receptacle box, follow these steps: 1. Turn off the power to the outlet. 2. Remove the cover plate and outlet. 3. Disconnect the wires from the old box. 4. Remove the old box from the wall. 5.
Install a new box and secure it. 6. Connect the wires to the new box. 7. Reinstall the outlet and cover plate. 8. Turn the power back on and test the outlet.
Conclusion
Installing a new outlet box is a simple and cost-effective way to update your electrical system. By following the steps mentioned in this blog post, you can ensure a safe and efficient installation process. Remember to turn off the power, gather the necessary tools, and follow the local electrical code.
With a little patience and the right instructions, you can successfully install a new outlet box yourself. Don’t forget to double-check your work to avoid any potential hazards. Happy DIY-ing!