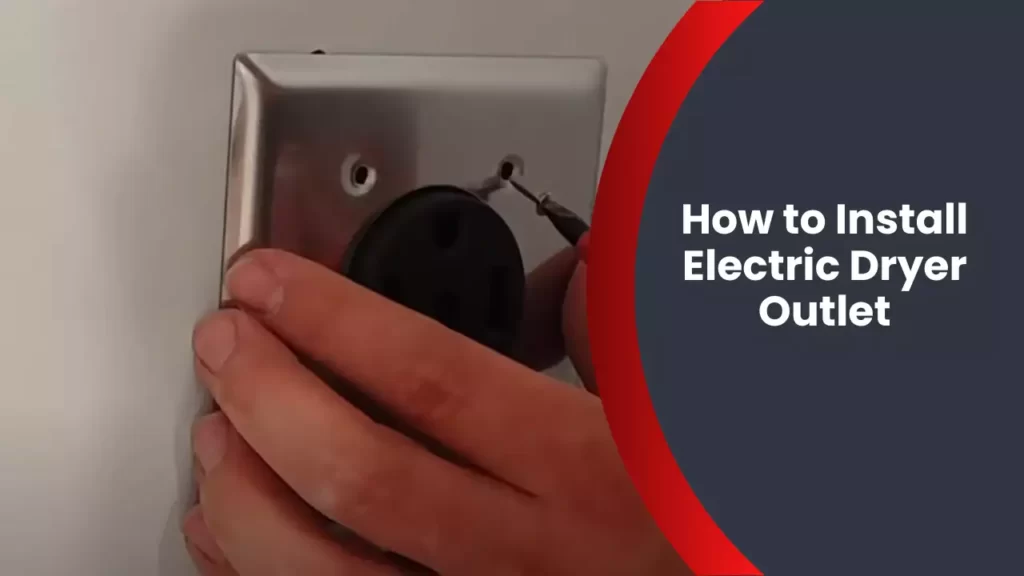
To install an electric dryer outlet, first turn off the power to the circuit, then attach the outlet to the wall box using screws and connect the wiring. Are you looking to install an electric dryer outlet in your home?
Having a dedicated outlet for your electric dryer is crucial for convenience and safety. In this guide, we will walk you through the step-by-step process of installing an electric dryer outlet. By following these simple instructions, you can ensure a safe and efficient installation.
So, let’s get started!
Understanding The Basics
Different Types of Dryer Outlets
Before jumping into the installation process, it’s important to understand the different types of dryer outlets available. This will help you choose the right one based on your specific needs. Here are the most common types:
| Type | Description |
|---|---|
| 3-Prong Outlet | This type of outlet has three prongs – two flat angled prongs for the hot wires and one L-shaped prong for the neutral wire. |
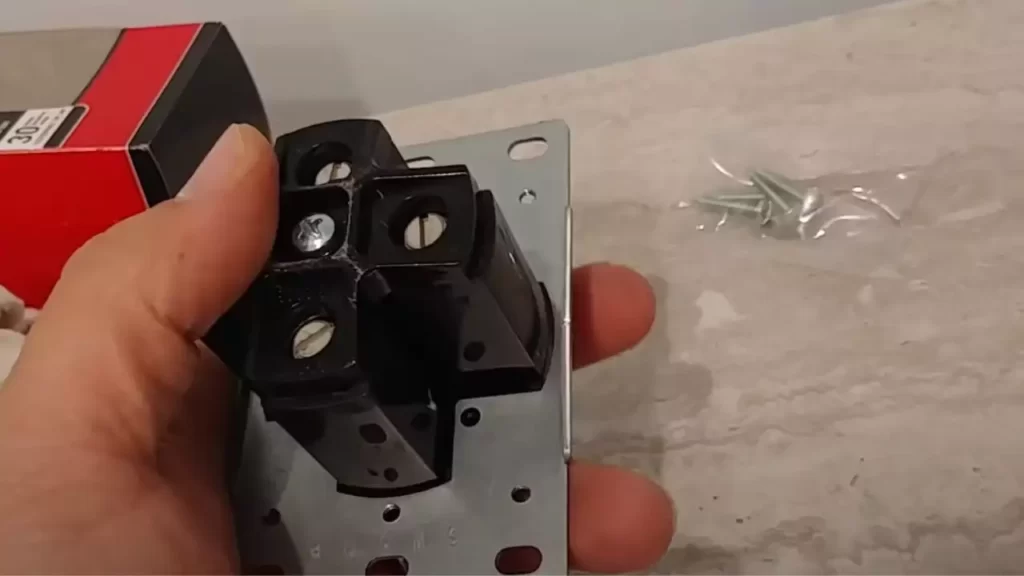
| 4-Prong Outlet | The 4-prong outlet is the updated version of the 3-prong outlet. It has four prongs – two flat angled prongs for the hot wires, one L-shaped prong for the neutral wire, and one round prong for the grounding wire. |
| NEMA 14-30 Outlet | The NEMA 14-30 outlet is a specific type of 4-prong outlet commonly used for electric dryers. It is designed to handle the higher electrical load required by dryers. |
Why Choose an Electric Dryer Outlet?
Now that you know the different types of dryer outlets, you might be wondering why you should choose an electric dryer outlet over other options. Let’s take a look at some of the advantages:
- Higher Efficiency: Electric dryers are known for their energy efficiency. They use less energy compared to gas dryers, which can help you save on utility bills in the long run.
- Convenience: Electric dryers are easy to use and require minimal maintenance. You don’t have to worry about refilling gas tanks or dealing with gas leaks.
- Wider Availability: Electric dryers are more commonly available in residential areas. This means you’ll have more options to choose from when it comes to brands and models.
- Environmental Friendly: Electric dryers produce fewer emissions than gas dryers, making them a more eco-friendly choice for your home.
Understanding the basics of electric dryer outlets is essential before you start the installation process. By knowing the different types of dryer outlets and the benefits of choosing an electric dryer, you’ll be able to make an informed decision for your home. So, let’s move on to the next step- preparing for the installation.

Preparing For Installation
When it comes to installing an electric dryer outlet, proper preparation is key to ensuring a seamless and efficient installation process. By taking the time to assess your electrical system, gathering the necessary tools and materials, and following important safety precautions, you can make the installation process run smoothly. In this article, we will guide you through each step of the preparation process, providing you with the knowledge and confidence to successfully install an electric dryer outlet.
Assessing the Electrical System
Before beginning any installation project, it is important to assess your current electrical system to ensure that it is equipped to handle the new outlet. Here are a few key factors to consider:
- Check the voltage of your current electrical system. Electric dryer outlets typically require a 240-volt circuit, so it is essential to verify that your system meets this requirement.
- Inspect your breaker panel to determine if there is an available double-pole breaker that can be dedicated to the new outlet.
- Consider the location of the outlet. Make sure it is conveniently located near the dryer, with sufficient space for the dryer’s power cord to reach it.
By thoroughly assessing your electrical system, you can identify any necessary upgrades or modifications that may be required before proceeding with the installation.
Gathering the Necessary Tools and Materials
Once you have assessed your electrical system and determined that it is ready for the installation, the next step is to gather the tools and materials necessary for the job. Here is a list of what you will need:
| Tools | Materials |
|---|---|
| Screwdriver set | Dryer outlet |
| Wire stripper | Wire nuts |
| Wire cutter | Electrical tape |
| Hammer | Electrical box |
| Level | Double-pole breaker |
| Pencil | Conduit and fittings (if required) |
Gathering these tools and materials in advance will help streamline the installation process and ensure you have everything you need on hand.
Safety Precautions to Follow
When working with electricity, it is crucial to prioritize safety. Here are some important precautions to follow during the installation process:
- Always turn off the power to the circuit you will be working on at the breaker panel before starting any electrical work.
- Use insulated gloves and safety goggles to protect yourself from potential electric shocks or debris.
- Make sure to follow local electrical codes and regulations to ensure the installation meets the required standards.
- If you are unsure about any step of the installation process, it is best to consult a professional electrician for assistance.
By adhering to these safety precautions, you can minimize the risk of accidents and ensure a safe working environment throughout the installation.

Step-By-Step Installation Process
Installing an electric dryer outlet may seem like a daunting task, but with the right guidance and precautions, it can be a straightforward process. By following these step-by-step instructions, you’ll be able to safely install an electric dryer outlet and ensure a reliable power source for your appliance.
Shutting Off the Power
Before starting any electrical work, it’s crucial to shut off the power to the area where you’ll be working. This step is essential to prevent any accidental electrocution. To shut off the power:
- Locate the circuit breaker panel in your home.
- Identify the breaker that controls the electricity to the dryer area.
- Flip the breaker switch to the “off” position.
Installing the Outlet Box
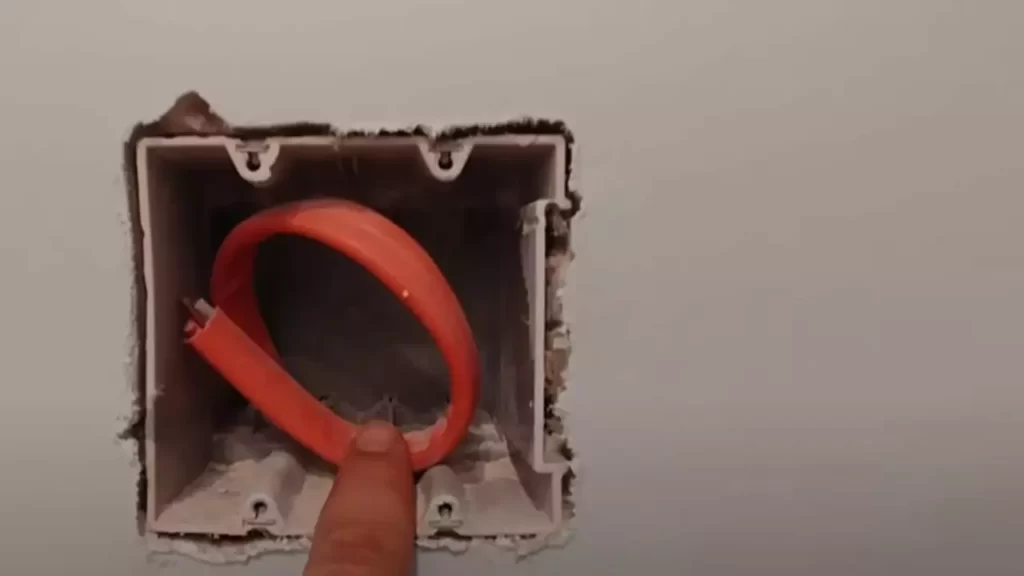
Once the power is safely turned off, you can proceed with installing the outlet box. The outlet box serves as a housing for the electrical wiring and provides a secure connection point for the dryer plug. Follow these steps:
- Choose a suitable location for the outlet box near the dryer area.
- Trace the outline of the outlet box on the wall.
- Using a drywall saw, carefully cut out the traced area.
- Insert the outlet box into the hole.
- Secure the box to the wall using screws or mounting brackets.
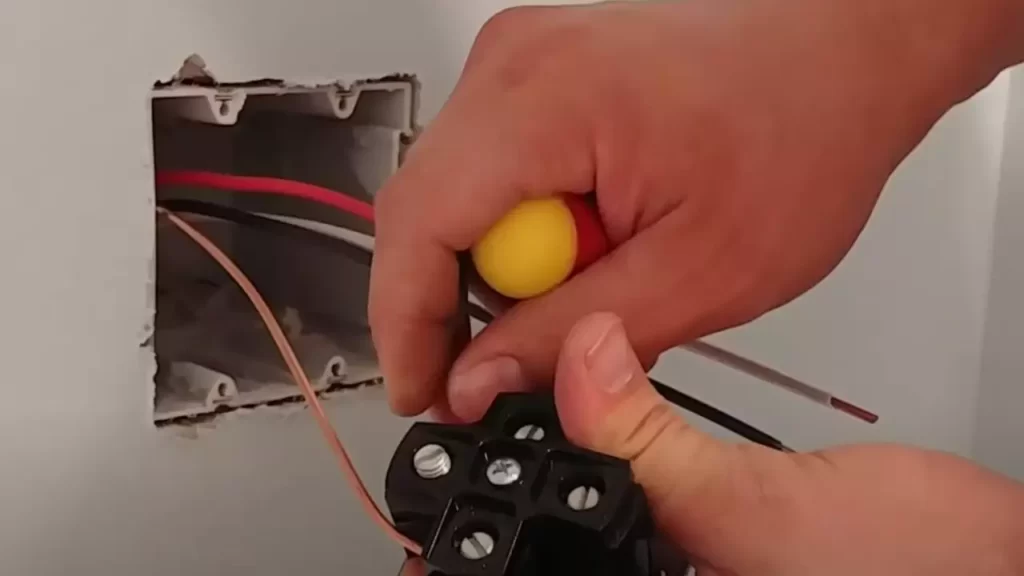
Connecting the Wiring
With the outlet box installed, it’s time to connect the wiring. Follow these steps:
- Remove the outlet cover plate.
- Identify the hot, neutral, and ground wires inside the outlet box.
- Strip the insulation off the wires using wire strippers.
- Connect the hot wire (usually black) to the brass screw terminal on the outlet.
- Connect the neutral wire (usually white) to the silver screw terminal.
- Connect the ground wire (usually green) to the green screw terminal.
Mounting the Outlet
With the wiring connected, it’s time to mount the outlet securely. Follow these steps:
- Insert the outlet into the outlet box.
- Screw the outlet to the box using the provided screws.
- Make sure the outlet is flush with the wall surface.
Testing the Connection
Before using the electric dryer, it’s important to test the connection to ensure everything is working correctly. Follow these steps:
- Turn on the power by flipping the breaker switch to the “on” position.
- Plug in the electric dryer to the outlet.
- Turn on the dryer and make sure it functions properly.
By following these step-by-step instructions, you can safely install an electric dryer outlet and have your appliance up and running in no time. Remember to exercise caution throughout the process and consult a professional if you’re unsure about any step.

Troubleshooting Common Issues
In the process of installing an electric dryer outlet, you may encounter some common issues that could prevent the outlet from functioning properly. Identifying and resolving these issues is crucial to ensure a safe and efficient installation. In this section, we will discuss three common problems that you may come across while installing an electric dryer outlet: Outlet Not Receiving Power, Incorrect Wiring Configuration, and Circuit Breaker Tripping Frequently.
Outlet Not Receiving Power
If your electric dryer outlet is not receiving power, there are a few possible reasons for this issue. First, check if the outlet is properly connected to the electrical source. Inspect the wiring connections inside the outlet box to ensure they are secure and tight. If any wires are loose, tighten them using a screwdriver.
Next, verify that the circuit breaker for the outlet is in the “On” position. Locate the circuit breaker panel in your home and look for the breaker that controls the electric dryer outlet. If the breaker is in the “Off” position, turn it to the “On” position. If it keeps tripping, proceed to the next section for troubleshooting tips.
Incorrect Wiring Configuration
An incorrect wiring configuration can lead to a dysfunctional electric dryer outlet. One of the most common mistakes is reversing the hot and neutral wires. This can disrupt the flow of electricity and prevent the outlet from receiving power. To fix this issue, you need to ensure that the hot wire, usually black or red, is connected to the brass-colored screw terminal, and the neutral wire, typically white, is connected to the silver-colored screw terminal.
Another potential wiring mistake is failing to ground the outlet properly. The ground wire, usually green or bare copper, must be connected to the green grounding screw provided on the outlet. Neglecting this step can increase the risk of electrical shocks and malfunctions. Make sure the ground wire is securely attached and there is no paint or debris obstructing the connection.
Circuit Breaker Tripping Frequently
If your circuit breaker keeps tripping after installing the electric dryer outlet, it could indicate an overloaded circuit or a faulty breaker. Firstly, check if you are using the correct amperage breaker for your dryer. Consult the manufacturer’s specifications or an electrician to ensure you have the appropriate amperage for the appliance.
If the amperage is correct, the circuit may be overloaded due to other devices or appliances sharing the same circuit. Consider redistributing the electrical load by plugging the dryer into a dedicated circuit. This will reduce the chances of overloading the circuit and tripping the breaker. If the issue persists, it is advisable to consult a qualified electrician to inspect and diagnose the problem.

Hiring A Professional Vs Diy: Pros And Cons
Considerations for DIY Installation
Before diving into the world of electric dryer outlet installation, it’s important to carefully consider whether you should tackle the project yourself or hire a professional. Taking a DIY approach can be a rewarding experience if you have the required skills and knowledge. Here are a few considerations to keep in mind:
- Electrical Knowledge: Do you have a good understanding of electrical work? Installing an electric dryer outlet involves dealing with electrical wiring and connections. If you lack the necessary knowledge, it might be best to hire a professional to avoid any risks or accidents.
- Tools and Equipment: Are you equipped with the proper tools and equipment for the job? DIY installation requires not only basic tools but also specialized equipment like wire strippers, electrical testers, and circuit breakers. Make sure you have everything you need before starting the project.
- Time and Effort: Installing an electric dryer outlet can be a time-consuming and labor-intensive task. Consider whether you have the time and patience to dedicate to the project. If you’re working on a tight schedule or have little experience with similar projects, hiring a professional might be a better option.
Benefits of Hiring a Professional
While taking the DIY route can be tempting, hiring a professional for electric dryer outlet installation comes with several advantages:
- Expertise: Professionals have the necessary expertise and knowledge to install an electric dryer outlet correctly. They can ensure that all the electrical connections are properly made and the outlet is safely installed, reducing the risk of electrical mishaps.
- Time and Convenience: Hiring a professional saves you time and effort. They have the experience and tools to complete the installation efficiently, allowing you to focus on other important tasks. Additionally, professionals can handle any unexpected challenges or complications that may arise during the installation process.
- Safety: Electrical work involves inherent safety risks. Professionals are well-versed in electrical safety practices and regulations, minimizing the chances of accidents or electrical hazards. They follow proper protocols and ensure that the installation meets all safety standards.
Factors to Consider When Choosing
When choosing between a DIY installation and hiring a professional, there are a few factors you should take into account:
- Budget: Evaluate your budget and determine if hiring a professional fits within your financial means. While DIY installation may save you money upfront, mistakes or inadequate installations can lead to costly repairs or safety hazards in the long run.
- Risk Tolerance: Consider your comfort level with taking on electrical work. If you prefer to leave it to the experts and prioritize peace of mind, hiring a professional is the way to go. On the other hand, if you enjoy learning new skills and are confident in your abilities, DIY installation may be an option.
- Project Complexity: Assess the complexity of the installation. If it involves complex wiring or modifications to existing electrical systems, it’s advisable to hire a professional who has experience with such projects. Simpler installations, on the other hand, may be suitable for the DIY approach.
Ultimately, the decision to hire a professional or take the DIY route for electric dryer outlet installation depends on your personal circumstances, skills, and preferences. Consider the factors mentioned above to make an informed decision that ensures a safe and functional installation.
Frequently Asked Questions
How Much Does It Cost To Install An Electric Dryer Outlet?
The cost of installing an electric dryer outlet can vary, ranging from $200 to $500. It depends on factors like the location of the outlet, the electrician’s fees, and any additional electrical work needed. Consulting with a professional electrician is advised to get an accurate estimate.
How Do You Hook Up An Electric Dryer To A Regular Outlet?
To hook up an electric dryer to a regular outlet, you’ll need a compatible power cord and receptacle. First, ensure the dryer and outlet have matching voltages. Then, connect the power cord to the dryer and plug it into the outlet.
Make sure to follow manufacturer instructions and prioritize safety precautions.
How Do You Wire A 3-Prong Dryer Plug?
To wire a 3-prong dryer plug, follow these steps: 1. Turn off the power to the dryer. 2. Remove the cover plate on the back of the dryer. 3. Connect the ground wire to the center terminal. 4. Attach the neutral wire to the left terminal.
5. Connect the hot wire to the right terminal. Double-check the connections before using the dryer.
How Do You Hook Up A 4-Prong Dryer Plug?
To hook up a 4-prong dryer plug, follow these steps: 1. Disconnect power and remove the old plug. 2. Connect the green grounding wire to the dryer’s grounding screw. 3. Attach the black and red wires to the correct terminals on the plug.
4. Connect the white wire to the center terminal. 5. Secure all wires and tighten the screws. Remember to consult the instruction manual for your specific dryer model.
Conclusion
Installing an electric dryer outlet may seem overwhelming at first, but with the proper guidance and tools, it can be a relatively simple process. Remember to ensure safety by turning off the power before beginning any electrical work. By following the step-by-step instructions provided in this guide, you’ll be able to install your electric dryer outlet with ease and have your dryer up and running in no time.
So go ahead, embark on this DIY project and enjoy the convenience of having a fully functional electric dryer in your home.
