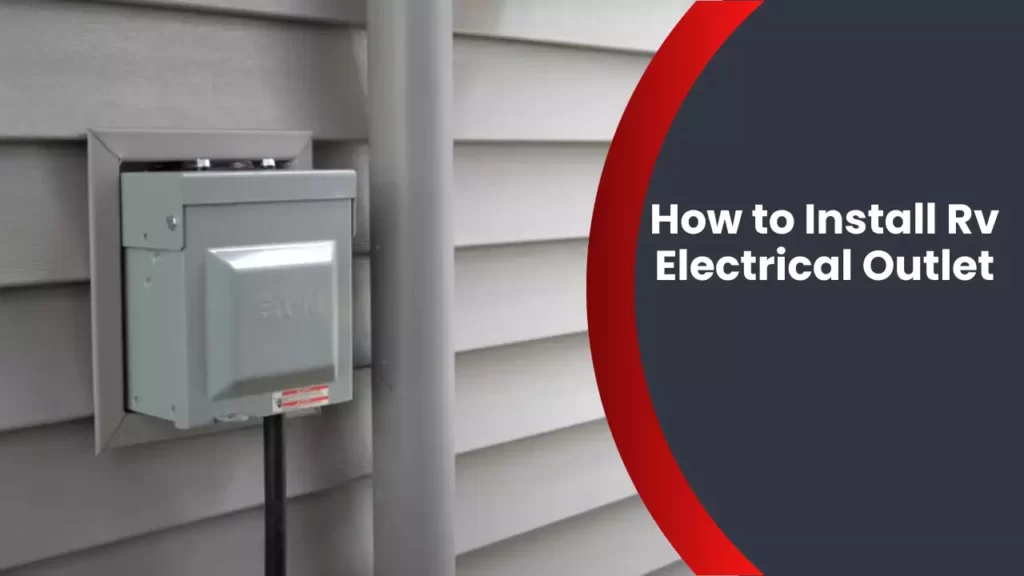
Installing an RV electrical outlet requires careful steps and precautions. Here’s a concise guide to help you with the installation process.
Whether you’re a seasoned RVer or just starting out, having a reliable electrical outlet in your RV is essential. It allows you to power various appliances and devices while on the road. Installing an RV electrical outlet may seem daunting, but with the right tools and knowledge, it can be a straightforward process.
We will walk you through the steps to install an RV electrical outlet, ensuring that you have a safe and functional power source during your travels. So, let’s get started!
Planning And Preparation
Installing an RV electrical outlet requires careful planning and preparation to ensure a safe and efficient electrical system for your recreational vehicle. This process involves assessing your electrical needs, determining the location for the outlet, and checking local regulations and obtaining necessary permits. Let’s dive into each step to help you get started on your RV electrical outlet installation.
Assess your electrical needs
Before installing an RV electrical outlet, it’s essential to determine your electrical needs. This involves considering the appliances and devices you will be using in your RV and their power requirements. Assessing your electrical needs will help you determine the appropriate amperage and voltage for the outlet.
Make a list of all the electrical appliances and devices you plan to use in your RV, such as air conditioning units, refrigerators, microwaves, and televisions. Check their power ratings or consult the manufacturer’s specifications to find out their electrical requirements.
- Take note of the amperage and voltage requirements for each device.
- Add up the total amperage needed for all your devices to determine the minimum amperage capacity of your RV electrical outlet.
Determine the location for the RV electrical outlet
Choosing the right location for your RV electrical outlet is crucial for convenience and safety. Consider the following factors when deciding where to install the outlet:
- Proximity to your RV parking spot: The outlet should be easily accessible and close to where you park your RV to minimize the length of the electrical cord needed.
- Distance from water sources: Keep the outlet away from water sources to prevent any electrical hazards.
- Availability of adequate space: Ensure there is enough space for the outlet installation, including clearance for the electrical panel and any necessary wiring.
Once you have determined the ideal location, mark it clearly for reference during the installation process.
Check local regulations and obtain necessary permits
Prior to installing an RV electrical outlet, it’s essential to familiarize yourself with local regulations and obtain any necessary permits. Each location may have specific requirements and codes that must be followed to ensure safety and compliance.
Contact your local building department or electrical authority to inquire about the regulations and permits needed for installing an RV electrical outlet. They will provide you with the necessary guidelines and any specific requirements that must be met.
Obtaining the required permits will not only keep you in compliance with regulations but also provide peace of mind knowing that your installation is approved and up to code.
By carefully assessing your electrical needs, choosing the right location, and following local regulations, you can lay the groundwork for a successful RV electrical outlet installation. In the next section, we will cover the actual installation process, guiding you through the necessary steps to bring power to your RV.
Gathering Materials And Tools
Before you begin installing an RV electrical outlet, it’s essential to gather all the necessary materials and tools. Having everything you need on hand will save you time and ensure a smoother installation process. Here is a list of materials and tools you will need:
List of materials needed:
- RV electrical outlet
- Weatherproof electrical box
- Electrical wires (of appropriate gauge)
- Wire nuts
- Electrical tape
- Wire stripper
- Wire cutter
- Screwdriver
- Drill
- Drill bits (specific to the electrical box you are using)
- Protective gloves
- Safety goggles
- Measuring tape
- Markers or pens
List of tools needed:
<strong>RV electrical outlet</strong>– This is the main component that will provide power to your RV. Choose an outlet that meets your specific power requirements.<strong>Weatherproof electrical box</strong>– It is important to use a weatherproof box to protect the electrical connections from moisture and other external elements.<strong>Electrical wires (of appropriate gauge)</strong>– Select wires of the appropriate gauge to handle the amperage of your RV’s electrical system. Solid copper wires are generally recommended for longevity.<strong>Wire nuts</strong>– These small connectors will securely join the electrical wires together.<strong>Electrical tape</strong>– Use electrical tape to insulate and protect exposed wires.<strong>Wire stripper</strong>– A wire stripper is essential for removing the protective insulation from the wires.<strong>Wire cutter</strong>– This tool will help you cut wires to the required length.<strong>Screwdriver</strong>– A screwdriver will be needed to secure the electrical outlet and box.<strong>Drill</strong>– You may need a drill to create holes for mounting the outlet and box.<strong>Drill bits (specific to the electrical box you are using)</strong>– Choose drill bits that match the size of the holes required for your electrical box.<strong>Protective gloves</strong>– Keep your hands safe by wearing protective gloves throughout the installation process.<strong>Safety goggles</strong>– It is crucial to wear safety goggles to protect your eyes from any potential hazards.<strong>Measuring tape</strong>– Use a measuring tape to ensure accurate placement of the electrical box.<strong>Markers or pens</strong>– Markers or pens can be helpful for labeling wires or making notes during the installation process.
Preparing the materials and tools in advance will make your RV electrical outlet installation project much smoother. Ensure that you have all the necessary items mentioned above, and you’ll be ready to move on to the next steps.
Installing The Rv Electrical Outlet
Installing the RV Electrical Outlet
Installing an RV electrical outlet is a crucial step in ensuring a safe and efficient power supply for your recreational vehicle. By following these simple steps, you can easily install an RV electrical outlet and enjoy a hassle-free camping experience.
Shut off the power supply
Before beginning any electrical work, it is important to shut off the power supply to the area where you will be installing the RV electrical outlet. This is a crucial safety measure that will protect you from any potential hazards during the installation process. Locate the circuit breaker or fuse box and switch off the power supply to the specific area.
Mount the electrical box
Once the power supply is shut off, it’s time to mount the electrical box. The electrical box serves as the base for the RV outlet and provides a secure housing for the electrical connections. Choose a suitable location on the exterior of your RV or the desired area, ensuring it meets the necessary safety codes. Use screws or bolts to firmly attach the electrical box to the wall or surface.
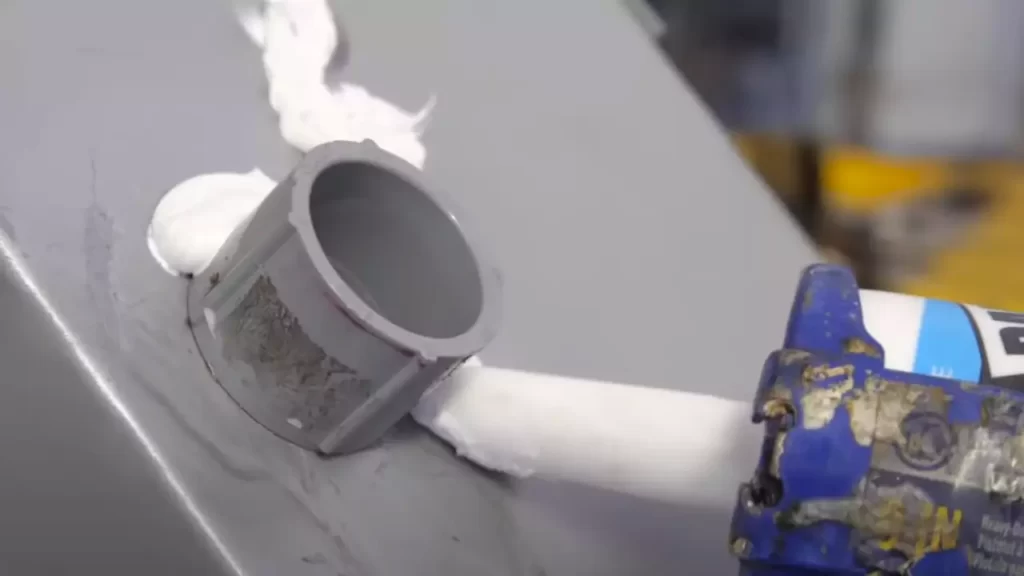
Connect the conduit and wiring
After mounting the electrical box, it’s time to connect the conduit and wiring. The conduit acts as a protective covering for the electrical wiring, preventing any damage or interference. Measure and cut the conduit to the required length, ensuring it reaches from the electrical box to the power source. Carefully thread the wires through the conduit, making sure they are secure and free from any tangles or knots. Connect the wires to their respective terminals, ensuring a tight and secure connection.
Install the outlet and cover
With the conduit and wiring correctly connected, it’s time to install the RV electrical outlet and cover. Attach the outlet to the electrical box, aligning the terminals with the corresponding wires. Use screws or bolts to secure the outlet in place, ensuring it is firmly attached. Once the outlet is installed, place the cover over it to protect it from any external elements such as rain, dust, or debris. This will help prolong the lifespan of the outlet and ensure its functionality.
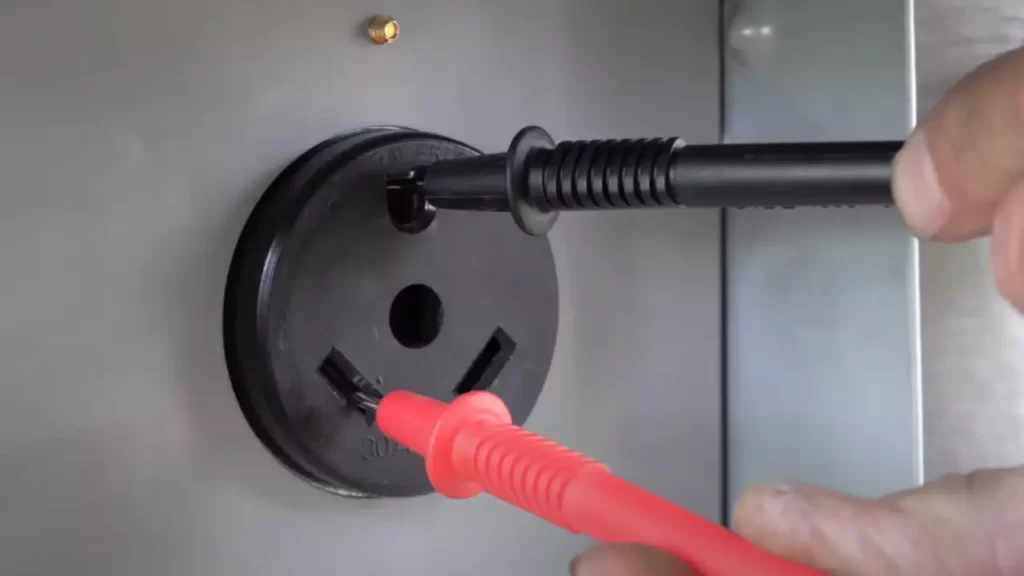
Test the outlet
The final step is to test the RV electrical outlet to ensure it is functioning properly. Turn on the power supply and plug in a compatible device or appliance to check if it receives power and functions as expected. Additionally, use a voltage tester or multimeter to confirm the correct voltage is being supplied to the outlet. This step is crucial in ensuring the safety and proper operation of your RV electrical system.
In conclusion, installing an RV electrical outlet is a straightforward process that can be accomplished by following these steps. Remember to prioritize safety by shutting off the power supply, mount the electrical box securely, connect the conduit and wiring properly, install the outlet and cover, and finally, test the outlet to ensure its functionality. By doing so, you can enjoy a reliable and efficient power supply during your RV adventures.
Troubleshooting And Maintenance Tips
When it comes to RV electrical outlets, it’s important to ensure they are functioning properly and well-maintained. This not only ensures the safety of your electrical system but also enables you to enjoy all the comforts of your RV without any interruptions. In this section, we will discuss some common issues that occur with RV electrical outlets, troubleshooting techniques to resolve them, and tips for maintaining the outlets.
Common Issues with RV Electrical Outlets
Despite being designed for durability and reliability, RV electrical outlets can encounter some common issues. Understanding these issues can help you identify and address them promptly. Here are a few common issues you may come across:
| Issue | Possible Cause | Solution |
|---|---|---|
| Power fluctuations | Faulty wiring or overloaded circuit | Have a professional electrician inspect and fix the wiring or redistribute the load on the circuit. |
| No power output | Tripped circuit breaker or blown fuse | Check the circuit breaker or fuse box and reset or replace as necessary. |
| Loose connections | Improper installation or wear and tear | Tighten the connections or consider replacing the outlet if necessary. |
Troubleshooting Techniques
When facing issues with your RV electrical outlet, it’s essential to troubleshoot the problem first to identify the root cause. Here are a few techniques you can follow:
- Check the power source: Ensure that there is power coming from the RV’s electrical system or shore power connection.
- Inspect the breaker panel: Examine the circuit breaker panel to identify any tripped breakers or blown fuses.
- Test with a voltmeter: Use a voltmeter to check for power output and identify any fluctuations or irregularities.
- Verify the wiring: Ensure all wiring connections are secure and not damaged.
- Consider load distribution: Evaluate the load on the circuit and redistribute it to prevent overload.
Tips for Maintaining the Outlet
To ensure that your RV electrical outlet functions optimally and avoids any potential issues, follow these maintenance tips:
- Regular inspection: Periodically inspect the outlet for any signs of wear and tear, loose connections, or physical damage.
- Keep it clean: Clean the outlet regularly to remove dust, dirt, or any debris that might affect its performance.
- Protect from moisture: Ensure the outlet is adequately protected from moisture or water to prevent any electrical hazards.
- Avoid overloading: Be mindful of the load on the circuit and avoid overloading it to maintain a stable power supply.
- Professional inspection: Consider getting a professional electrician to inspect and service your RV’s electrical system regularly.
By following these troubleshooting techniques and maintenance tips, you can ensure that your RV electrical outlet remains in optimal condition, providing uninterrupted power and peace of mind during your travels.
Additional Safety Precautions
When it comes to installing an RV electrical outlet, it’s crucial to prioritize safety above all else. Taking some additional safety precautions can ensure that you and your RV are protected from any electrical hazards. Here are some important measures to consider:
Importance of Grounding the Outlet
Grounding your RV electrical outlet is of utmost importance in order to protect against electrical shocks and fires. Grounding provides a safe pathway for electrical emergencies, directing electrical currents away from your RV and into the ground. To ensure proper grounding:
- Consult a qualified electrician: While installing the outlet, it is highly recommended to seek the expertise of a licensed professional who is well-versed in electrical systems. They will guide you through the grounding process and ensure compliance with local electrical codes.
- Use grounding wires: Install a grounding wire, typically made of copper, that connects the grounding terminal of the outlet to a metal rod driven into the ground. This establishes a secure connection between your RV and the earth.
- Regularly inspect the grounding system: Periodically check the condition of the grounding wire and connections to ensure they remain intact. Any signs of damage or corrosion should be promptly addressed.
Using Appropriate Weatherproofing Measures
Applying appropriate weatherproofing measures is essential to safeguard your RV electrical outlet from external elements. Harsh weather conditions can cause damage to the outlet, posing safety risks. To weatherproof your outlet effectively:
- Choose weather-resistant outlet covers: Opt for outlet covers that are specifically designed to withstand different weather conditions such as rain, snow, and extreme temperatures. These covers provide an additional layer of protection to prevent water and debris from entering the electrical system.
- Inspect and replace damaged covers: Regularly inspect the covers for any cracks, breaks, or other signs of damage. Replace them immediately with new ones to maintain the integrity of your RV electrical outlet.
Ensuring Proper Circuit Protection
Having proper circuit protection is vital to prevent electrical overload and potential electrical fires. It helps safeguard your RV’s electrical system and appliances. Here’s what you need to do:
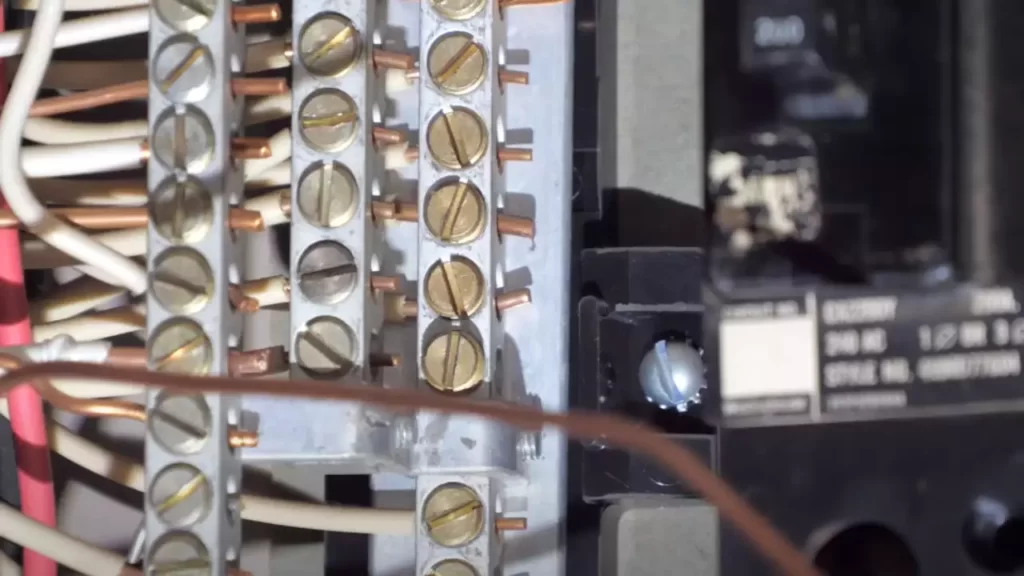
- Install circuit breakers: Fit circuit breakers in the electrical panel of your RV to protect against overloading. These devices automatically cut off the power supply when the current exceeds the designated limit, averting any potential damage.
- Label circuit breakers: Properly label each circuit breaker in the electrical panel, indicating which areas or appliances they correspond to. This ensures easy access and identification in case of any electrical issues.
By prioritizing these additional safety precautions, you can enjoy peace of mind during your RV adventures, knowing that your electrical outlet is secure and protected. Remember, it is always best to consult a professional electrician to ensure your installation adheres to safety standards and guidelines.
Frequently Asked Questions
How Do You Hook Up A 30 Amp Rv Outlet?
To hook up a 30 amp RV outlet, follow these steps: 1. Shut off the power to the circuit. 2. Install a 30 amp double-pole circuit breaker in the main panel. 3. Run 10-gauge wire from the panel to the outlet location.
4. Connect the wires to the outlet terminals. 5. Test the outlet to ensure it’s working properly.
What Is Needed To Install 50 Amp Rv Outlet?
To install a 50 amp RV outlet, you will need a 50 amp circuit breaker, a suitable electrical cable, outdoor-rated electrical boxes, a weatherproof RV outlet, and proper wiring connectors. Make sure to follow electrical codes and consult with a qualified electrician to ensure a safe and efficient installation.
How Do You Wire A 50 Amp Rv Plug At Home?
To wire a 50 amp RV plug at home, follow these simple steps: 1. Turn off the power supply. 2. Connect the red and black wires to the plug’s brass terminals. 3. Connect the white wire to the plug’s silver terminal.
4. Connect the green wire to the plug’s green terminal. 5. Securely tighten all connections.
Is A 30 Amp Rv Plug 120 Or 240?
A 30 amp RV plug is typically a 120-volt plug.
Conclusion
Installing an RV electrical outlet is easier than you might think. By following the steps outlined in this blog post, you can ensure a safe and efficient connection for your RV’s electrical needs. Remember to always prioritize safety and consult a professional if needed.
So, go ahead and enjoy the convenience of having a dedicated electrical outlet for your RV!